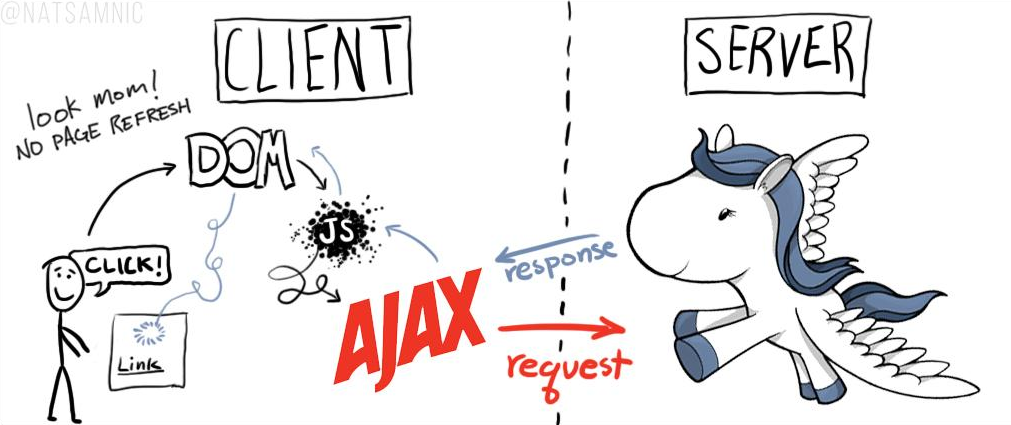
This is a collaboration piece between Real Python and Mr. Nathan Nichols.
Updated on 09/05/2014 to make the app slightly more RESTful.
Welcome. Last time we added AJAX to our basic Django communication app to better the user experience. The end result is an app that is more responsive and functional to the end user since we eliminated the page refresh.

If you remember, we had a little homework assignment at the end of the tutorial: Your turn. We need to handle some more events. With your new found knowledge of jQuery and AJAX, you get to put these into place. I added code to the final app – which you can download here – that includes a delete link. You just need to add an event to handle the click, which then calls a function that uses AJAX to send a POST request to the back-end to delete the post from the database. Follow the same workflow as I did in this tutorial. We’ll post the answer to this next time.
So, in terms of CRUD, we need to add DELETE capabilities. We’ll use the following workflow:
- Setup event handler
- Create the AJAX request
- Update the Django View
- Handle the callback
- Update the DOM
Setup Event Handler
When the user clicks the delete link, this “event” needs to be “handled” in the JavaScript file:
// Delete post on click
$("#talk").on('click', 'a[id^=delete-post-]', function(){
    var post_primary_key = $(this).attr('id').split('-')[2];
    console.log(post_primary_key) // sanity check
    delete_post(post_primary_key);
});
On the click, we grab the post primary key, which we added to an id at the same time a new post is added to the DOM:
$("#talk").prepend("<li><strong>"+json.text+"</strong> - <em> "+json.author+"</em> - <span> "+json.created+
    "</span> - <a id='delete-post-"+json.postpk+"'>delete me</a></li>");
We also pass the primary key as an argument to the delete_post() function, which we need to add…
Create the AJAX Request
As you probably guessed, the delete_post() function handles the AJAX request:
function delete_post(post_primary_key){
if (confirm('are you sure you want to remove this post?')==true){
$.ajax({
url : "delete_post/", // the endpoint
type : "DELETE", // http method
data : { postpk : post_primary_key }, // data sent with the delete request
success : function(json) {
// hide the post
$('#post-'+post_primary_key).hide(); // hide the post on success
console.log("post deletion successful");
},
error : function(xhr,errmsg,err) {
// Show an error
$('#results').html("<div class='alert-box alert radius' data-alert>"+
"Oops! We have encountered an error. <a href='#' class='close'>×</a></div>"); // add error to the dom
console.log(xhr.status + ": " + xhr.responseText); // provide a bit more info about the error to the console
}
});
} else {
return false;
}
};
Compare this code to the create_post() function. What’s different?
-
Take note of the conditional. The
confirm()method displays a dialog box, where the user must click either ‘OK’ or ‘Cancel’. Since this process will actually remove the post from the database, we just want to make sure that the user didn’t accidentally click delete. This just gives them a chance to cancel before the request is sent.These dialog boxes are not the most elegant way of handling this, but it is functional. Test it out.
-
Also, since we’re deleting a post, we use ‘DELETE’ for the HTTP method.
Keep in mind that some older browsers only support GET and POST requests. If you know your app will be used on some older versions of Internet Explorer, you can utilize POST tunneling as a work around.
Update the Django View
Now, let’s turn to the server-side and update the Django URLs and Views. The request is sent to the server-side, which is first handled by urls.py:
# Talk urls
from django.conf.urls import patterns, url


urlpatterns = patterns(
    'talk.views',
    url(r'^$', 'home'),
    url(r'^create_post/$', 'create_post'),
    url(r'^delete_post/$', 'delete_post'),
)
With the URL set up, the request is then routed to the appropriate Django view:
def delete_post(request):
    if request.method == 'DELETE':

        post = Post.objects.get(
            pk=int(QueryDict(request.body).get('postpk')))

        post.delete()

        response_data = {}
        response_data['msg'] = 'Post was deleted.'

        return HttpResponse(
            json.dumps(response_data),
            content_type="application/json"
        )
    else:
        return HttpResponse(
            json.dumps({"nothing to see": "this isn't happening"}),
            content_type="application/json"
        )
If the request method is ‘DELETE’ then we remove the post from the database. What happens if that primary key doesn’t exist? This will result in an unexpected side effect. In other words, we’ll get an error that is not properly handled. See if you can figure out how to catch the error and then properly handle it using a try/except statement.
Once the post is deleted, we create a response dict, serialize it into JSON, and then send it as the response back to the client-side.
Compare the code to the create_post() function. Why can’t we do request.DELETE.get? Well, because Django does not construct a dictionary for DELETE (or PUT) requests like it does for GET and POST requests. Thus, we constructed our own dictionary using the get method from the QueryDict class.
NOTE: This application could be more RESTful (and the code could be DRYer) if we used a single view to handle different scenarios based on the HTTP method (GET, POST, PUT, DELETE). Right now, we have different views for the GET, POST, and DELETE methods. This could easily be refactored to one single view:
PythonCopied!def index(request): if request.method == 'GET': # do something elif request.method == "POST": # do something elif request.method == "DELETE": # do something else: # do somethingWe’ll address this in depth next time when we add Django Rest Framework to the project.
Handle the Callback
Going back to the delete_post() function in main.js, how are we handling a successful callback?
success : function(json) {
    // hide the post
  $('#post-'+post_primary_key).hide(); // hide the post on success
  console.log("post deletion successful");
},
Here we hide a tag with a specific id and then log a success message to the console. For example, if we delete the post with an id of 20, then the tag associated with the id of post-20 will be hidden. Is this working? Test it out. It shouldn’t. Let’s fix that…
Update the DOM
Open the index.html template. Do you see that id anywhere? Nope. Let’s add it to the opening <li> tag:
<li id='post-{{post.pk}}'>
Now test it out. It should work.
Before we call it a day though, we also need to make a change in one other place. What happens if you add a post and then immediately try to delete it? It shouldn’t work since we are not updating the DOM correctly. Go back to the create_post() function and update the code used to add a new post to the DOM:
$("#talk").prepend("<li id='post-"+json.postpk+"'><strong>"+json.text+
    "</strong> - <em> "+json.author+"</em> - <span> "+json.created+
    "</span> - <a id='delete-post-"+json.postpk+"'>delete me</a></li>");
Notice the difference? Test it out. All is well.
What’s next?
Django Rest Framework.
Until then, comment if you have questions and check out the repo for the code.

