Loading video player…

Install Thonny

This course assumes that you have Python 3 installed on your computer. If not, please review Python 3 Installation & Setup. The web download can be accessed via a web browser by visiting the Thonny website. Once on the page, you’ll see a light gray box in the top right corner like this:
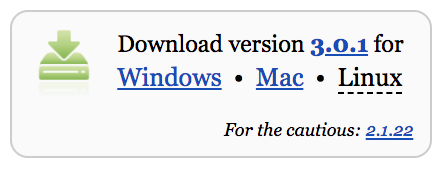
Thonny's Web Download Widget

Once you’ve found the gray box, click the appropriate link for your operating system.

You can also install Thonny via your system’s command line. On Windows, you can do this by starting a program called Command Prompt. On macOS and Linux, you start a program called Terminal. Once you’ve done that, enter the following command:

Shell
$ pip install thonny

00:00 Let’s get started by looking at how to install Thonny. Thonny is supported on three main platforms. It’s supported on macOS, it’s supported on Windows, and it’s also supported on Linux.

00:19 There are different ways you can install it depending on the platform that you’re on. Often, you’ll be using the installer from thonny.org, but you may use pip install thonny or install using apt-get install thonny depending on whether you’re on Linux or not.

00:36 Let’s look at installing Thonny on macOS using the installer. So, here we are at thonny.org. Click on the Mac link conveniently placed on the front page and then open that image that we download.

00:52 Now, the image will take a few seconds to download depending on the speed of your internet connection, but once it has downloaded, Mac will verify that image and then open the contents to show you two files, a text file and Thonny itself.

01:06 For a permanent installation, you need to move the Thonny application into the Mac’s Applications folder. So open a new Finder window with Command + N,

01:17 go to the Applications folder, and here you can see I’ve moved it out of the way, and now I’m just going to put it in order so we can see it fits in the right place, and then drag it into the window.

01:27 But as long as it’s anywhere there, it will end up in the right place. You can see that it gets copied across. And now that’s permanently ready to be run on a Mac. Double-clicking will open it up.

01:42 We get asked the first time we run it if it’s okay to open that, as a security measure. And now here we have Thonny ready to start programming. Installing Thonny on a Mac using pip.

01:58 So here in the Terminal window, it’s possible to install Thonny using pip3 install thonny. pip will download all the relevant frameworks and Thonny itself and then install Thonny. It can be run just by typing thonny.

02:15 As you can see here, Thonny is ready to run, and now we can start programming. Installing Thonny on Windows using an installer. Here’s the Thonny home page. And as you can see at the top, the Windows download link is conveniently provided.

02:32 You can click on it and the EXE for the installer will be downloaded. Running that will allow Thonny to be installed. Minimizing the browser will allow you to see that all the default options are followed to have a quick and easy installation of Thonny on Windows.

02:52 Once it’s been installed, which will take a few more seconds in real time,

03:04 you can click Finish and then run it in the normal way you would from the Start menu, which is done by tapping the Windows key and then typing the first few letters of Thonny.

03:12 And here’s Thonny ready to start programming.

03:22 Installing Thonny on Linux Using apt. An installer for modern Linux is not available on the site, but it is available via the package manager apt.

03:32 Here’s the command to get it installed. You may need to enter your password to run this. You’ll press y to confirm we want to install, and then Linux installs all the packages, including Thonny, that we need for it to run. As you can see, there’s quite a few.

03:50 However, once it has installed, it’s as easy as typing thonny in the terminal to run the program.

03:58 Now, you’ll also notice if you install via this method on Ubuntu, that the program gets put in your applications list. So clicking down in the bottom left to show the applications will show the Thonny icon and running it is as simple as double-clicking, just like when we entered the command earlier on.

04:25 Installing Thonny on Linux Using pip. Not all distributions will allow you to install using the package manager, so you may need to use this command, pip3 install thonny, and then it will collect all of the dependencies and Thonny itself and install it.

04:40 However, running it may be more difficult depending on where it gets installed to, which varies by your Linux distribution. So using the find command here, it’s possible to see where it is. And here I’m highlighting onscreen the version we need to run. It’s in the hidden .local/ folder, so the command will be .local/bin/thonny to allow it to run in this case. It’s not as easy as just typing thonny, but it’s not too difficult, and you can always put that on your path. Here we see we get an initial setup question with the language and settings, but now we see Thonny just as we have in all the other versions on all the other platforms.

Become a Member to join the conversation.