There are many different integrated development environments (IDEs) to choose from for Python development. One popular option for data-focused work is Spyder, an open-source Python IDE geared toward scientists, engineers, and data analysts. Its name comes from Scientific PYthon Development EnviRonment.
Out of the box, it has powerful plotting, what-if, and profiling capabilities. It also integrates well with the data science ecosystem, is extensible with first- or third-party plugins, and has a relatively quick learning curve.
How does Spyder stack up against other Python IDEs? It depends on your use case. It’s not as powerful or customizable as VS Code, nor does it pretend to be. It does, however, excel for data science workflows:
| Use Case | Pick Spyder | Pick an Alternative |
|---|---|---|
| Optimized for data science workflows | ✅ | — |
| Dedicated to Python | ✅ | — |
| Full-featured | — | VS Code |
| Supports interactive notebooks | ✅ With a plugin | Jupyter, VS Code |
If you’re focused on data science in Python, Spyder is a strong fit. For a more full-featured IDE or heavy notebook use, consider Jupyter or VS Code instead.
You can get a handy Spyder IDE cheat sheet at the link below:
Get Your Free Spyder Cheat Sheet: Click here to download the PDF with installation steps, shortcuts, and interface tips.
Take the Quiz: Test your knowledge with our interactive “Spyder: Your IDE for Data Science Development in Python” quiz. You’ll receive a score upon completion to help you track your learning progress:
Interactive Quiz
Spyder: Your IDE for Data Science Development in PythonTest your knowledge of the Spyder IDE for Python data science, including its Variable Explorer, Plots pane, and Profiler.
Start Using the Spyder IDE
You can install Spyder in a few ways: as a standalone program, through a prepackaged distribution, or from the command line. You can also try out Spyder online.
To install Spyder as a standalone application, go to the Spyder download page. When you visit the site, it detects your operating system and offers the appropriate download. Once you download your install file, open it and follow the directions.
You can also install a Python distribution tailored to data science, such as Anaconda or WinPython. Both of these choices include Spyder in their base installations.
You’ll likely want to install dependencies and useful data libraries in addition to Spyder. In this case, first create a Python virtual environment, then use this command:
$ conda create -c conda-forge -n spyder-env spyder numpy scipy pandas matplotlib sympy cython
The install process for pip is similar. To install spyder together with common packages, run:
$ python -m pip install spyder numpy scipy pandas matplotlib sympy cython
For more information on installing Spyder, refer to their install guide.
Out of the box, the Spyder interface consists of three panes:
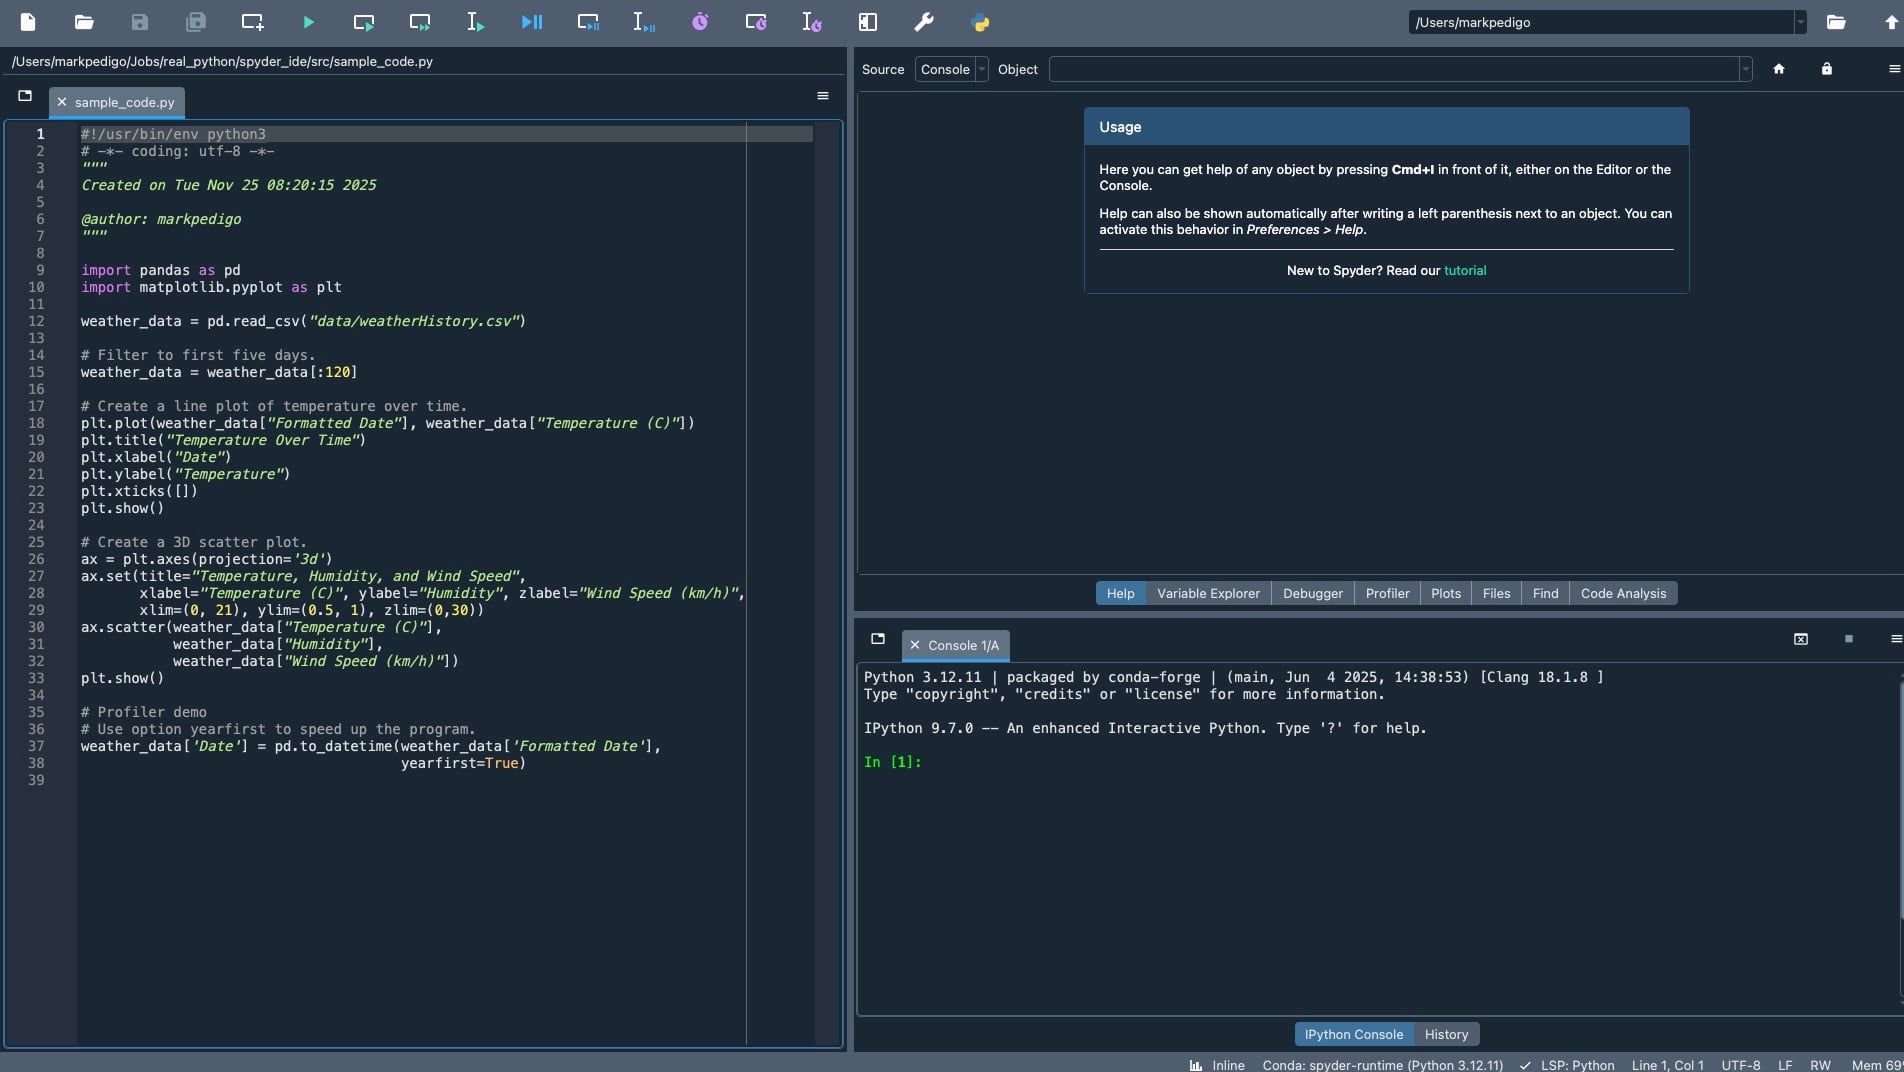
On the left, you see code in the Editor pane. In the bottom right, you’ll find the IPython Console. Here, you can run code and check past commands using the History tab. The top-right area includes tabs such as Help, Debugger, Files, Find, and Code Analysis. You’ll learn about the Variable Explorer, Plots, and Profiler in the upcoming sections.