
Locked learning resources

Join us and get access to thousands of tutorials and a community of expert Pythonistas.

Unlock This Lesson

Locked learning resources

This lesson is for members only. Join us and get access to thousands of tutorials and a community of expert Pythonistas.

Unlock This Lesson

Using the Viola-Jones Framework

Training a Viola-Jones classifier from scratch can take a long time. Fortunately, a pre-trained Viola-Jones classifier comes out-of-the-box with OpenCV! You will use that one to see the algorithm in action. If you really want to train the classifier yourself, scikit-image offers a tutorial with the accompanying code on their website.

To follow the exercise in this lesson, you’re going to need to dowload the following image:
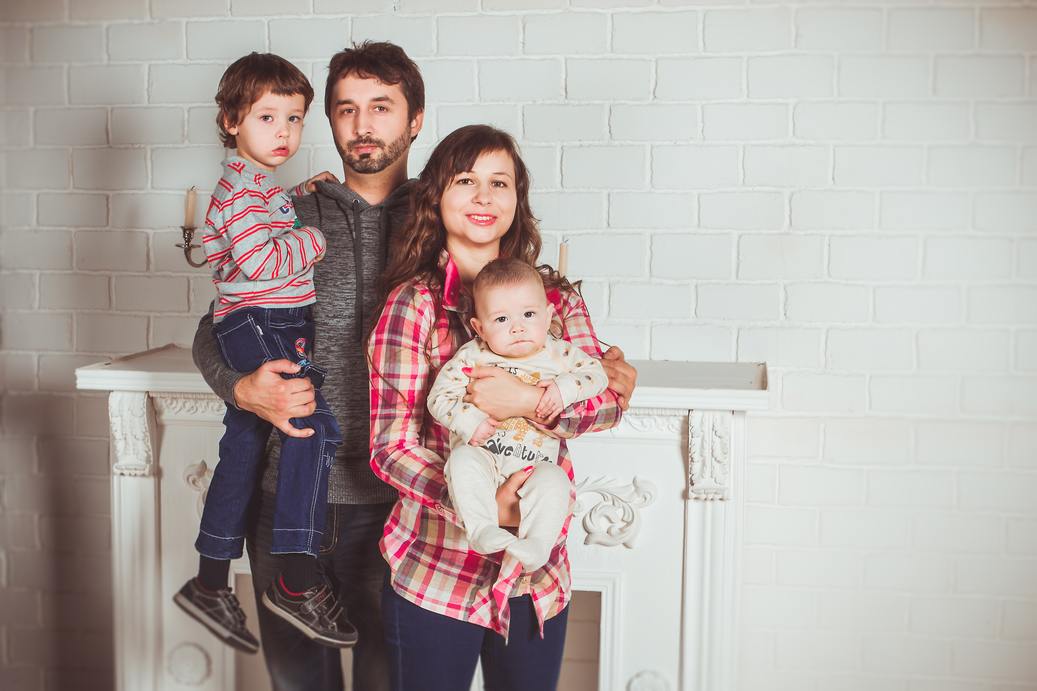
Family stock photo
Example stock photo for face detection (Image source)

You’ll also need to go to the OpenCV GitHub repo.

00:00 You’ll need a few critical files in order to follow along. First, grab this image from the link below this video. This is a stock image that we’re going to run through the face detection algorithm to hopefully get some faces. Now, head over to this GitHub repository linked down below.

00:20 This is the official OpenCV repo. Download the file named haarcascade_frontalface_alt.xml. Rather than manually training the algorithm with lots of training data, we’re going to use the file which has all of our weak classifiers nicely arranged into a single cascade.

00:42 This file should come with OpenCV when we install it in just a moment, but I find it easier just to grab it manually. Lastly, you’ll need the package management system Conda.

00:54 This is going to allow us to create a virtual environment for all of our project’s packages and other various dependencies. Conda comes with either Anaconda or Miniconda, and either should work fine for this project. All right.

01:09 I’m here in Visual Studio Code and as you can see, I’ve got a folder open called DETECTION-DEMO. Inside here, I’ve got my image and my cascade XML file.

01:20 Let’s start by choosing Terminal > New Terminal, and I will resize this so that you can see what I’m typing here.

01:28 We want to start by creating a new Conda environment. I’ll type conda create --name face-detection and we’ll use Python 3.7.

01:44 I’ll enter y to allow it to install packages. Now that that’s done, I’ll activate the environment with conda activate face-detection and now we can start installing our prerequisites.

01:58 The first one is scikit-learn, which I think is pronounced that way. And so I’ll type conda install scikit-learn, and make sure you allow it to install whatever packages it needs. Next is scikit-image, so I’ll type conda installand I want to get this from conda-forgescikit-image. There we go. Finally, I’ll grab OpenCV by typing conda install -c menpo opencv3.

02:35 And actually, it looks like we’re going to get downgraded to Python 2.7, but that should be fine for this course.

02:43 Now that we’ve got everything we need, we need to actually create our Python file. I’ll choose File > New File and I’ll name this program.py—very original, I know. In Visual Studio, I’m going to click on this button down here in the bottom-left corner to change my Python interpreter, and I’m going to choose the one that we just installed with Conda.

03:06 Now, we can finally start coding. This program is only 20 lines of code, so this should go pretty quick. Let’s start by importing cv2 as cv so that we can use it.

03:19 And now we need an object representing the original unaltered image, so I’ll create that variable and I’ll get the image with cv.imread(),

03:31 passing in the path to our image. Next, we need to convert this image to grayscale for the algorithm to process it, so we’ll get that with cv.cvtColor(), passing in the original_image and cv.COLOR_BGR2GRAY (BGR to gray).

03:53 Next, we need to grab the classifier we downloaded, so I’ll type face_cascade = cv.CascadeClassifier() and I’ll give it the path to the XML file. Finally, we can actually run the whole algorithm. For this I’ll type detected_faces = face_cascade.detectMultiScale() and I’ll pass in our grayscale_image.

04:25 I found that a scale factor of 1.3 works best for this picture. Now, detected_faces is an ndarray showing the coordinates of each face, so we just have to draw boxes around those coordinates and show them on the screen. To do this, I’ll type for (column, row, width, height) in detected_faces: cv.rectangle()—and we want to draw on the original image starting at the column and row, and ending at (column + width) and (row + height).

05:07 I want this to be green, which is going to be (0, 255, 0) in RGB, as we learned earlier. I will give this a thickness of 2, which should be fine. Now, just for presentation purposes, I’ll use cv.resize() to shrink the image since it’s fairly high-resolution and it may appear cut-off on my screen here.

05:31 Now we can do cv.imshow() to draw the window with a title of 'Image' and our small image.

05:42 cv.waitKey(), passing in 0, is going to set 0 as the kill key, which is especially useful on Windows since OpenCV tends to be kind of finicky over there. Finally, I’ll say, “When 0 is pressed, I want to destroy all windows.” And that’s it! I’ll right-click here and select to run in terminal and…wait for it… wait for it. Through the power of editing, there it is.

06:12 It was actually hidden behind my VSCode, which I have running in fullscreen. You can see the algorithm worked perfectly. We have a green box drawn out around all four of our faces in the image.

06:25 And now you also know all the big ideas behind the computations that happen behind the scenes—from computing the integral image to applying a classifier. Pretty cool.

Avatar image for rathodsushma5

rathodsushma5 on April 20, 2020

The code worked fine for me with python3.7. I didn’t had to downgrade to python2.7 as it was mentioned in the above comments.

OpenCV3 seemed to work fine, everything worked seemlessly for me.

Avatar image for justintylerfarias

justintylerfarias on April 26, 2020

for some reason my error is saying small is the problem that the variable small is invalid

Avatar image for nouradwi12

nouradwi12 on Sept. 14, 2020

How do I save the results -the photo with detected faces- ?

Avatar image for Nicholas Dow

Nicholas Dow on Sept. 15, 2020

The link is broken

Avatar image for Bartosz Zaczyński

Bartosz Zaczyński RP Team on Sept. 15, 2020

@nouradwi12 Have you tried this?

cv.imwrite('output.jpg', small)
Avatar image for jamesbrown68

jamesbrown68 on Dec. 6, 2020

My demo hung installing scikit-image:

>>conda install -c conda-forge scikit-image

Collecting package metadata (current_repodata.json): done
Solving environment: failed with initial frozen solve. Retrying with flexible solve.
Solving environment: failed with repodata from current_repodata.json, will retry with next repodata source.
Collecting package metadata (repodata.json): done
Solving environment: |

Then nothing.

Avatar image for braybray

braybray on Jan. 31, 2021

Hey guys I got a fix that will help you install opencv3!

Just to start off you should be coding this project in visual studio CODE not the normal visual studio. Now when you open visual studio code go to the extensions tab located on the left of the screen. Type in simply_view_image_for_python_opencv_debugging and install it. Now continue with the tutorial and also you can use python 3.7 to code this don’t worry about the python 2.7 stuff.

Good luck!

Avatar image for T Nakayama

T Nakayama on April 14, 2021

Thank you so much for presenting this interesting course. I have successfully detected faces by using this method. But it was necessary for me to pay more attention steps from the video’s instruction. I am using conda 4.10, Python 3.7 on Windows10.

1) It seems not be able to directly install opencv from menpo channel. I used Python 3.7 and got the following failed messages:

UnsatisfiableError: The following specifications were found
to be incompatible with the existing python installation in your environment:

Specifications:

  - opencv3 -> python[version='2.7.*|3.4.*|3.5.*']

Your python: python=3.7

This issue can be easily solved by using conda-forge channel as below:

  • OK> conda install -c conda-forge opencv

2) How to download the file “haarcascade_frontalface_alt.xml” from github.

Wrong way>

  • It is not correct to right click the file and save it.

Correct way>

  • Click the file name on github
  • Click “Raw” button
  • Right click the contents page
  • Save as the target file

Become a Member to join the conversation.