There are plenty of blogging platforms out there that you can use out of the box. However, building your own blog from scratch with Django is a great way to keep control over your content. Even if you’re just getting started with Django, its user-friendly features will allow you to focus on designing and posting your content.
In this tutorial, you’ll learn how to:
- Set up a new Django project
- Create and edit blog posts
- Display posts to the user
- Assign categories to posts
- Allow users to comment on posts
Along the way, you’ll leverage the Django admin site and explore how to work with forms in Django. This is an ideal project to dip your toes into the world of Django, but you should have a solid foundation in Python basics.
At the end of this tutorial, you’ll be able to share your knowledge through a working blog that you’ve built from scratch. If you’re curious about how the final source code looks, then you can click the link below:
Get Your Code: Click here to download your free source code to build a blog from scratch with Django.
Set Up the Development Environment
Whenever you’re starting a new web development project, it’s a good idea to first set up your development environment. Create a new directory for your project to live in, and cd into it:
$ mkdir django-blog
$ cd django-blog
Once you’re inside the django-blog/ directory, it’s a good idea to create a virtual environment to manage dependencies. Select your operating system below and use your platform-specific command to set up a virtual environment:
This command will create a venv/ folder in your working directory. Inside this directory, you’ll find several files, including a copy of the Python standard library. Later, when you install new dependencies, this directory will store them too. Next, you need to activate the virtual environment by running the following command:
With the above commands, you create and activate a virtual environment named venv by using Python’s built-in venv module. The parenthetical (venv) in front of the prompt indicates that you’ve successfully activated the virtual environment.
Now that you’ve created and activated a virtual environment, it’s time to install Django. You can do this using pip:
(venv) $ python -m pip install Django
Once you’ve set up the virtual environment and installed Django, you can now dive into creating your Django project.
Start Your Django Project
A Django web application is made up of a project and apps. A Django project holds some configurations that apply to the web application as a whole, such as project settings, URLs, shared templates, and static files. Each Django app can have its own URLs as well as its own HTML templates and static files, such as JavaScript and CSS.
To create your Django project, make sure you’re in the django-blog/ directory with your virtual environment activated. Then, run the following command to create the personal_blog project:
(venv) $ django-admin startproject personal_blog .
Don’t forget to add the dot (.) at the end of the command above. The dot prevents Django from creating a nested project directory for your portfolio project. Otherwise you’d end up with a personal_blog/ folder that contains a personal_blog/ subdirectory.
By running the startproject command as shown above, you’ve told Django to create one personal_blog/ folder in the django-blog/ directory. Your directory structure should look something like this:
django-blog/
│
├── personal_blog/
│   ├── __init__.py
│   ├── settings.py
│   ├── urls.py
│   └── wsgi.py
│
├── venv/
│
└── manage.py
Once your file structure is set up, you can now start the Django development server and check that your setup was successful. In the console, run the following command:
(venv) $ python manage.py runserver
Then, in your browser, go to http://localhost:8000, and you should see the following:
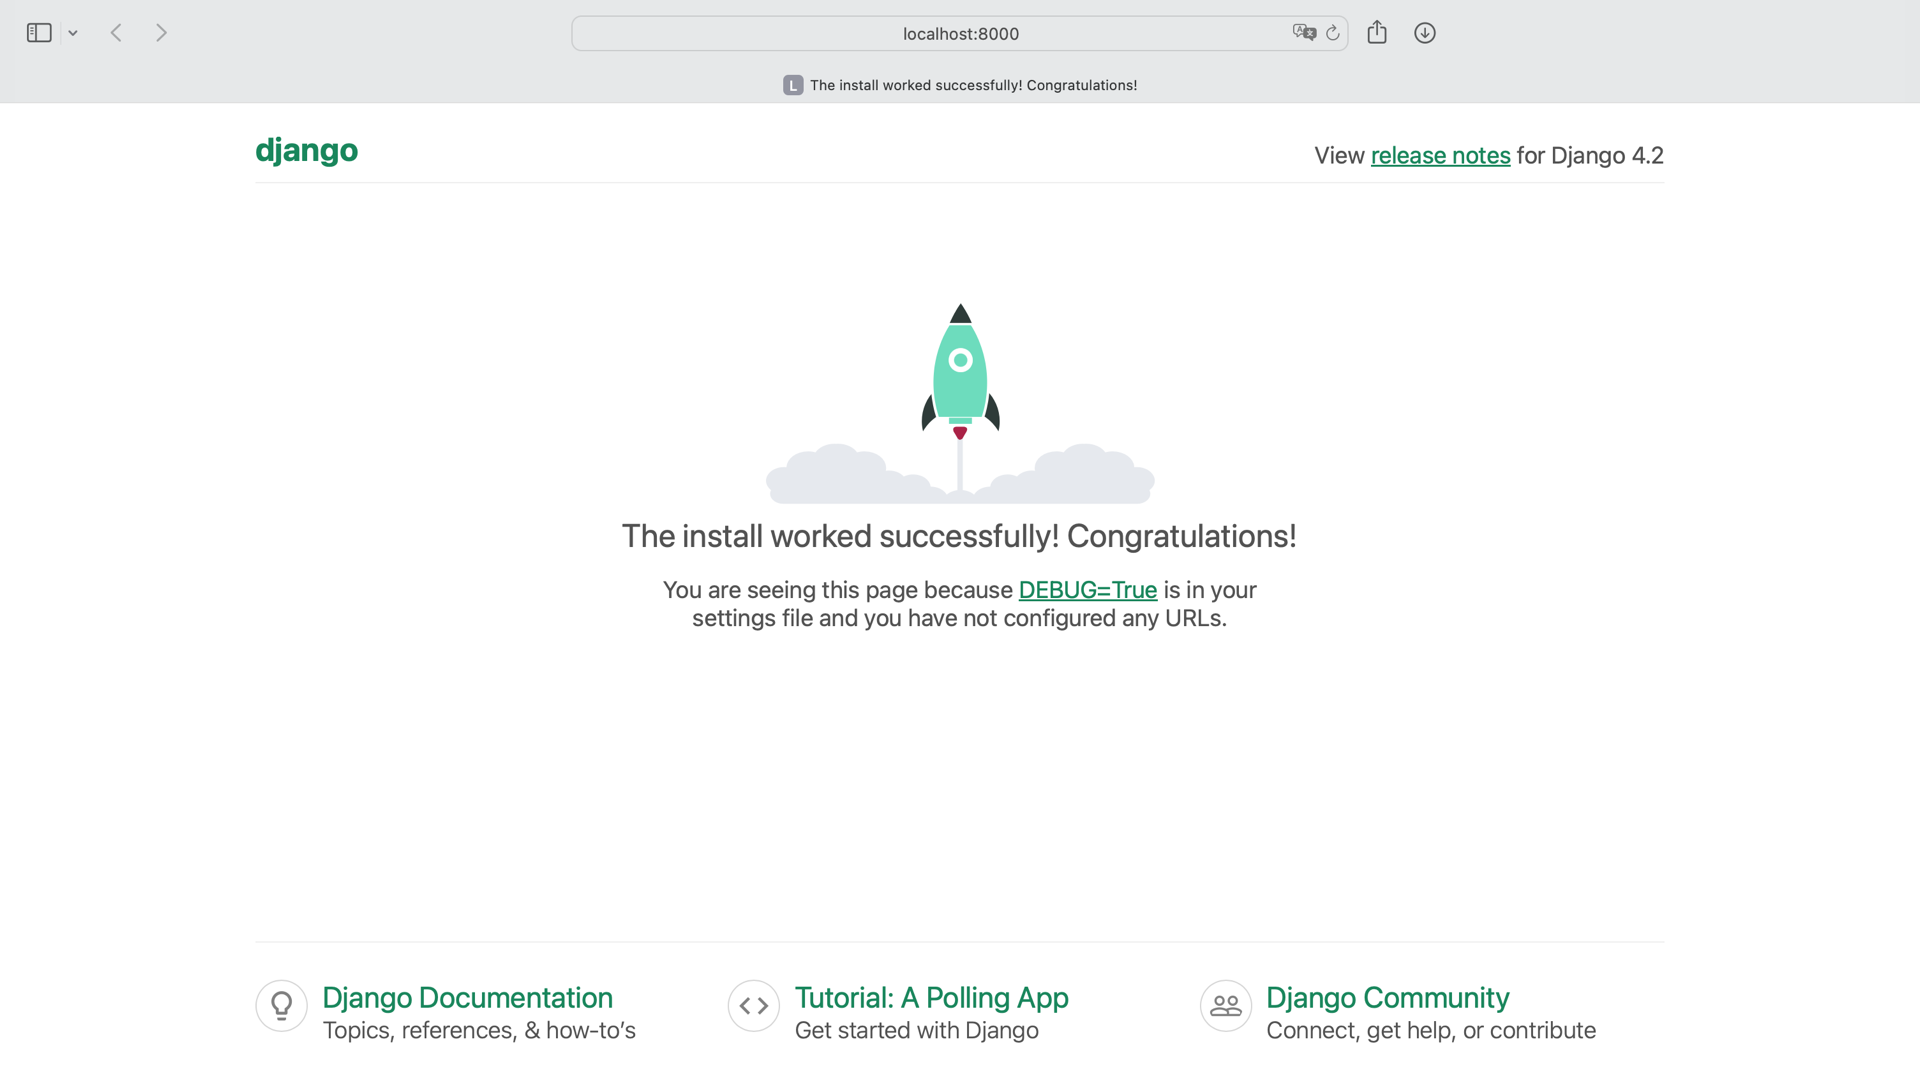
Congratulations, you’ve created a Django site! The next step is to create the blog app so that you can add views and functionality to your site.
Add the Blog App That You’ll Build From Scratch
Before you get into building out the functionality of this part of your site, create a new Django app named blog:
(venv) $ python manage.py startapp blog
Once you’ve created the app, you need to install it in your project. In django-blog/personal_blog/settings.py, add the following line of code under INSTALLED_APPS:
# personal_blog/settings.py

# ...

INSTALLED_APPS = [
    "blog.apps.BlogConfig",
    "django.contrib.admin",
    "django.contrib.auth",
    "django.contrib.contenttypes",
    "django.contrib.sessions",
    "django.contrib.messages",
    "django.contrib.staticfiles",
]

# ...
To include an app in a Django project, you need to add a reference to its configuration class at the beginning of the INSTALLED_APPS list in settings.py.
By adding blog.apps.BlogConfig, you let Django know that the blog app you just created exists. You’re one big step closer to successfully building a blog from scratch! The next step is to create the models to define the logic on how to store your blog content in a database.
Define Models to Represent Database Tables
If you want to store data to display on a website, then you’ll need a database. Typically, if you want to create a database with tables and columns within those tables, then you’ll need to use SQL to manage the database. But when you use Django, you don’t need to learn a new language because it has a built-in object relational mapper (ORM).
An ORM is a program that allows you to create classes that correspond to database tables. Class attributes correspond to columns, and instances of the classes correspond to rows in the database. So, instead of learning a whole new language to create your database and its tables, you can just write some Python classes.
When you’re using an ORM, models are the classes you build that represent database tables. In Django, these live in the models.py module of each Django app.
You’re going to need three separate models for the blog:
PostCategoryComment
Start with the code for the Category and Post models in the models.py file of your blog app:
 1# blog/models.py
 2
 3from django.db import models
 4
 5class Category(models.Model):
 6    name = models.CharField(max_length=30)
 7
 8class Post(models.Model):
 9    title = models.CharField(max_length=255)
10    body = models.TextField()
11    created_on = models.DateTimeField(auto_now_add=True)
12    last_modified = models.DateTimeField(auto_now=True)
13    categories = models.ManyToManyField("Category", related_name="posts")
The Category model is very basic. All that it needs is a single CharField in which you store the name of a category for your blog posts. To keep your category names short, you set a maximum length of thirty characters.
The title and body fields on the Post model also contain text. You need a CharField for the title to store a short string for the post title. The body of a post needs to be a long-form piece of text, so you use a TextField.
The next two fields, created_on and last_modified, are Django DateTimeFields. These store a datetime object containing the date and time when the post was created and modified, respectively.
For created_on, the DateTimeField takes the argument auto_now_add=True. This assigns the current date and time to this field whenever you create an instance of this class.
For last_modified, the DateTimeField takes the argument auto_now=True. This assigns the current date and time to this field whenever an instance of this class is saved. That means whenever you edit an instance of this class, date_modified is updated.
The final field on the Post model creates a relationship between a post and categories. Here you link your models for categories and posts in such a way that you can assign many categories to many posts. Django provides a ManytoManyField field type for this kind of relationship.
The ManyToManyField takes two arguments. The first is the model that it applies to—in this case, Category. The second allows you to access the relationship from a Category object, even though you haven’t added a field there. By adding a related_name of posts, you can access category.posts to get a list of posts with that category. You’ll see how this works later in the tutorial.
The third and final model that you need to add is named Comment:
 1# blog/models.py
 2
 3# ...
 4
 5class Comment(models.Model):
 6    author = models.CharField(max_length=60)
 7    body = models.TextField()
 8    created_on = models.DateTimeField(auto_now_add=True)
 9    post = models.ForeignKey("Post", on_delete=models.CASCADE)
The first three fields on this model should look familiar. There’s an author field for users to add a name or alias, a body field for the body of the comment, and a created_on field that’s identical to the created_on field on the Post model.
On line 9, you use another relational field, the ForeignKey field. This is similar to the ManyToManyField but instead defines a many-to-one relationship. The reasoning behind this is that many comments can be assigned to one post. But you can’t have a comment that corresponds to many posts.
The ForeignKey field takes two arguments. The first is the other model in the relationship—in this case, Post. The second tells Django what to do when a post is deleted. If a post is deleted, then you don’t want the comments related to it hanging around. Instead, you delete the comments as well. That’s what on_delete=models.CASCADE is for.
Now that you’ve created your Project class, you need Django to create the database. By default, the Django ORM creates databases in SQLite, but you can use other databases that use the SQL language, such as PostgreSQL or MySQL, with the Django ORM.
To start the process of creating a database, you need to create a migration. A migration is a file containing a Migration class with rules that tell Django what changes it needs to make to the database.
To create the migration, type the following command in the console, making sure that you’re in the django-blog/ directory:
(venv) $ python manage.py makemigrations blog
Migrations for 'blog':
  blog/migrations/0001_initial.py
    - Create model Category
    - Create model Post
    - Create model Comment
You should see that blog/ now contains migrations/, including a file named 0001_initial.py. This file contains the instructions that Django should perform on the database.
Now that you’ve created a migration file, you need to apply the migrations set out in that file and create your database using the migrate command:
(venv) $ python manage.py migrate blog
Operations to perform:
  Apply all migrations: blog
Running migrations:
  Applying blog.0001_initial... OK
Now that you’ve created the models, you can start to add some posts and categories to your blog. To do so, you’ll learn how to use the Django admin site, which will allow you to create instances of your model classes in a nice web interface.
Leverage the Django Admin Site
The Django admin site is a fantastic tool and one of the great benefits of using Django. The Django admin site allows you as the blog administrator to create, update, and delete instances of your model classes from the comfort of a nice web interface.
To access the Django admin site, you need to add yourself as a superuser. Django comes with built-in user models and a user management system that will allow you to log in to the admin.
Before you can create a superuser, you need to apply some existing migrations that Django has already prepared for you:
(venv) $ python manage.py migrate
Operations to perform:
  Apply all migrations: admin, auth, contenttypes, blog, sessions
Running migrations:
  Applying contenttypes.0001_initial... OK
  Applying auth.0001_initial... OK
  Applying admin.0001_initial... OK
  Applying admin.0002_logentry_remove_auto_add... OK
  Applying admin.0003_logentry_add_action_flag_choices... OK
  Applying contenttypes.0002_remove_content_type_name... OK
  Applying auth.0002_alter_permission_name_max_length... OK
  Applying auth.0003_alter_user_email_max_length... OK
  Applying auth.0004_alter_user_username_opts... OK
  Applying auth.0005_alter_user_last_login_null... OK
  Applying auth.0006_require_contenttypes_0002... OK
  Applying auth.0007_alter_validators_add_error_messages... OK
  Applying auth.0008_alter_user_username_max_length... OK
  Applying auth.0009_alter_user_last_name_max_length... OK
  Applying auth.0010_alter_group_name_max_length... OK
  Applying auth.0011_update_proxy_permissions... OK
  Applying auth.0012_alter_user_first_name_max_length... OK
  Applying sessions.0001_initial... OK
Looking at the list of applied migrations gives you an impression of the features that Django already comes packed with. For example, Django provides user authorization and the admin site.
After applying all the migrations, you can add yourself as superuser using the following command:
(venv) $ python manage.py createsuperuser
Username (leave blank to use 'root'): admin
Email address: admin@example.com
Password: RealPyth0n
Password (again): RealPyth0n
Superuser created successfully.
When you run the createsuperuser management command, Django prompts you to choose a username, provide an email address, and set a password. Use your own data for these fields and make sure to remember them.
Navigate to http://localhost:8000/admin and log in with the credentials that you just used to create a superuser. You’ll see a page similar to the one below:
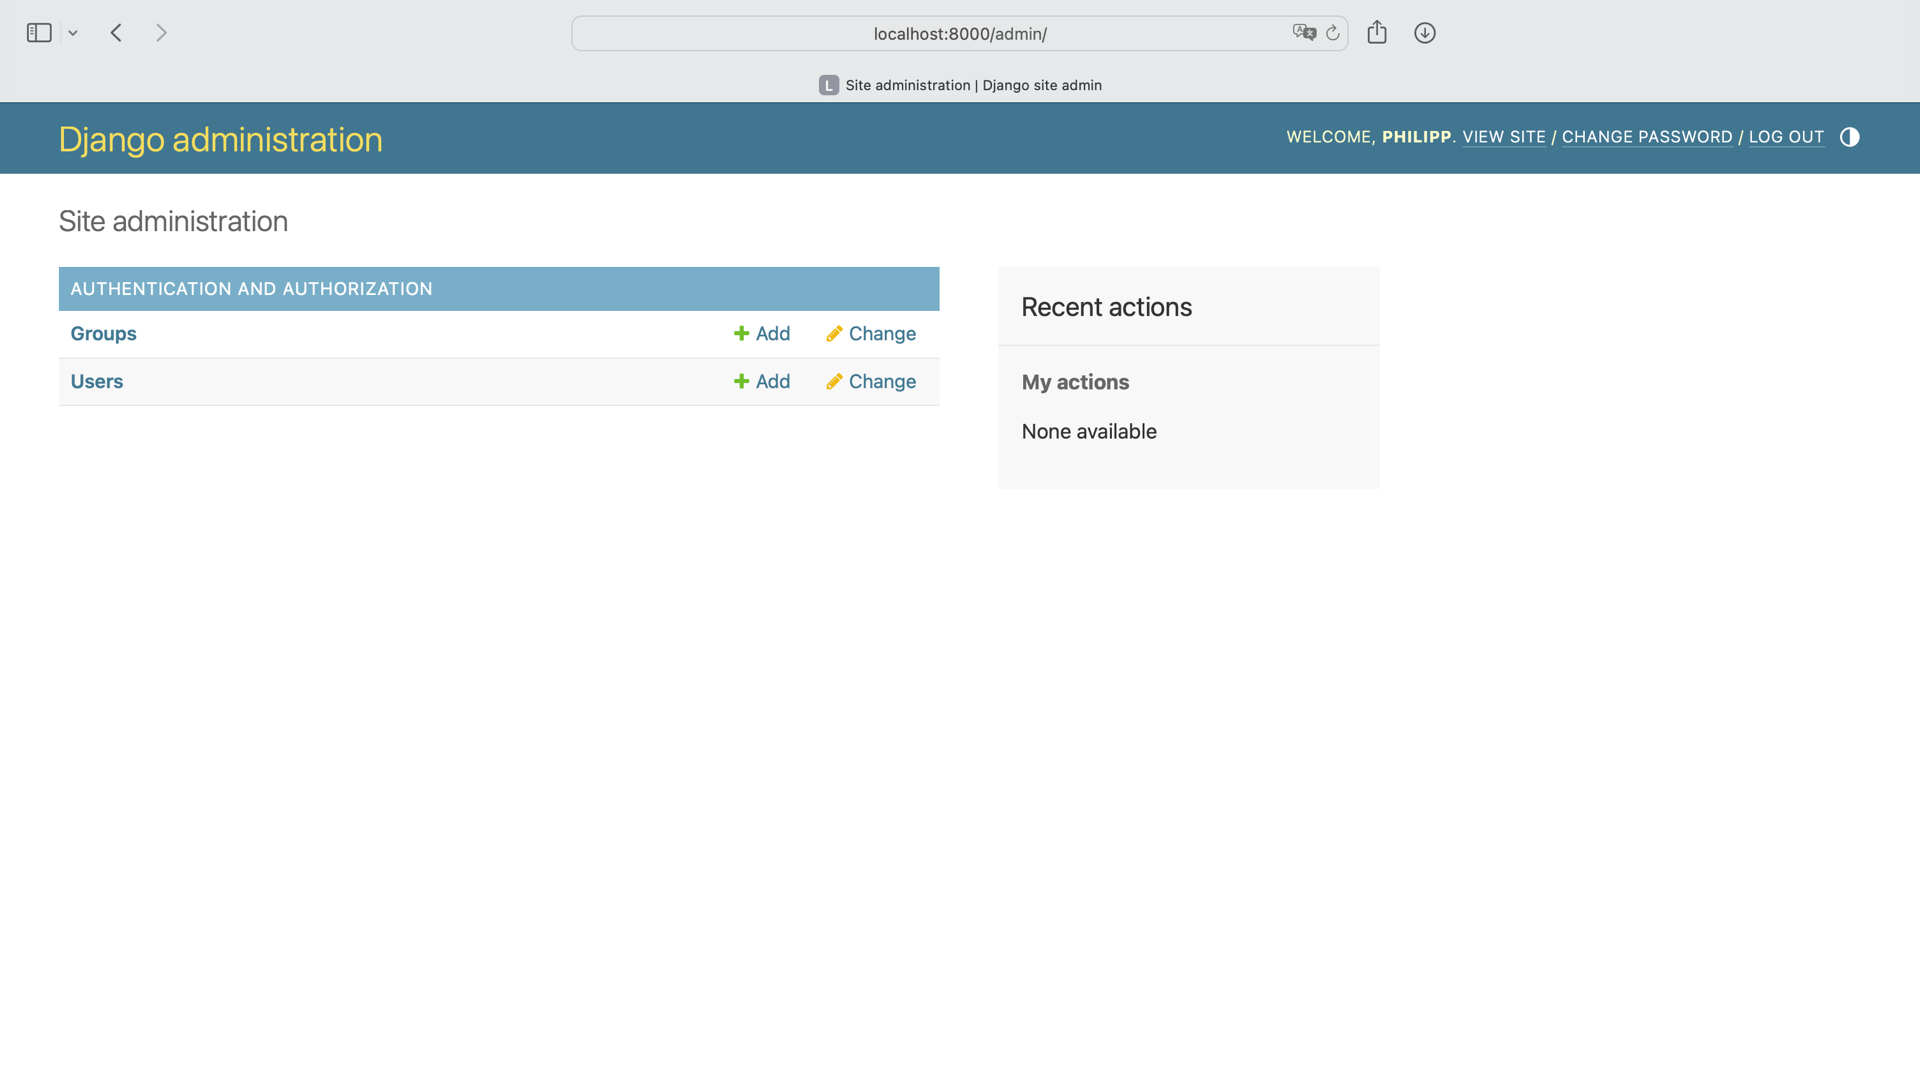
The User and Groups models should appear, but you’ll notice that there’s no reference to the Category, Post, or Comment models that you’ve created yourself. That’s because you need to register your models inside the Django admin site first.
In the blog directory, open the admin.py file and add the following lines of code:
 1# blog/admin.py
 2
 3from django.contrib import admin
 4from blog.models import Category, Comment, Post
 5
 6class CategoryAdmin(admin.ModelAdmin):
 7    pass
 8
 9class PostAdmin(admin.ModelAdmin):
10    pass
11
12class CommentAdmin(admin.ModelAdmin):
13    pass
14
15admin.site.register(Category, CategoryAdmin)
16admin.site.register(Post, PostAdmin)
17admin.site.register(Comment, CommentAdmin)
On line 4, you import the models that you want to register on the admin page.
From line 6 to line 13, you define empty CategoryAdmin, PostAdmin, and CommentAdmin classes. For the purposes of this tutorial, you don’t need to add any attributes or methods to these classes. Their purpose is to customize what the admin pages show. For this tutorial, the default configuration is enough.
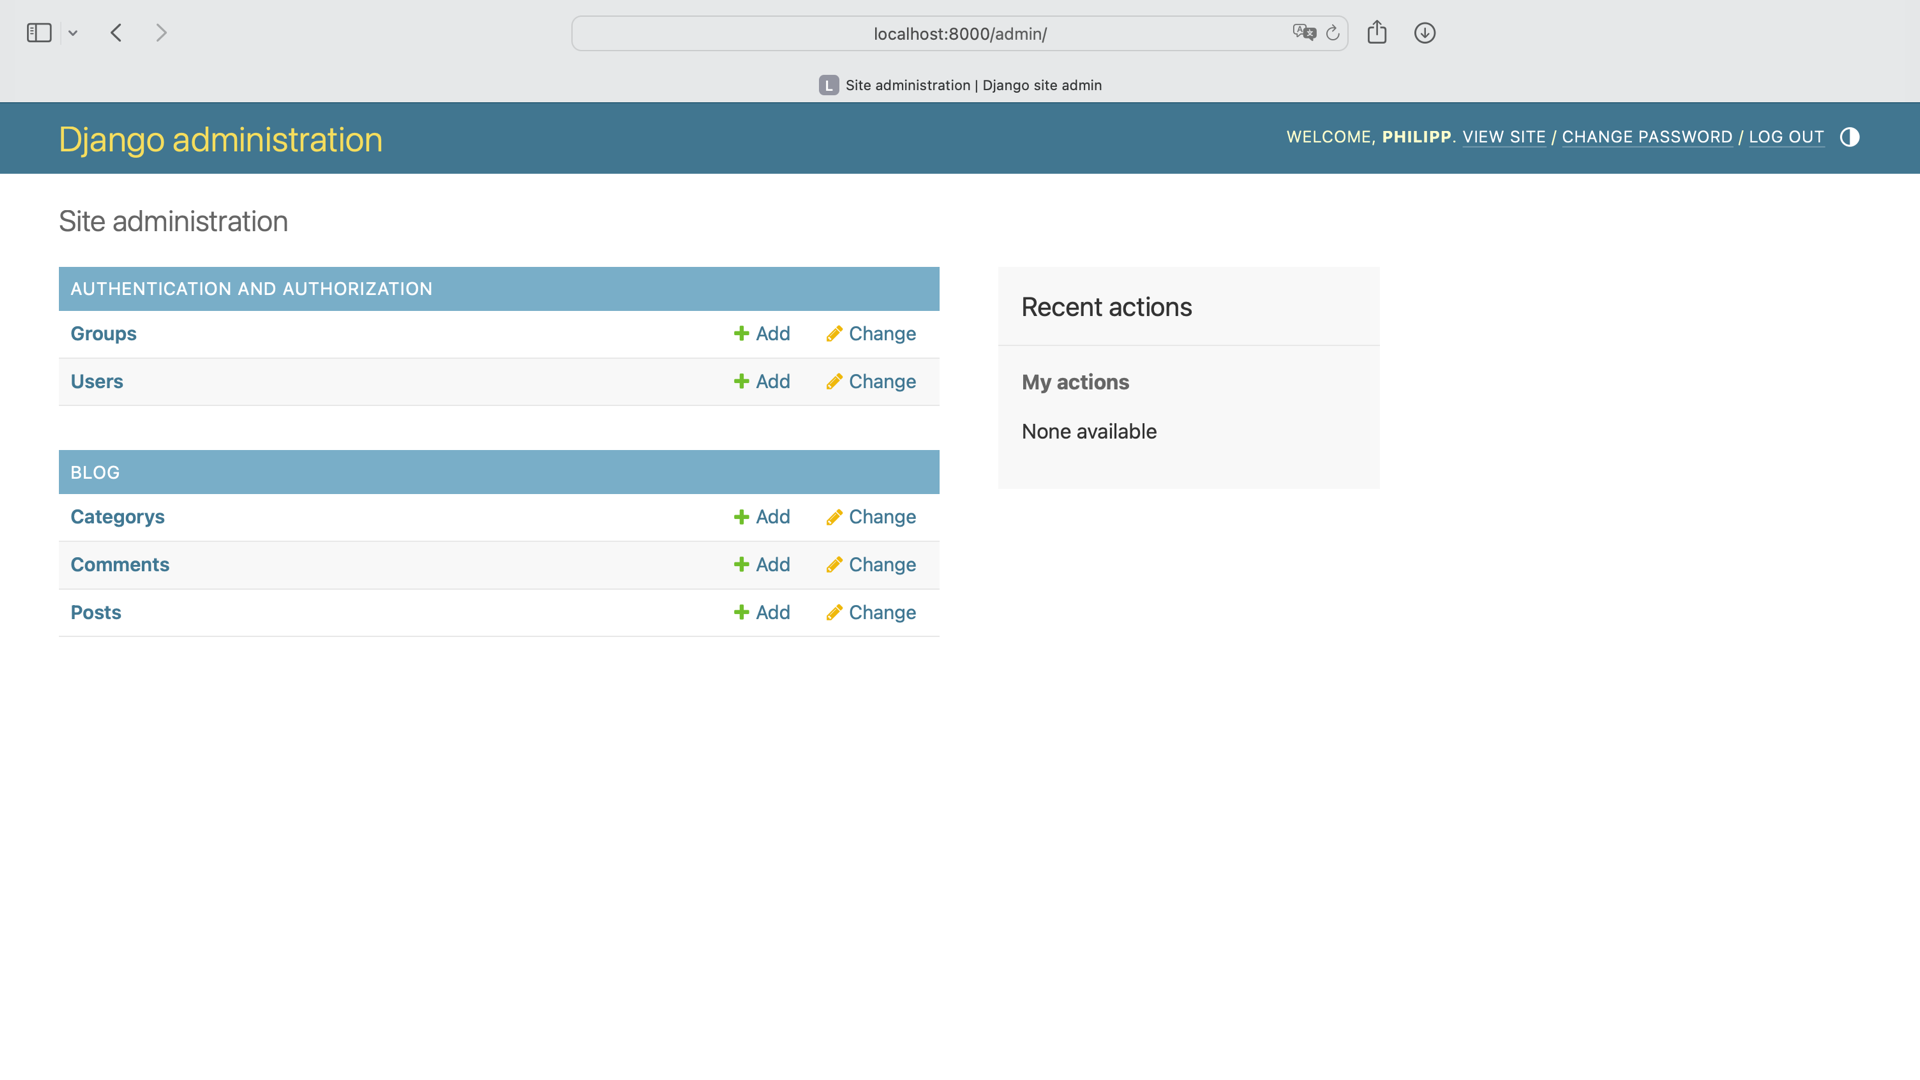
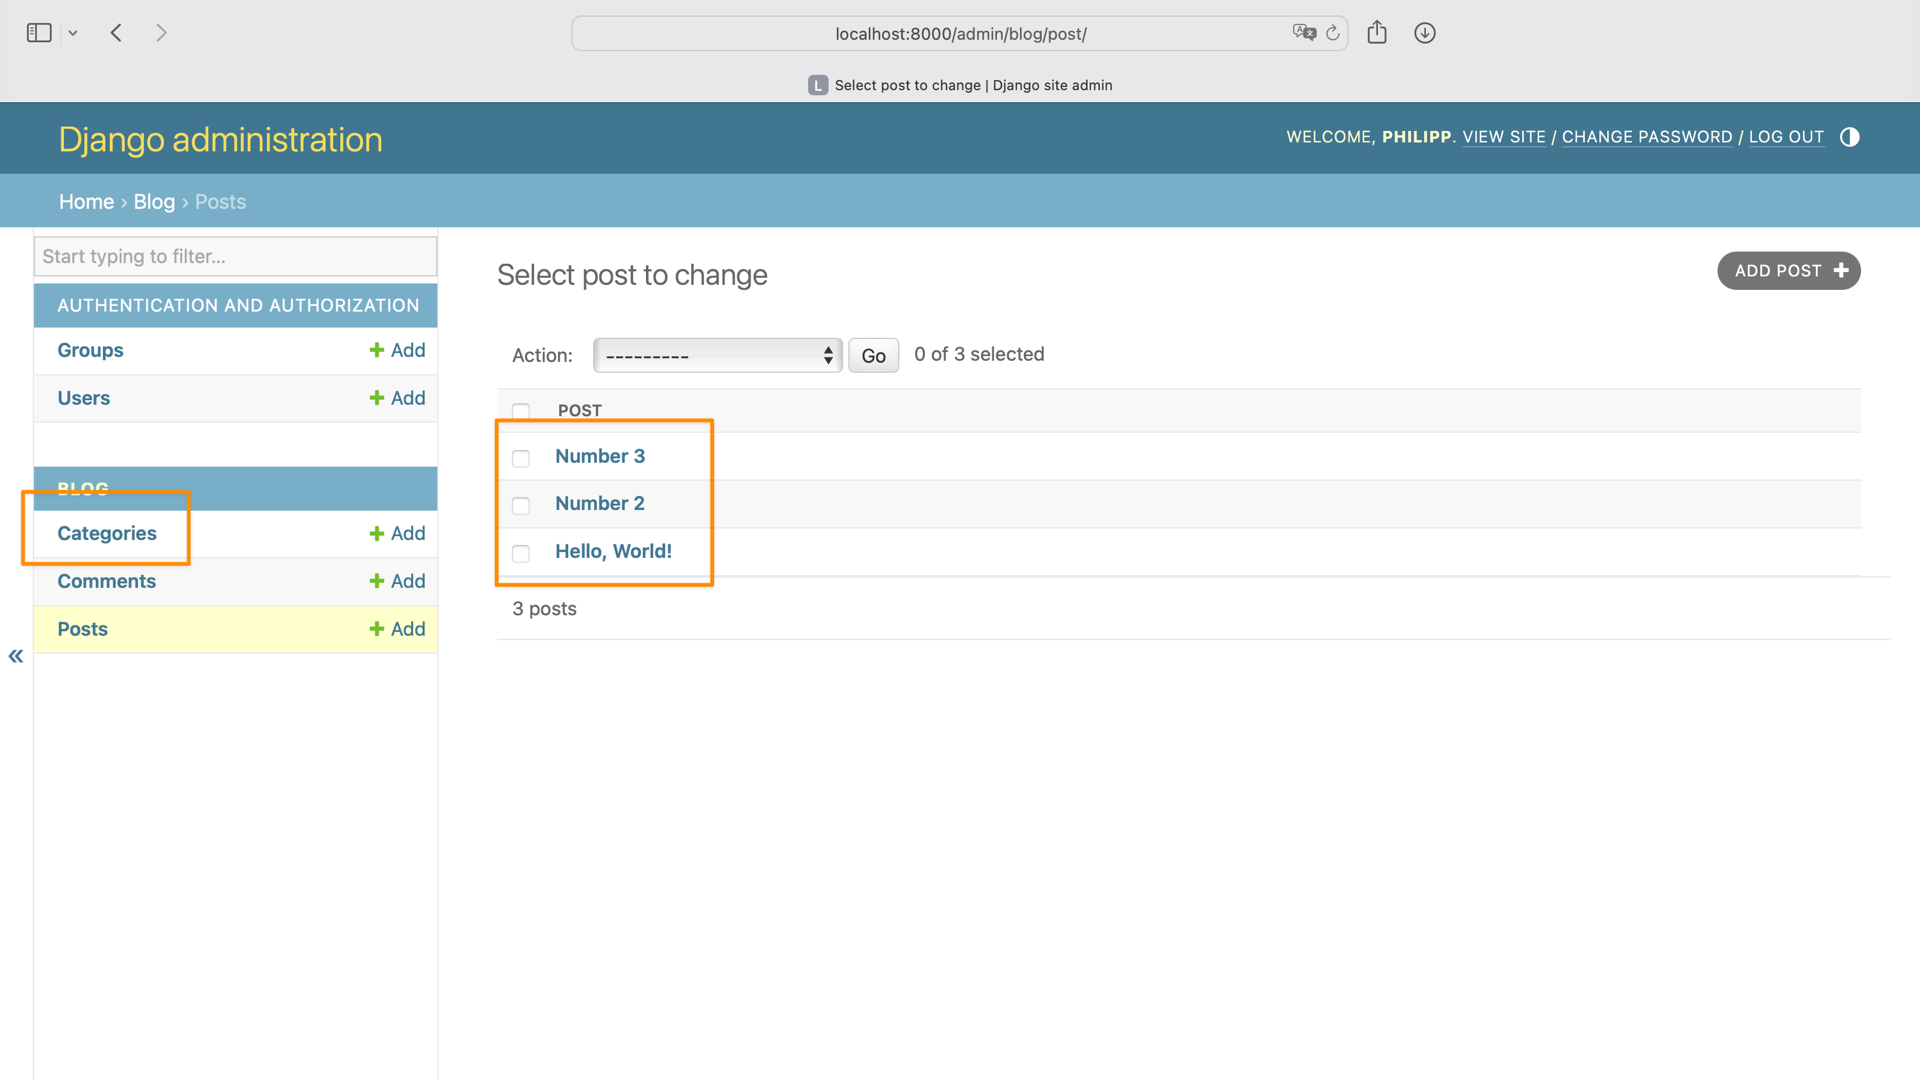
In the last three lines, you register the models with the admin classes. If you visit http://localhost:8000/admin, then you should see that the Post and Category models are now visible:
If you click into Posts, then you can add new posts for the blog that you’re building from scratch. If you don’t want to come up with titles and text right now, you can create placeholder posts by using some lorem ipsum dummy text:
Create a couple of fake posts and assign them fake categories before moving on to the next section. That way, you’ll have posts and categories that you can work with in the next section.
Control the Model Representation
Currently, there are two shortcomings in the Django admin site that you’ll tackle in this section. Both relate to the representation of your models. Hop over to http://localhost:8000/admin and see if you can find them. Additionally, you can click the collapsible below:
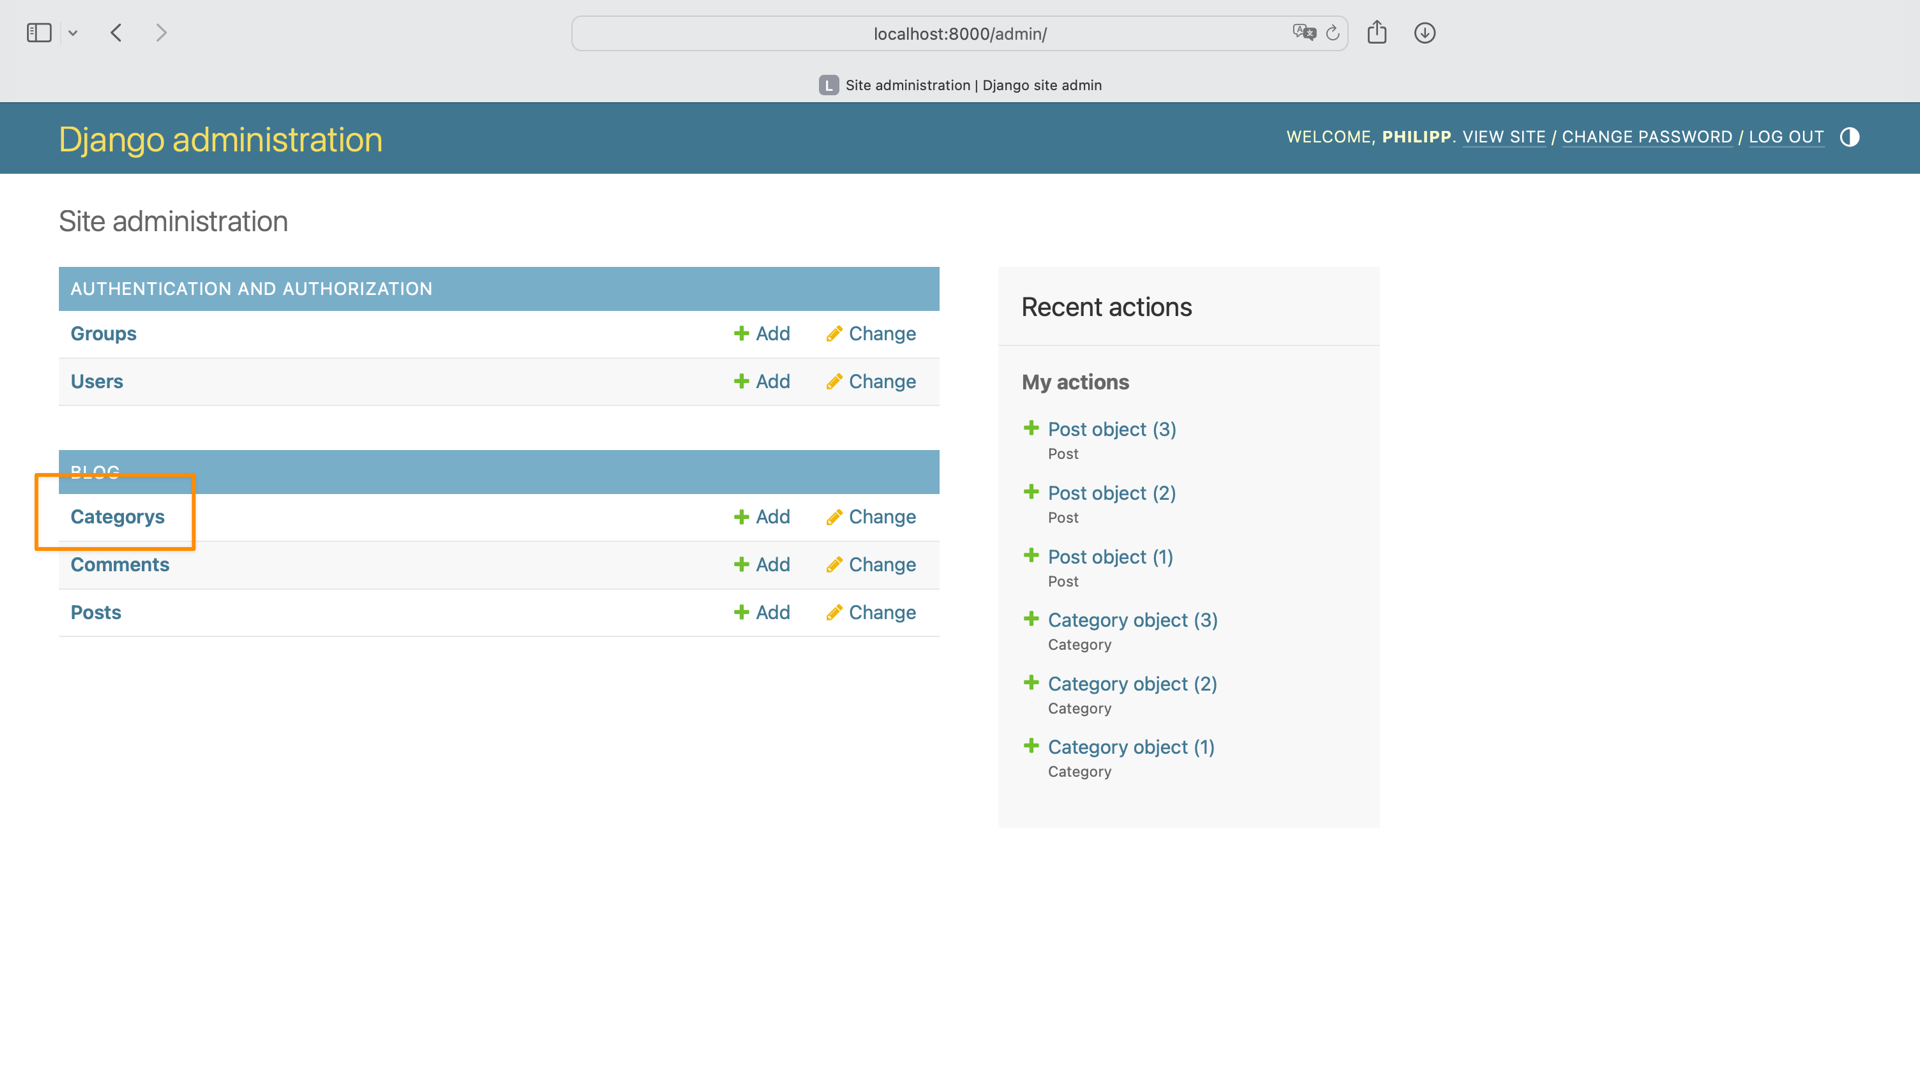
The first shortcoming is the link to your Category model. At the moment, the text says “Categorys” instead of the correct “Categories”:
The other shortcoming is that the blog posts and categories show their object representation instead of their titles:
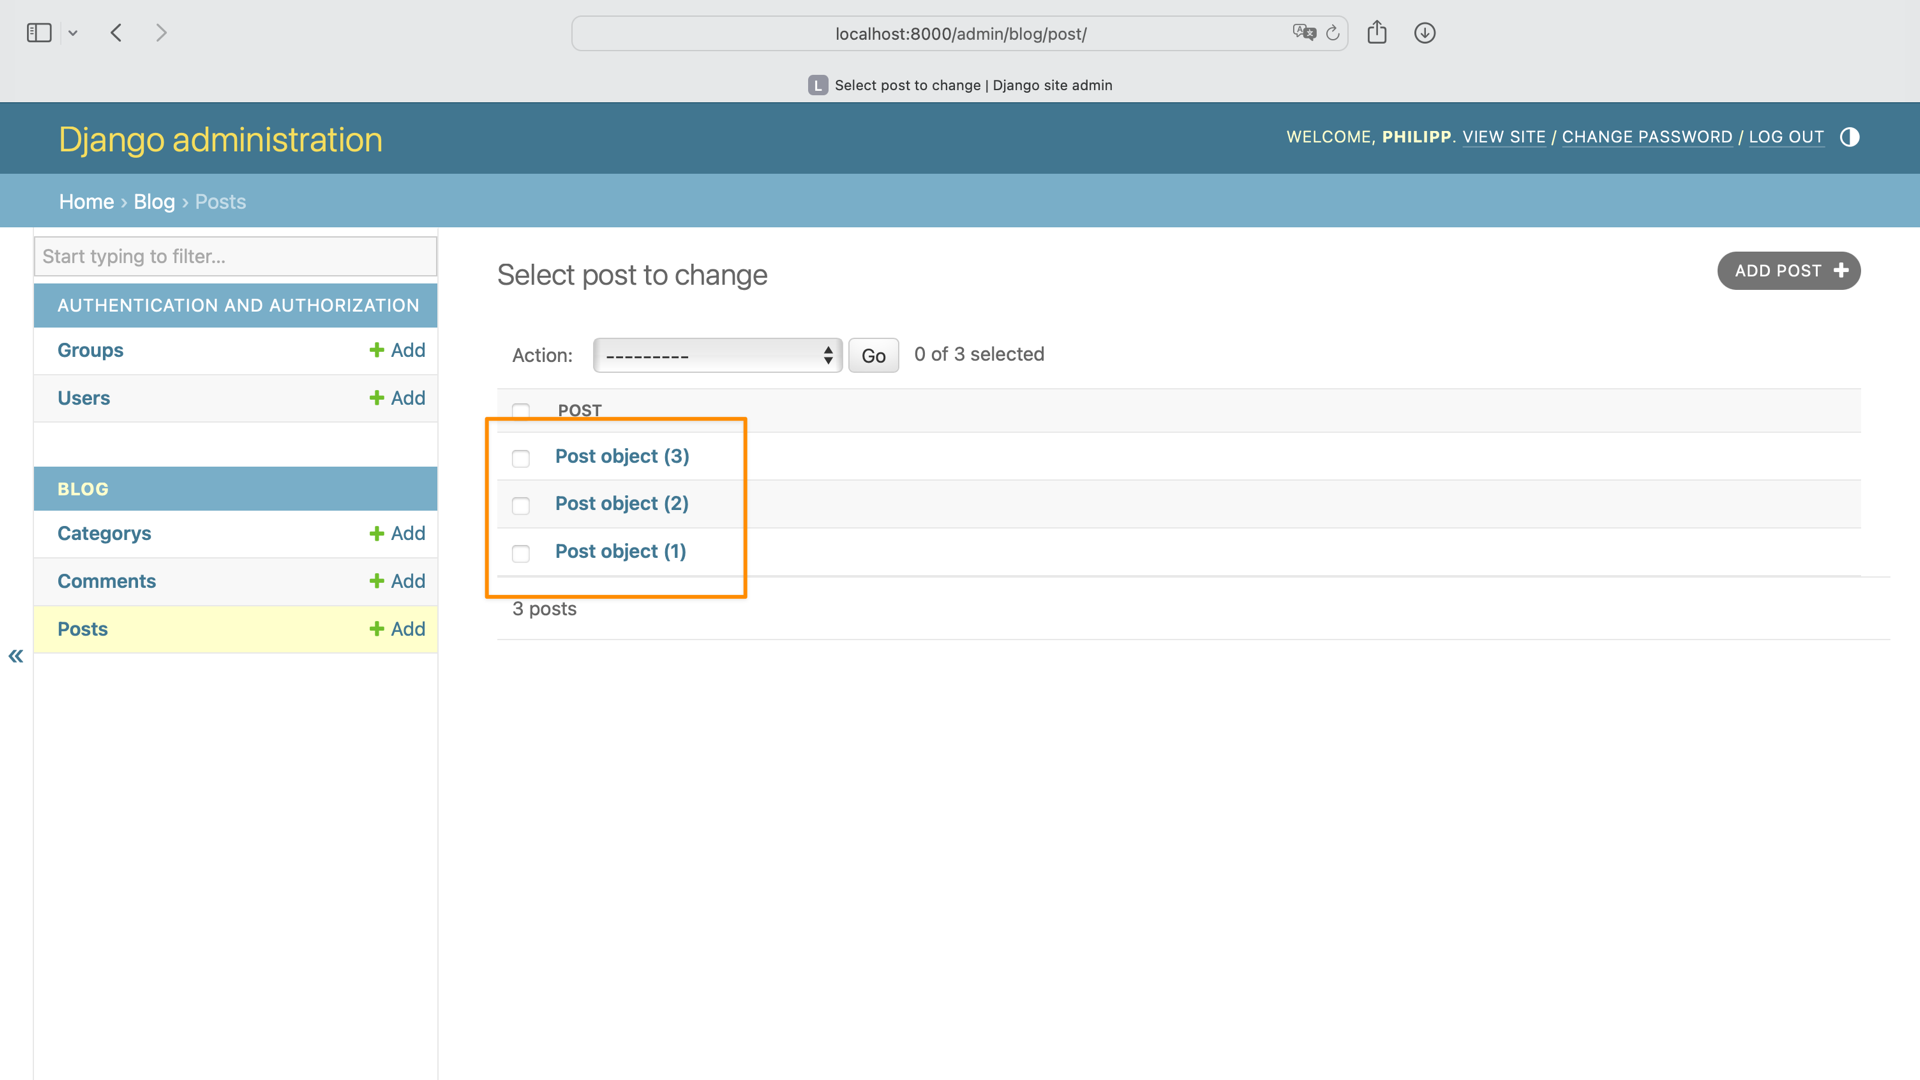
A model representation like this makes it hard to tell which post or category you need to click when you want to make some edits.
To improve the representation of your models, open models.py and add the highlighted code below:
 1# blog/models.py
 2
 3from django.db import models
 4
 5class Category(models.Model):
 6    name = models.CharField(max_length=30)
 7
 8    class Meta:
 9        verbose_name_plural = "categories"
10
11    def __str__(self):
12        return self.name
13
14class Post(models.Model):
15    title = models.CharField(max_length=255)
16    body = models.TextField()
17    created_on = models.DateTimeField(auto_now_add=True)
18    last_modified = models.DateTimeField(auto_now=True)
19    categories = models.ManyToManyField("Category", related_name="posts")
20
21    def __str__(self):
22        return self.title
23
24class Comment(models.Model):
25    author = models.CharField(max_length=60)
26    body = models.TextField()
27    created_on = models.DateTimeField(auto_now_add=True)
28    post = models.ForeignKey("Post", on_delete=models.CASCADE)
29
30    def __str__(self):
31        return f"{self.author} on '{self.post}'"
Just like with common Python classes, you can add a .__str()__ method to model classes to provide a better string representation of your objects. For categories, you want to display the name. For posts, you want the title. For comments, show the name of the commenter and the post that they’re commenting on.
To fix the incorrect plural form of your Category class, you add a Meta class to control the plural name of the class. By default, Django just adds a lowercase s at the end of a model name. For the plural of post, this works perfectly. For categories, you need to explicitly define verbose_name_plural with the correct spelling.
To verify that your changes work, visit http://localhost:8000/admin again:
Well done! You fixed both shortcomings, and the models are represented in a human readably way. Next, you’ll move from the admin area to the user-facing part of your blog.
Handle Logic With Views
A view in Django is a collection of functions or classes inside the views.py file in an app’s directory. Each function or class handles the logic that gets processed each time your user visits a different URL.
You’ll need to create three view functions for your blog in the views.py file in the blog/ directory:
blog_index()will display a list of all your posts.blog_detail()will display the full post. Later, this view will also show existing comments and a form to allow users to create new comments.blog_category()will be similar toblog_index, but the posts shown will only be of a specific category that the user chooses.
Start by adding the necessary imports and the blog_index() function to views.py:
 1# blog/views.py
 2
 3from django.shortcuts import render
 4from blog.models import Post, Comment
 5
 6def blog_index(request):
 7    posts = Post.objects.all().order_by("-created_on")
 8    context = {
 9        "posts": posts,
10    }
11    return render(request, "blog/index.html", context)
On line 4, you import the Post and the Comment models. On line 7, inside the view function, you obtain a Queryset containing all the posts in the database. A Queryset is a collection of all the objects in the database that match the query.
Adding the .order_by() method to the Queryset arranges the objects according to the argument given. The minus sign (-) tells Django to start with the largest value rather than the smallest. That way, you get the recently created posts first.
Finally, you define a context dictionary and render a template named index.html. Don’t worry about Django templates yet. You’ll get to creating those in the upcoming section.
Next, you can create the blog_category() view. This view function will need to take a category name as an argument and query the Post database for all the posts in the given category:
 1# blog/views.py
 2
 3# ...
 4
 5def blog_category(request, category):
 6    posts = Post.objects.filter(
 7        categories__name__contains=category
 8    ).order_by("-created_on")
 9    context = {
10        "category": category,
11        "posts": posts,
12    }
13    return render(request, "blog/category.html", context)
On line 6, you use a Django Queryset filter. The argument of the filter tells Django what conditions need to be true to retrieve an object. In this case, you only want posts whose categories contain the category with the name corresponding to what’s given in the argument of the view function. Again, you’re using .order_by() in line 8 to order posts starting with the most recent.
You then add these posts and the category to the context dictionary and render a category.html template.
The last view function to add is blog_detail():
 1# blog/views.py
 2
 3# ...
 4
 5def blog_detail(request, pk):
 6    post = Post.objects.get(pk=pk)
 7    comments = Comment.objects.filter(post=post)
 8    context = {
 9        "post": post,
10        "comments": comments,
11    }
12
13    return render(request, "blog/detail.html", context)
The blog_detail() view function takes a primary key value, pk, as an argument and, on line 6, retrieves the object with the given pk. The primary key is the unique identifier of a database entry. That means you’re requesting a single post with the specific primary key that you provide.
On line 7, you retrieve all the comments assigned to the given post by using Django filters again. If you haven’t created any comments in the Django admin site, then the QuerySet is empty. That’s fine for now.
Lastly, you add both post and comments to the context dictionary and render a detail.html template. Just like the other templates that you reference in your views, this template doesn’t exist yet. In the next section, you’ll create the missing templates.
Build the Templates
Templates are HTML files with the capability of rendering dynamic content sent over from your Django views. There are popular template engines like Jinja. But if you’re not planning on doing anything fancy in your templates, then you can use Django’s built-in template language.
The render() function of your views looks for HTML templates in a directory named templates/ inside your app directory. Since templates of different apps can have the same names, it’s also best practice to add a subdirectory with the app’s name inside the templates/ directory.
Create the template/ directory, as well as a subdirectory named blog/, and then the template files inside it:
(venv) $ mkdir -p blog/templates/blog
(venv) $ touch blog/templates/blog/index.html
(venv) $ touch blog/templates/blog/category.html
(venv) $ touch blog/templates/blog/detail.html
The first template that you’ll work on is index.html. You’ll use a for loop to loop over all the posts. For each post, you’ll display the title and a snippet of the body:
 1<!-- blog/templates/blog/index.html -->
 2
 3{% block page_title %}
 4    <h2>Blog Posts</h2>
 5{% endblock page_title %}
 6
 7{% block page_content %}
 8    {% block posts %}
 9        {% for post in posts %}
10            <h3><a href="{% url 'blog_detail' post.pk %}">{{ post.title }}</a></h3>
11            <small>
12                {{ post.created_on.date }} | Categories:
13                {% for category in post.categories.all %}
14                    <a href="{% url 'blog_category' category.name %}">
15                        {{ category.name }}
16                    </a>
17                {% endfor %}
18            </small>
19            <p>{{ post.body | slice:":400" }}...</p>
20        {% endfor %}
21    {% endblock posts %}
22{% endblock page_content %}
You may notice that the template wouldn’t render as a a valid HTML page. For this, required HTML elements like <html> and <head> are missing. You’ll take care of this later. For now, focus on how you work with the context dictionary in a Django template.
On line 9, you’re looping through the posts values. That means you can access keys of context in a Django template directly, as this dictionary is already unpacked for you.
Inside the for loop, you can then access the attributes of post, like .title on line 10. You wrap a post’s title in a hyperlink that points to the URL named blog_detail, which takes an integer as its argument. This integer is the unique primary key value, pk, of the post.
Underneath the title, you display the .created_on attribute of the post as well as its categories. On line 13, you use another for loop to loop over all the categories assigned to the post.
On line 19, you use the template filter slice to cut off the post body at four hundred characters so that the blog index is more readable. To learn more about template filters, check out the tutorial about built-in tags and filters.
Another interesting bit in the index.html template is the use of {% block %} template tags. With this template tag, you can define content blocks that you can use or override in child templates that extend the parent template.
A child template of index.html is category.html. This template should look almost the same. Any posts that the template receives from the view should be listed. That means the only difference in category.html is the headline:
<!-- blog/templates/blog/category.html -->

{% extends "blog/index.html" %}

{% block page_title %}
<h2>{{ category }}</h2>
{% endblock page_title %}
To extend a parent template, you must use the {% extends %} tag at the beginning of a child template. Inside the {% extends %} tag, you then define the template that you want to extend.
Once you’ve referenced the parent template, you can decide which blocks you want to inherit or override. If you don’t reference a block in a child template, then you inherit the parent’s block as it is. Alternatively, you can reference a parent’s block with new content.
Here, you only override the title block, but not the posts block of index.html. Since you don’t reference the posts block of the parent template, you inherit the content from index.html for this block. That’s exactly what you want to display all the posts that the blog_category() view provides.
The last template is detail.html template. In this template, you’ll display the title and full body of a post.
Between the title and the body of the post, you’ll display the date the post was created and any categories:
 1<!--  blog/templates/blog/detail.html -->
 2
 3{% block page_title %}
 4    <h2>{{ post.title }}</h2>
 5{% endblock page_title %}
 6
 7{% block page_content %}
 8    <small>
 9        {{ post.created_on.date }} | Categories:
10        {% for category in post.categories.all %}
11            <a href="{% url 'blog_category' category.name %}">
12                {{ category.name }}
13            </a>
14        {% endfor %}
15    </small>
16    <p>{{ post.body | linebreaks }}</p>
17{% endblock page_content %}
The first few lines of the template—in which you display the post title, date, and categories—is the same logic as for the previous templates. This time, when rendering the post body, you use a linebreaks template filter. This tag registers two consecutive line breaks as new paragraphs, so the body doesn’t appear as one long block of text.
Note: You’re not working with the comments in this template yet. You’ll introduce them later in the template. But for now, it’s good to know that you don’t need to use items in a template just because you’ve added them to the context dictionary.
With your templates in place, there’s only one puzzle piece missing to actually be able to view the blog that you’re building from scratch: routes. In the next section, you’ll create the routes for your views to be able to visit your blog in the browser.
Include Routes for URLs
To actually see your blog up and running, you need to hook up the routes for them in your Django project. Generally speaking, a route is the URL that you’ll enter in your browser’s address bar.
In Django, you create routes with patterns. Instead of manually creating a URL for every blog post, you can create a rule to access any existing blog post.
To do so, you’ll need to create an urls.py file inside blog/ and add the URLs for the three views:
# blog/urls.py

from django.urls import path
from . import views

urlpatterns = [
    path("", views.blog_index, name="blog_index"),
    path("post/<int:pk>/", views.blog_detail, name="blog_detail"),
    path("category/<category>/", views.blog_category, name="blog_category"),
]
Once the blog-specific URLs are in place, you need to add them to the project’s URL configuration in personal_blog/urls.py using include():
# personal_blog/urls.py

from django.contrib import admin
from django.urls import path, include

urlpatterns = [
    path("admin/", admin.site.urls),
    path("", include("blog.urls")),
]
With this set up you’ll have the following route logic:
| Route pattern | Example URL | Description |
|---|---|---|
"" |
http://localhost:8000/ |
Blog index |
"post/<int:pk>/" |
http://localhost:8000/post/1 |
Blog detail view of a post with pk=1 |
"category/<category>/" |
http://localhost:8000/category/python |
Blog index view of all posts with category python |
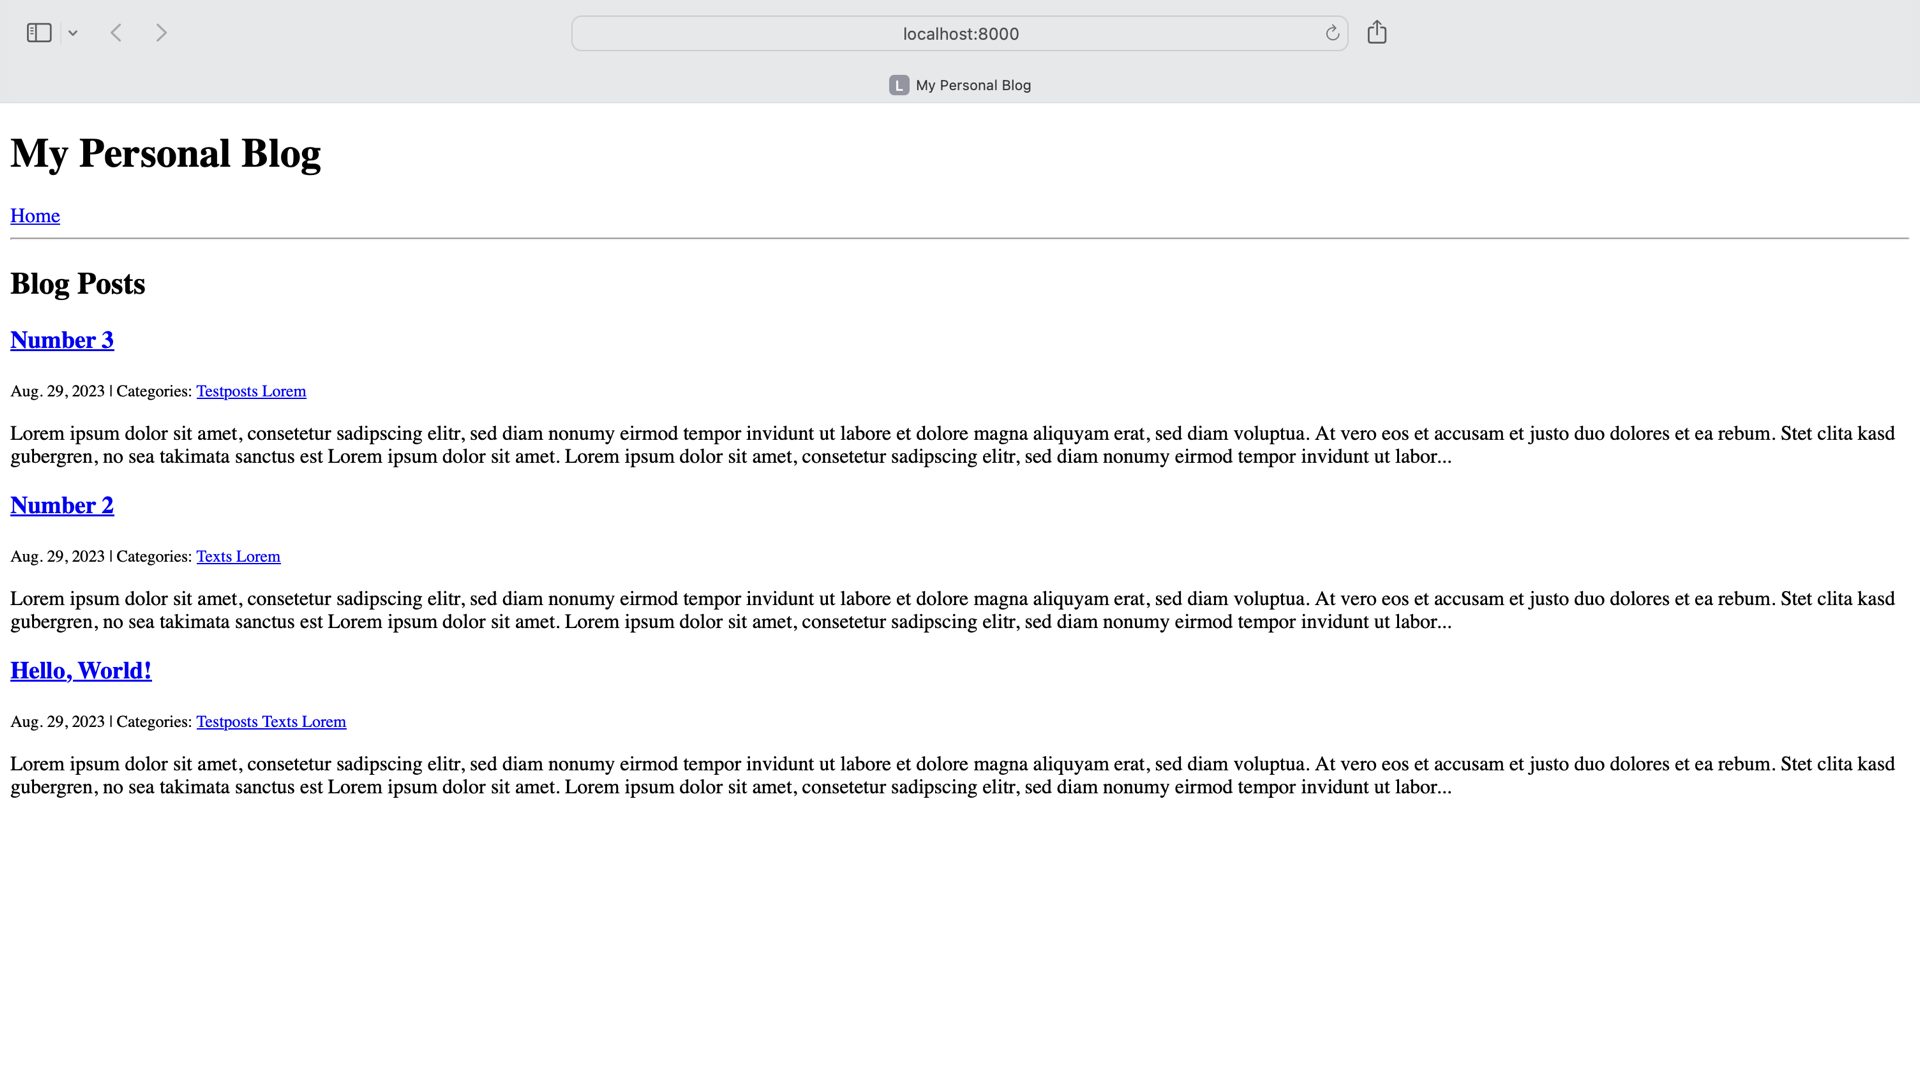
Go ahead and visit http://localhost:8000/. Then, click around and notice the different URLs in the address bar and the templates that you load:
So far, the blog looks rather basic. In the next section, you’ll enhance the look and feel of your blog by adding some style to your blog.
Make Your Blog Look Nice
Before you get started with the styling your project, you’ll create a base template that you’ll extend in your child templates from before. That way, you can structure your HTML templates in one place and let other templates inherit the content.
Start by creating a directory named templates/ in the django-blog/ folder and a file named base.html inside the new directory:
(venv) $ mkdir templates/
(venv) $ touch templates/base.html
As you saw previously, each Django project can consist of multiple apps that handle separate logic, and each app contains its own templates/ directory to store HTML templates related to the application. For templates that the whole project shares, it’s a good idea to create a templates/ directory in the root directory.
Inside base.html, add the following lines of code:
 1<!-- templates/base.html -->
 2
 3<!DOCTYPE html>
 4<html lang="en">
 5<head>
 6    <meta charset="utf-8">
 7    <title>My Personal Blog</title>
 8</head>
 9<body>
10<h1>My Personal Blog</h1>
11<a href="{% url "blog_index" %}">Home</a>
12<hr>
13{% block page_title %}{% endblock page_title %}
14{% block page_content %}{% endblock page_content %}
15</body>
16</html>
With the code above, you create the skeleton of a valid HTML document. You also define a My Personal Blog title and headline that any child template will inherit.
As you learned before, you need to add an {% extends %} tag at the beginning of a child template. Open index.html and add the highlighted line below:
<!-- blog/templates/blog/index.html -->

{% extends "base.html" %}

{% block page_title %}
    <h2>Blog Posts</h2>
{% endblock page_title %}

{% block posts %}
    <!-- ... -->
{% endblock posts %}
By adding {% extends "base.html" %} to index.html, the template will inherit the structure of base.html.
Continue with detail.html and make it a child template of base.html:
<!--  blog/templates/blog/detail.html -->

{% extends "base.html" %}

{% block page_title %}
    <h2>{{ post.title }}</h2>
{% endblock page_title %}

{% block page_content %}
    <!-- ... -->
{% endblock page_content %}
With template inheritance, you don’t have to repeat markup in your templates. Instead, you extend your child templates. Django then automatically merges them together when serving them in the view.
Remember that categories.html already extends index.html. Since templates pass through their inheritance, you don’t need to add any additional tags in this template.
Before you can see the base template in action, you need to tell your Django example project that base.html exists. The default settings register templates/ directories in each app, but not in the root directory itself. In personal_blog/settings.py, update TEMPLATES:
# personal_blog/settings.py

# ...

TEMPLATES = [
    {
        "BACKEND": "django.template.backends.django.DjangoTemplates",
        "DIRS": [
            BASE_DIR / "templates/",
        ],
        "APP_DIRS": True,
        "OPTIONS": {
            "context_processors": [
                "django.template.context_processors.debug",
                "django.template.context_processors.request",
                "django.contrib.auth.context_processors.auth",
                "django.contrib.messages.context_processors.messages",
            ]
        },
    }
]

# ...
You’ve already defined the constant BASE_DIR in settings.py, and it points to your project’s root directory. Next, you join the path with the forward slash operator (/) from pathlib to point to the templates/ directory and add it to the "DIRS" list.
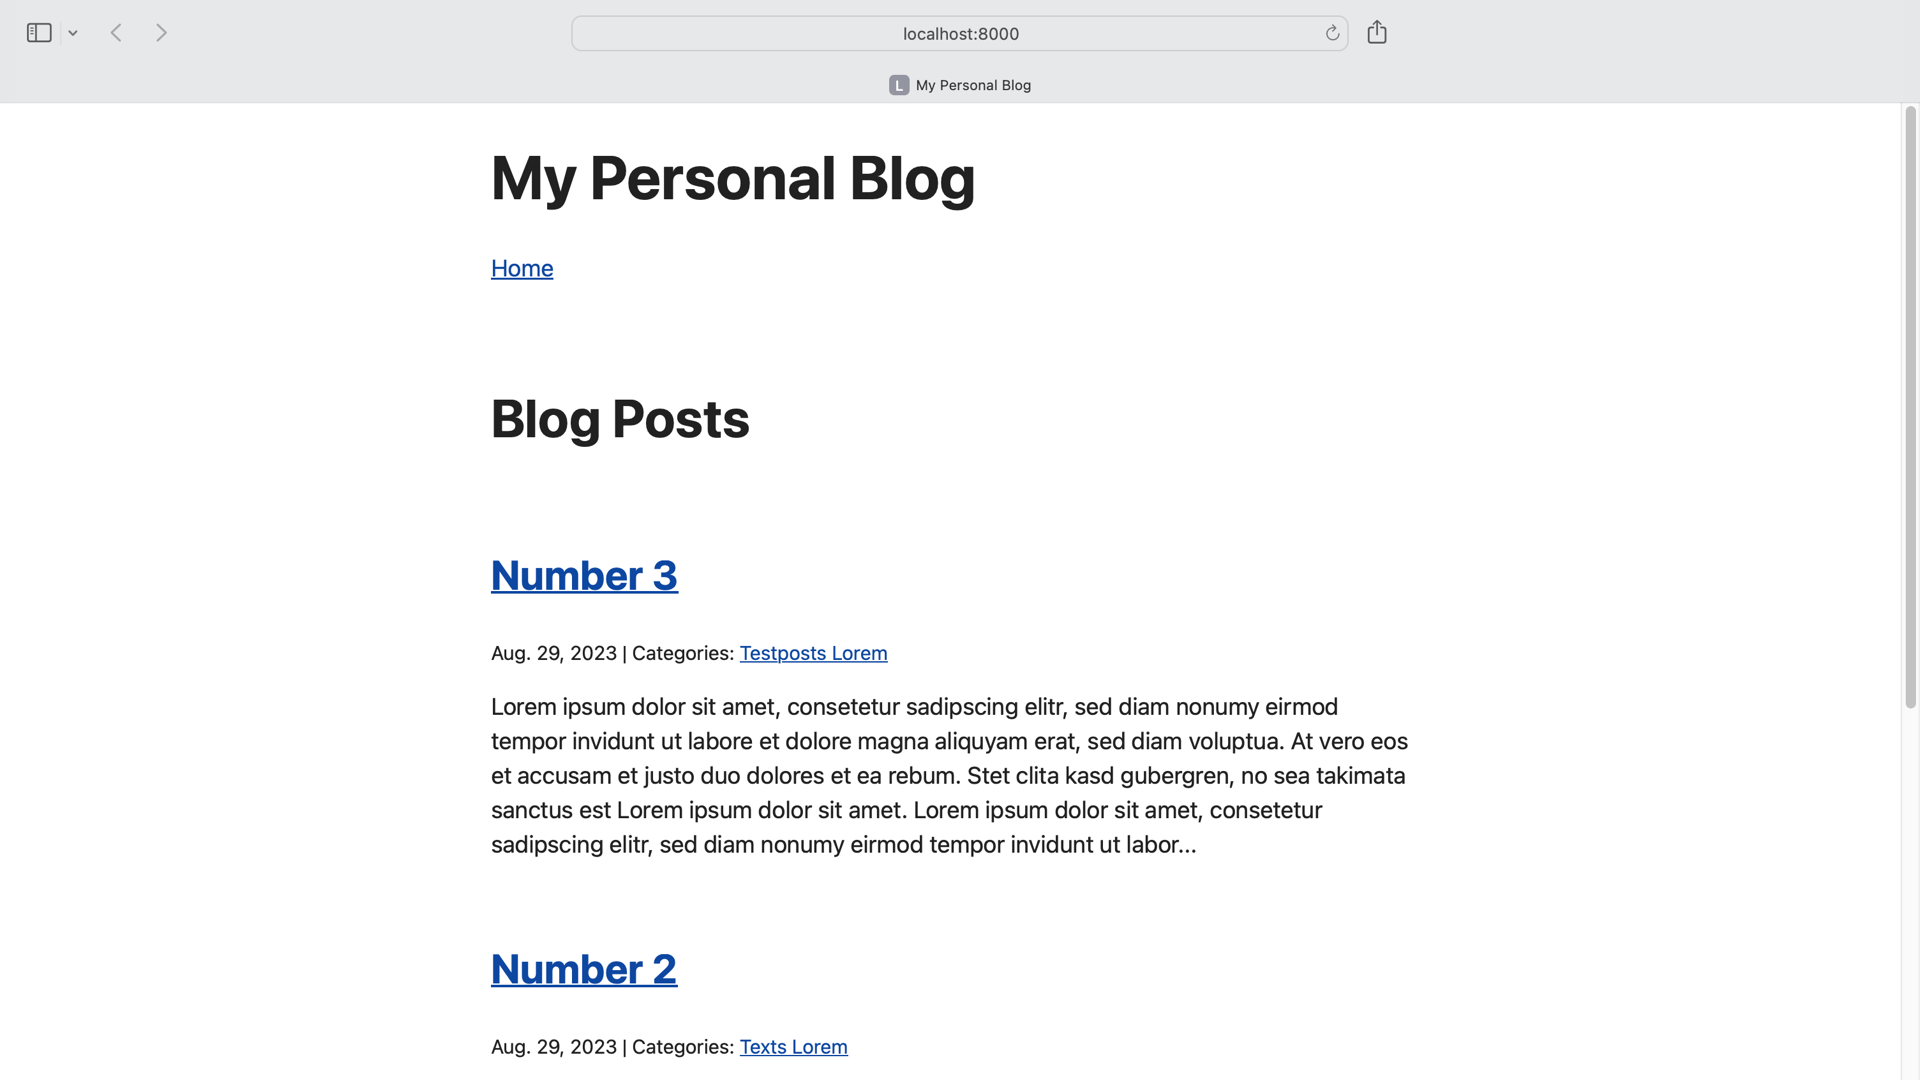
Hop over to your browser and visit http://localhost:8000/:
When you visit your blog, the main headline shows on every page. That means that the inheritance works. But without any styling, your blog still looks very basic.
Instead of going into CSS styling with this tutorial, you’ll add an external CSS framework to your project. Using external CSS frameworks can save you a lot of work during web development. That being said, if you don’t know CSS, it’s worth learning the basics if you’re into web development.
Open base.html again and add a link to the Simple.css framework:
 1<!-- templates/base.html -->
 2
 3<!DOCTYPE html>
 4<html lang="en">
 5<head>
 6    <meta charset="utf-8">
 7    <title>My Personal Blog</title>
 8    <link rel="stylesheet" href="https://cdn.simplecss.org/simple.min.css">
 9</head>
10<body>
11<!-- ... -->
12</body>
13</html>
Similar to the Python import technique, you can import an external CSS library to your website. In line 8, you’re loading an external CSS file. This external CSS file provides styling without the need for you to add any classes to your HTML elements.
Open http://localhost:8000/ and visit a categories page to verify that your child templates inherit the style:
Loading a stylesheet in your base template is all that you need to add external CSS styles to your project. All templates extend base.html and will inherit styling automatically.
Your blog is almost finished. The last feature that you’ll implement is the ability to add comments to your blog posts.
Work With Forms for User Comments
In order to make comments work on your blog, you need to add a form to the post page. Before you do so, you’ll need to create a Django form. Django forms are very similar to models. A form consists of a class where the class attributes are form fields. Django comes with some built-in form fields that you can use to quickly create the form you need.
Create a new file named forms.py in the blog/ directory:
(venv) $ touch blog/forms.py
Inside forms.py, add the CommentForm class with the two fields author and body:
# blog/forms.py

from django import forms

class CommentForm(forms.Form):
    author = forms.CharField(
        max_length=60,
        widget=forms.TextInput(
            attrs={"class": "form-control", "placeholder": "Your Name"}
        ),
    )
    body = forms.CharField(
        widget=forms.Textarea(
            attrs={"class": "form-control", "placeholder": "Leave a comment!"}
        )
    )
For both author and body, you use a CharField class. To control how the form element should be rendered on the page, you pass in a widget argument.
The author field has the forms.TextInput widget. This tells Django to load this field as an HTML text input element in the templates. The body field uses a forms.TextArea widget instead, so the field is rendered as an HTML text area element.
These widgets also take the argument attrs, which is a dictionary that allows you to specify some CSS classes. This will help with formatting the template for this view later. It also allows you to add some placeholder text.
Once you’ve created the Django form for comments, have a look at how a form travels through requests:
- When a user visits a page containing a form, they send a
GETrequest to the server. In this case, there’s no data entered in the form, so you just want to render the form and display it. - When a user enters information and clicks the Submit button, they send a
POSTrequest, containing the data submitted with the form, to the server. At this point, the data goes for processing, and two things can happen:- The form is valid, and the user is redirected to the next page.
- The form is invalid, and the empty form shows up once again. The user is back at step 1, and the process repeats.
The view function that needs to resemble this behavior is the blog_detail() view. Update blog_detail() with the highlighted code below:
 1# blog/views.py
 2
 3from django.http import HttpResponseRedirect
 4from django.shortcuts import render
 5from blog.models import Post, Comment
 6from blog.forms import CommentForm
 7
 8# ...
 9
10def blog_detail(request, pk):
11    post = Post.objects.get(pk=pk)
12    form = CommentForm()
13    if request.method == "POST":
14        form = CommentForm(request.POST)
15        if form.is_valid():
16            comment = Comment(
17                author=form.cleaned_data["author"],
18                body=form.cleaned_data["body"],
19                post=post,
20            )
21            comment.save()
22            return HttpResponseRedirect(request.path_info)
23
24    comments = Comment.objects.filter(post=post)
25    context = {
26        "post": post,
27        "comments": comments,
28        "form": CommentForm(),
29    }
30    return render(request, "blog/detail.html", context)
In line 3, you import HttpResponseRedirect, which helps you redirect the request in line 22. You’ll have a closer look at line 22 in a moment. First, follow the request through the body of blog_detail().
Regardless of your request type, you take CommentForm(), which you imported in line 6, and make an instance of it in line 12. That way, you ensure that there’s always an empty form present in your view.
Then in line 13, you check if you’ve received a POST request. If so, you update form with the data of the POST request in line 14. That’s the data that the user entered into the form.
After that, you validate the form using .is_valid() in line 15 to check that the user has entered all the fields correctly.
Note: If a form isn’t valid, you can output the errors to the user. This is beyond the scope of this tutorial, but you can read more about rendering form error messages in the Django documentation.
If the form is valid, then you create a new instance of Comment in lines 16 to 20. You can access the data from the form using form.cleaned_data, which is a dictionary. Before passing in user-submitted data to your database queries, it’s good practice to clean up form data. That way, you make sure that any input is consistent and safe.
The keys of form.cleaned_data correspond to the form fields, so you can access the author using form.cleaned_data["author"] in line 17 and the comment’s body with form.cleaned_data["body"] in line 18.
To properly create a Comment object in your database, you must connect it to an existing Post in line 19. You grab the related post with the primary key of the view in line 11.
Once you’ve created the comment from the form, you save it using .save() in line 21 and redirect the user to the URL that request.path_info contains in line 22. In your case, that’ll be the URL of a blog post.
This means, in other words, that when you transmit a valid form to blog_detail() with a POST request, then Django will call blog_detail() again after saving your comment. This time, Django will call the view function with a GET request, and the blog post will load with an emptied form and your comment in the list of comments.
For these GET requests or when the form isn’t valid, the rest of blog_detail() will do this:
- Line 24 queries the database for any existing comments on your post.
- Lines 25 to 29 create the
context, including the data for the post, the filtered comments, and the form. - Line 30 renders the
detail.htmltemplate withcontext.
Now that context also contains comments and the form data, you can update your detail.html template:
 1<!-- blog/templates/blog/detail.html -->
 2
 3{% block page_title %}
 4    <h2>{{ post.title }}</h2>
 5{% endblock page_title %}
 6
 7{% block page_content %}
 8    <small>
 9        <!-- ... -->
10    </small>
11    <p>{{ post.body | linebreaks }}</p>
12
13    <h3>Leave a comment:</h3>
14    <form method="post">
15        {% csrf_token %}
16        <div>
17            {{ form.author }}
18        </div>
19        <div>
20            {{ form.body }}
21        </div>
22        <button type="submit" class="btn btn-primary">Submit</button>
23    </form>
24
25    <h3>Comments:</h3>
26    {% for comment in comments %}
27        <p>
28            On {{ comment.created_on.date }} <b>{{ comment.author }}</b> wrote:
29        </p>
30        <p>
31            {{ comment.body | linebreaks }}
32        </p>
33    {% endfor %}
34{% endblock page_content %}
Underneath the post, you display your form. If you don’t define a form’s action attribute, then the form action points to the page you’re currently on. You then add a csrf_token, which provides security and renders the body and author fields of the form, followed by a submit button.
Finally, you loop over all the comments on the given post. Instead of showing the full timestamp, you only display the date for the .created_on attribute of a comment.
Hop over to http://localhost:8000/ and see your updates in action:
With these changes in place, you’ve made your blog truly interactive. Now your readers can share their feedback directly below each post.
Implementing comments with Django’s form feature on your blog app was the last step in this tutorial. If you want to compare your code with the final code of this tutorial, then you can click the link below:
Get Your Code: Click here to download your free source code to build a blog from scratch with Django.
Conclusion
Congratulations, you’ve covered a lot in this tutorial. By building and extending your own blog with Django, you can keep control over your content and hone your skills as a web developer.
In this tutorial, you’ve learned how to:
- Set up a new Django project
- Create and edit blog posts
- Display posts to the user
- Assign categories to posts
- Allow users to comment on posts
In addition, you’ve learned about the Django admin site and used Django forms to interact with users.
Did you come up with ideas on how to improve your Django project while learning by example in this tutorial? If so, share your ideas with the Real Python community in the comments below.