Modern AI agents can write functions, refactor modules, generate tests, and implement entire features from a natural language prompt. But their output is only as reliable as the project they’re working in. A Python project for agentic coding answers the questions an agent would otherwise guess at: how your project is organized and which tools to run.
Fortunately, making agents more reliable doesn’t require longer prompts or a different coding agent. Instead, you can build a project that makes expectations explicit. Automated tests, linters, type checkers, configuration files, and concise project documentation create feedback loops that help both humans and AI catch mistakes early. The result is a development workflow that’s more predictable, regardless of which coding assistant you use.
In this tutorial, you’ll build a Python project optimized for agentic coding from an empty directory. Along the way, you’ll configure the tools that give agents fast, executable feedback, document your project’s conventions, and organize your repository so an agent can navigate it effectively. Although you’ll see examples of agent-specific instruction files, the overall approach is tool agnostic and works with a wide range of agents.
Before starting this tutorial, you should:
- Be familiar with running commands in the terminal
- Understand the basic Python package structure
- Have Git installed and configured
Here’s the layout you’ll end up with, including every configuration file and check that an agent relies on:
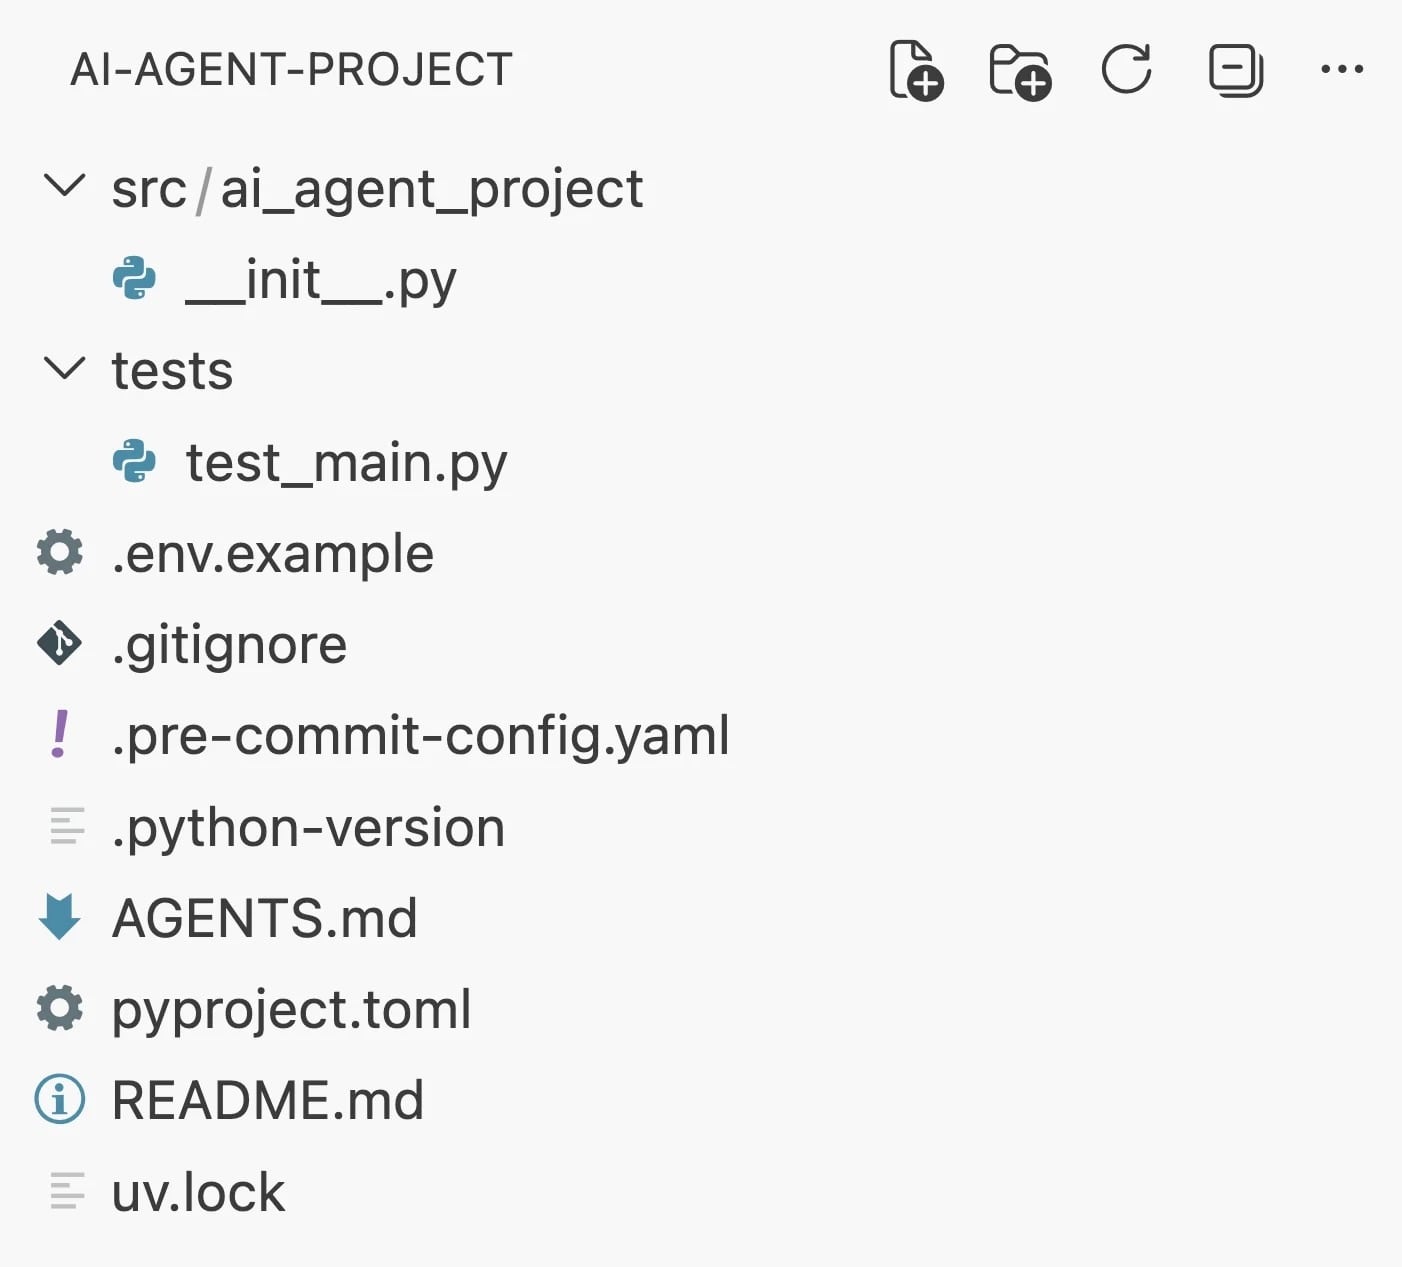
Each file in that tree does one job, and you’ll add them a few at a time across the next three steps.
Get Your Code: Click here to download the free sample code you’ll use to set up a Python project that gives AI coding agents fast, automated feedback on every change.
Step 1: Initialize Your Python Project
uv is a package and Python installation manager that can be used to set up new projects.
If you haven’t already installed uv, then follow the installation instructions for your operating system.
Once it’s installed, create a new project by running:
$ uv init --package ai-agent-project
$ cd ai-agent-project
The uv init command creates a minimal Python project with sensible defaults.
Depending on the version of uv you’re using, the generated files may vary slightly, but you’ll typically see something similar to this:
ai-agent-project/
│
├── src/
│   │
│   └── ai_agent_project/
│       └── __init__.py
│
├── .gitignore
├── .python-version
├── pyproject.toml
└── README.md
This gives you a working starting point without requiring you to manually create configuration files or virtual environments.
Layout matters more here than it might first appear, and the reason has to do with how agents read a repository. Humans naturally build a mental model of a project over time. After working in a repository, you probably know where to find files, tests, and configuration without thinking about it.
AI agents don’t have that advantage. Instead, they build a working model of your project from the files they can access. Each unnecessary directory, inconsistent name, or duplicated configuration increases the amount of information an agent has to process before it can make useful changes.
By following a standard package layout, like the one uv provides, you are able to give an agent more context with less ambiguity.
This idea extends beyond directory structure.
Every configuration file, automated check, and documentation file you’ll add later in this tutorial reduces uncertainty.
Instead of repeatedly describing those expectations in prompts, you encode those preferences directly into the project itself.
Version control is an essential part of modern Python development, but it also plays an important role when working with AI agents. Agents often make changes across multiple files, and Git provides a reliable way to review, compare, or discard those changes before they’re merged.
Running uv init initializes both your Python project and a Git repository.
Commit this initial state:
$ git add .
$ git commit -m "Initial project scaffold"
That snapshot is your undo button. Even when working alone, frequent commits make it much easier to recover from an incorrect implementation or compare multiple agent-generated solutions.
Step 2: Build an Agent-Friendly Python Project Foundation
Well-organized projects help agents understand where code belongs. The next step is making it clear whether the code an agent writes is correct. Since agents generate code much faster than humans, fast feedback becomes even more valuable. An agent can implement a feature in seconds, but without automated checks it may continue building on incorrect assumptions. By the time the mistake is discovered, several files may need to be rewritten.
Rather than trying to describe every coding convention in your prompts, you can encode those expectations directly into your project’s tooling. Every failed test, linting error, or type error provides immediate, actionable feedback that helps the agent converge on a correct implementation. Whenever possible, configure tools to enforce conventions automatically rather than documenting them.