When your script asks a user a basic yes-or-no question, they might type yes, Y, no!, or yeah. As a programmer, you have to guess every way they might answer, so your Python script needs to account for that. With the newly released Jev AI model, you can ease the load on your if statements and try to make sense of all human replies.
You’ll start with a small train station script that only accepts an uppercase Y or N. Then you’ll hand the station visitor’s answer to Jev, and finally ask three questions in one request to find out where each visitor should go:
To follow along, you should be comfortable with reading user input from the keyboard and Python dictionaries. If you’ve worked with an AI model through the OpenRouter API before, then you’ll recognize the setup steps. But that’s not a requirement.
Get Your Code: Click here to download the free sample code you’ll use to connect a Python script to Jev with the TypeSafe SDK and OpenRouter.
Take the Quiz: Test your knowledge with our interactive “How to Get Started With Jev in Python” quiz. You’ll receive a score upon completion to help you track your learning progress:

Interactive Quiz
How to Get Started With Jev in PythonCheck your understanding of the Jev AI model in Python, from OpenRouter setup and Noul cutoffs to Choice and Score answers.
Prerequisites
Jev is a model by TypeSafe AI, and like many AI companies, TypeSafe AI publishes a Python SDK for its model. Instead of sending a prompt and getting prose back, as you do with LLMs like Claude or ChatGPT, Jev answers every question in a typed format. You get a number or a key from a set of options, which you can conveniently parse in your Python code.
Your project needs at least Python 3.10 and the TypeSafe SDK. You’ll manage both with uv because uv installs the right Python version for you and reads your dependencies from pyproject.toml.
Note: If you don’t have uv yet, then follow the installation instructions for your operating system. Check that uv --version works in your terminal before you continue.
You also need an API key to talk to Jev. You can get one straight from TypeSafe AI, but for this tutorial, you’ll use OpenRouter. OpenRouter is a good place to try out a model without creating a separate account and entering your credit card details with every provider.
The OpenRouter video course covers the platform in depth. For now, all you need is an OpenRouter account with a few dollars of credit on it and an API key from the keys page of your account. Jev is cheap, but not free, so a request from an empty account fails.
You don’t need to pick a model version. The SDK asks for jev-latest by default, which OpenRouter resolves to the newest Jev release. If you’d rather pin a version so that your results stay reproducible, then you can pass an argument like model="jev-1.13" when you create the client later on.
Step 1: Set Up Your Jev Python Project
To get a feel for when Jev can come in handy, it’s a good idea to start with a script that doesn’t use any AI at all. The scenario takes place at a train station. A visitor walks up to the counter, and your script asks if they lost something.
Create a new folder called jev-python/, head over to it in your terminal, and add a file named plain_python.py:
plain_python.py
 1def respond(lost_something):
 2    if lost_something:
 3        print("You can find the lost and found counter on the right.")
 4    else:
 5        print("What can I help you with?")
 6
 7def ask():
 8    while True:
 9        answer = input("Did you lose something? (Y/N) ")
10        if answer == "Y":
11            return True
12        if answer == "N":
13            return False
14        print("Please answer with Y or N.")
15
16def main():
17    lost_something = ask()
18    respond(lost_something)
19
20if __name__ == "__main__":
21    main()
In line 9, you ask the visitor if they lost something, and you want a clear answer. If the input is an uppercase Y or N, then ask() returns True or False. Otherwise, you stay in the while loop until you get one of the two letters.
Run the script with uv run, which picks a suitable Python interpreter for you:
$ uv run plain_python.py
Did you lose something? (Y/N) y
Please answer with Y or N.
Did you lose something? (Y/N) Y
You can find the lost and found counter on the right.
Even a lowercase y doesn’t count. You could add .upper() to the answer, so that lowercase input works, too. But now imagine that the visitor says, “Yeah, I’ve lost something.” Where does this stop? Every phrasing that a real person could come up with is another case that your script would need to handle.
That’s where Jev comes into the picture. To work with Jev in Python, you need the TypeSafe SDK. Create a pyproject.toml file next to your script and declare the dependency:
pyproject.toml
[project]
name = "jev-python"
version = "0.1.0"
requires-python = ">=3.10"
dependencies = [
    "typesafe-sdk==0.7.1",
]
The dependencies list is the most important part of this file. When you run a script with uv run inside this folder, uv reads your pyproject.toml file. It creates a virtual environment and installs typesafe-sdk before your script starts.
Next, create a file named .env and paste the API key from your OpenRouter account into it:
.env
OPENROUTER_API_KEY=your-openrouter-api-key
The variable name must be OPENROUTER_API_KEY in uppercase because that’s the name your script will look up in a moment.
Note: Keep this file to yourself. If you’re working with Git, then add .env to your .gitignore file before your first commit. That way, your key stays out of your repository. It’s still on your screen, though, so hide the file before you record a video or share your desktop.
You now have a working script, a project file that knows about the TypeSafe SDK, and a secret key. In the next step, you’ll connect the three.
Step 2: Ask Jev a Yes-or-No Question With Noul
The code that talks to Jev isn’t that different from your plain Python script, which is why you’ll enhance what you have rather than start from scratch. Copy plain_python.py to a new file named jev_noul.py. Noul is the name of the first Jev primitive that you’ll use, and it’s the one that answers yes-or-no questions.
Connect Your Script to Jev
Open jev_noul.py and connect it to Jev through OpenRouter:
jev_noul.py
 1import os
 2
 3from typesafe_sdk import Noul, TypeSafeClient
 4
 5client = TypeSafeClient(
 6    api_key=os.environ["OPENROUTER_API_KEY"],
 7    base_url="https://openrouter.ai/api",
 8)
 9
10def respond(lost_something):
11    if lost_something:
12        print("You can find the lost and found counter on the right.")
13    else:
14        print("What can I help you with?")
15
16def ask():
17    while True:
18        answer = input("Did you lose something? ")
19        r = client.system_one(
20            state=answer,
21            questions={
22                "lost_something": Noul(
23                    instructions="Is the answer from the user affirmative?"
24                ),
25            },
26        )
27        lost_something = r.answers["lost_something"].noul
28        if lost_something > 0.8:
29            return True
30        if lost_something < 0.2:
31            return False
32        print("Sorry, I didn't get that.")
33
34def main():
35    lost_something = ask()
36    respond(lost_something)
37
38if __name__ == "__main__":
39    main()
In line 3, you import Noul and TypeSafeClient from the SDK. Then, in lines 5 to 8, you create your client as an instance of TypeSafeClient. The API key comes from the environment variable you defined in .env, and the base_url points to the OpenRouter API. If you had an API key from TypeSafe AI directly, then you’d store it in a TYPESAFE_API_KEY variable and leave out both arguments.
In line 18, you only ask “Did you lose something?” and don’t mention Y or N anymore. The visitor’s answer then goes into client.system_one() in line 19, and you store the reply in r, which is short for response. The method takes two arguments. The state is the text that Jev should look at, and questions is a dictionary of the questions that you want Jev to answer about that text.
The questions dictionary in lines 21 to 25 has one item. You can pick any key you like, and "lost_something" is what you’ll use to look up the answer later. The value is your Noul object with instructions that tell Jev which lens to look through when it reads the state.
In line 27, you look up your question in r.answers by its key and read its .noul attribute. That’s a float between 0 and 1. You can think of it as a Boolean on a sliding scale, where 1 means a clear yes and 0 a clear no.
You pick the cutoffs in lines 28 and 30 yourself. If the value is above 0.8, then ask() returns True. If it’s below 0.2, then ask() returns False.
Anything in between means that Jev isn’t sure, and you ask again. Lower the bar, and you accept more mumbled answers. Raise it, and you ask visitors to repeat themselves more often.
Drag the two cutoffs below to see where the Noul scores of a few typical replies end up:
Since you’re reading the API key from the environment now, you need to point uv to your .env file when you run the script:
$ uv run --env-file .env jev_noul.py
Did you lose something? Yeah, I lost something
You can find the lost and found counter on the right.
That’s your first answer from Jev, and your script understood a full sentence without a single if statement checking for Y! The first request takes a moment while the client opens the connection. Later requests in the same run reuse it and come back noticeably faster.
Run the script again and try a plain no, or something like nope, just looking around, and you’ll get a different reply from the counter.
Word Your Instruction So Jev Can Answer
Before you move on, have a look at what a less helpful instruction does. Add a temporary print(lost_something) after line 27, and change the instruction to "Did the user lose something?" for a moment. With that wording, “Yeah, I lost something” scored 0.94 in a test run. But a plain “yes” only scored 0.31, and the script kept apologizing.
The question in line 18 never reaches Jev. The state in line 20 holds nothing but the visitor’s answer, so a bare “yes” gives Jev no clue what the visitor said yes to.
The instruction that asks whether the answer is affirmative works on the answer alone. In the same test run, “yes” then scored 0.98, “yeah” scored 0.95, and “yes, I did lose something” scored 0.97. Your numbers will differ a little, but the pattern stays. Putting the question into the state as well would be the other way to give Jev that context.
As with any AI model, the question you ask decides the quality of the answer you get back. When a Noul score lands in the middle, look at your state and your instructions before you touch the cutoffs.
In the next step, you’ll ask Jev three questions about one visitor in a single request.
Step 3: Ask Jev Three Questions at Once
In the last step, you replaced your Y or N check with a single Noul. That does the job when you need a yes or a no. But a real information desk needs to know more than one thing about a visitor before it can send them anywhere.
Jev has two more primitives for that. A Score rates something on an ordered scale that you describe, and a Choice picks one of the options that you define. You can ask for all three in a single request.
Define Your Three Questions
Create a new file named jev_desk.py and define the questions for your information desk:
jev_desk.py
 1import os
 2from pprint import pprint
 3
 4from typesafe_sdk import Choice, Noul, Score, TypeSafeClient
 5
 6client = TypeSafeClient(
 7    api_key=os.environ["OPENROUTER_API_KEY"],
 8    base_url="https://openrouter.ai/api",
 9)
10
11QUESTIONS = {
12    "desk": Choice(
13        instructions="Where should the info desk send the visitor?",
14        criteria={
15            "ticket_counter": "Buying, changing, or refunding tickets.",
16            "lost_and_found": "Looking for something they lost.",
17            "immediate_help": "An emergency, an injury, or a missing person.",
18        },
19    ),
20    "urgency": Score(
21        instructions="How urgent is the request of the visitor?",
22        criteria=[
23            "Not urgent at all.",
24            "Should be handled today.",
25            "Should be handled within the next few minutes.",
26            "Needs to be handled right now.",
27        ],
28    ),
29    "needs_assistance": Noul(
30        instructions=(
31            "Does the visitor need a staff member to help them get around "
32            "the station, for example because of a wheelchair, heavy "
33            "luggage, or small children?"
34        ),
35    ),
36}
In line 4, you import Choice and Score next to the primitives you already know. Then, in lines 11 to 36, you collect three questions in your QUESTIONS dictionary, one of each type.
Your Choice in lines 12 to 19 takes criteria as a dictionary. Each key is an option that Jev can pick, and each value describes when that option applies. You’ll always get one of the keys back, even for a visitor who only asks for the restrooms. It’s a good idea to use names that read well in your code, like "lost_and_found", and to add a catch-all option like "general_info" if your desk gets that kind of question often.
Lines 20 to 28 define your Score, which takes criteria as a list. The order matters because the list is the scale, from lowest to highest. Instead of asking for a number between one and ten, you describe what each step on the scale means.
Your Noul in lines 29 to 35 works like the one from the previous step. This time, the instructions are longer and give Jev a few examples of what counts as needing assistance.
Send a Visitor’s Request
Now it’s time to send a visitor’s request to Jev. Add a main() function to the end of jev_desk.py:
jev_desk.py
38# ...
39
40def main():
41    visitor_says = input("What does the visitor say? ")
42    r = client.system_one(
43        state={"visitor_says": visitor_says},
44        questions=QUESTIONS,
45    )
46    pprint(r.model_dump()["answers"])
47
48if __name__ == "__main__":
49    main()
In line 43, you pass a dictionary as the state instead of a bare string. That way, your instructions can refer to the visitor’s words by name. In line 46, you convert your response into a plain dictionary with .model_dump() and print the "answers" part with pprint().
Go ahead and run the script and play a visitor who’s in a hurry:
$ uv run --env-file .env jev_desk.py
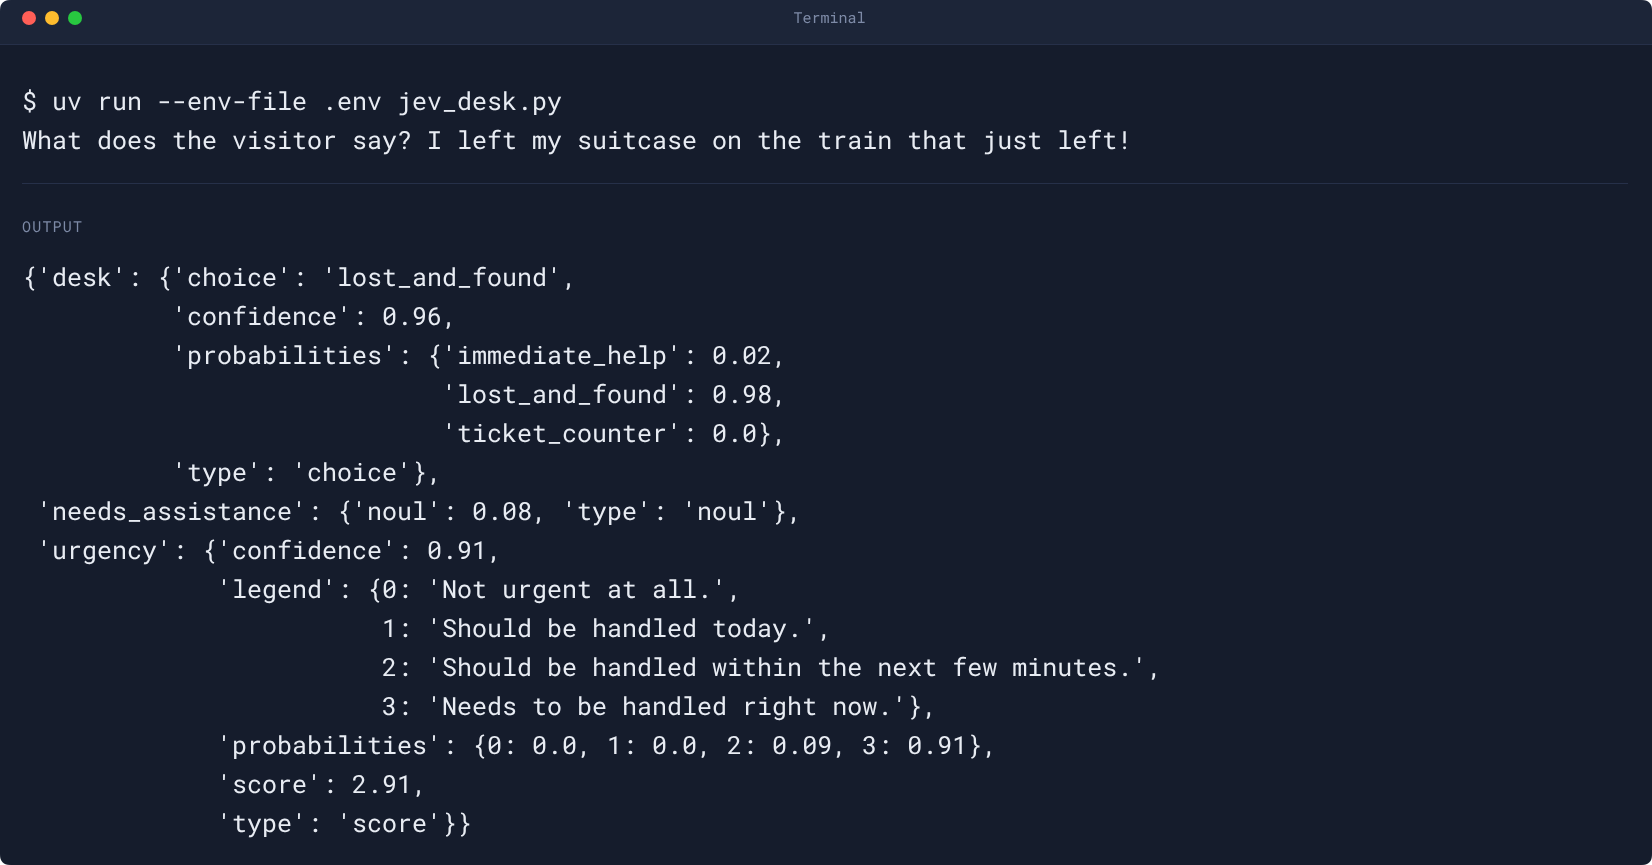
What does the visitor say? I left my suitcase on the train that just left!
{'desk': {'choice': 'lost_and_found',
          'confidence': 0.96,
          'probabilities': {'immediate_help': 0.02,
                            'lost_and_found': 0.98,
                            'ticket_counter': 0.0},
          'type': 'choice'},
 'needs_assistance': {'noul': 0.08, 'type': 'noul'},
 'urgency': {'confidence': 0.91,
             'legend': {0: 'Not urgent at all.',
                        1: 'Should be handled today.',
                        2: 'Should be handled within the next few minutes.',
                        3: 'Needs to be handled right now.'},
             'probabilities': {0: 0.0, 1: 0.0, 2: 0.09, 3: 0.91},
             'score': 2.91,
             'type': 'score'}}
Each answer carries its type, so you always know which primitive produced it. Your Choice answer gives you the chosen key in choice, plus a probabilities dictionary that shows how the other options fared. The confidence value tells you how lopsided that distribution is. If the probabilities were spread evenly over all three desks, then the confidence would be low.
The Score answer numbers the steps of your scale from 0 to 3 and maps them back to your descriptions in legend. The score itself is the probability-weighted average of these steps, so it can land between two of them. Here, 2.91 sits between “within the next few minutes” and “right now”, much closer to “right now”. The Noul answer is the same float that you know from jev_noul.py.
The values are numbers and option keys instead of prose. You traverse the response like any other Python object and get on with your program logic. In your own code, you’d read r.answers["desk"].choice and r.answers["urgency"].score instead of printing the whole dictionary, just like you did with .noul before.
Send this visitor to the lost and found counter right now, and don’t call the staff member with the luggage cart. In the next section, you’ll work through the errors that are most likely to stand between you and your first Jev answer.
Troubleshooting
Most hiccups on the way to your first Jev answer come from your setup. Here are the errors that you’re most likely to see, and how to fix them.
If Python complains with ModuleNotFoundError: No module named 'typesafe_sdk', then the TypeSafe SDK isn’t installed in the environment that runs your script. Check that your pyproject.toml sits in the same folder as your script and that you start the script with uv run.
If your script stops with KeyError: 'OPENROUTER_API_KEY', then the environment variable isn’t set. Usually, that means you forgot the --env-file .env option, or the .env file lives in another folder. Run uv run --env-file .env jev_noul.py from your project folder and keep the .env file in that same folder.
If you get a TypeSafeAuthenticationError, then the request reached OpenRouter, but the key wasn’t accepted. Copy the key again from your OpenRouter account and check that there’s no whitespace around it in .env. Also make sure that you didn’t remove the base_url argument. Without it, the client sends your OpenRouter key to TypeSafe AI’s own API, which doesn’t know it.
Other errors from the SDK inherit from TypeSafeAPIError and carry the message from the server. An error that mentions credits means that your OpenRouter balance is empty, and a TypeSafeRateLimitError means that you’re sending requests faster than your account allows. Both go away with a top-up or a short pause rather than a code change.
Next Steps
You’ve connected a Python script to Jev, replaced a rigid Y or N check with a Noul, and asked a Choice, a Score, and a Noul question in one request. Along the way, you’ve seen that the wording of your instructions matters more than any cutoff in your code.
Jev isn’t a new idea. What you built is a form of classification, and you can get similar results from a general large language model with a well-written prompt, especially if you put Pydantic AI on top to get typed results.
Still, Jev does that whole setup in one call, and at the moment it’s both fast and cheap. Whether it stays that way is something to keep an eye on. For now, it’s a nice little tool in your AI toolbox.
Here are some ideas for additional features:
- Route the visitor: Replace
pprint()withifstatements that print a different reply for eachdeskoption. Page a staff member whenurgencygets close to the top of your scale. - Keep the conversation going: Wrap
main()in awhileloop so that the desk serves more than one visitor. Add a way to exit the loop with a quit command. - Add context to the state: Pass the current time or the departure board into the
statedictionary. Then see how theurgencyscore changes when the visitor’s train leaves in two minutes.
If you’d like to compare Jev with other models, then have a look at how to use the OpenRouter API to switch models with a single line. You can also run a local model with Ollama and check whether a plain prompt gets you comparable results.
What are you going to ask Jev about? Share your ideas in the comments below!
Get Your Code: Click here to download the free sample code you’ll use to connect a Python script to Jev with the TypeSafe SDK and OpenRouter.
Take the Quiz: Test your knowledge with our interactive “How to Get Started With Jev in Python” quiz. You’ll receive a score upon completion to help you track your learning progress:
Interactive Quiz
How to Get Started With Jev in PythonCheck your understanding of the Jev AI model in Python, from OpenRouter setup and Noul cutoffs to Choice and Score answers.