If you’re active on social media, then you know that images and videos are popular forms of content. As a programmer, you mainly work with text, so sharing the content that you create on a daily basis may not seem intuitive. That’s where a code image generator can come in handy for you!
With a code image generator, you can create a nice-looking image of your code snippets. That way, you can share code without worrying about formatting, different syntax highlighting, or character count limitations.
In this step-by-step tutorial, you’ll learn how to:
- Set up and run a Flask project
- Connect and style Jinja templates
- Use Playwright to create images
- Beautify code with Pygments
- Leverage sessions to save browser states
- Enhance the user experience with JavaScript
Creating your own code image generator will allow you to hone your skills as a Python programmer and experiment with full-stack web development.
Although you’ll find plenty of full-featured code image generators like carbon or ray.so, crafting a custom tool will allow you to meet your specific needs and continue to improve it later on.
Get Your Code: Click here to download the free source code for your Python code image generator.
Demo: A Code Image Generator With Python
The code image generator is a Flask project that creates stylish screenshots of a code snippet with the help of Pygments and Playwright. The project will run locally in your browser, and you have full control over the look of the code that you want to share:
Once you run the Flask server, you can visit the application in the browser, add your own Python code, select a style, and download an image of the code to your computer.
Project Overview
You’ll build the code image generator in multiple steps. In each step, you’ll focus on one important area of your codebase.
After setting up the project, you’ll notice that the structure of the tutorial mirrors the route that a user would take when using your tool. You start by creating the pages and functions to accept code input from the user.
Then, you move on to implementing the selection of syntax highlighting styles. This will make a user’s code snippet look good when you build the route to generate an image of the code in the following step.
Finally, you’ll have a closer look at some areas of your project and improve the user experience. At the end of the tutorial, you’ll have your very own code image generator that’s ready to use and highly extensible.
Over the course of the tutorial, you’ll get guidance on which files and folders to create. In the end, your project layout will look like this:
code-image-generator/
│
├── static/
│   └── styles.css
│
├── templates/
│   ├── base.html
│   ├── code_input.html
│   ├── image.html
│   └── style_selection.html
│
├── app.py
└── utils.py
In the materials for this tutorial, you’ll find a folder for each step, containing source code of the project in its current state:
Get Your Code: Click here to download the free source code for your Python code image generator.
At the end of each step, you can compare your own code with the source code while following along. If you have questions about a step or you’re stuck at some point, then you can scroll down to the comments area and ask the Real Python community for help.
Prerequisites
In this tutorial, you’ll build a code image generator with Python, Flask, Pygments, and Playwright. While working through the steps, it’ll be helpful if you’re comfortable with the following concepts:
If you’re not confident in your knowledge of these prerequisites, then that’s okay too! In fact, going through this tutorial will help you learn and practice these concepts. You can always stop and review the resources linked above if you get stuck.
Step 1: Set Up the Code Image Generator
To kick things off, you’ll start by installing all the dependencies that you need for this project. Then you’ll make sure that your main components are working and implement the project structure.
At the end of this step, you’ll have a working Flask project that forms the foundation for the upcoming steps.
Install the Dependencies
In this tutorial, the project’s root directory is named code-image-generator/. During the next few steps of this tutorial, you’ll place all the files and folders that you create inside this directory.
You can create the root folder anywhere on your system. Once you’ve created it, open a new terminal session in the root directory of the project. Then select your operating system below and use your platform-specific command to set up a virtual environment:
With the above commands, you create and activate a virtual environment named venv by using Python’s built-in venv module. The parenthetical (venv) in front of the prompt indicates that you’ve successfully activated the virtual environment.
Next, use pip to install the Python packages that you’ll work with in this project:
(venv) $ python -m pip install Flask playwright Pygments
Each of the three packages will fulfill a particular role in the project:
- Flask: Running your web server
- Pygments: Highlighting your code
- Playwright: Creating the code images
You’ll learn more about each of them as you go. For now, have a closer look at Playwright.
Give Playwright a Spin
Playwright is a framework for testing websites by creating test workflows and simulating user behavior. With Playwright, you can automate tasks like form submission, UI testing, and even web scraping. In this tutorial, you’ll leverage one of Playwright’s features in particular: the capability to take screenshots of websites and elements on websites.
You installed the playwright package with pip in your virtual environment. However, to actually use Playwright, you also need to install the required browsers:
(venv) $ python -m playwright install
This command installs the latest version of Chromium, Firefox, and WebKit. These are similar to the browser that you use to explore the Web.
The main difference is that these browsers are headless, which means that they don’t have a graphical user interface (GUI). Instead, you use Playwright to run them in the background, and you can control the browsers programmatically.
Open the Python REPL and test out Playwright to receive the content of a website element:
>>> from playwright.sync_api import sync_playwright
>>> target_url = "https://www.example.com"
>>> element = "h1"
>>> with sync_playwright() as playwright:
...     webkit = playwright.webkit
...     browser = webkit.launch()
...     browser_context = browser.new_context()
...     page = browser_context.new_page()
...     page.goto(target_url)
...     found_element = page.locator(element)
...     text = found_element.text_content()
...     browser.close()
...
<Response url='https://www.example.com/' request=...>
>>> text
'Example Domain'
By running the code above, you start a headless browser, visit example.com, and read the content of the h1 headline. In this example, you used playwright.webkit to run a WebKit browser. But Playwright offers you an API to work with other browser instances like Firefox or Chromium.
The code you just used will be the starting point for a vital functionality of your project: creating the code images. That’s why you’ll revisit this code later and go into the details of how Playwright works.
At this point, feel free to play around with the code above to use different browsers, visit other websites, and grab the content of other website elements. Once you’re done exploring, it’s time to create the initial structure for your project.
Create the Flask Project Layout
Flask is a lightweight Python web framework, which makes it a great choice for this project. The central hub of your project will be an app.py file that’ll contain all the logic to handle the requests sent to the web app.
Create app.py in the root of your project directory and add the content below:
# app.py

from flask import Flask

app = Flask(__name__)

@app.route("/", methods=["GET"])
def code():
    pass
The root of your project will be the code() view, which is short for view function. Views are special functions in Flask that you prepend with app.route() decorators. Flask will listen to the route that you define as the first parameter, and it’ll call the function when requested.
Here you add a single slash (/) as the route, which means that Flask calls code() when you visit the root URL of the project. In other words, code() will be the entry point of your web app.
The methods parameter restricts which request methods the view allows. With a list that contains "GET", you make the view accessible in the browser when a user enters the URL in the address bar. To show something to the user when they visit, you need to return some content. For now, you only add a pass statement as an indicator for yourself that you’ll come back to the function body later.
In Flask, you use Jinja templates to define the structure of the rendered content. An important feature of Jinja is support for template inheritance. That means you can define a base template with common elements and then extend or override specific sections in child templates to create consistent layouts across multiple pages.
By default, Flask looks for the templates in a folder named templates/. Create this folder and add an empty base template named base.html to it:
<!-- templates/base.html -->

<!-- Your base template -->
Next, add your first child template, named code_input.html, to the template folder:
<!-- templates/code_input.html -->

<!-- Your first child template -->
The templates in your project will provide the logic and structure for the front end of your project. With the help of Cascading Style Sheets (CSS), you can style the content.
Web app developers commonly save CSS files in a static/ directory. In this project, you’ll only work with one CSS file, named styles.css. But if you decide to expand the project at some point, you can also use this folder to store images or JavaScript files.
Create a new directory named static/ and place a file named styles.css in it:
/* static/styles.css */

/* Your CSS file */
Just like with the templates above, it’s okay to leave the CSS file empty for now. Over the course of this tutorial, you’ll enhance it bit by bit.
With all the files and folders in place, your Flask project layout should look like this:
code-image-generator/
│
├── static/
│   └── styles.css
│
├── templates/
│   ├── base.html
│   └── code_input.html
│
└── app.py
Later, you’ll add a few more files to your project. But this structure gives you a good starting point. For now, you’ll focus on the files that you’ve just created and add some code to them.
Write Your Initial Templates
As you learned above, the root of your project is the code() view in app.py. To get things started, the code() view should render a template with a message that tells users what to do when they visit this page of your project.
For this, you need to import Flask’s render_template() function and replace the pass statement in the function body of code() with the code below:
# app.py

from flask import Flask, render_template

app = Flask(__name__)

@app.route("/", methods=["GET"])
def code():
    context = {
        "message": "Paste Your Python Code 🐍",
    }
    return render_template("code_input.html", **context)
It’s common practice in Flask projects to collect all the data that you want to pass on to a template in a context dictionary.
In this case, you add a message to context to display in the template.
Then, you use render_template() to instruct Flask to use the code_input.html Jinja template with the items from context.
The file extension of the template is .html, but the content isn’t common HTML code. The code_input.html file is a Jinja template that comes with a variety of powerful features, such as dynamic content rendering by integrating variables from your context and using loops, conditionals, and filters in your templates.
So far, code_input.html doesn’t have any content. Go ahead and update code_input.html with the content below:
<!-- templates/code_input.html -->

{% extends "base.html" %}

{% block title %}
  - Code Input
{% endblock title %}

{% block content %}
{% endblock content %}
In the code above, you add two Jinja blocks named title and content. Having blocks in a Jinja template indicates that the template builds upon a parent template that defines these blocks.
In this case, the parent template is base.html, which you extend at the beginning of code_input.html. In other words, code_input.html requires a template named base.html to work properly:
 1<!-- templates/base.html -->
 2
 3<!DOCTYPE html>
 4<html lang="en">
 5  <head>
 6    <meta charset="utf-8"/>
 7    <meta name="viewport" content="width=device-width, initial-scale=1"/>
 8    <title>
 9      Code to Image {% block title %}{% endblock title %}
10    </title>
11  </head>
12  <body>
13    <h1>
14      <a href="{{ url_for('code') }}">Code to Image</a>: <span>{{ message }}</span>
15    </h1>
16    <main>
17      {% block content %}
18      {% endblock content %}
19    </main>
20  </body>
21</html>
Commonly, the Jinja base template is named base.html, and it contains the main HTML structure of your web pages. The main structure of base.html is similar to a normal HTML page. You start by declaring the doctype, wrapping everything in <html> tags, and setting the lang attribute.
Then you go on to add <head> and <body> with some other nested elements. This is where things get a bit more interesting, so it’s worth having a look at them in detail:
- Line 9 sets the title of your project to Code to Image. The empty
titleblock gives you the opportunity to extend the title with a child template. For example, incode_input.html, you add the string - Code Input to the title. - Line 14 links the headline to the URL of the
code()view by usingurl_for(), which creates a full URL to a given endpoint. You also render themessagevariable of your context and add it to the headline if the variable is present. - Lines 17 to 18 define an empty
contentblock that you can overwrite with content from within the templates that extendbase.html.
If you’re curious about how your code image generator looks at the moment, then you can run the Flask development server with this command:
(venv) $ python -m flask run
* Debug mode: off
WARNING:
  This is a development server.
  Do not use it in a production deployment.
  Use a production WSGI server instead.
 * Running on http://127.0.0.1:5000
Press CTRL+C to quit
When you run the Flask development server, the output shows you some important information.
First, it lets you know that the flask run command spins up a development server that you shouldn’t use in production. You can ignore this message because your project is only running locally. If you want to learn more about running a production-ready server, then you can give Deploying a Python Flask Example Application Using Heroku a read.
Then, Flask lets you know which IP address the server is running on. By default, the address is http://127.0.0.1:5000. When you visit the address in your browser, then you see your project’s title and the message value:
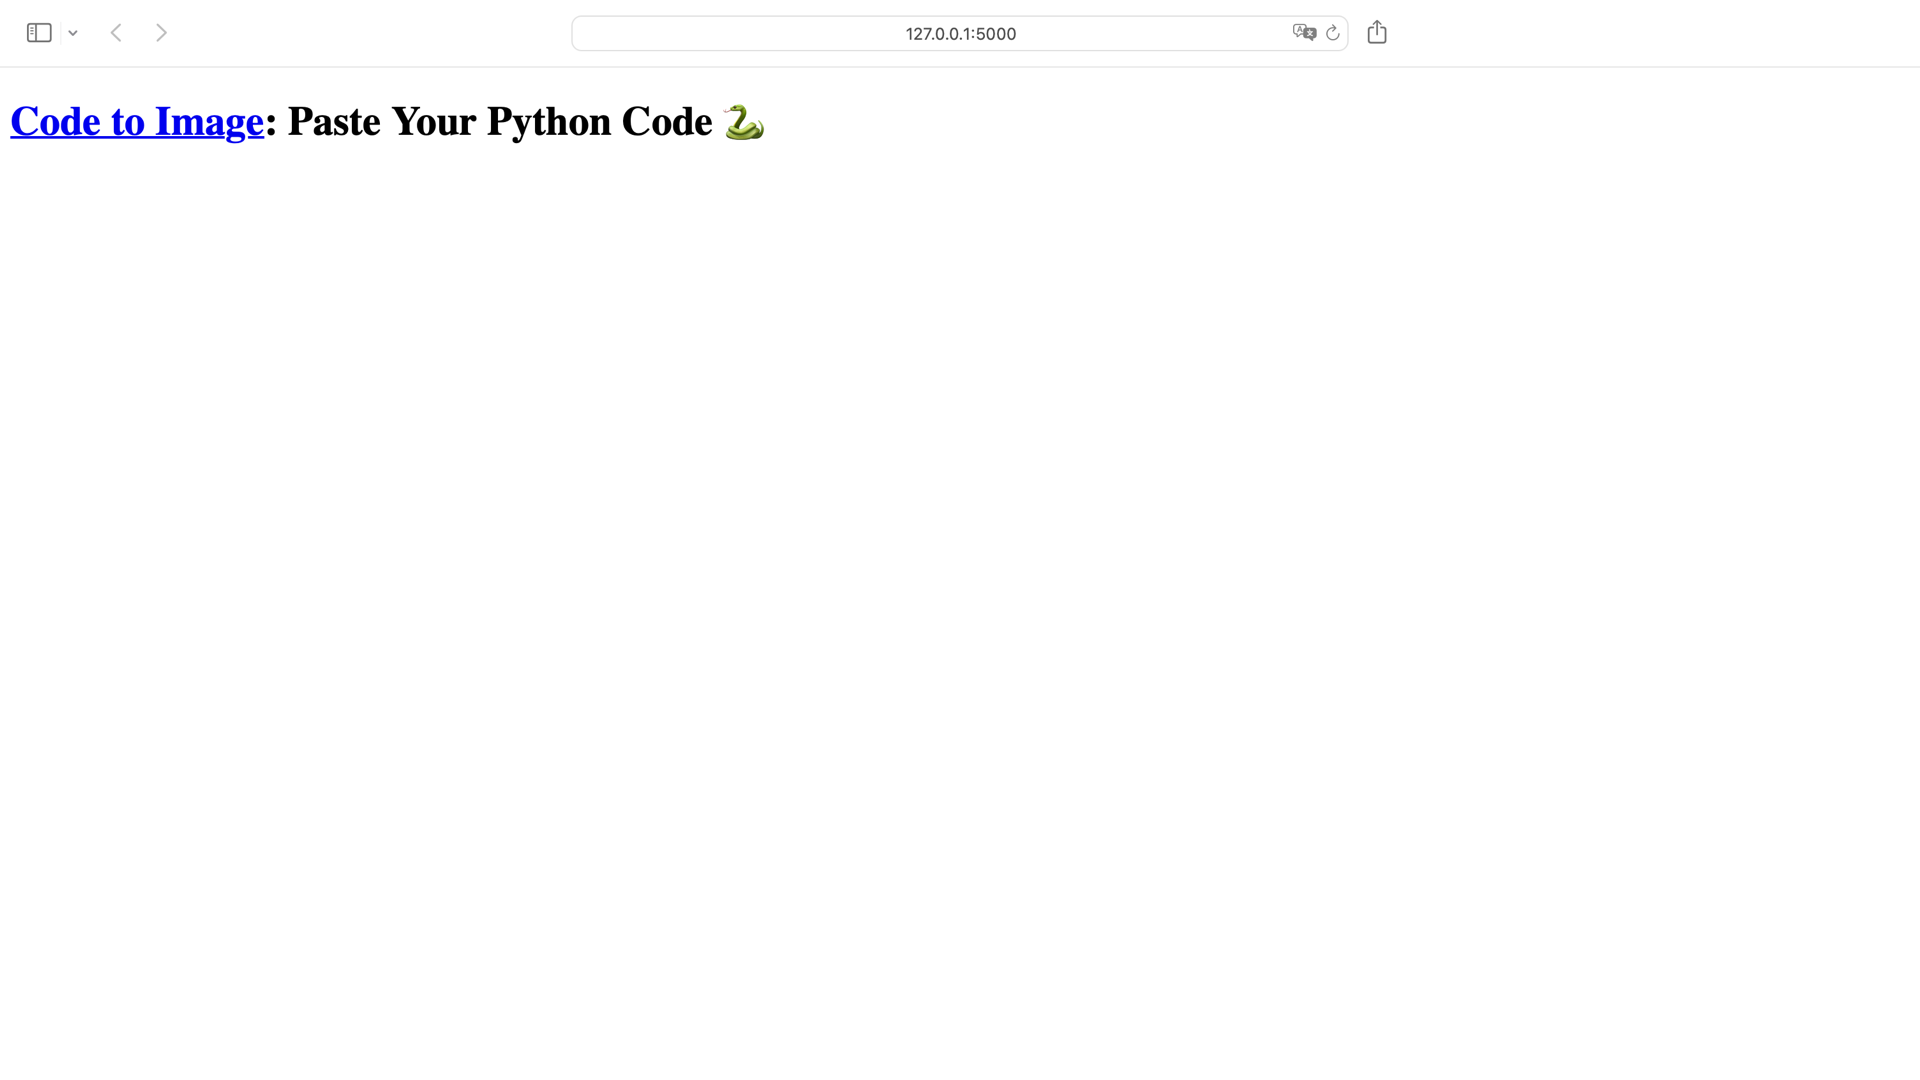
It’s cool to see that your code image generator runs. But the design is a bit underwhelming so far. That’s what you’ll tackle next.
Stop the development server by pressing Ctrl+C in your terminal, and read on to add some styling to your project.
Add Custom Styling With CSS
For this project, you’ll keep the CSS code minimal. Not only will having minimal CSS code let you focus on the Python code, but you can also use the CSS code as a starting point for future projects.
You’ll make sure that the text of your app is a proper size and that your content is properly positioned on the page. You’ll also add some basic formatting and coloring.
Add the code below to styles.css:
 1/* static/styles.css */
 2
 3* {
 4    box-sizing: border-box;
 5}
 6
 7body {
 8    font-family: sans-serif;
 9    font-size: 20px;
10    line-height: 1.3em;
11}
12
13main {
14    display: flex;
15    justify-content: center;
16    text-align: center;
17}
18
19h1 {
20    font-size: 2em;
21    text-align: center;
22    line-height: 1em;
23}
24
25h1 a {
26    text-decoration: none;
27    color: inherit;
28}
29
30span {
31    color: deepskyblue;
32}
In CSS, you use selectors to define which elements on a website you want to target with the style declaration that you put inside the curly braces ({}).
In line 3, you use an asterisk (*) as a selector to target all the elements and set their box-sizing to border-box. This declaration makes dealing with the sizes of elements much more convenient. If you want to learn more about this, then you can check out an explanation by Paul Irish which is so popular that it sparked International box-sizing Awareness Day.
In lines 8 to 10, you define the typography rules for the code image generator, with a slightly increased font size and line height. You let the operating system choose the font-family, as long as the browser serves a sans serif font.
For the <main> element on line 13, you use flex to center the code image generator on the page.
The other CSS rules define text size and color changes, like increasing the size of your headline in line 20 or setting elements inside of a <span> tag to deep sky blue.
Next, you need to connect your base.html template with the styles.css file by adding a link to the style sheet inside of <head>:
<!-- templates/base.html -->

<!DOCTYPE html>
<html lang="en">
  <head>
    <meta charset="utf-8"/>
    <meta name="viewport" content="width=device-width, initial-scale=1"/>
    <title>
      Code to Image {% block title %}{% endblock title %}
    </title>
    <link
      rel="stylesheet"
      type="text/css"
      href="{{ url_for('static', filename='styles.css') }}"
    />
  </head>
  <body>
    <!-- ... -->
  </body>
</html>
You can reference a CSS file with a <link> tag in the header of your HTML page. Just like before, you use url_for() to create the full URL for the href attribute. To link to the styles.css file stored in your Flask project’s static/ folder specifically, you use the filename argument.
By adding the CSS file reference to base.html, you’re taking advantage of the inheritance mechanism that Jinja templates provide. You only need to add styles.css in your base template. Templates like code_input.html that extend base.html will also inherit the styles.
Start your Flask development server again and see your basic styling in action:
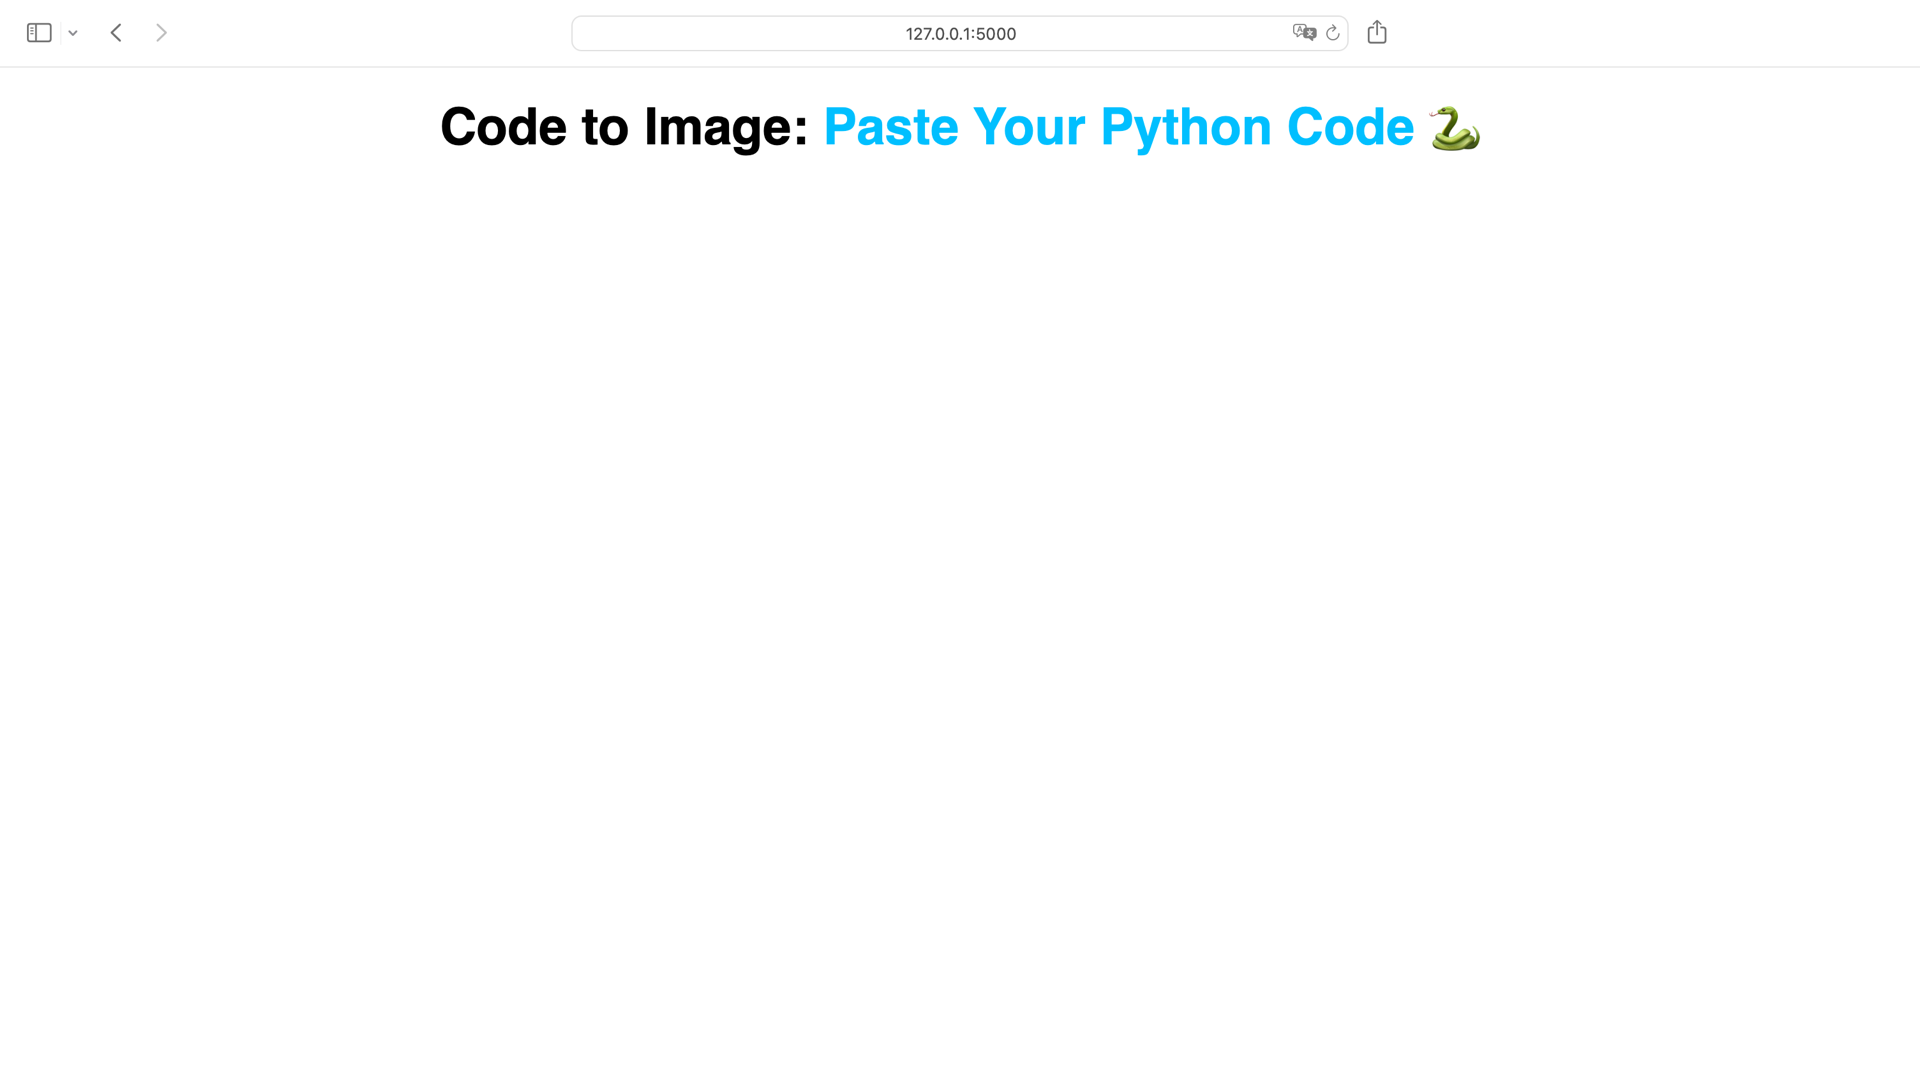
Awesome, the start of your code image generator looks clean and tidy! That’s the perfect starting point for accepting code input from the user.
Step 2: Accept Code Input
The first ingredient that the code image generator app needs from a user is some code. In this step of the tutorial, you’ll first take care of the template that receives the code input. Then, you’ll introduce sessions to make user input persistent and start thinking about what to do once a user adds code.
Update the Code Input Page
To accept user input in your template, you need to add a form with a text input field in your code_input.html template. Since the user input can expand over multiple lines, it’s a good idea to work with a <textarea> element:
 1<!-- templates/code_input.html -->
 2
 3{% extends "base.html" %}
 4
 5{% block title %}
 6  - Code Input
 7{% endblock title %}
 8
 9{% block content %}
10<form>
11  <textarea
12    class="code"
13    name="code"
14    placeholder="Paste your Python code here"
15  >{{ code }}</textarea>
16</form>
17{% endblock content %}
Note that you also add a {{ code }} variable to line 15 without any spaces between the variable and the surrounding <textarea> tags. If you added a space here, then there’d be a space on the page surrounding your code input, too.
If you haven’t set the {{ code }} variable or you delete the content of the text input field, then the browser shows the placeholder text that you define in line 14.
To avoid starting with an empty text field, you can define a placeholder code snippet and set the code variable in the code() view in app.py:
# app.py

from flask import Flask, render_template

app = Flask(__name__)

PLACEHOLDER_CODE = "print('Hello, World!')"

@app.route("/", methods=["GET"])
def code():
    context = {
        "message": "Paste Your Python Code 🐍",
        "code": PLACEHOLDER_CODE,
    }
    return render_template("code_input.html", **context)
You’ll use PLACEHOLDER_CODE in different places later. So it makes sense to define it as a constant near the top of app.py. To transmit PLACEHOLDER_CODE to the template, you use it as the value of code that you add to the context dictionary.
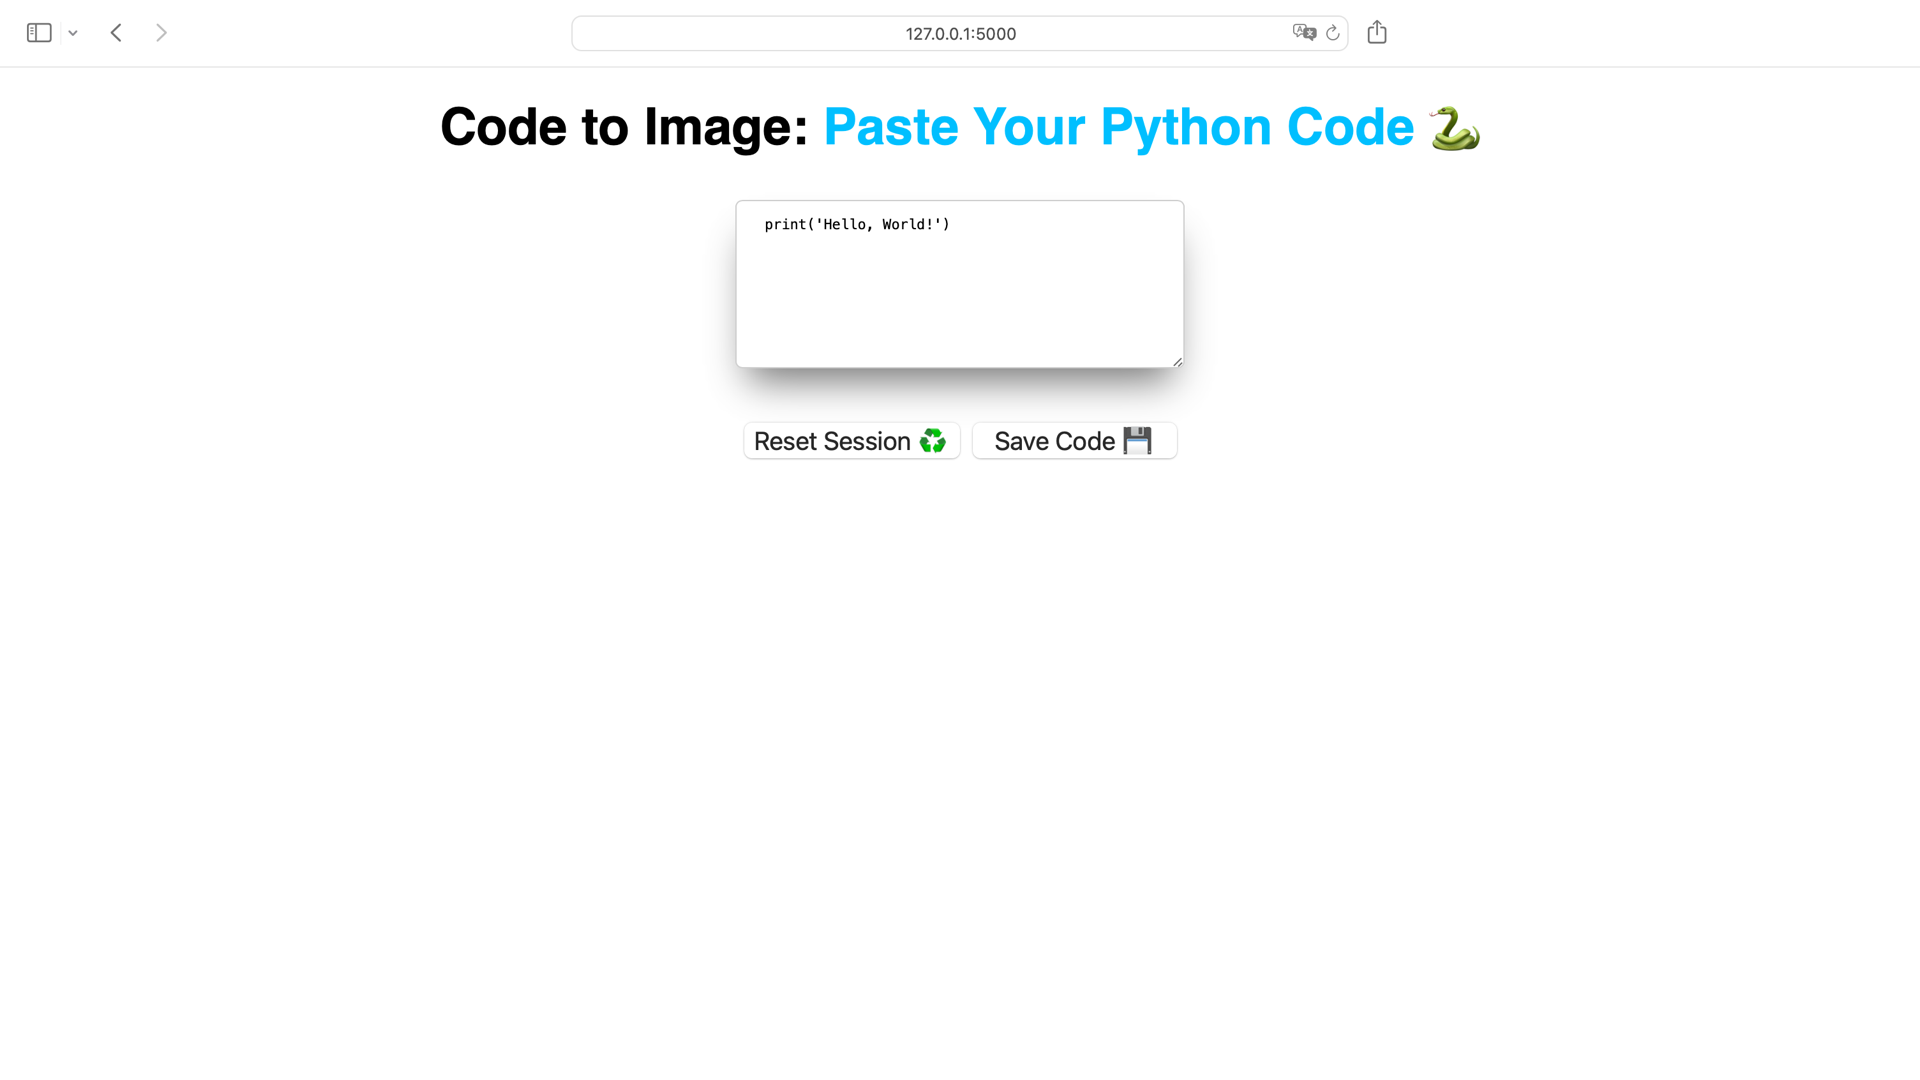
When you restart your Flask development server and visit http://127.0.0.1:5000, then you’ll see that print('Hello, World!') is placed in the text area by default:
When you delete the default code, then the text area’s placeholder text shows and you can paste in your own code snippet. Once you paste your own code, there’s not much to do with it yet. Also, it would be cool if any code that you added would persist on a page reload. That’s where sessions come into play.
Introduce Sessions
If you want to store data without adding a database to your project, then sessions are a great idea. A session is a mechanism that allows you to store and persist user-specific information between multiple requests that the same user makes to a web application.
Flask offers you a session object right out of the box.
With a Flask session, you can persist data like a code snippet between requests. As long as you have your browser window open, you can reload a page, and your session data stays accessible.
To use sessions in your project, you need to set a secret key for your Flask application first. A secret key is a random string of characters used to encrypt and decrypt data, such as tokens or session data. The secret key acts as a secure identifier, allowing the server to validate the integrity of the session data.
As long as you work with your Flask project locally, it’s okay to make up a string value for app.secret_key. However, if you want to deploy your Flask app later, then it’s a good idea to generate a proper secret key.
If you need to create cryptographically secure data, like a Flask secret key, then you can use Python’s secrets module:
>>> import secrets
>>> secrets.token_hex()
'2e9ac41b1e0b66a8d93d66400e2300c4b4c2953f'
The .token_hex() method returns a hexadecimal string containing random numbers and letters from 0 to 9 and a to f. Use the value that secrets.token_hex() outputs for you and add it to your Flask project’s app.py file:
# app.py

from flask import Flask, render_template

app = Flask(__name__)
app.secret_key = "2e9ac41b1e0b66a8d93d66400e2300c4b4c2953f"

# ...
To avoid saving the secret key directly in your code, it may be a good idea to work with environment variables. You can learn more about that in the Flask documentation on configuration handling.
Once you’ve set app.secret_key, you can work with the session object. To access the data stored in a Flask session, you can use the session object like a Python dictionary. This means you can set values using keys and retrieve data using the same keys:
 1# app.py
 2
 3from flask import Flask, render_template, session
 4
 5# ...
 6
 7@app.route("/", methods=["GET"])
 8def code():
 9    if session.get("code") is None:
10        session["code"] = PLACEHOLDER_CODE
11    context = {
12        "message": "Paste Your Python Code 🐍",
13        "code": session["code"],
14    }
15    return render_template("code_input.html", **context)
After importing session from flask in line 3, you can work with session as if it were a dictionary. In line 9, you check if session already contains some code. If not, then you set session["code"] to your placeholder code.
You also update the value of code in your context dictionary in line 13 to work with the session’s code in the template.
Manage Sessions
Now you need an additional view in app.py to save a user’s custom code in session. On top of that, it also makes sense to have a view to reset a session.
Add both routes and the necessary imports to app.py:
# app.py

from flask import (
    Flask,
    redirect,
    render_template,
    request,
    session,
    url_for,
)

# ...

@app.route("/save_code", methods=["POST"])
def save_code():
    session["code"] = request.form.get("code")
    return redirect(url_for("code"))

@app.route("/reset_session", methods=["POST"])
def reset_session():
    session.clear()
    session["code"] = PLACEHOLDER_CODE
    return redirect(url_for("code"))
Both views require Flask’s redirect() and url_for() functions, which you add to the list of imports. Additionally, you import request, which you use in save_code() to access data from a posted form. With that number of imports, it makes sense to distribute your import statement onto multiple lines.
When a user submits a form, you can use request.form.get() with the input field’s name as an argument. In code_input.html you set the name of the text area to "code", so that’s the string that you’re using here. To save the code input in the session, you set it as the value of session["code"].
In reset_session(), you don’t need to rely on transmitted form data because you reset the session with session.clear() and set the session’s code value to the placeholder code.
Once you either store the pasted code or reset the session, you redirect the browser to the code() view.
In both app.route() decorators, you limit the request method to POST requests. That means you can’t access the routes /save_code and /reset_session by just typing their addresses in the browser. Instead, you’ll use these routes as formaction targets for two buttons in code_input.html. One button will make a POST to reset the session, and the other button will make a POST to save the code in the session.
Go on and add the two buttons to code_input.html:
<!-- templates/code_input.html -->

{% extends "base.html" %}

{% block title %}
  - Code Input
{% endblock title %}

{% block content %}
<form>
  <textarea
    class="code"
    name="code"
    placeholder="Paste your Python code here"
  >
    {{ code }}
  </textarea>
  <div class="controls">
    <button formmethod="post" formaction="{{ url_for('reset_session') }}">
      Reset Session ♻️
    </button>
    <button formmethod="post" formaction="{{ url_for('save_code') }}">
      Save Code 💾
    </button>
  </div>
</form>
{% endblock content %}
You wrap the two buttons in a <div> element with a controls class attribute on the code input page. You’ll use the class attribute later to style all the HTML elements with the controls class.
Both buttons have post as their formmethod to send a POST request when you click the button. The targets for the POST requests are the values that you set for the formaction attributes: the URLs for reset_session() and save_code().
Start your Flask development server again, visit http://127.0.0.1:5000, and interact with your code input page:
When you edit the code in the text field and reload the page, then the code jumps back to print('Hello, World!'), which you set as PLACEHOLDER_CODE. Only when you click Save Code do you save the entered code in the session. When you now reload the page, the entered code persists.
That means your session functionality is working. If you want to reset your session, then you can click the Reset Session button.
Style the Code Input Page
In the previous section, you added two buttons and a <div> element to the code input page. To style these elements, you need to add some CSS declarations for them to styles.css.
Since you’re opening styles.css, you can take the opportunity and make other style adjustments. For example, you can tackle a minor problem that your code input field currently has.
Specifically, if you paste code that’s larger than the placeholder line with Python’s print() function, then the text field isn’t displaying all the code.
Hop over to styles.css and add some CSS rules to make the elements on your page look nicer:
/* static/styles.css */

/* ... */

button,
select {
    cursor: pointer;
    font-size: 100%;
    margin: 0.25em;
    min-width: 8em;
}

.controls {
    margin: 1em 0;
    display: flex;
    justify-content: center;
    align-items: center;
    flex-wrap: wrap;
}

.code {
    font-family: monospace;
    box-shadow: #767676 0px 20px 30px -10px;
    border-radius: 0.5em;
    padding: 1em 2em;
    min-width: 32em;
    max-width: 100%;
    min-height: 12em;
    text-align: left;
    border: 1px solid #cecece;
    margin: 1em;
    line-height: 1.4em;
}
Besides adding declarations for <button> elements, you also anticipate a <select> element that you’ll add later in this tutorial. These form elements should show the mouse cursor as a pointer to indicate that these elements are clickable. You also add some space around them and set a minimum width.
Next, you define styling rules for all the HTML elements with a controls class attribute. Again, you’re adding some space by using flex to center the form controls.
The text input with the code class also gets a style update. You adjust the borders, add a subtle shadow behind the element, and set the font-family of <textarea> to your operating system’s default monospace font. Of course, you can also get more creative and add one of several cool programming fonts.
To increase the size of the code input field, you set a min-width and a min-height. When you visit the code input page, then the <textarea> element is bigger by default:
Increasing the size of the code input field in the CSS is a good start. However, when you click Save Code, it’d be cool if the code input field adjusted to the code you pasted. To make that happen, you need to calculate the number of lines and the length of your code in the code() view:
# app.py

# ...

@app.route("/", methods=["GET"])
def code():
    if session.get("code") is None:
        session["code"] = PLACEHOLDER_CODE
    lines = session["code"].split("\n")
    context = {
        "message": "Paste Your Python Code 🐍",
        "code": session["code"],
        "num_lines": len(lines),
        "max_chars": len(max(lines, key=len)),
    }
    return render_template("code_input.html", **context)

# ...
To get the number of lines, you split the lines into a list. Then you can count the number of items in the list with len() and store it in "num_lines" in the context dictionary.
To get the longest line, you use max() with key=len as an argument. Then, you use len() on the result to get the maximum number of characters in that line and pass it to the context dictionary, too.
Note: To learn more about the key argument to max(), check out this resource on tweaking the default behavior of min() and max().
Now that you know how many lines the code snippet contains and how long the longest line is, you can set min-width and max-width in code_input.html dynamically:
<!-- templates/code_input.html -->

{% extends "base.html" %}

{% block title %}
  - Code Input
{% endblock title %}

{% block content %}
<style>
  .code {
    min-height: calc({{ num_lines }}em * 1.5 + 2 * 1em);
    min-width: calc({{ max_chars }}ch + 4 * 2em);
  }
</style>
<form>
  <!-- ... -->
</form>
{% endblock content %}
Generally, adding inline CSS is considered bad practice. In this case, you can make an exception to take advantage of Jinja.
By adding a <style> HTML block to your template, you can use Jinja variables in your CSS code. When the page is rendered, Flask dynamically updates the CSS styling like it would do in any other part of your document. That way, you can access num_lines and max_chars and let CSS calculate the size of your code input element with some comfortable padding.
When you now paste code and save it, then the text field shrinks or expands to the size of your code:
Nice! With all of these changes, your code input page definitely looks presentable. However, the code itself is still only black on white. In the next step, you’ll add another view where you can select a bunch of cool styles to color your code.
Step 3: Color Your Code
In this step, you’ll add another exciting page to your code image generator: the style selection. You’ll use Pygments to add the style as syntax highlighting to the code and mix HTML input fields with the power of Jinja.
At the end of this step, you’ll be able to color your code with a variety of Pygments styles to tailor your code snippets to your personal taste.
Introduce Syntax Highlighting With Pygments
Pygments is a syntax highlighting engine that can style over five hundred markup and programming languages. In your project, you’ll hand over the plain Python code snippet that a user pastes. Pygments processes the input and returns the code snippet wrapped in HTML elements.
Note: If you want to see Pygments in action, then just have a look at the very page that you’re on right now. Real Python uses Pygments to style all the code examples that you can find on the site.
To use Pygments, you generally need at least three components:
- A lexer that breaks up the code into chunks that Pygments understands
- Some style that determines how the highlighted code should look
- A formatter that defines the way the program will output the code
Open up a Python REPL session and see the three components above in action:
>>> from pygments import formatters, highlight, lexers
>>> code = "print('Hello, World!')"
>>> highlight(code, lexers.Python3Lexer(), formatters.HtmlFormatter())
'<div class="highlight"><pre><span></span><span class="nb">print</span>...'
To get Pygments-processed Python code as HTML, you add your source code, the Python3Lexer(), and the HtmlFormatter() to the highlight() function.
The Python lexer takes care of wrapping each element of your Python code in an element. For example, print is wrapped inside of two <span> elements.
The elements surrounding your Python code are HTML because of HTMLFormatter.
The lexer that you use should always match the type of code that you provide. If you want to highlight JavaScript code, then you should use the JavascriptLexer. You can find a list of all the available lexers in the Pygments documentation on lexers.
When it comes to the code formatter, Pygments is more flexible. In the code above, you formatted the code as HTML. But you can also output LaTeX or Rich Text Format (RTF) code:
>>> highlight(code, lexers.Python3Lexer(), formatters.LatexFormatter())
'\\begin{Verbatim}[commandchars=\\\\\\{\\}]\n\\PY{n+nb}{print}\\...'

>>> highlight(code, lexers.Python3Lexer(), formatters.RtfFormatter())
"{\\rtf1\\ansi\\uc0\\deff0{\\fonttbl{\\f0\\fmodern\\fprq1\\fcharset0;}}..."
To access the styling rules, you can use the .get_style_defs() method. For HTMLFormatter(), the styling rules are CSS:
>>> formatters.HtmlFormatter().get_style_defs()
'pre { line-height: 125%; }\ntd.linenos .normal { color: inherit; ...'
Feel free to play around with different lexers and formatters. For this project, you’ll continue to use the Python3Lexer() with the HtmlFormatter() to render the highlighted code in the browser.
Highlight the Code
To work with Pygments in your Flask project, you need to import the highlight() function. You also need the HtmlFormatter and Python3Lexer classes. Go ahead and update app.py like in the snippet below:
# app.py

from flask import (
    # ...
)
from pygments import highlight
from pygments.formatters import HtmlFormatter
from pygments.lexers import Python3Lexer

# ...
Then, you need another view in app.py that works with session["code"], sets the Pygments definitions, and renders a template that shows the highlighted code:
 1# app.py
 2
 3# ...
 4
 5@app.route("/style", methods=["GET"])
 6def style():
 7    formatter = HtmlFormatter()
 8    context = {
 9        "message": "Select Your Style 🎨",
10        "style_definitions": formatter.get_style_defs(),
11        "style_bg_color": formatter.style.background_color,
12        "highlighted_code": highlight(
13            session["code"], Python3Lexer(), formatter
14        ),
15    }
16    return render_template("style_selection.html", **context)
You create a style() view that accepts GET requests. In the function body, you set formatter to be an HtmlFormatter() in line 7. With formatter.get_style_defs(), you get the CSS style definitions in line 10. Saving these definitions in your context is super handy, as you’ll be able to use CSS code in a <style> block in your template later.
In line 11, you access the formatter style’s background color and add it as a "style_bg_color" key so that you can use it as a template variable. In lines 12 to 14, you add the highlighted code to context. That’s the output that the Python3Lexer() and formatter produce based on the code that you store in your current session.
Finally, you render a template named style_selection.html in line 16. This template doesn’t exist yet. Go on and create it with the content below:
<!-- templates/style_selection.html -->

{% extends "base.html" %}

{% block title %}
  - Style Selection
{% endblock title %}

{% block content %}
<style>
  {{ style_definitions }}

  .code {
    background-color: {{ style_bg_color }};
  }
</style>
<form>
  <div class="code">
    {{ highlighted_code | safe }}
  </div>
</form>
{% endblock content %}
Your style template follows the same structure as code_input.html. You extend base.html and overwrite the title and content blocks.
Inside the <style> element, you interpolate the content of style_definitions. This Jinja variable contains all the CSS rules that you need to style the user’s input code, which is already stored in highlighted_code.
Additionally, you set the content of style_bg_color as the background of your .code CSS selector, so that background color will fill up the whole element. The placeholder form will work as a frame to display the highlighted code, which you display in a <div> element. That way, you can use the background color to paint the background of this element and match the Pygments style.
Since highlighted_code contains HTML code, you need to add the safe filter to the Jinja variable. That way, you signal to Flask that you’re aware of the variable’s content and that Jinja is allowed to render it as HTML. You can learn more about the safe filter in the Jinja documentation on HTML escaping.
With style_selection.html ready, visit the style selection page on http://127.0.0.1:5000/style and check how your highlighted code looks:
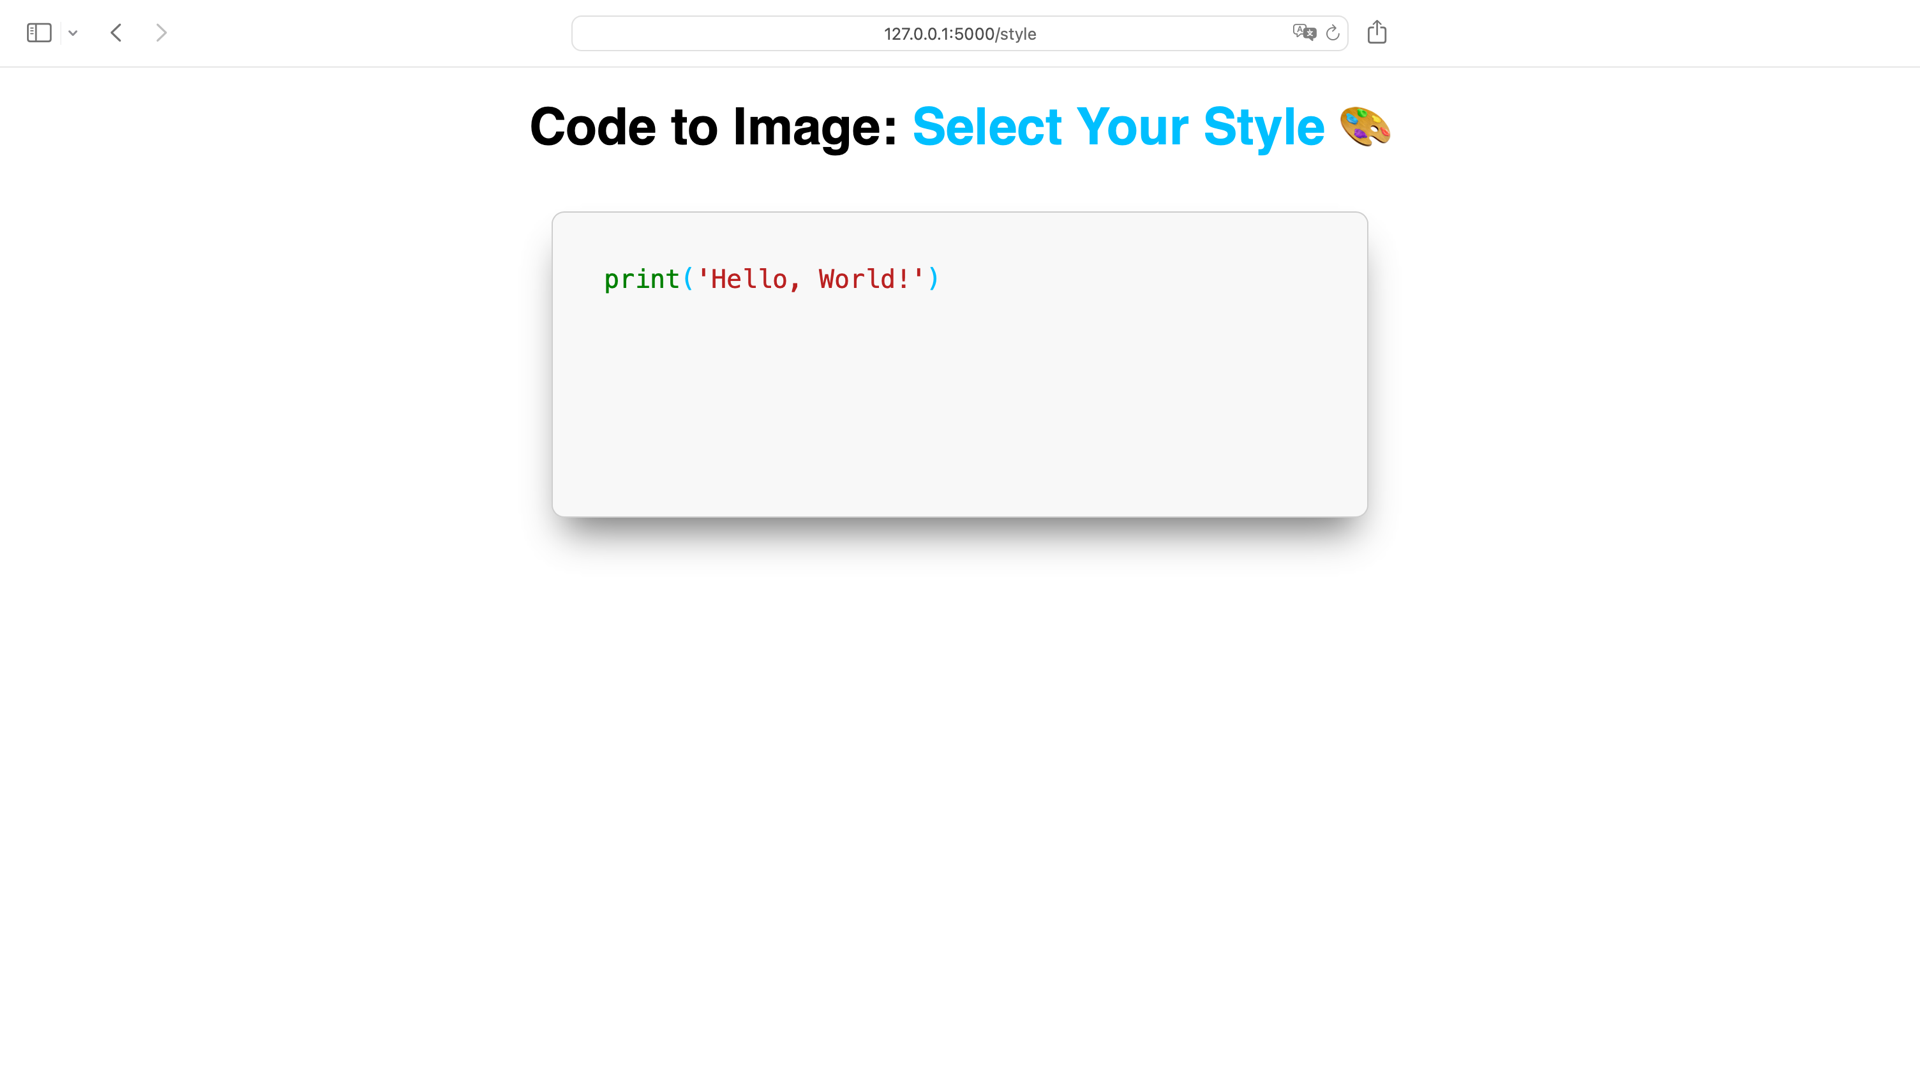
That’s quite nice! But having only one default style as the syntax highlighting is a bit boring. It’s time to check out all the styles that Pygments has to offer.
Get All the Styles
The template name is style_selection.html, and the page shows a big headline saying Select Your Style, but there’s only one style to display. It’s time to match the filename and title with the action that a user can perform on the page. Before you continue working on your Flask app, take a moment to investigate the styles that Pygments has in stock.
Open the Python REPL and take a look at all the Pygments styles by using the get_all_styles() function:
>>> from pygments.styles import get_all_styles
>>> list(get_all_styles())
['default', 'emacs', 'friendly', 'friendly_grayscale', 'colorful',
'autumn', 'murphy', 'manni', 'material', 'monokai', 'perldoc', 'pastie',
'borland', 'trac', 'native', 'fruity', 'bw', 'vim', 'vs', 'tango', 'rrt',
'xcode', 'igor', 'paraiso-light', 'paraiso-dark', 'lovelace', 'algol',
'algol_nu', 'arduino', 'rainbow_dash', 'abap', 'solarized-dark',
'solarized-light', 'sas', 'staroffice', 'stata', 'stata-light',
'stata-dark', 'inkpot', 'zenburn', 'gruvbox-dark', 'gruvbox-light',
'dracula', 'one-dark', 'lilypond', 'nord', 'nord-darker', 'github-dark']
With get_all_styles(), you can list all the styles that Pygments has to offer. If you have a look at the names, then you may recognize some styles that you use as a theme for your favorite Python IDEs and code editors.
Now that you know how to get all the styles, you can add them to the context dictionary of style() in app.py:
# app.py

# ...

from pygments.styles import get_all_styles

# ...

@app.route("/style", methods=["GET"])
def style():
    formatter = HtmlFormatter()
    context = {
        "message": "Select Your Style 🎨",
        "all_styles": list(get_all_styles()),
        "style_definitions": formatter.get_style_defs(),
        "style_bg_color": formatter.style.background_color,
        "highlighted_code": highlight(
            session["code"], Python3Lexer(), formatter
        ),
    }
    return render_template("style_selection.html", **context)
Start by importing get_all_styles from pygments.styles and then call it within a list() constructor to get a list of all the Pygments styles.
With the all_styles variable available in your template’s context, you can build a selection menu that shows all the styles and a Change Style button to change the code highlighting to the selected style:
<!-- templates/style_selection.html -->

# ...

{% block content %}
<style>
  /* ... */
</style>
<form>
  <div class="controls">
    <select name="style">
      {% for style_name in all_styles %}
        <option value="{{ style_name }}">{{ style_name }}</option>
      {% endfor %}
    </select>
    <button formmethod="post" formaction="{{ url_for('save_style') }}">
      Change Style 💅
    </button>
  </div>
  <div class="code">
    {{ highlighted_code | safe }}
  </div>
</form>
{% endblock content %}
On top of your code block, you add a <div> element containing the style selection menu that loops through all all_styles and shows each style_name as an option.
You also add a button to change the style. The button posts the form to a save_style URL. This route doesn’t exist yet. Hop over to app.py again and create a view for it:
# app.py

# ...

PLACEHOLDER_CODE = "print('Hello, World!')"
DEFAULT_STYLE = "monokai"

# ...

@app.route("/save_style", methods=["POST"])
def save_style():
    session["style"] = request.form.get("style")
    return redirect(url_for("style"))
First, you add a new DEFAULT_STYLE constant that contains the Pygments style name that your code image generator should start with. In this tutorial, that’s the beloved Monokai color palette by Wimer Hazenberg. Of course, you can choose any other style name that get_all_styles() offers.
Next, you add a save_style() view. This is the view that receives the "style" value from the posted form of style_selection.html. Once you store the style in the session, you redirect the request to style().
Remember that you haven’t stored a style in your session when you visit /style for the first time. So you also need to update style() to work with DEFAULT STYLE if there’s no style present in the session:
# app.py

# ...

@app.route("/style", methods=["GET"])
def style():
    if session.get("style") is None:
        session["style"] = DEFAULT_STYLE
    formatter = HtmlFormatter(style=session["style"])
    context = {
        "message": "Select Your Style 🎨",
        "all_styles": list(get_all_styles()),
        "style_definitions": formatter.get_style_defs(),
        "style_bg_color": formatter.style.background_color,
        "highlighted_code": highlight(
            session["code"], Python3Lexer(), formatter
        ),
    }
    return render_template("style_selection.html", **context)

# ...
If there’s no style set, then you rely on DEFAULT_STYLE in your style() view to make sure that there’s always a value in session["style"] before continuing.
Then you initialize HtmlFormatter with the current style that’s stored in your session. Passing in style will make sure that the code is highlighted with either your default style or the style that you selected in the form.
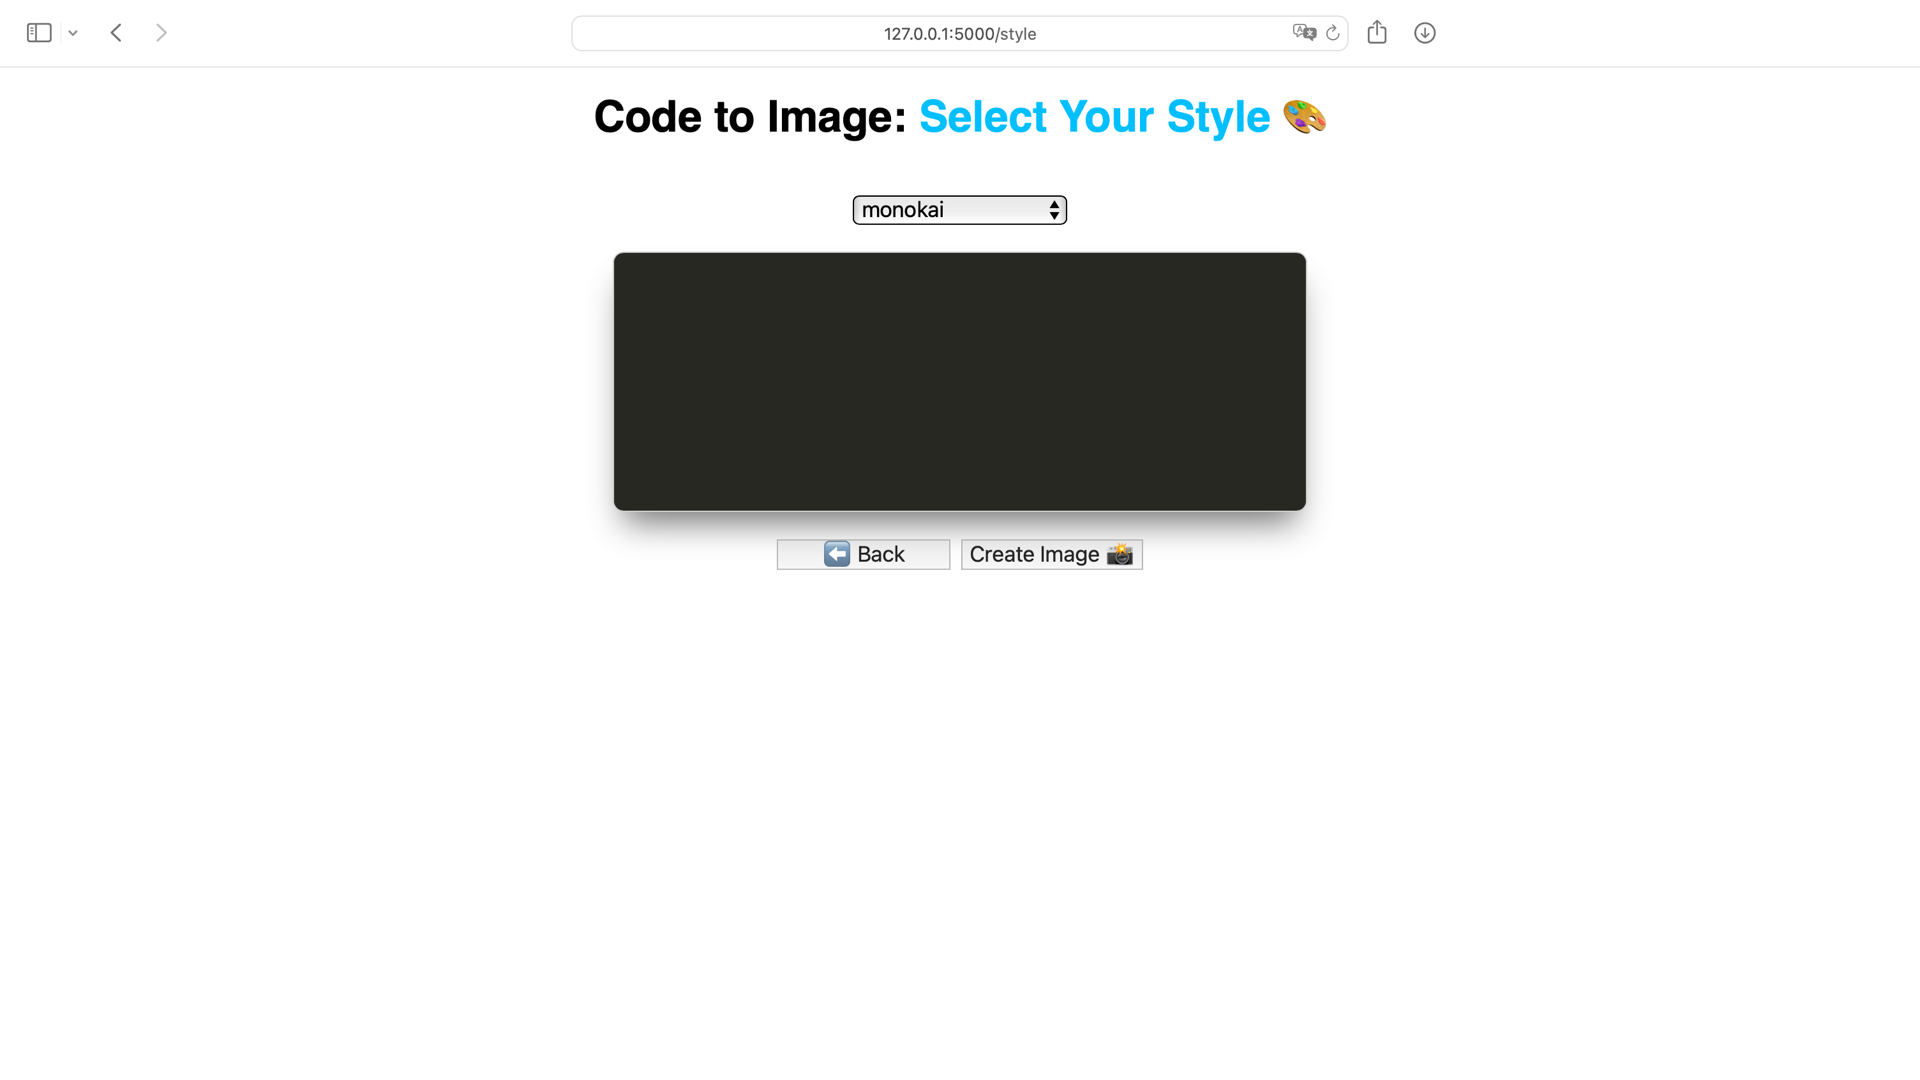
Check out how the style selection works by restarting your Flask development server and visiting http://127.0.0.1:5000/style:
When you visit the style selection page, you start with your default style. After selecting another style and clicking the Change Style button, the page reloads and shows your code in the selected style.
Note: When you select a different style and click the Change Style button, the code changes its style, but the text in the select menu snaps back to the first item in the style list. Later in the tutorial, you’ll make sure that the select menu always shows the current style.
It’s neat that visiting /style directly and changing the style works in general. But the idea of your code image generator is that you start with the code input and then move on to the style selection. So, you can go ahead and connect both pages!
Link Code Input and Style Selection
To connect the code input page with the style selection page, you’ll add a button to each view’s template. The button for style_selection.html works like a common HTML hyperlink:
<!-- templates/style_selection.html -->

{% extends "base.html" %}

{% block title %}
  - Style Selection
{% endblock title %}

{% block content %}
<style>
  /* ... */
</style>
<form>
  <div class="controls">
    <!-- ... -->
  </div>
  <div class="code">
    {{ highlighted_code | safe }}
  </div>
  <div class="controls">
    <button formmethod="get" formaction="{{ url_for('code') }}">
      ⬅️ Back
    </button>
  </div>
</form>
{% endblock content %}
You add the Back button in another <div> element for the controls. This time, you put it below the code block. As formmethod, you choose GET because you don’t need to send any data when you want to go back to the URL for your code() view.
In code_input.html, on the other hand, you need to send data. That’s why the button needs a different formmethod value:
<!-- templates/code_input.html -->

{% extends "base.html" %}

{% block title %}
  - Code Input
{% endblock title %}

{% block content %}
<style>
  /* ... */
</style>
<form>
  <!-- ... -->
  <div class="controls">
    <button formmethod="post" formaction="{{ url_for('reset_session') }}">
      Reset Session ♻️
    </button>
    <button formmethod="post" formaction="{{ url_for('save_code') }}">
      Save Code 💾
    </button>
    <button formmethod="post" formaction="{{ url_for('save_style') }}">
      Next ➡️
    </button>
  </div>
</form>
{% endblock content %}
Instead of just linking to /style, you set the URL for save_style() as formaction, which you address with a POST request that you set as formmethod.
You may wonder what the advantage of this approach is. After all, there’s no style to save yet. However, you’d lose any code that you entered in the text field if the Next button were only a plain link sending a GET request.
When sending a POST to save_style(), you want to make sure that the code is also saved in the session.
Open app.py and enhance save_style() to also remember the code if the form contains some:
 1# app.py
 2
 3# ...
 4
 5@app.route("/save_style", methods=["POST"])
 6def save_style():
 7    if request.form.get("style") is not None:
 8        session["style"] = request.form.get("style")
 9    if request.form.get("code") is not None:
10        session["code"] = request.form.get("code")
11    return redirect(url_for("style"))
12
13# ...
Before, you only accessed save_style() when you were selecting a style. Now you can reach save_style() from the code input page. That’s why you need to check if the form contains a "style" value in line 7. Only then do you want to update session["style"].
In line 9, you use a conditional statement to check if the form contains a "code" value. This handles the case that you trigger with the Next button in code_input.html.
Restart your Flask development server and visit http://127.0.0.1:5000 to test if jumping between the pages works:
When you click the Next button on the code input page, the code gets saved, and you see the code with the default style on the /style route. Changing the style works exactly like before, and clicking the Back button brings you back to the first page.
Note: If you want, you can remove the Save Code button at this point in the code_input.html template:
<!-- templates/code_input.html -->

<!-- ... -->
<form>
  <!-- ... -->
  <div class="controls">
    <button formmethod="post" formaction="{{ url_for('reset_session') }}">
      Reset Session ♻️
    </button>
    <!-- Optionally: Remove the Save Code button -->
    <button formmethod="post" formaction="{{ url_for('save_style') }}">
      Next ➡️
    </button>
  </div>
</form>
{% endblock content %}
Since you’re saving the code anyway when you click Next, the Save Code button doesn’t have a purpose anymore. That being said, it also doesn’t hurt to keep the Save Code button on your code input page.
With the two pages of your code image generator working, it’s time to add a third: the page where you can see and download the code image.
Step 4: Generate an Image From the Code
At the beginning of this tutorial, you took a short detour by checking out how Playwright works. In this step, you’ll take the code from before and adjust it to work within Flask.
At the end of this step, you’ll be able to create an image with your code image generator and display it to the user.
Add the Code Image Routes
This time, you start by connecting the pages first. Similar to the Next button on the code input page that leads to the style selection page, you now need a button that links to the image route. For the text on the button, you can be more precise and add Create Image as its label:
<!-- templates/style_selection.html -->

<!-- ... -->

{% block content %}
<style>
  /* ... */
</style>
<form>
  <!-- ... -->
  <div class="controls">
    <button formmethod="get" formaction="{{ url_for('code') }}">
      ⬅️ Back
    </button>
    <button formmethod="get" formaction="{{ url_for('image') }}">
      Create Image 📸
    </button>
  </div>
</form>
{% endblock content %}
When you click the button to go to the image page, then you’ll always have a style stored in your session already. You don’t need to transfer any data from the form, so you can work with a GET request.
The URL that you use as the target for formaction doesn’t exist yet. You need to add it to app.py next:
# app.py

# ...

@app.route("/image", methods=["GET"])
def image():
    context = {
        "message": "Done! 🎉",
    }
    return render_template("image.html", **context)
For now, there’s not much happening in the image() view. Its purpose is only to load and populate an image.html template with a success message.
Go on and create a template named image.html in your templates/ folder:
<!-- templates/image.html -->

{% extends "base.html" %}

{% block title %}
  - Your Image
{% endblock title %}

{% block content %}
<form>
  {% if image_b64 %}
    <div class="code-picture">
      <img
        src="data:image/png;base64,{{ image_b64 | safe }}"
        alt="Code Image"
      />
    </div>
    <a
      href="data:image/png;base64,{{ image_b64 | safe }}"
      download="Your_CodeImage.png"
    >
      Download Your Code Image ⤵️
    </a>
  {% endif %}
  <div class="controls">
    <button formmethod="get" formaction="{{ url_for('code') }}">
      🔄 Back to Start
    </button>
  </div>
</form>
{% endblock content %}
The image template teases an image_b64 variable that doesn’t exist in your context yet. That means that the code block inside the {% if image_b64 %} statement won’t be rendered, and you’ll only see the Back to Start button at the bottom of the page.
To show the image, you need to create the image and store it in the image_b64 variable. That’s where Playwright comes into play again.
Take a Screenshot With Playwright
In the Playwright test drive at the beginning of the tutorial, you read the content of a website’s element. Now you’ll push the earlier code a step further and take a screenshot.
Create a new file named utils.py next to app.py at the root of your project and add the code below:
 1# utils.py
 2
 3from playwright.sync_api import sync_playwright
 4
 5def take_screenshot_from_url(url, session_data):
 6    with sync_playwright() as playwright:
 7        webkit = playwright.webkit
 8        browser = webkit.launch()
 9        browser_context = browser.new_context(device_scale_factor=2)
10        browser_context.add_cookies([session_data])
11        page = browser_context.new_page()
12        page.goto(url)
13        screenshot_bytes = page.locator(".code").screenshot()
14        browser.close()
15        return screenshot_bytes
The take_screenshot_from_url() function is handy code that you may use on different parts of your project in the future. While you’ll only use it once in this tutorial, it’s still a good idea to maintain some modularity by putting the code into its own file and importing it later.
Here’s what the function does:
- Line 5 defines
take_screenshot_from_url()with the parametersurlandsession_data. Withurl, you’ll pass in the URL that Playwright’s browser should visit. To work with the data you’ve stored in your own session, you need to transfer the session information totake_screenshot_from_url(). That’s why you also add insession_dataas the second parameter. - Line 6 uses a context manager to wrap the Playwright code. This way, you’ll make sure that Python sets up and tears down the
playwrightinstance properly. - Lines 7 and 8 create and launch a headless WebKit browser.
- Line 9 creates a new context for the browser named
browser_context. You also set thedevice_scale_factorto2. Increasing the scale factor will make sure that the picture you take isn’t pixelated. - Line 10 adds the session info to
browser_contextwith.add_cookie(). - Line 11 opens a new page in your
browser_context. You can think of it like a new browser window. - Line 12 visits the target URL. That’s the same as if you’d entered the URL in your browser’s address bar and hit Enter.
- Line 13 takes a screenshot of the element with a
codeclass. Playwright’s.screenshot()method returns a buffer with the image. - Line 14 closes the browser.
- Line 15 returns the image buffer.
The buffer that you store in the screenshot_bytes variable is in bytes. That means you could save the in-memory image as a file on your disk and link it on a page. Or you can decode it as a string and let the browser do the work to display the code image.
Display the Code Image
With take_screenshot_from_url() ready, you can enhance image() in app.py to take a screenshot of your highlighted code on the style selection page:
 1# app.py
 2
 3import base64
 4
 5# ...
 6
 7from utils import take_screenshot_from_url
 8
 9# ...
10
11@app.route("/image", methods=["GET"])
12def image():
13    session_data = {
14        "name": app.config["SESSION_COOKIE_NAME"],
15        "value": request.cookies.get(app.config["SESSION_COOKIE_NAME"]),
16        "url": request.host_url,
17    }
18    target_url = request.host_url + url_for("style")
19    image_bytes = take_screenshot_from_url(target_url, session_data)
20    context = {
21        "message": "Done! 🎉",
22        "image_b64": base64.b64encode(image_bytes).decode("utf-8"),
23    }
24    return render_template("image.html", **context)
Once you’ve imported take_screenshot_from_url() from utils in line 7, you define a session_data dictionary in line 13. This dictionary contains all the information that Playwright’s browser context needs to simulate your session.
In line 18, you set target_url to the style selection page, and in line 19, you get back the image as bytes from the take_screenshot_from_url() call.
The base64 module that you import in line 3 helps you to Base64-encode the binary image data in line 22. Python’s base64.b64encode() returns a byte literal. With .decode("utf-8"), you convert it to a Base64 string.
The Base64 string represents your image buffer in a string format. That way, you can pass the image just like any other Python string and work with it in the template.
The image.html template already knows how to deal with the Base64 string. But before you check out how the image page looks with a picture, take a moment to polish the CSS code a bit in the next section.
Style the Code Image Template
In the last section, you introduced some new HTML elements that deserve a bit of attention in your CSS file. Open styles.css and add the code below to your style sheet:
/* static/styles.css */

/* ... */

.code-picture {
    text-align: center;
}

.code-picture img {
    margin: 1em 0;
    border: 1px solid #cecece;
    max-width: 80%;
    padding: 1em;
}
With these adjustments to styles.css, you can make sure that the code image fits the page. Restart your Flask development server, hop over to the browser, and open http://127.0.0.1:5000:
Awesome, your code image generator works! You can paste code, select a style, and generate an image that you can download. At first glance, the project looks finished. But if you look closely, there are a few minor shortcomings to improve.
Step 5: Improve the User Experience
When playing around with your code image generator, you may have experienced a few shortcomings yourself. For example, you can’t see the name of the current style, and you may encounter unnecessary button clicks or empty code images.
Tackling these shortcomings will elevate your project to the next level and enhance the user experience. Pull up your sleeves and get to work in this last step of the tutorial!
Show the Current Style
When you visit the style selection page, the dropdown where you can select the style always shows default. Instead, it’d be cool if the dropdown displayed the currently selected style.
Start by adding a "style" key to the context dictionary inside the style() view:
# app.py

# ...

@app.route("/style", methods=["GET"])
def style():
    if session.get("style") is None:
        session["style"] = DEFAULT_STYLE
    formatter = HtmlFormatter(style=session["style"])
    context = {
        "message": "Select Your Style 🎨",
        "all_styles": list(get_all_styles()),
        "style": session["style"],
        "style_definitions": formatter.get_style_defs(),
        "style_bg_color": formatter.style.background_color,
        "highlighted_code": highlight(
            session["code"], Python3Lexer(), formatter
        ),
    }
    return render_template("style_selection.html", **context)
With "style" in your context dictionary, you can check for the current style in your style selection template. To do so, add a conditional statement in the loop of the <select> element in style_selection.html:
<!-- templates/style_selection.html -->

<!-- ... -->

<form>
  <div class="controls">
    <select name="style">
      {% for style_name in all_styles %}
        <option
          value="{{ style_name }}"
          {% if style_name == style %}selected{% endif %}
        >
          {{ style_name }}
        </option>
      {% endfor %}
    </select>
    <button formmethod="post" formaction="{{ url_for('save_style') }}">
      Change Style 💅
    </button>
  </div>
  <!-- ... -->
</form>
{% endblock content %}
All available styles are added to the <select> element by looping through the all_styles variable. By adding a conditional statement that checks if style_name matches the current style inside the style variable, you can dynamically add the selected property for this option. The browser will then use this option as the pre-selected item in the dropdown menu.
Restart your Flask development server and test your update:
Nice, the dropdown menu on your style selection page now shows you the currently active style. To change the style, you still have to push the Change Style button, though. Wouldn’t it be much cooler if the style would update once you interacted with the dropdown menu?
Let JavaScript Do the Clicking
When you select a style in the dropdown menu, then you have to click the Change Style button to trigger a POST request that updates the style. With a few lines of JavaScript, you can shortcut the click action and send the POST request directly when you interact with the dropdown menu.
Open style_selection.html and add the highlighted code:
 1<!-- templates/style_selection.html -->
 2
 3{% extends "base.html" %}
 4
 5{% block title %}
 6  - Style Selection
 7{% endblock title %}
 8
 9{% block content %}
10<style>
11  /* ... */
12</style>
13<script>
14  document.addEventListener("DOMContentLoaded", () => {
15    document.querySelector("select").addEventListener("change", () => {
16      document.querySelector("form").submit();
17    });
18  });
19</script>
20<form method="post" action="{{ url_for('save_style') }}">
21  <div class="controls">
22    <select name="style">
23      {% for style_name in all_styles %}
24        <option
25          value="{{ style_name }}"
26          {% if style_name == style %}selected{% endif %}
27        >
28          {{ style_name }}
29        </option>
30      {% endfor %}
31    </select>
32    <!-- Remove: "Change Style" Button-->
33  </div>
34  <div class="code">
35    {{ highlighted_code | safe }}
36  </div>
37  <div class="controls">
38    <button formmethod="get" formaction="{{ url_for('code') }}">
39      ⬅️ Back
40    </button>
41    <button formmethod="get" formaction="{{ url_for('image') }}">
42      Create Image 📸
43    </button>
44  </div>
45</form>
46{% endblock content %}
In line 13, you’re adding a script block. With <script> on an HTML page, you can add inline JavaScript to your website. Generally, it’s a good idea to outsource JavaScript code to its own file. But if it’s only a few lines of code that are specific to the Jinja template, then it’s fine to keep the code inline.
Here’s what the JavaScript code does:
- Line 14 checks that the site is loaded first.
- Line 15 adds a
"change"event to the<select>element. - Line 16 submits the form when the
"change"event is triggered.
It’s important to wait until the site is loaded. Otherwise, the <select> element might not be present yet when the browser executes the JavaScript code and tries to add the "change" event.
When you add an event listener to an HTML object, the browser keeps an eye on the element and triggers any code that you connect to the event. In this case, that’s sending the form.
To send the form to the right target with the correct method, you need to add method and action to the <form> tag. With this information present, you can finally remove the Change Style button in line 32.
Again, restart the Flask development server and verify that the code you introduced works:
When you select a style in the style selection dropdown menu, then the "change" event triggers, and the site reloads with the new style. That’s way smoother than having to click a button after you’ve selected a style. Well done!
Fall Back Gracefully
There’s one last brush-up that you can do before wrapping up the project. When a user deletes the default code and goes to the next page, then there’s no code to style:
Having no code snippet to work with, the code image generator will produce an image of a blank code box. That’s not a big deal. But you can improve the user experience by showing a Python comment as a fallback.
To catch empty strings in the back end, head over to app.py and add a fallback mechanic to save_code() and save_style():
 1# app.py
 2
 3PLACEHOLDER_CODE = "print('Hello, World!')"
 4DEFAULT_STYLE = "monokai"
 5NO_CODE_FALLBACK = "# No Code Entered"
 6
 7# ...
 8
 9@app.route("/save_code", methods=["POST"])
10def save_code():
11    session["code"] = request.form.get("code") or NO_CODE_FALLBACK
12    return redirect(url_for("code"))
13
14# ...
15
16@app.route("/save_style", methods=["POST"])
17def save_style():
18    if request.form.get("style") is not None:
19        session["style"] = request.form.get("style")
20    if request.form.get("code") is not None:
21        session["code"] = request.form.get("code") or NO_CODE_FALLBACK
22    return redirect(url_for("style"))
In line 5, you’re using a string that contains a Python comment as the fallback code. You set the session’s code to the fallback code when the code value for request.form is empty in lines 11 and 21.
One point to remember when choosing fallback logic is not to confuse the user. For example, if you used your placeholder code as fallback code, then a user might think there’s a bug in your code image generator. By using a No Code Entered message as a Python comment instead, you’re making it clear that the code image generator expects code.
With all the code changes in place, restart the Flask development server and visit http://127.0.0.1:5000 one last time:
Even when you trick the browser’s check for an empty text input by passing in a space, your code image isn’t empty. Instead, you show a neat fallback string that reminds the user to enter some code.
Congratulations, you’ve created a fully functional code image generator with some cool features! You can paste code snippets, and your session saves them. The input field expands depending on the size of the pasted code, and you can select one of many styles to make the code snippet presentable. And finally, you can create an image with the click of a button. Well done!
Conclusion
By finishing this project, you honed your skills as a Python programmer and experimented with full-stack web development.
In this tutorial, you worked with a variety of exciting concepts. Specifically, you learned how to:
- Get your Flask project up and running
- Add style by connecting Jinja templates
- Create images with Playwright
- Make your code beautiful with Pygments
- Save browser states with sessions
- Improve the user experience with JavaScript
You can now create nice-looking images of your code snippets that you can share with friends on social media.
Get Your Code: Click here to download the free source code for your Python code image generator.
Next Steps
One advantage of building your own tools is that you can expand them to your own liking. The project that you created in this tutorial is only a starting point.
Here are a some ideas on how to improve the code image generator:
- Add the capability to highlight other programming languages than Python.
- Create a theme gallery page that displays all the available Pygments styles.
- Implement the option to define the image dimensions and format.
Do you have other ideas about what to work on next? Share them with the Real Python community in the comments below!