When I started learning computer programming late in the last millennium, it was driven by my desire to write computer games. I tried to figure out how to write games in every language and on every platform I learned, including Python. That’s how I discovered pygame and learned how to use it to write games and other graphical programs. At the time, I really wanted a primer on pygame.
By the end of this article, you’ll be able to:
- Draw items on your screen
- Play sound effects and music
- Handle user input
- Implement event loops
- Describe how game programming differs from standard procedural Python programming
This primer assumes you have a basic understanding of writing Python programs, including user-defined functions, imports, loops, and conditionals. You should also be familiar with how to open files on your platform. A basic understanding of object-oriented Python is helpful as well. pygame works with most versions of Python, but Python 3.6 is recommended and used throughout this article.
You can get all of the code in this article to follow along:
Sample Code: Click here to download the source code for the PyGame sample project used in this tutorial.
Background and Setup
pygame is a Python wrapper for the SDL library, which stands for Simple DirectMedia Layer. SDL provides cross-platform access to your system’s underlying multimedia hardware components, such as sound, video, mouse, keyboard, and joystick. pygame started life as a replacement for the stalled PySDL project. The cross-platform nature of both SDL and pygame means you can write games and rich multimedia Python programs for every platform that supports them!
To install pygame on your platform, use the appropriate pip command:
$ pip install pygame
You can verify the install by loading one of the examples that comes with the library:
$ python3 -m pygame.examples.aliens
If a game window appears, then pygame is installed properly! If you run into problems, then the Getting Started guide outlines some known issues and caveats for all platforms.
Basic Pygame Program
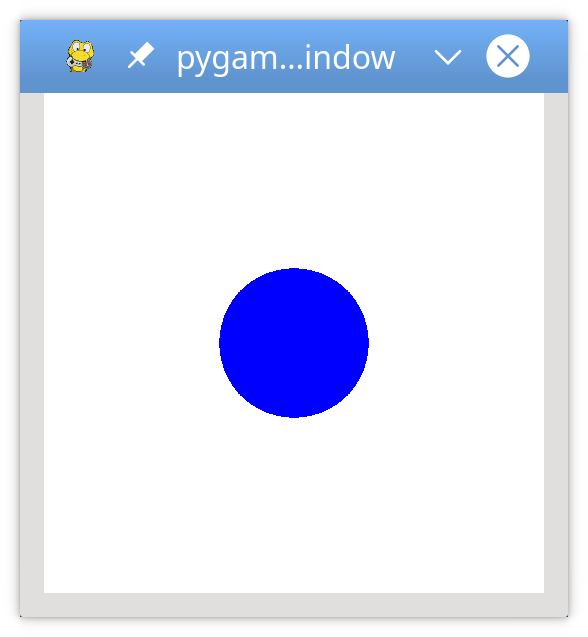
Before getting down to specifics, let’s take a look at a basic pygame program. This program creates a window, fills the background with white, and draws a blue circle in the middle of it:
 1# Simple pygame program
 2
 3# Import and initialize the pygame library
 4import pygame
 5pygame.init()
 6
 7# Set up the drawing window
 8screen = pygame.display.set_mode([500, 500])
 9
10# Run until the user asks to quit
11running = True
12while running:
13
14    # Did the user click the window close button?
15    for event in pygame.event.get():
16        if event.type == pygame.QUIT:
17            running = False
18
19    # Fill the background with white
20    screen.fill((255, 255, 255))
21
22    # Draw a solid blue circle in the center
23    pygame.draw.circle(screen, (0, 0, 255), (250, 250), 75)
24
25    # Flip the display
26    pygame.display.flip()
27
28# Done! Time to quit.
29pygame.quit()
When you run this program, you’ll see a window that looks like this:
Let’s break this code down, section by section:
-
Lines 4 and 5 import and initialize the
pygamelibrary. Without these lines, there is nopygame. -
Line 8 sets up your program’s display window. You provide either a list or a tuple that specifies the width and height of the window to create. This program uses a list to create a square window with 500 pixels on each side.
-
Lines 11 and 12 set up a game loop to control when the program ends. You’ll cover game loops later on in this tutorial.
-
Lines 15 to 17 scan and handle events within the game loop. You’ll get to events a bit later as well. In this case, the only event handled is
pygame.QUIT, which occurs when the user clicks the window close button. -
Line 20 fills the window with a solid color.
screen.fill()accepts either a list or tuple specifying the RGB values for the color. Since(255, 255, 255)was provided, the window is filled with white. -
Line 23 draws a circle in the window, using the following parameters:
screen: the window on which to draw(0, 0, 255): a tuple containing RGB color values(250, 250): a tuple specifying the center coordinates of the circle75: the radius of the circle to draw in pixels
-
Line 26 updates the contents of the display to the screen. Without this call, nothing appears in the window!
-
Line 29 exits
pygame. This only happens once the loop finishes.
That’s the pygame version of “Hello, World.” Now let’s dig a little deeper into the concepts behind this code.
Pygame Concepts
As pygame and the SDL library are portable across different platforms and devices, they both need to define and work with abstractions for various hardware realities. Understanding those concepts and abstractions will help you design and develop your own games.
Initialization and Modules
The pygame library is composed of a number of Python constructs, which include several different modules. These modules provide abstract access to specific hardware on your system, as well as uniform methods to work with that hardware. For example, display allows uniform access to your video display, while joystick allows abstract control of your joystick.
After importing the pygame library in the example above, the first thing you did was initialize Pygame using pygame.init(). This function calls the separate init() functions of all the included pygame modules. Since these modules are abstractions for specific hardware, this initialization step is required so that you can work with the same code on Linux, Windows, and Mac.
Displays and Surfaces
In addition to the modules, pygame also includes several Python classes, which encapsulate non-hardware dependent concepts. One of these is the Surface which, at its most basic, defines a rectangular area on which you can draw. Surface objects are used in many contexts in pygame. Later you’ll see how to load an image into a Surface and display it on the screen.
In pygame, everything is viewed on a single user-created display, which can be a window or a full screen. The display is created using .set_mode(), which returns a Surface representing the visible part of the window. It is this Surface that you pass into drawing functions like pygame.draw.circle(), and the contents of that Surface are pushed to the display when you call pygame.display.flip().
Images and Rects
Your basic pygame program drew a shape directly onto the display’s Surface, but you can also work with images on the disk. The image module allows you to load and save images in a variety of popular formats. Images are loaded into Surface objects, which can then be manipulated and displayed in numerous ways.
As mentioned above, Surface objects are represented by rectangles, as are many other objects in pygame, such as images and windows. Rectangles are so heavily used that there is a special Rect class just to handle them. You’ll be using Rect objects and images in your game to draw players and enemies, and to manage collisions between them.
Okay, that’s enough theory. Let’s design and write a game!
Basic Game Design
Before you start writing any code, it’s always a good idea to have some design in place. Since this is a tutorial game, let’s design some basic gameplay for it as well:
- The goal of the game is to avoid incoming obstacles:
- The player starts on the left side of the screen.
- The obstacles enter randomly from the right and move left in a straight line.
- The player can move left, right, up, or down to avoid the obstacles.
- The player cannot move off the screen.
- The game ends either when the player is hit by an obstacle or when the user closes the window.
When he was describing software projects, a former colleague of mine used to say, “You don’t know what you do until you know what you don’t do.” With that in mind, here are some things that won’t be covered in this tutorial:
- No multiple lives
- No scorekeeping
- No player attack capabilities
- No advancing levels
- No boss characters
You’re free to try your hand at adding these and other features to your own program.
Let’s get started!
Importing and Initializing Pygame
After you import pygame, you’ll also need to initialize it. This allows pygame to connect its abstractions to your specific hardware:
 1# Import the pygame module
 2import pygame
 3
 4# Import pygame.locals for easier access to key coordinates
 5# Updated to conform to flake8 and black standards
 6from pygame.locals import (
 7    K_UP,
 8    K_DOWN,
 9    K_LEFT,
10    K_RIGHT,
11    K_ESCAPE,
12    KEYDOWN,
13    QUIT,
14)
15
16# Initialize pygame
17pygame.init()
The pygame library defines many things besides modules and classes. It also defines some local constants for things like keystrokes, mouse movements, and display attributes. You reference these constants using the syntax pygame.<CONSTANT>. By importing specific constants from pygame.locals, you can use the syntax <CONSTANT> instead. This will save you some keystrokes and improve overall readability.
Setting Up the Display
Now you need something to draw on! Create a screen to be the overall canvas:
 1# Import the pygame module
 2import pygame
 3
 4# Import pygame.locals for easier access to key coordinates
 5# Updated to conform to flake8 and black standards
 6from pygame.locals import (
 7    K_UP,
 8    K_DOWN,
 9    K_LEFT,
10    K_RIGHT,
11    K_ESCAPE,
12    KEYDOWN,
13    QUIT,
14)
15
16# Initialize pygame
17pygame.init()
18
19# Define constants for the screen width and height
20SCREEN_WIDTH = 800
21SCREEN_HEIGHT = 600
22
23# Create the screen object
24# The size is determined by the constant SCREEN_WIDTH and SCREEN_HEIGHT
25screen = pygame.display.set_mode((SCREEN_WIDTH, SCREEN_HEIGHT))
You create the screen to use by calling pygame.display.set_mode() and passing a tuple or list with the desired width and height. In this case, the window is 800x600, as defined by the constants SCREEN_WIDTH and SCREEN_HEIGHT on lines 20 and 21. This returns a Surface which represents the inside dimensions of the window. This is the portion of the window you can control, while the OS controls the window borders and title bar.
If you run this program now, then you’ll see a window pop up briefly and then immediately disappear as the program exits. Don’t blink or you might miss it! In the next section, you’ll focus on the main game loop to ensure that your program exits only when given the correct input.
Setting Up the Game Loop
Every game from Pong to Fortnite uses a game loop to control gameplay. The game loop does four very important things:
- Processes user input
- Updates the state of all game objects
- Updates the display and audio output
- Maintains the speed of the game
Every cycle of the game loop is called a frame, and the quicker you can do things each cycle, the faster your game will run. Frames continue to occur until some condition to exit the game is met. In your design, there are two conditions that can end the game loop:
- The player collides with an obstacle. (You’ll cover collision detection later.)
- The player closes the window.
The first thing the game loop does is process user input to allow the player to move around the screen. Therefore, you need some way to capture and process a variety of input. You do this using the pygame event system.
Processing Events
Key presses, mouse movements, and even joystick movements are some of the ways in which a user can provide input. All user input results in an event being generated. Events can happen at any time and often (but not always) originate outside the program. All events in pygame are placed in the event queue, which can then be accessed and manipulated. Dealing with events is referred to as handling them, and the code to do so is called an event handler.
Every event in pygame has an event type associated with it. For your game, the event types you’ll focus on are keypresses and window closure. Keypress events have the event type KEYDOWN, and the window closure event has the type QUIT. Different event types may also have other data associated with them. For example, the KEYDOWN event type also has a variable called key to indicate which key was pressed.
You access the list of all active events in the queue by calling pygame.event.get(). You then loop through this list, inspect each event type, and respond accordingly:
27# Variable to keep the main loop running
28running = True
29
30# Main loop
31while running:
32    # Look at every event in the queue
33    for event in pygame.event.get():
34        # Did the user hit a key?
35        if event.type == KEYDOWN:
36            # Was it the Escape key? If so, stop the loop.
37            if event.key == K_ESCAPE:
38                running = False
39
40        # Did the user click the window close button? If so, stop the loop.
41        elif event.type == QUIT:
42            running = False
Let’s take a closer look at this game loop:
-
Line 28 sets up a control variable for the game loop. To exit the loop and the game, you set
running = False. The game loop starts on line 29. -
Line 31 starts the event handler, walking through every event currently in the event queue. If there are no events, then the list is empty, and the handler won’t do anything.
-
Lines 35 to 38 check if the current
event.typeis aKEYDOWNevent. If it is, then the program checks which key was pressed by looking at theevent.keyattribute. If the key is the Esc key, indicated byK_ESCAPE, then it exits the game loop by settingrunning = False. -
Lines 41 and 42 do a similar check for the event type called
QUIT. This event only occurs when the user clicks the window close button. The user may also use any other operating system action to close the window.
When you add these lines to the previous code and run it, you’ll see a window with a blank or black screen:
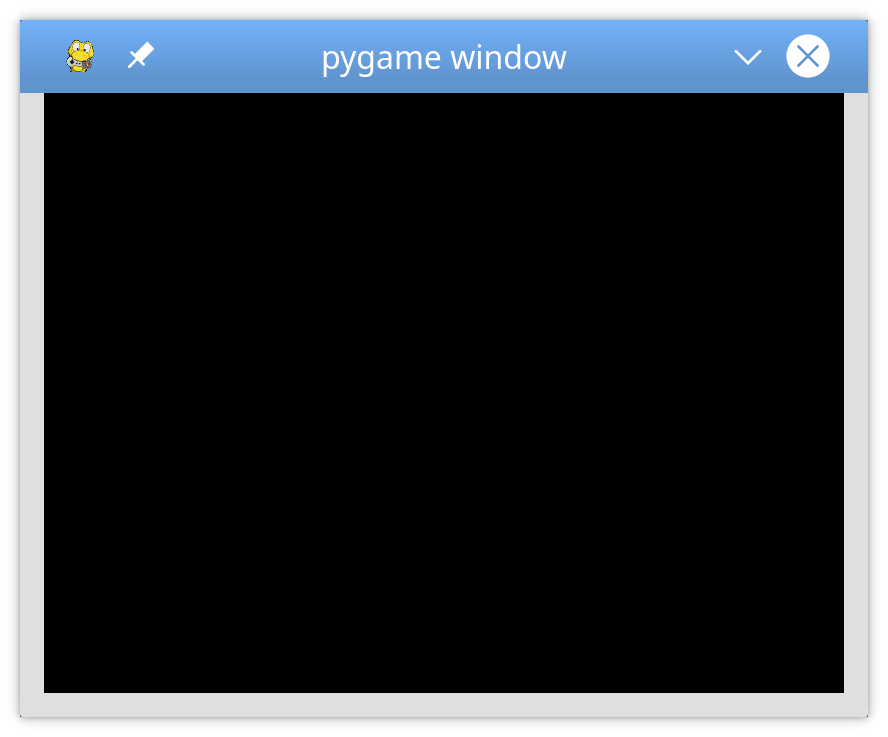
The window won’t disappear until you press the Esc key, or otherwise trigger a QUIT event by closing the window.
Drawing on the Screen
In the sample program, you drew on the screen using two commands:
screen.fill()to fill the backgroundpygame.draw.circle()to draw a circle
Now you’ll learn about a third way to draw to the screen: using a Surface.
Recall that a Surface is a rectangular object on which you can draw, like a blank sheet of paper. The screen object is a Surface, and you can create your own Surface objects separate from the display screen. Let’s see how that works:
44# Fill the screen with white
45screen.fill((255, 255, 255))
46
47# Create a surface and pass in a tuple containing its length and width
48surf = pygame.Surface((50, 50))
49
50# Give the surface a color to separate it from the background
51surf.fill((0, 0, 0))
52rect = surf.get_rect()
After the screen is filled with white on line 45, a new Surface is created on line 48. This Surface is 50 pixels wide, 50 pixels tall, and assigned to surf. At this point, you treat it just like the screen. So on line, 51 you fill it with black. You can also access its underlying Rect using .get_rect(). This is stored as rect for later use.
Using .blit() and .flip()
Just creating a new Surface isn’t enough to see it on the screen. To do that, you need to blit the Surface onto another Surface. The term blit stands for Block Transfer, and .blit() is how you copy the contents of one Surface to another. You can only .blit() from one Surface to another, but since the screen is just another Surface, that’s not a problem. Here’s how you draw surf on the screen:
54# This line says "Draw surf onto the screen at the center"
55screen.blit(surf, (SCREEN_WIDTH/2, SCREEN_HEIGHT/2))
56pygame.display.flip()
The .blit() call on line 55 takes two arguments:
- The
Surfaceto draw - The location at which to draw it on the source
Surface
The coordinates (SCREEN_WIDTH/2, SCREEN_HEIGHT/2) tell your program to place surf in the exact center of the screen, but it doesn’t quite look that way:
The reason why the image looks off-center is that .blit() puts the top-left corner of surf at the location given. If you want surf to be centered, then you’ll have to do some math to shift it up and to the left. You can do this by subtracting the width and height of surf from the width and height of the screen, dividing each by 2 to locate the center, and then passing those numbers as arguments to screen.blit():
54# Put the center of surf at the center of the display
55surf_center = (
56    (SCREEN_WIDTH-surf.get_width())/2,
57    (SCREEN_HEIGHT-surf.get_height())/2
58)
59
60# Draw surf at the new coordinates
61screen.blit(surf, surf_center)
62pygame.display.flip()
Notice the call to pygame.display.flip() after the call to blit(). This updates the entire screen with everything that’s been drawn since the last flip. Without the call to .flip(), nothing is shown.
Sprites
In your game design, the player starts on the left, and obstacles come in from the right. You can represent all the obstacles with Surface objects to make drawing everything easier, but how do you know where to draw them? How do you know if an obstacle has collided with the player? What happens when the obstacle flies off the screen? What if you want to draw background images that also move? What if you want your images to be animated? You can handle all these situations and more with sprites.
In programming terms, a sprite is a 2D representation of something on the screen. Essentially, it’s a picture. pygame provides a Sprite class, which is designed to hold one or several graphical representations of any game object that you want to display on the screen. To use it, you create a new class that extends Sprite. This allows you to use its built-in methods.
Players
Here’s how you use Sprite objects with the current game to define the player. Insert this code after line 18:
20# Define a Player object by extending pygame.sprite.Sprite
21# The surface drawn on the screen is now an attribute of 'player'
22class Player(pygame.sprite.Sprite):
23    def __init__(self):
24        super(Player, self).__init__()
25        self.surf = pygame.Surface((75, 25))
26        self.surf.fill((255, 255, 255))
27        self.rect = self.surf.get_rect()
You first define Player by extending pygame.sprite.Sprite on line 22. Then .__init__() uses .super() to call the .__init__() method of Sprite. For more info on why this is necessary, you can read Supercharge Your Classes With Python super().
Next, you define and initialize .surf to hold the image to display, which is currently a white box. You also define and initialize .rect, which you’ll use to draw the player later. To use this new class, you need to create a new object and change the drawing code as well. Expand the code block below to see it all together:
 1# Import the pygame module
 2import pygame
 3
 4# Import pygame.locals for easier access to key coordinates
 5# Updated to conform to flake8 and black standards
 6from pygame.locals import (
 7    K_UP,
 8    K_DOWN,
 9    K_LEFT,
10    K_RIGHT,
11    K_ESCAPE,
12    KEYDOWN,
13    QUIT,
14)
15
16# Define constants for the screen width and height
17SCREEN_WIDTH = 800
18SCREEN_HEIGHT = 600
19
20# Define a player object by extending pygame.sprite.Sprite
21# The surface drawn on the screen is now an attribute of 'player'
22class Player(pygame.sprite.Sprite):
23    def __init__(self):
24        super(Player, self).__init__()
25        self.surf = pygame.Surface((75, 25))
26        self.surf.fill((255, 255, 255))
27        self.rect = self.surf.get_rect()
28
29# Initialize pygame
30pygame.init()
31
32# Create the screen object
33# The size is determined by the constant SCREEN_WIDTH and SCREEN_HEIGHT
34screen = pygame.display.set_mode((SCREEN_WIDTH, SCREEN_HEIGHT))
35
36# Instantiate player. Right now, this is just a rectangle.
37player = Player()
38
39# Variable to keep the main loop running
40running = True
41
42# Main loop
43while running:
44    # for loop through the event queue
45    for event in pygame.event.get():
46        # Check for KEYDOWN event
47        if event.type == KEYDOWN:
48            # If the Esc key is pressed, then exit the main loop
49            if event.key == K_ESCAPE:
50                running = False
51        # Check for QUIT event. If QUIT, then set running to false.
52        elif event.type == QUIT:
53            running = False
54
55    # Fill the screen with black
56    screen.fill((0, 0, 0))
57
58    # Draw the player on the screen
59    screen.blit(player.surf, (SCREEN_WIDTH/2, SCREEN_HEIGHT/2))
60
61    # Update the display
62    pygame.display.flip()
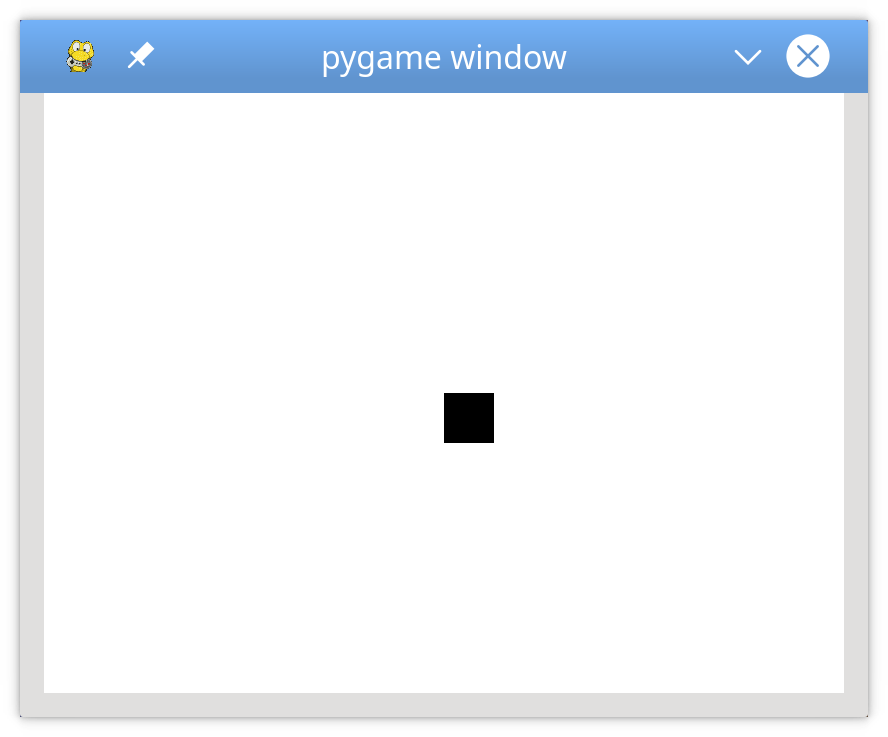
Run this code. You’ll see a white rectangle at roughly the middle of the screen:
What do you think would happen if you changed line 59 to screen.blit(player.surf, player.rect)? Try it and see:
55# Fill the screen with black
56screen.fill((0, 0, 0))
57
58# Draw the player on the screen
59screen.blit(player.surf, player.rect)
60
61# Update the display
62pygame.display.flip()
When you pass a Rect to .blit(), it uses the coordinates of the top left corner to draw the surface. You’ll use this later to make your player move!
User Input
So far, you’ve learned how to set up pygame and draw objects on the screen. Now, the real fun starts! You’ll make the player controllable using the keyboard.
Earlier, you saw that pygame.event.get() returns a list of the events in the event queue, which you scan for KEYDOWN event types. Well, that’s not the only way to read keypresses. pygame also provides pygame.event.get_pressed(), which returns a dictionary containing all the current KEYDOWN events in the queue.
Put this in your game loop right after the event handling loop. This returns a dictionary containing the keys pressed at the beginning of every frame:
54# Get the set of keys pressed and check for user input
55pressed_keys = pygame.key.get_pressed()
Next, you write a method in Player to accepts that dictionary. This will define the behavior of the sprite based off the keys that are pressed. Here’s what that might look like:
29# Move the sprite based on user keypresses
30def update(self, pressed_keys):
31    if pressed_keys[K_UP]:
32        self.rect.move_ip(0, -5)
33    if pressed_keys[K_DOWN]:
34        self.rect.move_ip(0, 5)
35    if pressed_keys[K_LEFT]:
36        self.rect.move_ip(-5, 0)
37    if pressed_keys[K_RIGHT]:
38        self.rect.move_ip(5, 0)
K_UP, K_DOWN, K_LEFT, and K_RIGHT correspond to the arrow keys on the keyboard. If the dictionary entry for that key is True, then that key is down, and you move the player .rect in the proper direction. Here you use .move_ip(), which stands for move in place, to move the current Rect.
Then you can call .update() every frame to move the player sprite in response to keypresses. Add this call right after the call to .get_pressed():
52# Main loop
53while running:
54    # for loop through the event queue
55    for event in pygame.event.get():
56        # Check for KEYDOWN event
57        if event.type == KEYDOWN:
58            # If the Esc key is pressed, then exit the main loop
59            if event.key == K_ESCAPE:
60                running = False
61        # Check for QUIT event. If QUIT, then set running to false.
62        elif event.type == QUIT:
63            running = False
64
65    # Get all the keys currently pressed
66    pressed_keys = pygame.key.get_pressed()
67
68    # Update the player sprite based on user keypresses
69    player.update(pressed_keys)
70
71    # Fill the screen with black
72    screen.fill((0, 0, 0))
Now you can move your player rectangle around the screen with the arrow keys:
You may notice two small problems:
- The player rectangle can move very fast if a key is held down. You’ll work on that later.
- The player rectangle can move off the screen. Let’s solve that one now.
To keep the player on the screen, you need to add some logic to detect if the rect is going to move off screen. To do that, you check whether the rect coordinates have moved beyond the screen’s boundary. If so, then you instruct the program to move it back to the edge:
25# Move the sprite based on user keypresses
26def update(self, pressed_keys):
27    if pressed_keys[K_UP]:
28        self.rect.move_ip(0, -5)
29    if pressed_keys[K_DOWN]:
30        self.rect.move_ip(0, 5)
31    if pressed_keys[K_LEFT]:
32        self.rect.move_ip(-5, 0)
33    if pressed_keys[K_RIGHT]:
34        self.rect.move_ip(5, 0)
35
36    # Keep player on the screen
37    if self.rect.left < 0:
38        self.rect.left = 0
39    if self.rect.right > SCREEN_WIDTH:
40        self.rect.right = SCREEN_WIDTH
41    if self.rect.top <= 0:
42        self.rect.top = 0
43    if self.rect.bottom >= SCREEN_HEIGHT:
44        self.rect.bottom = SCREEN_HEIGHT
Here, instead of using .move(), you just change the corresponding coordinates of .top, .bottom, .left, or .right directly. Test this, and you’ll find the player rectangle can no longer move off the screen.
Now let’s add some enemies!
Enemies
What’s a game without enemies? You’ll use the techniques you’ve already learned to create a basic enemy class, then create a lot of them for your player to avoid. First, import the random library:
 4# Import random for random numbers
 5import random
Then create a new sprite class called Enemy, following the same pattern you used for Player:
55# Define the enemy object by extending pygame.sprite.Sprite
56# The surface you draw on the screen is now an attribute of 'enemy'
57class Enemy(pygame.sprite.Sprite):
58    def __init__(self):
59        super(Enemy, self).__init__()
60        self.surf = pygame.Surface((20, 10))
61        self.surf.fill((255, 255, 255))
62        self.rect = self.surf.get_rect(
63            center=(
64                random.randint(SCREEN_WIDTH + 20, SCREEN_WIDTH + 100),
65                random.randint(0, SCREEN_HEIGHT),
66            )
67        )
68        self.speed = random.randint(5, 20)
69
70    # Move the sprite based on speed
71    # Remove the sprite when it passes the left edge of the screen
72    def update(self):
73        self.rect.move_ip(-self.speed, 0)
74        if self.rect.right < 0:
75            self.kill()
There are four notable differences between Enemy and Player:
-
On lines 62 to 67, you update
rectto be a random location along the right edge of the screen. The center of the rectangle is just off the screen. It’s located at some position between 20 and 100 pixels away from the right edge, and somewhere between the top and bottom edges. -
On line 68, you define
.speedas a random number between 5 and 20. This specifies how fast this enemy moves towards the player. -
On lines 73 to 76, you define
.update(). It takes no arguments since enemies move automatically. Instead,.update()moves the enemy toward the left side of the screen at the.speeddefined when it was created. -
On line 74, you check whether the enemy has moved off-screen. To make sure the
Enemyis fully off the screen and won’t just disappear while it’s still visible, you check that the right side of the.recthas gone past the left side of the screen. Once the enemy is off-screen, you call.kill()to prevent it from being processed further.
So, what does .kill() do? To figure this out, you have to know about Sprite Groups.
Sprite Groups
Another super useful class that pygame provides is the Sprite Group. This is an object that holds a group of Sprite objects. So why use it? Can’t you just track your Sprite objects in a list instead? Well, you can, but the advantage of using a Group lies in the methods it exposes. These methods help to detect whether any Enemy has collided with the Player, which makes updates much easier.
Let’s see how to create sprite groups. You’ll create two different Group objects:
- The first
Groupwill hold everySpritein the game. - The second
Groupwill hold just theEnemyobjects.
Here’s what that looks like in code:
82# Create the 'player'
83player = Player()
84
85# Create groups to hold enemy sprites and all sprites
86# - enemies is used for collision detection and position updates
87# - all_sprites is used for rendering
88enemies = pygame.sprite.Group()
89all_sprites = pygame.sprite.Group()
90all_sprites.add(player)
91
92# Variable to keep the main loop running
93running = True
When you call .kill(), the Sprite is removed from every Group to which it belongs. This removes the references to the Sprite as well, which allows Python’s garbage collector to reclaim the memory as necessary.
Now that you have an all_sprites group, you can change how objects are drawn. Instead of calling .blit() on just Player, you can iterate over everything in all_sprites:
117# Fill the screen with black
118screen.fill((0, 0, 0))
119
120# Draw all sprites
121for entity in all_sprites:
122    screen.blit(entity.surf, entity.rect)
123
124# Flip everything to the display
125pygame.display.flip()
Now, anything put into all_sprites will be drawn with every frame, whether it’s an enemy or the player.
There’s just one problem… You don’t have any enemies! You could create a bunch of enemies at the beginning of the game, but the game would quickly become boring when they all left the screen a few seconds later. Instead, let’s explore how to keep a steady supply of enemies coming as the game progresses.
Custom Events
The design calls for enemies to appear at regular intervals. This means that at set intervals, you need to do two things:
- Create a new
Enemy. - Add it to
all_spritesandenemies.
You already have code that handles random events. The event loop is designed to look for random events occurring every frame and deal with them appropriately. Luckily, pygame doesn’t restrict you to using only the event types it has defined. You can define your own events to handle as you see fit.
Let’s see how to create a custom event that’s generated every few seconds. You can create a custom event by naming it:
78# Create the screen object
79# The size is determined by the constant SCREEN_WIDTH and SCREEN_HEIGHT
80screen = pygame.display.set_mode((SCREEN_WIDTH, SCREEN_HEIGHT))
81
82# Create a custom event for adding a new enemy
83ADDENEMY = pygame.USEREVENT + 1
84pygame.time.set_timer(ADDENEMY, 250)
85
86# Instantiate player. Right now, this is just a rectangle.
87player = Player()
pygame defines events internally as integers, so you need to define a new event with a unique integer. The last event pygame reserves is called USEREVENT, so defining ADDENEMY = pygame.USEREVENT + 1 on line 83 ensures it’s unique.
Next, you need to insert this new event into the event queue at regular intervals throughout the game. That’s where the time module comes in. Line 84 fires the new ADDENEMY event every 250 milliseconds, or four times per second. You call .set_timer() outside the game loop since you only need one timer, but it will fire throughout the entire game.
Add the code to handle your new event:
100# Main loop
101while running:
102    # Look at every event in the queue
103    for event in pygame.event.get():
104        # Did the user hit a key?
105        if event.type == KEYDOWN:
106            # Was it the Escape key? If so, stop the loop.
107            if event.key == K_ESCAPE:
108                running = False
109
110        # Did the user click the window close button? If so, stop the loop.
111        elif event.type == QUIT:
112            running = False
113
114        # Add a new enemy?
115        elif event.type == ADDENEMY:
116            # Create the new enemy and add it to sprite groups
117            new_enemy = Enemy()
118            enemies.add(new_enemy)
119            all_sprites.add(new_enemy)
120
121    # Get the set of keys pressed and check for user input
122    pressed_keys = pygame.key.get_pressed()
123    player.update(pressed_keys)
124
125    # Update enemy position
126    enemies.update()
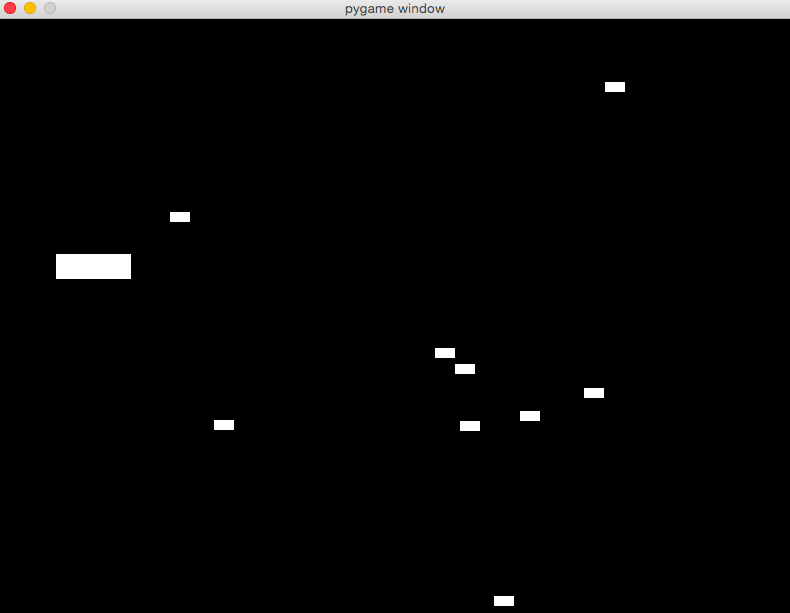
Whenever the event handler sees the new ADDENEMY event on line 115, it creates an Enemy and adds it to enemies and all_sprites. Since Enemy is in all_sprites, it will get drawn every frame. You also need to call enemies.update() on line 126, which updates everything in enemies, to ensure they move properly:
However, that’s not the only reason there’s a group for just enemies.
Collision Detection
Your game design calls for the game to end whenever an enemy collides with the player. Checking for collisions is a basic technique of game programming, and usually requires some non-trivial math to determine whether two sprites will overlap each other.
This is where a framework like pygame comes in handy! Writing collision detection code is tedious, but pygame has a LOT of collision detection methods available for you to use.
For this tutorial, you’ll use a method called .spritecollideany(), which is read as “sprite collide any.” This method accepts a Sprite and a Group as parameters. It looks at every object in the Group and checks if its .rect intersects with the .rect of the Sprite. If so, then it returns True. Otherwise, it returns False. This is perfect for this game since you need to check if the single player collides with one of a Group of enemies.
Here’s what that looks like in code:
130# Draw all sprites
131for entity in all_sprites:
132    screen.blit(entity.surf, entity.rect)
133
134# Check if any enemies have collided with the player
135if pygame.sprite.spritecollideany(player, enemies):
136    # If so, then remove the player and stop the loop
137    player.kill()
138    running = False
Line 135 tests whether player has collided with any of the objects in enemies. If so, then player.kill() is called to remove it from every group to which it belongs. Since the only objects being rendered are in all_sprites, the player will no longer be rendered. Once the player has been killed, you need to exit the game as well, so you set running = False to break out of the game loop on line 138.
At this point, you’ve got the basic elements of a game in place:
Now, let’s dress it up a bit, make it more playable, and add some advanced capabilities to help it stand out.
Sprite Images
Alright, you have a game, but let’s be honest… It’s kind of ugly. The player and enemies are just white blocks on a black background. That was state-of-the-art when Pong was new, but it just doesn’t cut it anymore. Let’s replace all those boring white rectangles with some cooler images that will make the game feel like an actual game.
Earlier, you learned that images on disk can be loaded into a Surface with some help from the image module. For this tutorial, we made a little jet for the player and some missiles for the enemies. You’re welcome to use this art, draw your own, or download some free game art assets to use. You can click the link below to download the art used in this tutorial:
Sample Code: Click here to download the source code for the PyGame sample project used in this tutorial.
Altering the Object Constructors
Before you use images to represent the player and enemy sprites, you need to make some changes to their constructors. The code below replaces the code used previously:
 7# Import pygame.locals for easier access to key coordinates
 8# Updated to conform to flake8 and black standards
 9# from pygame.locals import *
10from pygame.locals import (
11    RLEACCEL,
12    K_UP,
13    K_DOWN,
14    K_LEFT,
15    K_RIGHT,
16    K_ESCAPE,
17    KEYDOWN,
18    QUIT,
19)
20
21# Define constants for the screen width and height
22SCREEN_WIDTH = 800
23SCREEN_HEIGHT = 600
24
25
26# Define the Player object by extending pygame.sprite.Sprite
27# Instead of a surface, use an image for a better-looking sprite
28class Player(pygame.sprite.Sprite):
29    def __init__(self):
30        super(Player, self).__init__()
31        self.surf = pygame.image.load("jet.png").convert()
32        self.surf.set_colorkey((255, 255, 255), RLEACCEL)
33        self.rect = self.surf.get_rect()
Let’s unpack line 31 a bit. pygame.image.load() loads an image from the disk. You pass it a path to the file. It returns a Surface, and the .convert() call optimizes the Surface, making future .blit() calls faster.
Line 32 uses .set_colorkey() to indicate the color pygame will render as transparent. In this case, you choose white, because that’s the background color of the jet image. The RLEACCEL constant is an optional parameter that helps pygame render more quickly on non-accelerated displays. This is added to the pygame.locals import statement on line 11.
Nothing else needs to change. The image is still a Surface, except now it has a picture painted on it. You still use it in the same way.
Here’s what similar changes to the Enemy look like:
59# Define the enemy object by extending pygame.sprite.Sprite
60# Instead of a surface, use an image for a better-looking sprite
61class Enemy(pygame.sprite.Sprite):
62    def __init__(self):
63        super(Enemy, self).__init__()
64        self.surf = pygame.image.load("missile.png").convert()
65        self.surf.set_colorkey((255, 255, 255), RLEACCEL)
66        # The starting position is randomly generated, as is the speed
67        self.rect = self.surf.get_rect(
68            center=(
69                random.randint(SCREEN_WIDTH + 20, SCREEN_WIDTH + 100),
70                random.randint(0, SCREEN_HEIGHT),
71            )
72        )
73        self.speed = random.randint(5, 20)
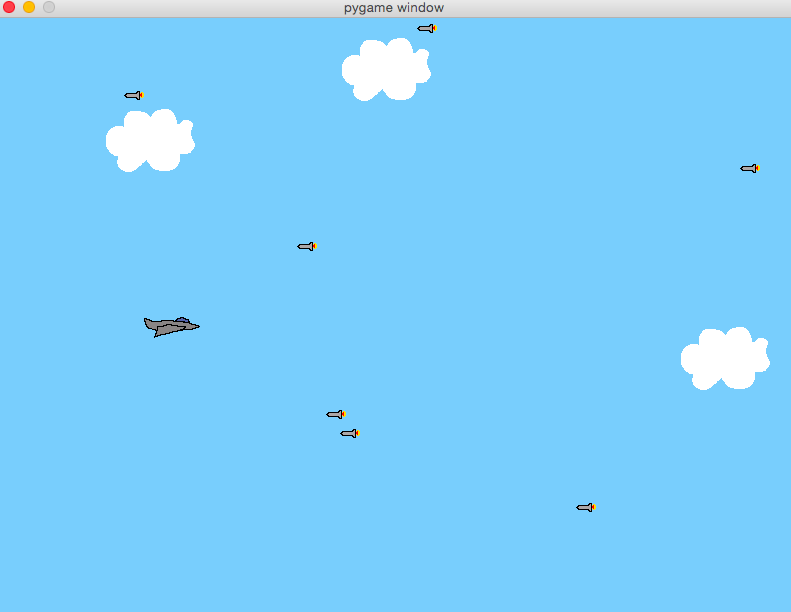
Running the program now should show that this is the same game you had before, except now you’ve added some nice graphics skins with images. But why stop at just making the player and enemy sprites look nice? Let’s add a few clouds going past to give the impression of a jet flying through the sky.
Adding Background Images
For background clouds, you use the same principles as you did for Player and Enemy:
- Create the
Cloudclass. - Add an image of a cloud to it.
- Create a method
.update()that moves thecloudtoward the left side of the screen. - Create a custom event and handler to create new
cloudobjects at a set time interval. - Add the newly created
cloudobjects to a newGroupcalledclouds. - Update and draw the
cloudsin your game loop.
Here’s what Cloud looks like:
 83# Define the cloud object by extending pygame.sprite.Sprite
 84# Use an image for a better-looking sprite
 85class Cloud(pygame.sprite.Sprite):
 86    def __init__(self):
 87        super(Cloud, self).__init__()
 88        self.surf = pygame.image.load("cloud.png").convert()
 89        self.surf.set_colorkey((0, 0, 0), RLEACCEL)
 90        # The starting position is randomly generated
 91        self.rect = self.surf.get_rect(
 92            center=(
 93                random.randint(SCREEN_WIDTH + 20, SCREEN_WIDTH + 100),
 94                random.randint(0, SCREEN_HEIGHT),
 95            )
 96        )
 97
 98    # Move the cloud based on a constant speed
 99    # Remove the cloud when it passes the left edge of the screen
100    def update(self):
101        self.rect.move_ip(-5, 0)
102        if self.rect.right < 0:
103            self.kill()
That should all look very familiar. It’s pretty much the same as Enemy.
To have clouds appear at certain intervals, you’ll use event creation code similar to what you used to create new enemies. Put it right below the enemy creation event:
116# Create custom events for adding a new enemy and a cloud
117ADDENEMY = pygame.USEREVENT + 1
118pygame.time.set_timer(ADDENEMY, 250)
119ADDCLOUD = pygame.USEREVENT + 2
120pygame.time.set_timer(ADDCLOUD, 1000)
This says to wait 1000 milliseconds, or one second, before creating the next cloud.
Next, create a new Group to hold each newly created cloud:
125# Create groups to hold enemy sprites, cloud sprites, and all sprites
126# - enemies is used for collision detection and position updates
127# - clouds is used for position updates
128# - all_sprites is used for rendering
129enemies = pygame.sprite.Group()
130clouds = pygame.sprite.Group()
131all_sprites = pygame.sprite.Group()
132all_sprites.add(player)
Next, add a handler for the new ADDCLOUD event in the event handler:
137# Main loop
138while running:
139    # Look at every event in the queue
140    for event in pygame.event.get():
141        # Did the user hit a key?
142        if event.type == KEYDOWN:
143            # Was it the Escape key? If so, then stop the loop.
144            if event.key == K_ESCAPE:
145                running = False
146
147        # Did the user click the window close button? If so, stop the loop.
148        elif event.type == QUIT:
149            running = False
150
151        # Add a new enemy?
152        elif event.type == ADDENEMY:
153            # Create the new enemy and add it to sprite groups
154            new_enemy = Enemy()
155            enemies.add(new_enemy)
156            all_sprites.add(new_enemy)
157
158        # Add a new cloud?
159        elif event.type == ADDCLOUD:
160            # Create the new cloud and add it to sprite groups
161            new_cloud = Cloud()
162            clouds.add(new_cloud)
163            all_sprites.add(new_cloud)
Finally, make sure the clouds are updated every frame:
167# Update the position of enemies and clouds
168enemies.update()
169clouds.update()
170
171# Fill the screen with sky blue
172screen.fill((135, 206, 250))
Line 172 updates the original screen.fill() to fill the screen with a pleasant sky blue color. You can change this color to something else. Maybe you want an alien world with a purple sky, a toxic wasteland in neon green, or the surface of Mars in red!
Note that each new Cloud and Enemy are added to all_sprites as well as clouds and enemies. This is done because each group is used for a separate purpose:
- Rendering is done using
all_sprites. - Position updates are done using
cloudsandenemies. - Collision detection is done using
enemies.
You create multiple groups so that you can change the way sprites move or behave without impacting the movement or behavior of other sprites.
Game Speed
While testing the game you may have noticed that the enemies move a little fast. If not, then that’s okay, as different machines will see different results at this point.
The reason for this is that the game loop processes frames as fast as the processor and environment will allow. Since all the sprites move once per frame, they can move hundreds of times each second. The number of frames handled each second is called the frame rate, and getting this right is the difference between a playable game and a forgettable one.
Normally, you want as high a frame rate as possible, but for this game, you need to slow it down a bit for the game to be playable. Fortunately, the module time contains a Clock which is designed exactly for this purpose.
Using Clock to establish a playable frame rate requires just two lines of code. The first creates a new Clock before the game loop begins:
106# Setup the clock for a decent framerate
107clock = pygame.time.Clock()
The second calls .tick() to inform pygame that the program has reached the end of the frame:
188# Flip everything to the display
189pygame.display.flip()
190
191# Ensure program maintains a rate of 30 frames per second
192clock.tick(30)
The argument passed to .tick() establishes the desired frame rate. To do this, .tick() calculates the number of milliseconds each frame should take, based on the desired frame rate. Then, it compares that number to the number of milliseconds that have passed since the last time .tick() was called. If not enough time has passed, then .tick() delays processing to ensure that it never exceeds the specified frame rate.
Passing in a smaller frame rate will result in more time in each frame for calculations, while a larger frame rate provides smoother (and possibly faster) gameplay:
Play around with this number to see what feels best for you!
Sound Effects
So far, you’ve focused on gameplay and the visual aspects of your game. Now let’s explore giving your game some auditory flavor as well. pygame provides mixer to handle all sound-related activities. You’ll use this module’s classes and methods to provide background music and sound effects for various actions.
The name mixer refers to the fact that the module mixes various sounds into a cohesive whole. Using the music sub-module, you can stream individual sound files in a variety of formats, such as MP3, Ogg, and Mod. You can also use Sound to hold a single sound effect to be played, in either Ogg or uncompressed WAV formats. All playback happens in the background, so when you play a Sound, the method returns immediately as the sound plays.
Note: The pygame documentation states that MP3 support is limited, and unsupported formats can cause system crashes. The sounds referenced in this article have been tested, and we recommend testing any sounds thoroughly before releasing your game.
As with most things pygame, using mixer starts with an initialization step. Luckily, this is already handled by pygame.init(). You only need to call pygame.mixer.init() if you want to change the defaults:
106# Setup for sounds. Defaults are good.
107pygame.mixer.init()
108
109# Initialize pygame
110pygame.init()
111
112# Set up the clock for a decent framerate
113clock = pygame.time.Clock()
pygame.mixer.init() accepts a number of arguments, but the defaults work fine in most cases. Note that if you want to change the defaults, you need to call pygame.mixer.init() before calling pygame.init(). Otherwise, the defaults will be in effect regardless of your changes.
After the system is initialized, you can get your sounds and background music setup:
135# Load and play background music
136# Sound source: http://ccmixter.org/files/Apoxode/59262
137# License: https://creativecommons.org/licenses/by/3.0/
138pygame.mixer.music.load("Apoxode_-_Electric_1.mp3")
139pygame.mixer.music.play(loops=-1)
140
141# Load all sound files
142# Sound sources: Jon Fincher
143move_up_sound = pygame.mixer.Sound("Rising_putter.ogg")
144move_down_sound = pygame.mixer.Sound("Falling_putter.ogg")
145collision_sound = pygame.mixer.Sound("Collision.ogg")
Lines 138 and 139 load a background sound clip and begin playing it. You can tell the sound clip to loop and never end by setting the named parameter loops=-1.
Lines 143 to 145 load three sounds you’ll use for various sound effects. The first two are rising and falling sounds, which are played when the player moves up or down. The last is the sound used whenever there is a collision. You can add other sounds as well, such as a sound for whenever an Enemy is created, or a final sound for when the game ends.
So, how do you use the sound effects? You want to play each sound when a certain event occurs. For example, when the ship moves up, you want to play move_up_sound. Therefore, you add a call to .play() whenever you handle that event. In the design, that means adding the following calls to .update() for Player:
26# Define the Player object by extending pygame.sprite.Sprite
27# Instead of a surface, use an image for a better-looking sprite
28class Player(pygame.sprite.Sprite):
29    def __init__(self):
30        super(Player, self).__init__()
31        self.surf = pygame.image.load("jet.png").convert()
32        self.surf.set_colorkey((255, 255, 255), RLEACCEL)
33        self.rect = self.surf.get_rect()
34
35    # Move the sprite based on keypresses
36    def update(self, pressed_keys):
37        if pressed_keys[K_UP]:
38            self.rect.move_ip(0, -5)
39            move_up_sound.play()
40        if pressed_keys[K_DOWN]:
41            self.rect.move_ip(0, 5)
42            move_down_sound.play()
For a collision between the player and an enemy, you play the sound for when collisions are detected:
201# Check if any enemies have collided with the player
202if pygame.sprite.spritecollideany(player, enemies):
203    # If so, then remove the player
204    player.kill()
205
206    # Stop any moving sounds and play the collision sound
207    move_up_sound.stop()
208    move_down_sound.stop()
209    collision_sound.play()
210
211    # Stop the loop
212    running = False
Here, you stop any other sound effects first, because in a collision the player is no longer moving. Then you play the collision sound and continue execution from there.
Finally, when the game is over, all sounds should stop. This is true whether the game ends due to a collision or the user exits manually. To do this, add the following lines at the end of the program after the loop:
220# All done! Stop and quit the mixer.
221pygame.mixer.music.stop()
222pygame.mixer.quit()
Technically, these last few lines are not required, as the program ends right after this. However, if you decide later on to add an intro screen or an exit screen to your game, then there may be more code running after the game ends.
That’s it! Test it again, and you should see something like this:
A Note on Sources
You may have noticed the comment on lines 136-137 when the background music was loaded, listing the source of the music and a link to the Creative Commons license. This was done because the creator of that sound required it. The license requirements stated that in order to use the sound, both proper attribution and a link to the license must be provided.
Here are some sources for music, sound, and art that you can search for useful content:
- OpenGameArt.org: sounds, sound effects, sprites, and other artwork
- Kenney.nl: sounds, sound effects, sprites, and other artwork
- Gamer Art 2D: sprites and other artwork
- CC Mixter: sounds and sound effects
- Freesound: sounds and sound effects
As you make your games and use downloaded content such as art, music, or code from other sources, please be sure that you are complying with the licensing terms of those sources.
Conclusion
Throughout this tutorial, you’ve learned how game programming with pygame differs from standard procedural programming. You’ve also learned how to:
- Implement event loops
- Draw items on the screen
- Play sound effects and music
- Handle user input
To do this, you used a subset of the pygame modules, including the display, mixer and music, time, image, event, and key modules. You also used several pygame classes, including Rect, Surface, Sound, and Sprite. But these only scratch the surface of what pygame can do! Check out the official pygame documentation for a full list of available modules and classes.
You can find all of the code, graphics, and sound files for this article by clicking the link below:
Sample Code: Click here to download the source code for the PyGame sample project used in this tutorial.
Feel free to leave comments below as well. Happy Pythoning!