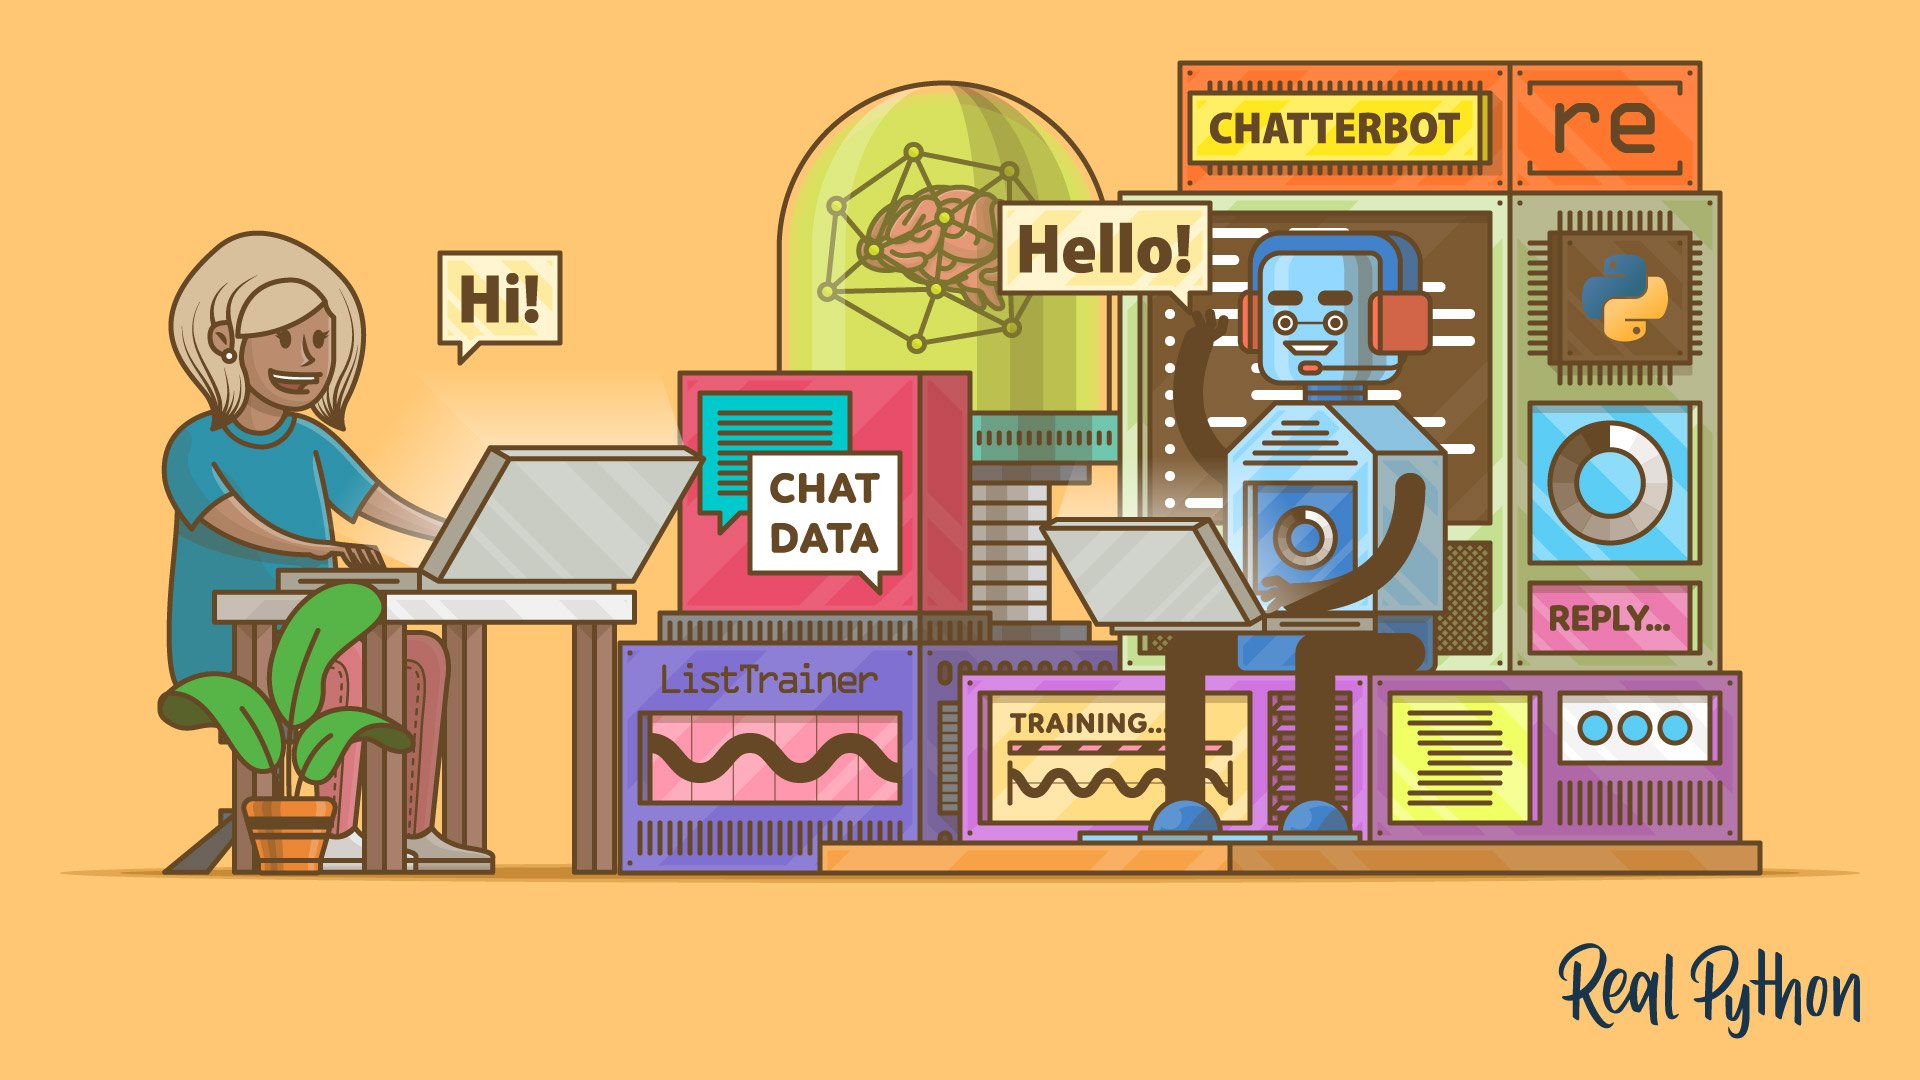
The Python ChatterBot library lets you build a self-learning command-line chatbot with just a few lines of code. You’ll set up a basic bot, clean real WhatsApp conversation data with regular expressions, and train your chatbot on that custom corpus. You’ll also plug in a local LLM through Ollama to augment its replies with contextual knowledge.
By the end of this tutorial, you’ll understand that:
- ChatterBot is a Python library that combines text processing, machine learning, and a local database to generate chatbot replies.
- A minimal ChatterBot script instantiates
ChatBot, collects user input in a loop, and returns matching responses through.get_response(). - Training with
ListTrainerand default settings stores conversation pairs in a SQLite database that ChatterBot queries with Levenshtein distance to pick each reply. - ChatterBot can call a local LLM through
OllamaLogicAdapter, voting against other logic adapters with a confidence score. - ChatterBot was revived in 2025 with spaCy-based NLP, CSV and JSON trainers, and experimental LLM support.
Along the way, you’ll move from a potted plant that can only echo hello to a chatbot that chats knowledgeably about houseplants. You can follow along with your own WhatsApp export or grab the provided sample data below.
Get Your Code: Click here to download the free sample code that you’ll use to build a chatbot with Python’s Chatterbot.
Take the Quiz: Test your knowledge with our interactive “ChatterBot: Build a Chatbot With Python” quiz. You’ll receive a score upon completion to help you track your learning progress:
Interactive Quiz
ChatterBot: Build a Chatbot With PythonTest your understanding of the ChatterBot Python library, from training a basic bot with ListTrainer to wiring in a local LLM through Ollama.
Preview the Chatbot
At the end of this tutorial, you’ll have a command-line chatbot that can respond to your inputs with semi-meaningful replies:

You’ll achieve that by preparing WhatsApp chat data and using it to train the chatbot. Beyond learning from your automated training, the chatbot will improve over time as it gets more exposure to questions and replies from user interactions.
Project Overview
The ChatterBot library combines text processing, machine learning algorithms, and data storage and retrieval to allow you to build flexible chatbots.
You can build an industry-specific chatbot by training it with relevant data. Additionally, the chatbot will remember user responses and continue building its internal graph structure to improve the responses that it can give.
Note: After a long hiatus, ChatterBot was revived in early 2025 with support for modern Python, new training formats for CSV and JSON data, and even experimental LLM integration. Under the hood, ChatterBot now uses spaCy for language processing, which gives it a more robust NLP pipeline than before.
If you want to develop an LLM-first chatbot, Real Python’s LLM Application Development With Python learning path takes you through the concepts and libraries step by step:
Learning Path
LLM Application Development With Python
13 Resources ⋅ Skills: OpenAI, Ollama, OpenRouter, Prompt Engineering, LangChain, LlamaIndex, ChromaDB, MarkItDown, RAG, Embeddings, Pydantic AI, LangGraph, MCP
In this tutorial, you’ll start with an untrained chatbot that’ll showcase how quickly you can create an interactive chatbot using Python’s ChatterBot. You’ll also notice how small the vocabulary of an untrained chatbot is.
Next, you’ll learn how you can train such a chatbot and check on the slightly improved results. The more plentiful and high-quality your training data is, the better your chatbot’s responses will be.
Therefore, you’ll either fetch the conversation history of one of your WhatsApp chats or use the provided chat.txt file that you can download here:
Get Your Code: Click here to download the free sample code that you’ll use to build a chatbot with Python’s Chatterbot.
It’s rare that input data comes exactly in the form you need, so you’ll clean the chat export data to get it into a useful input format. This process will show you some tools you can use for data cleaning, which may help you prepare other input data to feed to your chatbot.
After data cleaning, you’ll retrain your chatbot and give it another spin to experience the improved performance. Finally, you’ll hook a local LLM into your chatbot to augment the variety and contextual relevance of its responses.
When you work through this process from start to finish, you’ll get a good idea of how you can build and train a Python chatbot with the ChatterBot library so that it can provide an interactive experience with relevant replies.
Prerequisites
Before you get started, make sure that you have Python 3.10 or later installed, which is the minimum Python version that ChatterBot supports. If you need help setting up Python, check out Python 3 Installation & Setup Guide.
Once you have a suitable Python version, you’re ready to get started. You’ll touch on a handful of Python concepts while working through the tutorial:
- Conditional statements
whileloops for iteration- Lists and tuples
- Python functions
- Substring checks and substring replacement
- File input/output
- Python comprehensions and generator expressions
- Regular expressions (regex) using
re
If you’re comfortable with these concepts, then you’ll probably be comfortable writing the code for this tutorial. If you don’t have all of the prerequisite knowledge before starting this tutorial, that’s okay! In fact, you might learn more by going ahead and getting started. You can always stop and review the resources linked here if you get stuck.
Step 1: Create a Chatbot Using Python ChatterBot
In this step, you’ll set up a virtual environment and install the necessary dependencies. You’ll also create a working command-line chatbot that can reply to you—but it won’t have interesting replies for you yet.
To get started with your chatbot project, create and activate a virtual environment, then install chatterbot:
$ python -m venv venv
$ source venv/bin/activate
(venv) $ python -m pip install chatterbot
Running this command in your terminal application installs ChatterBot and its dependencies into a new Python virtual environment.
After the installation is complete, running python -m pip freeze should bring up a list of installed dependencies that’s similar to what you can find in the provided sample code’s requirements.txt file:
Get Your Code: Click here to download the free sample code that you’ll use to build a chatbot with Python’s Chatterbot.
With the installation out of the way, you’re ready to get started! Create a new Python file, call it bot.py, and add the code that you need to get a basic chatbot up and running:
bot.py
 1from chatterbot import ChatBot
 2
 3chatbot = ChatBot("Chatpot")
 4
 5exit_conditions = (":q", "quit", "exit")
 6while True:
 7    query = input("> ")
 8    if query in exit_conditions:
 9        break
10    else:
11        print(f"🪴 {chatbot.get_response(query)}")
After importing ChatBot in line 1, you create an instance of ChatBot in line 3. The only required argument is a name, and you call this one "Chatpot". No, that’s not a typo—you’ll actually build a chatty flowerpot chatbot in this tutorial! You’ll soon notice that pots may not be the best conversation partners after all.
In line 6, you create a while loop that’ll keep looping until you enter one of the exit conditions defined in line 5. Finally, in line 11, you call .get_response() on the ChatBot instance that you created earlier and pass it the user input that you collected in line 7 and assigned to query.
The call to .get_response() in the final line of the short script is the only interaction with your chatbot. And yet—you have a functioning command-line chatbot that you can take for a spin.
When you run bot.py for the first time, ChatterBot may throw a descriptive error message, informing you that a spaCy language model that it uses for text processing is missing:
Traceback (most recent call last):

...

chatterbot.chatterbot.ChatBot.ChatBotException: Setup error:
The Spacy model for "English" language is missing.
Please install the model using the command:

python -m spacy download en_core_web_sm

See https://spacy.io/usage/models for more information about available models.
If you bump into this, then go ahead and run the suggested command to install the missing language model:
(venv) $ python -m spacy download en_core_web_sm
The command will print some information about the installation to your console. Python won’t download this data again during subsequent runs.
Once you’re ready to communicate with your freshly homegrown Chatpot, you can go ahead and run the Python file:
(venv) $ python bot.py
You’ll see the greater-than sign (>) that you defined in bot.py as your input prompt. You can now start to interact with your chatty pot:
> hello
🪴 hello
> are you a plant?
🪴 hello
> can you chat, pot?
🪴 hello
Your chat-pot is responding, but it’s really struggling to branch out. Tough to expect more from a potted plant—after all, it’s never gotten to see the world!
Note: On Windows PowerShell, the potted plant emoji (🪴) might not render correctly. Feel free to replace it with any other prompt you like.
Even if your chat-pot doesn’t have much to say yet, it’s already learning and growing. To test this out, stop the current session. You can do this by typing one of the exit conditions—":q", "quit", or "exit". Then start the chatbot again. Enter a different message, and you’ll notice that the chatbot remembers what you typed during the previous run:
> hi
🪴 hello
> what's up?
🪴 are you a plant?
During the first run, ChatterBot created a SQLite database file where it stored all your inputs and connected them with possible responses. There should be three new files that have popped up in your working directory:
./
├── bot.py
├── db.sqlite3
├── db.sqlite3-shm
└── db.sqlite3-wal
ChatterBot uses the default SQLStorageAdapter and creates a SQLite file database unless you specify a different storage adapter.
Note: The main database file is db.sqlite3, while the other two, ending with -wal and -shm, are temporary support files. They only exist during an active conversation session.
Because you said both hello and hi at the beginning of the chat, your chat-pot learned that it can use these messages interchangeably. That means if you chat a lot with your new chatbot, it’ll gradually have better replies for you. But improving its responses manually sounds like a long process!
Now that you’ve created a working command-line chatbot, you’ll learn how to train it so you can have slightly more interesting conversations.
Step 2: Begin Training Your Chatbot
In the previous step, you built a chatbot that you could interact with from your command line. The chatbot started from a clean slate and wasn’t very interesting to talk to.
In this step, you’ll train your chatbot using ListTrainer to make it a little smarter from the start. You’ll also learn about built-in trainers that come with ChatterBot, including their limitations.
Your chatbot doesn’t have to start from scratch, and ChatterBot provides you with a quick way to train your bot. You’ll use ChatterBot’s ListTrainer to provide some conversation samples that’ll give your chatbot more room to grow:
bot.py
 1from chatterbot import ChatBot
 2from chatterbot.trainers import ListTrainer
 3
 4chatbot = ChatBot("Chatpot")
 5
 6trainer = ListTrainer(chatbot)
 7trainer.train([
 8    "Hi",
 9    "Welcome, friend 🤗",
10])
11trainer.train([
12    "Are you a plant?",
13    "No, I'm the pot below the plant!",
14])
15
16exit_conditions = (":q", "quit", "exit")
17while True:
18    query = input("> ")
19    if query in exit_conditions:
20        break
21    else:
22        print(f"🪴 {chatbot.get_response(query)}")
In line 2, you import ListTrainer, to which you pass your chatbot on line 6 to create trainer.
In lines 7 to 10, you set up the first training round, where you pass a list of two strings to trainer.train(). Using .train() injects entries into your database to build upon the graph structure that ChatterBot uses to choose possible replies.
Note: If you pass an iterable with exactly two items to ListTrainer.train(), then ChatterBot considers the first item a statement and the second item an acceptable response.
You can run more than one training session, so in lines 11 to 14, you add another statement and another reply to your chatbot’s database.
If you now run the interactive chatbot once again using python bot.py, you can elicit somewhat different responses from it than before:
> hi
🪴 Welcome, friend 🤗
> hello
🪴 are you a plant?
> me?
🪴 are you a plant?
> yes
🪴 hi
> are you a plant?
🪴 No, I'm the pot below the plant!
> cool
🪴 Welcome, friend 🤗
The conversation isn’t yet fluent enough that you’d like to go on a second date, but there’s additional context that you didn’t have before! When you train your chatbot with more data, it’ll get better at responding to user inputs.
The ChatterBot library comes with some corpora that you can use to train your chatbot. You can use ChatterBotCorpusTrainer to train on these built-in datasets, and the corpus trainer now works smoothly with current Python versions.
ChatterBot also offers CsvFileTrainer and JsonFileTrainer for loading structured training data from files. If you have your conversation data in one of these formats, you can train your chatbot with just a few lines:
from chatterbot.trainers import JsonFileTrainer

# ...

trainer = JsonFileTrainer(chatbot)
trainer.train("./data/conversations.json")
While the provided corpora and file trainers might be enough for you, in this tutorial, you’ll go a different route and learn how to adapt your own conversational input data for training with ChatterBot’s ListTrainer.
To train your chatbot to respond to industry-relevant questions, you’ll probably need to work with custom data, for example, from existing support requests or chat logs from your company.
Moving forward, you’ll work through the steps of converting chat data from a WhatsApp conversation into a format that you can use to train your chatbot. If your own resource is WhatsApp conversation data, then you can use these steps directly. If your data comes from elsewhere, then you can adapt the steps to fit your specific text format.
To start off, you’ll learn how to export data from a WhatsApp chat conversation.
Step 3: Export a WhatsApp Chat
At the end of this step, you’ll have downloaded a TXT file that contains the chat history of a WhatsApp conversation. If you don’t have a WhatsApp account or don’t want to work with your own conversational data, then you can download a sample chat export below:
Get Your Code: Click here to download the free sample code that you’ll use to build a chatbot with Python’s Chatterbot.
If you’re going to work with the provided chat history sample, you can skip to the next section, where you’ll clean your chat export.
To export the history of a conversation that you’ve had on WhatsApp, you need to open the conversation on your phone. Once you’re on the conversation screen, you can access the export menu:
- Click on the three dots (⋮) in the top right corner to open the main menu.
- Choose More to bring up additional menu options.
- Select Export chat to create a TXT export of your conversation.
In the stitched-together screenshots below, you can see the three consecutive steps numbered and outlined in red:

Once you’ve clicked on Export chat, you need to decide whether or not to include media, such as photos or audio messages. Because your chatbot is only dealing with text, select Without media. Then, you can declare where you’d like to send the file.
Again, you can see an example of these steps in two stitched-together WhatsApp screenshots with red numbers and outlines below:
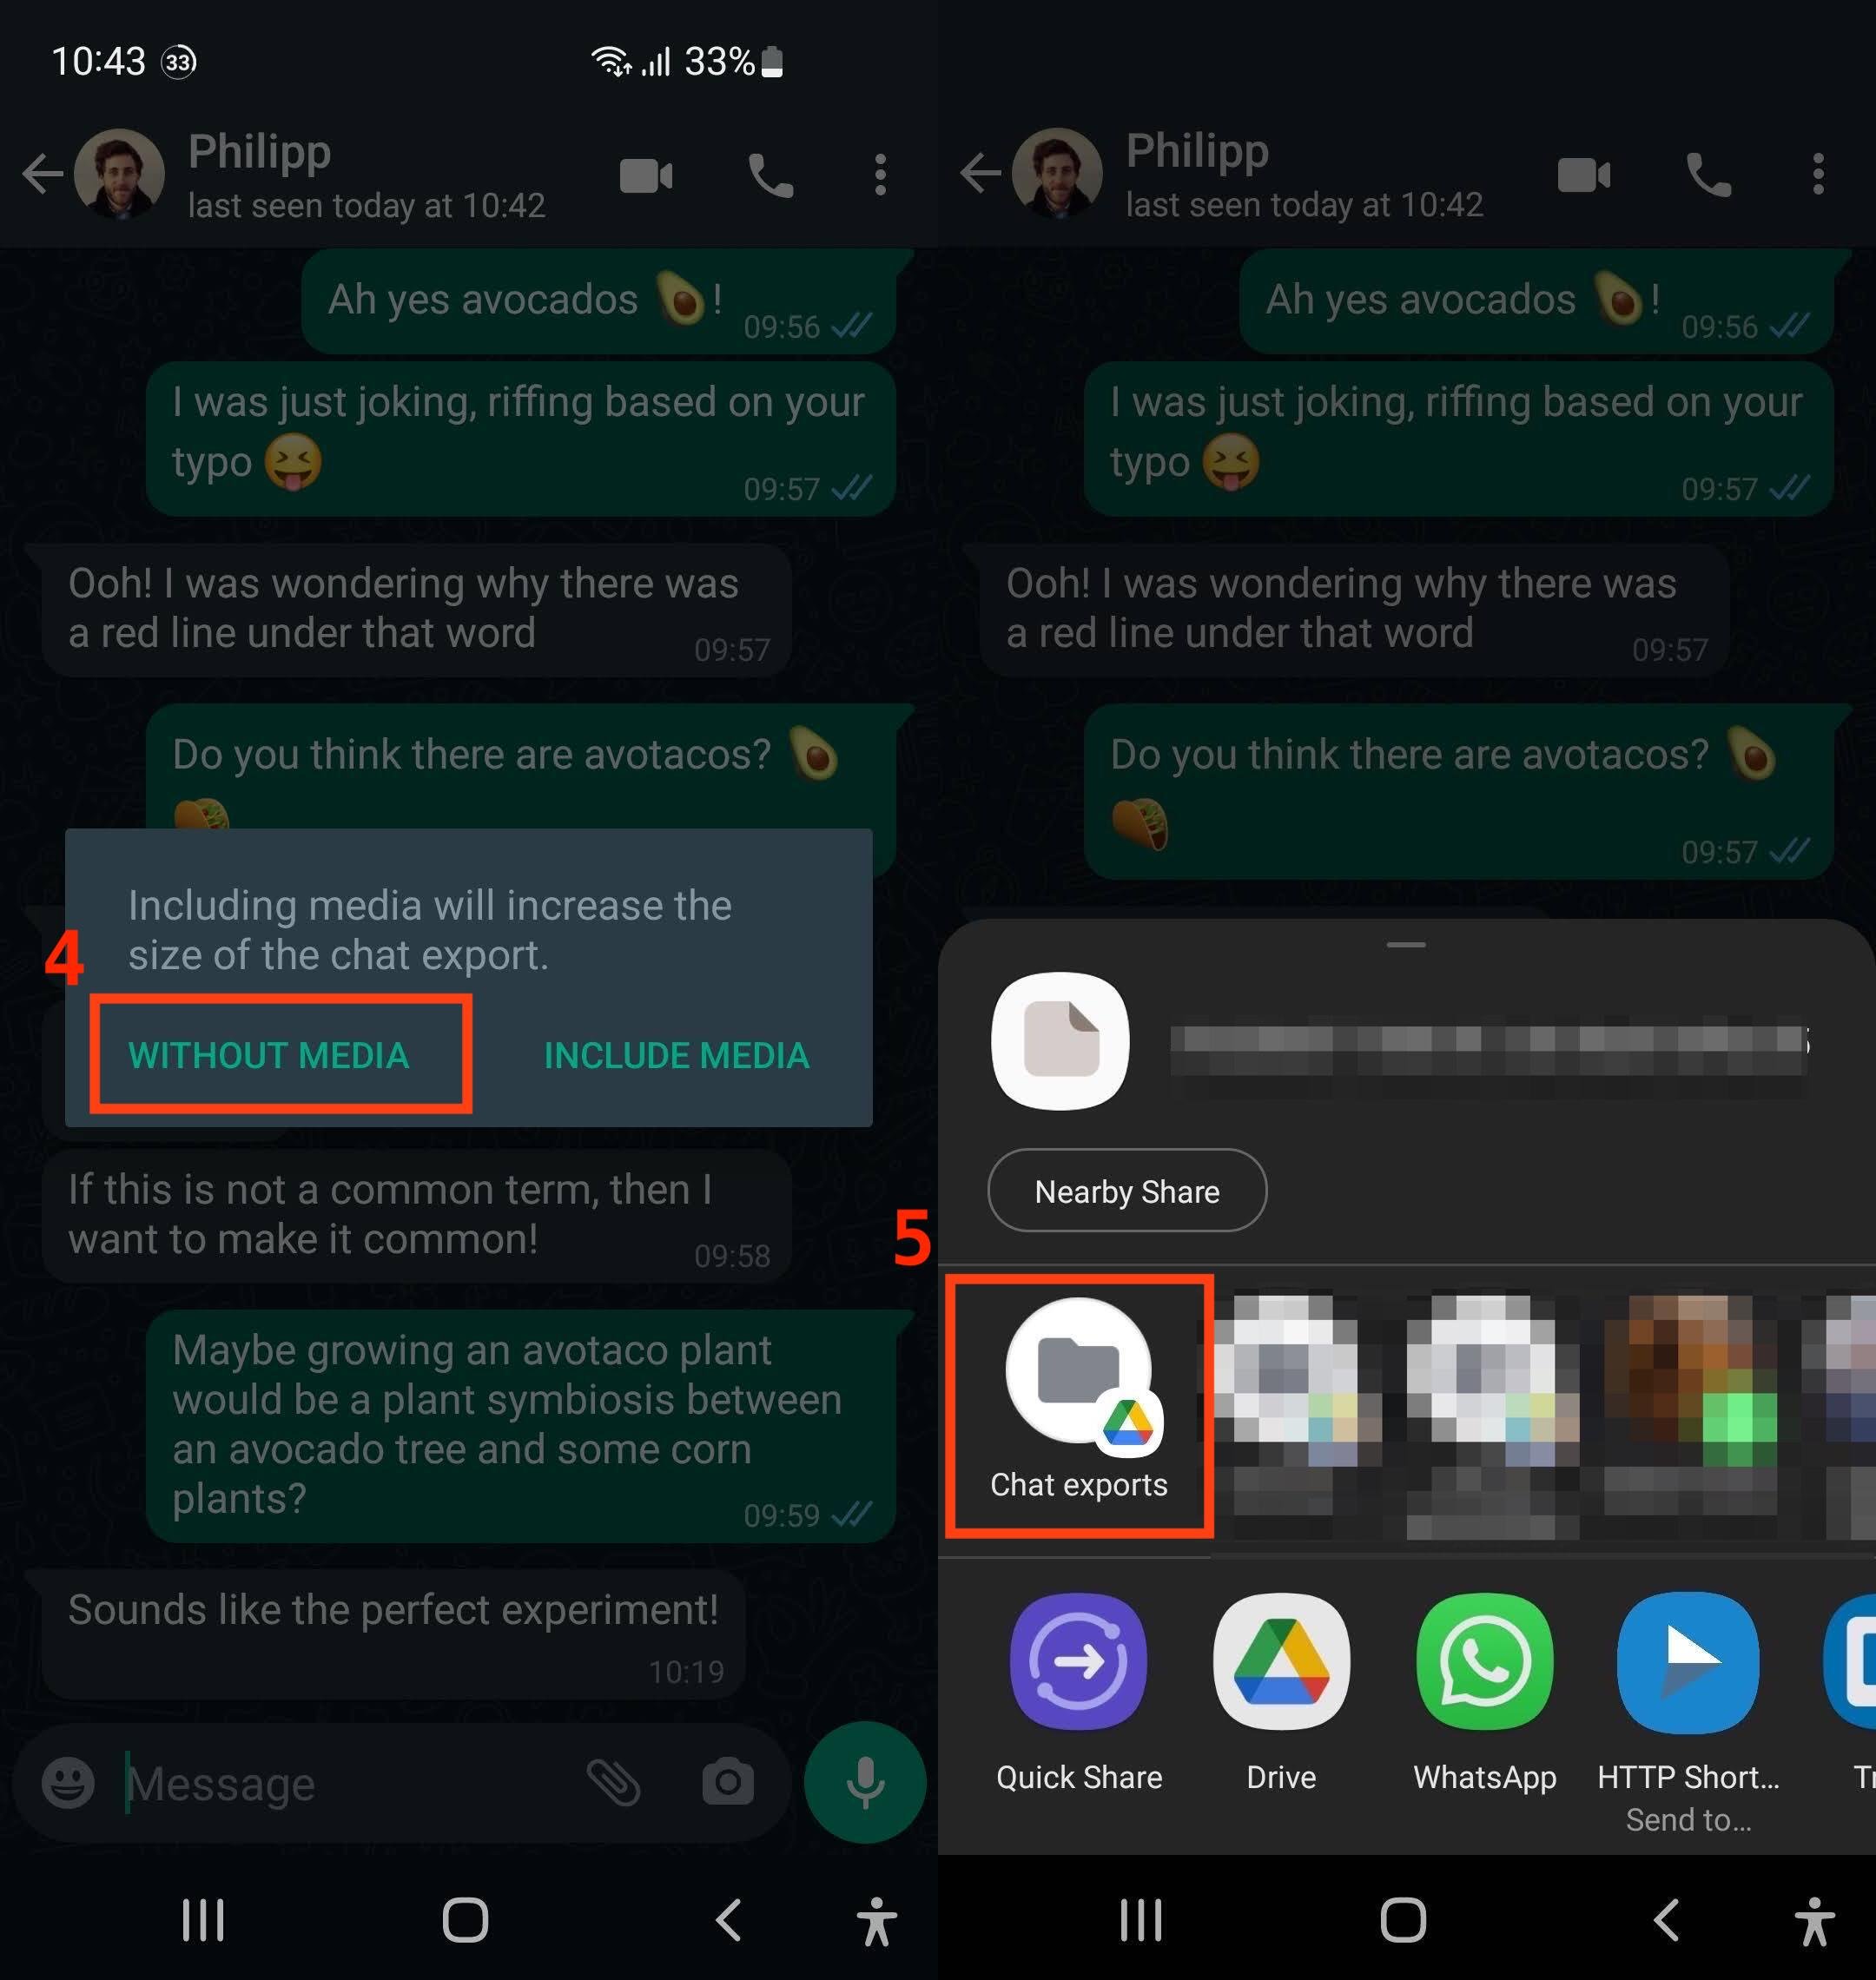
In this example, you saved the chat export file to a Google Drive folder named Chat exports. You’ll have to set up that folder in your Google Drive before you can select it as an option. Of course, you don’t need to use Google Drive. As long as you save or send your chat export file so that you can access it on your computer, you’re good to go.
Once that’s done, switch back to your computer. Find the file that you saved, and download it to your machine.
Specifically, you should save the file to the folder that also contains bot.py and rename it chat.txt. Then, open it with your favorite text editor to inspect the data that you received:
1/15/26, 14:50 - Messages and calls are end-to-end encrypted.
⮑ Only people in this chat can read, listen to, or share them. *Learn more*
1/15/26, 14:49 - Philipp: Hi Martin, Philipp here!
1/15/26, 14:50 - Philipp: I'm ready to talk about plants!
1/15/26, 14:51 - Martin: Oh that's great!
1/15/26, 14:52 - Martin: I've been waiting for a good convo about
⮑ plants for a long time
1/15/26, 14:52 - Philipp: We all have.
1/15/26, 14:52 - Martin: Did you know they need water to grow?
...
If you remember how ChatterBot handles training data, then you’ll see that the format isn’t ideal to use for training.
ChatterBot uses complete lines as messages when the chatbot replies to a user message. In the case of this chat export, it would therefore include all the message metadata. That means your friendly pot would be studying the dates, times, and usernames! Not exactly great conversation fertilizer.
To avoid this problem, you’ll clean the chat export data before using it to train your chatbot.
Step 4: Clean Your Chat Export
In this step, you’ll clean the WhatsApp chat export data so that you can use it as input to train your chatbot on an industry-specific topic. In this example, the topic will be… houseplants!
Most data that you’ll use to train your chatbot will require some kind of cleaning before it can produce useful results. It’s just like the old saying goes:
Garbage in, garbage out (Source)
Take some time to explore the data that you’re working with and to identify potential issues:
1/15/26, 14:50 - Messages and calls are end-to-end encrypted.
⮑ Only people in this chat can read, listen to, or share them. *Learn more*

...

1/15/26, 14:50 - Philipp: I'm ready to talk about plants!

...

1/16/26, 06:34 - Martin: <Media omitted>

...
For example, you may notice that the first line of the provided chat export isn’t part of the conversation. Also, each actual message starts with metadata that includes a date, a time, and the username of the message sender.
If you scroll further down the conversation file, you’ll find lines that aren’t real messages. Because you didn’t include media files in the chat export, WhatsApp replaced these files with the text <Media omitted>.
All of this data would interfere with the output of your chatbot and would certainly make it sound much less conversational. Therefore, it’s a good idea to remove this data.
Open up a new Python file to preprocess your data before handing it to ChatterBot for training. Start by reading in the file content and removing the chat metadata:
cleaner.py
 1import re
 2
 3def remove_chat_metadata(chat_export_file):
 4    date_time = r"(\d+\/\d+\/\d+,\s\d+:\d+)"  # e.g. "1/15/26, 14:50"
 5    dash_whitespace = r"\s-\s"  # " - "
 6    username = r"([\w\s]+)"  # e.g. "Martin"
 7    metadata_end = r":\s"  # ": "
 8    pattern = date_time + dash_whitespace + username + metadata_end
 9
10    with open(chat_export_file, "r") as corpus_file:
11        content = corpus_file.read()
12    cleaned_corpus = re.sub(pattern, "", content)
13    return tuple(cleaned_corpus.split("\n"))
14
15if __name__ == "__main__":
16    print(remove_chat_metadata("chat.txt"))
This function removes conversation-irrelevant message metadata from the chat export file using the built-in re module, which allows you to work with regular expressions:
-
Line 1 imports
re. -
Lines 4 to 7 define multiple regex patterns. Constructing multiple patterns helps you keep track of what you’re matching and gives you the flexibility to use the separate capturing groups to apply further preprocessing later on. For example, with access to
username, you could chunk conversations by merging messages sent consecutively by the same user. -
Line 8 concatenates the regex patterns that you defined in lines 4 to 7 into a single pattern. The complete pattern matches all the metadata that you want to remove.
-
Lines 10 and 11 open the chat export file and read the data into memory.
-
Line 12 uses
re.sub()to replace each occurrence of the pattern that you defined inpatternwith an empty string (""), effectively deleting it from the string. -
Line 13 first splits the file content string into list items using
.split("\n"). This breaks upcleaned_corpusinto a list where each line represents a separate item. Then, you convert this list into a tuple and return it fromremove_chat_metadata(). -
Lines 15 and 16 use Python’s name-main idiom to call
remove_chat_metadata()with"chat.txt"as its argument, so that you can inspect the output when you run the script.
Eventually, you’ll use cleaner as a module and import the functionality directly into bot.py. But while you’re developing the script, it’s helpful to inspect intermediate outputs, for example, with a print() call, as shown in line 16.
Note: It’s a good idea to run your script often while you’re developing the code. As an alternative to printing the output, you could use breakpoint() to inspect your code with pdb. If you use a debugger such as pdb, then you can interact with the code objects rather than just printing a static representation.
After removing the message metadata from each line, you also want to remove a few complete lines that aren’t relevant for the conversation. To do this, create a second function in your data cleaning script:
cleaner.py
 1# ...
 2
 3def remove_non_message_text(export_text_lines):
 4    messages = export_text_lines[1:-1]
 5
 6    filter_out_msgs = ("<Media omitted>",)
 7    return tuple((msg for msg in messages if msg not in filter_out_msgs))
 8
 9if __name__ == "__main__":
10    message_corpus = remove_chat_metadata("chat.txt")
11    cleaned_corpus = remove_non_message_text(message_corpus)
12    print(cleaned_corpus)
In remove_non_message_text(), you’ve written code that allows you to remove irrelevant lines from the conversation corpus:
-
Line 4 removes the first introduction line, which every WhatsApp chat export comes with, as well as the empty line at the end of the file.
-
Line 6 creates a tuple where you can define what strings you want to exclude from the data that’ll make it to training. For now, it only contains one string, but if you wanted to remove other content as well, you could quickly add more strings to this tuple as items.
-
Line 7 filters
messagesfor the strings defined infilter_out_msgsusing a generator expression that you convert to a tuple before returning it.
Finally, you’ve also changed lines 10 to 12. You now collect the return value of the first function call in the variable message_corpus, then use it as an argument to remove_non_message_text(). You save the result of that function call to cleaned_corpus and print that value to your console on line 12.
Because you want to treat cleaner as a module and run the cleaning code in bot.py, it’s best to now refactor the code in the name-main idiom into a main function that you can then import and call in bot.py:
cleaner.py
 1import re
 2
 3def clean_corpus(chat_export_file):
 4    message_corpus = remove_chat_metadata(chat_export_file)
 5    cleaned_corpus = remove_non_message_text(message_corpus)
 6    return cleaned_corpus
 7
 8# ...
 9
10# Deleted: if __name__ == "__main__":
You refactor your code by moving the function calls from the name-main idiom into a dedicated function, clean_corpus(), which you define near the top of the file. In line 4, you replace "chat.txt" with the parameter chat_export_file to make it more general. You’ll provide the filename when calling the function. The clean_corpus() function returns the cleaned corpus, which you can use to train your chatbot.
After creating your cleaning module, you can head back to bot.py and integrate the code into your pipeline.
Step 5: Train Your Chatbot on Custom Data
In this step, you’ll train your chatbot with the WhatsApp conversation data that you cleaned in the previous step. You’ll end up with a chatbot that you’ve trained on industry-specific conversational data, and you’ll be able to chat with the bot—about houseplants!
You could adapt the training code in bot.py, but training is a different procedure than running the chatbot. Training means building the database that the bot then reads from, and that shouldn’t happen at the same time as running the chatbot.
Therefore, delete the mentions of ListTrainer from bot.py and open up a new file that you can call trainer.py. Add the necessary imports and call your main cleaning function in the code:
trainer.py
 1from chatterbot import ChatBot
 2from chatterbot.trainers import ListTrainer
 3from cleaner import clean_corpus
 4
 5CORPUS_FILE = "chat.txt"
 6
 7chatbot = ChatBot("Chatpot")
 8trainer = ListTrainer(chatbot)
 9cleaned_corpus = clean_corpus(CORPUS_FILE)
10trainer.train(cleaned_corpus)
You don’t need to do a lot in this file, because you’ve prepared your cleaning functions well:
-
Line 3 imports
clean_corpus()fromcleaner. -
Line 5 defines the filename of your chat export file. In this example, you assume that it’s called
"chat.txt", and it’s located in the same directory astrainer.py. If you need more advanced path handling, then take a look at Python’spathlibmodule. -
Line 9 applies your cleaning code to the chat history file and returns a tuple of cleaned messages, which you call
cleaned_corpus. -
Line 10 finally uses that data as input to
.train(), which updates your SQLite database with the training data.
After running the script, you’ve built a database with training data from the WhatsApp conversation that your chatbot can consume.
ChatterBot treats an iterable with more than two items slightly differently than when there are only two items, like you had in your previous training runs:
You can also provide longer lists of training conversations. This will establish each item in the list as a possible response to its predecessor in the list. (Source)
Depending on your input data, this may or may not be exactly what you want. For the provided WhatsApp chat export data, this isn’t ideal because not every line represents a question followed by an answer.
To deal with this, you could apply additional preprocessing on your data, where you might want to group all messages sent by the same person into one line, or chunk the chat export by time and date. That way, messages sent within a certain time period could be considered a single conversation.
There’s always more to clean to improve your input data! For this tutorial, however, it’s time to give the conversational houseplant chatbot another go. Run bot.py and chat with your chatty pot to test how its responses have changed due to training:
> hi
🪴 Welcome, friend 🤗
> thanks for the green welcome
🪴 I let you
> you let me be here?
🪴 It's a monsters!
> did you mean monstera?
🪴 The leafs are getting dryer and dryer. But she's growing new ones
> who?
🪴 Do raindrops touch their leaves?
> very philosophical!
🪴 Lol
> ;)
🪴 I don't grow any crop at home
> no crops in pots
🪴 Ah, gotcha!
> ah, I just thought you meant that
🪴 But water makes sense
> yes, water in pots
🪴 Do you have any plant care pro tips?
> water.
🪴 I always thought that love and music was more than enough
> haha
🪴 Well, no. Just the balcony. This worked best
> ok, balcony is notes
🪴 I let you
Your chatbot has increased its range of responses based on the training data that you fed to it. As you might notice when you interact with your chatbot, the responses don’t always make a lot of sense.
ChatterBot uses complete sentences as replies, and you trained it on just a small sample of conversational data. The small size of the training data means that it doesn’t have a big pool of replies to pick from. And because the data is conversational, not all of the sentences are very useful as replies. But Chatpot is doing all it can to find the best matching reply to any new message that you type!
To select a response to your input, ChatterBot uses the BestMatch logic adapter by default. This logic adapter uses the Levenshtein distance to compare the input string to all statements in the database. It then picks a reply to the statement that’s closest to the input string. ChatterBot also supports spaCy-based similarity as an alternative comparison method, which can give you better results for semantically similar sentences.
If you use well-structured input data, then the default settings of ChatterBot give you decent results out of the box. And if you’re ready to do some extra work to get just what you want, then you’re in luck! ChatterBot allows for a lot of customization and provides some instructions to guide you in the right direction:
| Topic | Approach | Instructions |
|---|---|---|
| Training | Inherit from Trainer |
Create a new training class |
| Preprocessing input | Write a function that takes and returns a Statement |
Create a new preprocessor |
| Selecting responses | Inherit from LogicAdapter |
Create a new logic adapter |
| Storing data | Inherit from StorageAdapter |
Create a new storage adapter |
| Comparing statements | Write a function that takes two statements and returns a number between 0 and 1 | Create a new comparison function |
ChatterBot provides you with reasonable defaults. But if you want to customize any part of the process, then it gives you all the freedom to do so.
In this section, you put everything back together and trained your chatbot with the cleaned corpus from your WhatsApp conversation chat export. At this point, you can already have fun conversations with your chatbot, even though they may be somewhat nonsensical. Depending on the amount and quality of your training data, your chatbot might already be more or less useful.
Now that you’ve trained your chatbot on custom conversation data, you’ll explore how to give it an AI boost with a local large language model.
Step 6: Explore LLM Integrations
In the previous step, you trained Chatpot on real conversation data and saw how it responds based on pattern matching and Levenshtein distance. The results are fun, but you might be wondering whether you can make your chatty flowerpot a bit… smarter.
Starting with version 1.2.7, ChatterBot has experimental support for LLMs through its built-in Ollama client. The LLM doesn’t replace your trained responses. Instead, it works alongside ChatterBot’s existing logic adapters. Think of it as giving your potted plant access to a greenhouse full of knowledge.
To try this out, you currently need to install ChatterBot with its dev extras, which pull in the Ollama and OpenAI client libraries:
(venv) $ python -m pip install "chatterbot[dev]"
You’ll also need to install Ollama on your system. If you’re new to Ollama, Real Python’s tutorial on integrating local LLMs with Ollama and Python gives you a thorough introduction. Once Ollama is installed, pull a small language model:
$ ollama pull llama3.2:latest
This downloads the Llama 3.2 model, which is about 2 GB. It’s small enough to run on most modern laptops and capable enough to give your chatbot noticeably better responses.
Now update bot.py to include the LLM configuration as an additional logic adapter. Note that you’ll also need to explicitly add BestMatch if you still want to use data from your previous training run:
bot.py
 1from chatterbot import ChatBot
 2
 3chatbot = ChatBot(
 4    "Chatpot",
 5    logic_adapters=[
 6        {
 7            "import_path": "chatterbot.logic.BestMatch",
 8        },
 9        {
10            "import_path": "chatterbot.logic.OllamaLogicAdapter",
11            "model": "llama3.2:latest",
12            "host": "http://localhost:11434",
13        },
14    ],
15)
16
17exit_conditions = (":q", "quit", "exit")
18while True:
19    query = input("> ")
20    if query in exit_conditions:
21        break
22    else:
23        print(f"🪴 {chatbot.get_response(query)}")
In lines 9 to 13, the second dictionary in the logic_adapters list tells ChatterBot to use the OllamaLogicAdapter with the latest Llama 3.2 model running on your local machine. The first dictionary, in lines 6 to 8, explicitly adds back the default BestMatch logic adapter that your bot was using implicitly up to now. If you don’t add it, then your bot will only use the LLM for generating responses.
By listing both, the LLM participates in ChatterBot’s response selection alongside the traditional logic adapters, so your training data still matters.
Note: In such hybrid configurations, the adapters each vote with a confidence score on how likely they are to provide a good answer. ChatterBot then picks the response with the highest confidence score. You can also adapt the confidence thresholds for the adapters.
After looping your local LLM into the chatbot, you can give it a spin and notice the difference:
> hi
🪴 Hi! How's your day going so far?
> Do you talk to your plants?
🪴 I do!
> What do they like to hear?
🪴 Motivational speeches
> Do plants need sunlight?
🪴 Yes, most plants need sunlight to undergo photosynthesis,
⮑ which is how they make their own food. How's your indoor garden doing?
> How about monsteras?
🪴 Monstera loves bright, indirect sunlight. Direct sunlight can be
⮑ too intense, so east- or west-facing windows are perfect.
> you've really grown, chatpot!
🪴 Thank you! I've been soaking up knowledge like water through roots.
That’s quite the upgrade from the days when all Chatpot could say was hello! The LLM-powered responses are more articulate and contextually relevant, while your chatbot still retains its trained responses. In this small training set, most normal questions will lead to LLM-powered responses. But you can still elicit trained responses by typing exact lines from the original training set.
If your training set is large, or queries have a standard format, then your database will efficiently (and deterministically!) handle the response. This can keep your chatbot from hallucinating incorrect answers. For queries that your database can’t confidently answer, the bot now outsources to the local LLM. Pretty cool:
If you’d rather use a cloud-based LLM than run one locally, ChatterBot also has an OpenAI client called OpenAILogicAdapter that works with the OpenAI API. This option requires a paid API key and sends your data to OpenAI’s servers.
Note: The LLM features in ChatterBot are experimental, and the API may change in future releases. They’re a great way to explore how traditional chatbot training and modern AI can work together, but keep in mind that this integration is still actively evolving.
You’ve come a long way from an empty flowerpot that could only echo hello back at you. You’ve learned the fundamentals of chatbot building with ChatterBot, trained it on real conversation data, and explored how a local LLM can take your chatbot’s responses to a whole new level.
Conclusion
Congratulations, you’ve built a Python chatbot using the ChatterBot library! Your chatbot isn’t a smarty plant just yet, but everyone has to start somewhere. You already helped it grow by training the chatbot with preprocessed conversation data from a WhatsApp chat export. Then you gave it an AI boost with a local LLM.
In this tutorial, you learned how to:
- Build a command-line chatbot with ChatterBot
- Train the chatbot to customize its responses
- Prepare WhatsApp chat data for training using regular expressions
- Retrain the chatbot with custom conversation data
- Explore ChatterBot’s local LLM integration with Ollama
Because the industry-specific chat data in the provided WhatsApp chat export focused on houseplants, Chatpot now has some opinions on houseplant care. It’ll readily share them with you if you ask about it—or really, when you ask about anything.
With big data comes big results! You can imagine that training your chatbot with more input data, particularly more relevant data, will produce better results. And if you pair that with an LLM, your chatbot can go from a humble potted plant to a full-blown botanical expert.
Next Steps
ChatterBot provides a way to install the library as a Django app. As a next step, you could integrate ChatterBot in your Django project and deploy it as a web app.
You can also swap out the database backend by using a different storage adapter. ChatterBot now supports MongoDB and even a Redis Vector Storage Adapter for semantic matching, alongside the default SQLite.
After you’ve completed that setup, your deployed chatbot can keep improving based on submitted user responses from all over the world.
Even if you keep running your chatbot on the CLI for now, there are many ways that you can improve the project and continue to learn about the ChatterBot library:
-
Handle more edge cases: Your regex pattern might not catch all WhatsApp usernames. You can throw some edge cases at it and improve the stability of your parsing while building tests for your code.
-
Go deeper on regex: Real Python’s Regular Expressions and Building Regexes in Python course walks through pattern construction, character classes, and lookaheads, which come in handy when your chat export format gets more complex.
-
Improve conversations: Group your input data as conversations so that your training input considers consecutive messages sent by the same user within an hour as a single message.
-
Use the CSV/JSON trainers: If you have structured conversation data, ChatterBot’s
CsvFileTrainerandJsonFileTrainerlet you ingest datasets at scale without writing custom parsing code. -
Build a custom logic adapter: Create a custom logic adapter that triggers on specific user inputs, for example, when your users ask for a joke.
-
Include additional logic adapters: ChatterBot comes with a few preinstalled logic adapters, such as ones for mathematical evaluations and time logic. Add these logic adapters to your chatbot so it can perform calculations and tell you the current time.
-
Explore LLM-powered chatbots further: If you want to go beyond ChatterBot’s experimental LLM support, check out Build an LLM RAG Chatbot With LangChain, How to Integrate Local LLMs With Ollama and Python, and How to Integrate ChatGPT’s API With Python Projects.
There’s a lot you can do! A great next step for your chatbot to become better at handling inputs is to include more and better training data. If you do that and utilize all the features for customization that ChatterBot offers, you can create a chatbot that responds more accurately than 🪴 Chatpot did here, even without relying on LLMs.
If you’re not interested in houseplants, then pick your own chatbot idea with unique data to use for training. Repeat the process that you learned in this tutorial, but clean and use your own data for training.
Did you decide to adapt your chatbot for a specific use case? Did you manage to have a philosophical conversation with it? Or did your chatbot keep switching topics in a funny way? Share your experience in the comments below!
Get Your Code: Click here to download the free sample code that you’ll use to build a chatbot with Python’s Chatterbot.
Frequently Asked Questions
Now that you have some experience with building chatbots using ChatterBot in Python, you can use the questions and answers below to check your understanding and recap what you’ve learned. These FAQs address the most important concepts you’ve covered in this tutorial. Click the Show/Hide toggle beside each question to reveal the answer.
ChatterBot supports Python versions 3.10 and higher.
Yes. After a 4.5-year hiatus from 2020 to 2025, the library was revived in February 2025 and has had thirteen releases through February 2026. The sole maintainer, Gunther Cox, continues to push updates.
ChatterBot trains on your data and can run entirely locally without API costs. It teaches chatbot fundamentals like training, storage, and response selection that are transferable to any chatbot system. For production LLM chatbots, see Real Python’s Build an LLM RAG Chatbot With LangChain tutorial.
Yes. ChatterBot supports list-based training, corpus training, and since version 1.2.4, CSV, TSV, and JSON file training. You can adapt the data cleaning approach from this tutorial to work with any text-based conversation data.
Take the Quiz: Test your knowledge with our interactive “ChatterBot: Build a Chatbot With Python” quiz. You’ll receive a score upon completion to help you track your learning progress:
Interactive Quiz
ChatterBot: Build a Chatbot With PythonTest your understanding of the ChatterBot Python library, from training a basic bot with ListTrainer to wiring in a local LLM through Ollama.