Python namespace packages are an advanced Python feature. You may have heard them mentioned in relation to the __init__.py file. Specifically, if you don’t include at least an empty __init__.py file in your package, then your package becomes a namespace package.
For the most part, namespace packages and regular packages won’t behave differently when it comes to using them in your project. In fact, you’ve probably accidentally forgotten to include an __init__.py file in at least one package but didn’t notice any side effects. While namespace packages are generally a bit slower to import than regular packages, you won’t usually run into many issues.
In this tutorial, you’ll dive into what Python namespace packages are, where they come from, why they’re created when you don’t include an __init__.py file, and when they might be useful.
Along the way, you’ll get the chance to make your own namespace package structures, and you’ll install and extend an experimental namespace package from PyPI.
Python namespace packages are probably going to be useful for people who manage or architect collections of related packages. That said, you’ll get to experiment with a project that can make namespace packages more accessible to the average user.
This is an advanced tutorial, and to get the most out of it, you should be very familiar with the basics of Python and comfortable with the import system, as well as having some exposure to packaging.
So, what’s a Python namespace package, and what’s it for?
Free Source Code: Click here to download the free source code that you’ll use to explore Python namespace packages.
Take the Quiz: Test your knowledge with our interactive “Python Namespace Packages” quiz. You’ll receive a score upon completion to help you track your learning progress:

Interactive Quiz
Python Namespace PackagesPractice your knowledge about namespace packages in Python. Revisit managing multiple packages without an __init__.py file.
In Short: Python Namespace Packages Are a Way to Organize Multiple Packages
By way of a quick recap, you’ll first examine the general concept of a Python namespace before tackling namespace packages. A namespace is a way to group objects under a specific name. You can group values, functions, and other objects.
For example, when you import math, you gain access to the math namespace. Inside the math namespace, you can select from a whole host of different objects.
You can also think of a Python dictionary as a namespace. With a Python dictionary, you can take two variables that started out as completely separate, independent variables and include them within the same dictionary namespace:
>>> real_python = {}

>>> home_page = "https://realpython.com"
>>> import_tutorial = "python-import"

>>> real_python["home_page"] = home_page
>>> real_python["import_tutorial"] = import_tutorial
Now, you can reference both the home_page and import_tutorial values from the real_python namespace. Namespace packages work in a similar way, but they combine whole packages instead of values or other Python objects.
This allows you to have two independent packages on PyPI, for example, that still share the same namespace. One single namespace package doesn’t make a whole lot of sense. To really see the advantage of namespace packages, you need at least two packages.
Namespace packages are typically used by businesses that may have extensive libraries of packages that they want to keep under a company namespace. For example, the Microsoft Azure packages are all accessible, once installed, through the azure namespace.
That’s why you’ll create your own company namespace in the next section.
What Does a Namespace Package Look Like?
Imagine you work for the Snake Corporation, and your team wants to make sure that all the packages in its library are always accessible from the snake_corp namespace. So, no matter what package you’re using, as long as it was made by the Snake Corporation, you’ll import from snake_corp.
Without namespace packages, you’d have two options:
- Create a monorepo, which would be a single package called
snake_corpwith hundreds of modules for all the different libraries and utilities that you might need. - Create various packages, but prefix them all with
snake_corp. For example, you might havesnake_corp_dateutilas a package.
The trouble with creating a monorepo is that everyone has to download all the code even if they only use a tiny fraction of it. It also complicates matters in terms of version management and other packaging workflows, especially if different teams are in charge of different subpackages.
The issue with creating various packages with a common prefix is that it can be quite verbose, messy, and inelegant. And, at the end of the day, the Snake Corporation CEO has said that they don’t like that solution. They’d prefer using a monorepo over prefixing all the packages. Besides, using common prefixes is just a convention that doesn’t technically create a common namespace.
What you have in this situation is a perfect use case for namespace packages! Namespace packages allow you to have multiple separate packages with their own packaging workflow, but they can all live in the same snake_corp namespace.
Note: In the following examples, you’ll be creating a bunch of packages. You’ll note that the containing folders and the package names vary depending on whether you’re referring to the name for when you pip install or import, for example. Check out this table for a rough breakdown of what’s generally used:
| Purpose | Typical Casing | Example |
|---|---|---|
PyPI and pip |
Kebab | charset-normalizer |
| Import | Snake | charset_normalizer |
| Prose | Pascal or none | Charset Normalizer |
In the following examples, you’ll be using these conventions. But be aware that these conventions aren’t universal.
To illustrate how you can achieve the kind of structure to make the Snake Corporation CEO happy, you’ll now make three packages:
snake-corp-dateutil: Some date utilities specific to the Snake Corporationsnake-corp-magic-numbers: Some number-generation utilities specific to the Snake Corporationsnake-service: An employee project that wants to make use of both thesnake-corp-dateutilandsnake-corp-magic-numberspackages
In this example, you’ll take the prose name to be the same as the pip name.
In the next section, you’ll set up the packages and install them in your virtual environment. In the section after that, you’ll get to use them.
Setting Up Some Namespace Packages
To get started setting up the Snake Corporation’s namespace packages, create the following folder and file structure:
snake-corp/
│
├── snake-corp-dateutil/
│   ├── snake_corp/
│   │   └── dateutil.py
│   └── pyproject.toml
│
├── snake-corp-magic-numbers/
│   ├── snake_corp/
│   │   └── magic.py
│   └── pyproject.toml
│
└── snake-service/
    └── snake_service.py
With that, you have the basic file structure of three packages. Both the utility packages, snake-corp-dateutil and snake-corp-magic-numbers, start by defining an implicit namespace package called snake_corp. It’s an implicit namespace package because of the absence of an __init__.py file.
As for the import name, you’ll import the snake-corp-dateutil package as snake_corp.dateutil and snake-corp-magic-numbers as snake_corp.magic.
You’ll use a virtual environment to contain your project. Inside the virtual environment, you’ll install the two utility packages, which is why you have a pyproject.toml file for each. This simulates what it’d be like if they were available on a corporate package server, for example.
Inside the dateutil.py module, all you need to include is a business-critical function that’ll return the number of days until World Snake Day:
# snake-corp-dateutil/snake_corp/dateutil.py

from datetime import datetime

def days_to_snake_day(from_date=None):
    """Return the number of days until World Snake Day (July 16th)."""
    if from_date is None:
        from_date = datetime.now()
    if from_date.month > 7 or (from_date.month == 7 and from_date.day > 16):
        day_of_snake = datetime(from_date.year + 1, 7, 16)
    else:
        day_of_snake = datetime(from_date.year, 7, 16)
    return (day_of_snake - from_date).days
You’ll use just one function here for demonstration purposes, but you can imagine that you might have a bunch of date-related functions that are specific to the Snake Corporation.
In the corresponding pyproject.toml file, you fill out some information that setuptools needs to properly install the package:
# snake-corp-dateutil/pyproject.toml

[build-system]
requires = ["setuptools", "setuptools-scm"]
build-backend = "setuptools.build_meta"

[tool.setuptools.packages.find]
where = ["."]
include = ["snake_corp"]
namespaces = true

[project]
name = "snake-corp-dateutil"
version = "1.0.3"
description = "Date Utilities for the Snake Corporation"
license = { text = "Snake Corp Software License Agreement" }
This configuration file ensures that pip knows how to treat this package.
The tool.setuptools.packages.find section is what controls package discovery, and while namespace packages are generally enabled by default, you can be explicit about including your namespace package by specifying where, include, and namespaces options.
You can read more about configuring package discovery in pyproject.toml files by checking out the setuptools documentation.
Note: It’s possible to get away with including less information in your pyproject.toml file. In some cases, pip can even install a package without pyproject.toml or an equivalent file. That said, in other cases, it’ll treat a namespace package as a normal package, meaning that the examples below won’t work.
In the magic.py module, you can also add in a special number generator that’s required for some special Snake Corporation beaurocracy. This number generator is just a placeholder for the example:
# snake-corp-magic-numbers/snake_corp/magic.py

import random

def secret_number_generator():
    # Insert special Snake Corporation sauce here ...
    return random.randint(0, 9999)
You only return a random number in this function, which isn’t very useful in and of itself. But you can imagine that this might be a special token generator. You may need to get a token from a corporate API service or generate a universally unique identifier (UUID).
The corresponding pyproject.toml file is very similar to the last one, with changes to the name, version, and description:
# snake-corp-magic-numbers/pyproject.toml

[build-system]
requires = ["setuptools", "setuptools-scm"]
build-backend = "setuptools.build_meta"

[tool.setuptools.packages.find]
where = ["."]
include = ["snake_corp"]
namespaces = true

[project]
name = "snake-corp-magic-numbers"
version = "1.1.8"
description = "Super Magic Secret Numbers for the Snake Corporation"
license = { text = "Snake Corp Software License Agreement" }
Now the two utility packages are ready for you to install with pip in a virtual environment. Well done!
In the next section, you’ll see what it’s like to develop a new package, making use of the namespace packages that you just created.
Installing and Using Namespace Packages
Navigate to the outer snake-corp folder, where you can see the folders of the two utility packages. Create a virtual environment there, and install the packages:
In this example, you’ve included the -e flag for editable install when installing the package. This gives you the flexibility to modify most of the source code of the installed packages without needing to reinstall it. That’s just for this tutorial. Typically, you’d only include the -e flag if you’re installing a package that you’re actively developing.
Now you can finally start developing your new package that makes use of these two utilities. Make a snake-service folder and create your initial snake_service.py file to test out the snake_corp namespace:
# snake-service/snake_service.py

from snake_corp import dateutil, magic

print(magic.secret_number_generator())
print(dateutil.days_to_snake_day())
When you run this module inside your virtual environment, you shouldn’t get any exceptions, and you should get two numbers printed on the console. Your numbers will be different:
(venv) $ python snake-service/snake_service.py
2342
171
Nice! Note how you’re able to import both the utilities from the snake_corp namespace, as if both belonged to the same package. Magic!
Now all the developers in the Snake Corporation can develop their many libraries separately and still include them in the snake_corp namespace. This does mean that all the developers need to make sure they create a snake_corp folder at the root of their project without an __init__.py file, though.
It may seem a bit odd to have implicit namespace packages at first. Wouldn’t it be easier to have a file to indicate that a package was meant to be treated as a namespace package? Right now, it’s easier to create a namespace package than a regular package! You’ll be considering some of those questions in the next section.
Why Do Namespace Packages Exist?
There are two situations in which a Python namespace package might be useful:
- You have a very large package, but not all users of that package need access to everything it offers. Still, you want to keep the common namespace
- You have many different and related packages, and you’d like to have them all share the same namespace.
In these situations, a common namespace shared between separate packages is often what’s most practical.
Ideally, you want to be able to install packages in different locations but still have them act like a unified package in your code. Also, you’d like the packages to be relatively independent in the sense of having hundreds of packages contributing to a namespace but only needing to install one of them to start using the namespace.
The old way to achieve a common namespace in Python was to use the pkgutil module. You can still use this way in modern Python, even though it’s obsolete. Using pkgutil to create a namespace package involves including a snippet in all the namespace packages’ __init__.py files:
# __init__.py

from pkgutil import extend_path
__path__ = extend_path(__path__, __name__)
This old way of making namespaces is the approach that Microsoft Azure still takes to keep all Azure-related packages in an azure namespace. The Google Cloud Python libraries also take this approach.
Even though this seems like it may be a relatively straightforward approach, different packaging systems have different requirements. Not everyone uses pip to install packages. An operating system (OS) may use its own packaging systems to install third-party Python packages. These new packages extend the Python installation included as part of the OS distribution.
For example, the Advanced Package Tool, commonly known as APT, typically uses the Ubuntu package repository, where you’ll find loads of Python packages, some essential to APT itself. You can install all of these Python packages without pip.
Trying to make the old-style namespace packages work with a variety of these OS-level packaging systems was problematic. For example, some packaging systems won’t allow you to create the same __init__.py file in the same folder structure in a different location. So you’d end up having to create a whole package whose sole purpose was to provide the magical __init__.py file.
Suffice to say, the old way led to a hard-to-maintain and hard-to-explain process that all maintainers had to be familiar with. It was a fragile structure, too, because if one of the maintainers or users messed up, it could break the whole namespace. Additionally, once the namespace was broken, it might not be obvious what had happened.
Implicit namespace packages were introduced with PEP 420 and provided a solution for these issues. Now you don’t have to manage multiple __init__.py files and deal with dependencies. Now you can have lots of packages, and any two of them will work together, merging into the same namespace seamlessly.
There’s been a fair amount of criticism of implicit namespace packages, though. As it stands, it’s easier to create a namespace package than a regular package. For beginners, that can make it seem like the namespace package is the default option, which you have to opt out of by creating an __init__.py package.
It’s also possible, though rare, to run into hard-to-track bugs if you misuse implicit namespace packages. Perhaps you’ve got hundreds of packages installed in your active Python interpreter, and you forgot to include __init__.py in a few of them. This can lead to strange behavior resulting from the inadvertent mixing of two or more packages.
That said, such namespace bugs aren’t very common in day-to-day usage, especially if you have good virtual environment habits.
As for potential use cases, PEP 420 describes a situation in which the Python standard library itself could make use of a namespace package. The encodings module in the standard library could potentially become a namespace package, which would allow different operating systems—which may require arcane encodings—to add their own encoding to the encodings namespace without much effort.
That said, the encodings module still remains a regular package with an __init__.py file. In fact, many libraries that could potentially make use of namespace packages don’t. For example, the scikit-learn package has extensions and models that live in separately published packages:
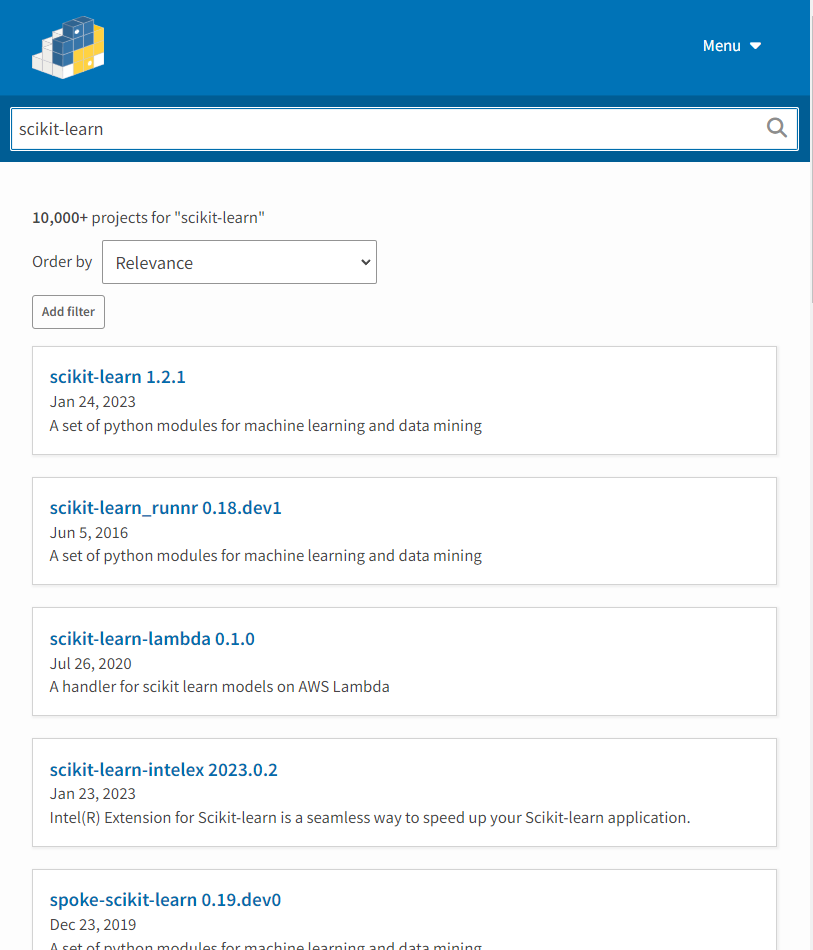
Usually these packages use the prefixing convention, and these have to be imported from the prefixed package, so they’re not a common namespace at all, just a convention. Typically this isn’t a huge issue, but it could potentially be cleaner with a scikit-learn namespace, or a sub-namespace that other packages could contribute to.
So, namespace packages can serve more purposes than just grouping tons of packages under a single namespace. One namespace to bring them all and in the source code bind them! In the following section, you’ll get to experiment with one potential use case that’s slightly less ambitious.
What’s an Example of a Namespace Package?
Even though namespace packages aren’t very common to see—likely because most of the branded namespace packages are closed source—they do exist in the wild. Here are a few examples of public projects that use namespace packages:
Are you aware of other projects that make use of namespace packages? Share them in the comments below! In the meantime, you’ll examine another potential use case for namespace packages in the following sections.
First, you’ll see how installing a namespace package might work once you’ve uploaded it to PyPI. Then, you’ll dive into its source code to see how it works. Finally, you’ll see how you can take namespace packages further to create a prototype plugin system.
Experimenting With a Real Namespace Package
In the next few sections, you’re going to check out a real-life example of a namespace package that you can use and experiment with. The DataRepos package is special because it expects you to contribute to its namespace. This package was developed for this tutorial, but it turned into a potentially useful project.
You’ll learn what DataRepos is and how you can install it from PyPI with pip. You’ll see how it works, and then you’ll dive into the source code. From there, you’ll extend the source code beyond what’s on PyPI, creating another namespace package inside the main namespace package to create a proof-of-concept plugin system.
The DataRepos package is a ready-to-use package—but also a template—for how you can use namespace packages for hosting distributed data.
If you’re a tutorial or documentation writer, then you often want to use sample datasets. The issue is that you have to get users to download the dataset, and then you might need to introduce some code to be able to load that dataset into a Python REPL session. This can veer your tutorial off course and become tedious boilerplate.
The DataRepos package can help by providing a common interface to a wide range of data distributed among separate packages. A package like this may be useful for other industries, too. You might have some operators or researchers who need access to some data but struggle with Python. Having a common interface to data, or even code, that might be distributed across various packages could be useful.
Spin up another virtual environment in a new folder and install the DataRepos package from PyPI:
(venv) $ python -m pip install data-repos
Note that the prose name is DataRepos, the pip name is data-repos, and the import name is data_repos. So, installing DataRepos with pip install data-repos creates a data_repos namespace package.
Now, in your own local project folder, create a folder called data_repos, which mirrors the data_repos you just installed. Inside your folder, insert a mock CSV file called greetings.csv:
language,greeting
english,hello
spanish,hola
polish,cześć
german,hallo
filipino,kamusta
norwegian,hei
This data shows you how to say hello informally in various languages. Your project folder should now look like this:
data-repos-local/
│
├── data_repos/
│   └── greetings.csv
│
└── venv/
You’ve created an implicit namespace package called data_repos and added a file to it. This means that the DataRepos package will have access to your folder, without any setup. This is because the DataRepos package also has an implicit namespace package called data_repos, which works together with your own data_repos package.
Now, if you start an interactive session, then you’ll be able to see how DataRepos works:
>>> from data_repos import read
>>> read.data("greetings")
   language  greeting
0   english     hello
1   spanish      hola
2    polish     cześć
3    german     hallo
4  filipino   kamusta
5 norwegian       hei
You’re importing read, which the data-repos package provides. But then you’re reading "greetings", which is a resource that’s part of your local data_repos namespace package, data-repos-local. Even though these packages reside in completely different locations on disk, they’re able to operate together seamlessly.
All you need to do, as a user of DataRepos, is to import the read module from data_repos. Then you can call the data() function, passing in the name of your local file without its extension. You provided the file called greetings.csv, so you pass in "greetings" as an argument to data().
The data() function accepts a string argument, which then searches the data_repos namespace for files that match that name. Because you contributed to that namespace locally, it’ll find greetings.csv. It’ll then check its file extension and choose an appropriate reader function to convert that file into a pandas DataFrame. Voila!
Where this idea comes into its own is that it allows you to create separate packages, such as DataReposCars, with their own—potentially very large—datasets.
If you were to start a new DataReposCars package with the intention of publishing on PyPI, then you’d populate the repository’s file structure like this:
data-repos-cars/
│
├── data_repos/
│   └── cars.csv
│
└── pyproject.toml
All you’d need to do is populate the data_repos namespace with a data file in a format supported by DataRepos. Here’s some sample data that you could use:
price,year,make,model
23590,2019,nissan,maxima s sedan 4d
30590,2020,volvo,s60 t5 momentum sedan 4d
34990,2020,cadillac,xt4 sport suv 4d
28990,2018,lexus,es 350 sedan 4d
30590,2019,bmw,4 series 430i gran coupe
The package is nearly complete now. Because this package is meant as an extension to the DataRepos package and won’t work without having the DataRepos package, you can declare DataRepos as a dependency in pyproject.toml:
[build-system]
requires = ["setuptools", "setuptools-scm"]
build-backend = "setuptools.build_meta"

[tool.setuptools.packages.find]
where = ["."]
include = ["data_repos"]
namespaces = true

[project]
version = "1.0.0"
name = "data-repos-cars"
description = "A cars dataset"
requires-python = ">=3.7"
license = { text = "MIT" }
dependencies = ["data-repos"]
This means that whenever you try to install this package, pip will try to install data-repos first. So, once you’ve uploaded DataReposCars on PyPI, users will be able to install it by typing pip install data-repos-cars. Then, they can access your data just like in the previous examples:
>>> from data_repos import read
>>> read.data("cars")
   price  year      make                     model
0  23590  2019    nissan         maxima s sedan 4d
1  30590  2020     volvo  s60 t5 momentum sedan 4d
2  34990  2020  cadillac          xt4 sport suv 4d
3  28990  2018     lexus           es 350 sedan 4d
4  30590  2019       bmw  4 series 430i gran coupe
...
You can have as many packages as you like that contribute to the data_repos namespace, which means that you can theoretically wrap an infinite amount of data with the same interface, but users don’t have to install all the data. They only have to install the packages that contain the data they’re interested in.
In the next section, you’ll dive into the source code to see how DataRepos works under the hood.
Inspecting the DataRepos Namespace Package Source Code
The DataRepos source code is open source and available on GitHub. What you’ll look into in this section is a simplified version of that code to see how it uses importlib to scan the data_repos namespace for supported file formats.
The structure of DataRepos is quite basic, consisting of only one folder, the data_repos namespace package, one Python module read.py and some sample CSV data, also within the data_repos folder.
Take a look at the source code of read.py below:
# data-repos/data_repos/read.py

from importlib import resources
import pandas as pd

def data(name):
    """Get a data file."""
    data_path = path(name)
    file_type = data_path.suffix.lstrip(".")
    return readers[file_type](data_path)

def path(name):
    """Find the path to a data file."""
    for resource in resources.files(__package__).iterdir():
        if resource.stem == name:
            return resource
    raise FileNotFoundError(f"{name} not found in {__package__}")

def csv(data_path):
    """Read a CSV file from a path."""
    return pd.read_csv(data_path)

def json(data_path):
    """Read a JSON file from a path."""
    return pd.read_json(data_path)

readers = {"csv": csv, "json": json}
The main function that the user will call is the data() function. The data() function takes the data file’s name and searches for the corresponding file using the importlib.resources.files() function.
The importlib.resources.files() function returns a Path object and, in the case of a namespace package, returns a MultiplexedPath object. Because namespace packages are packages that live in multiple locations on disk, you need a Path object that can represent multiple locations on disk too.
Note: For regular packages, the import system searches for the first package on the module search path. Once it finds something, it returns it immediately.
When importing namespace packages, though, the import system checks the whole module search path because you may have additional portions of the namespace later in the module search path. That’s why namespace packages are slightly slower to import than regular packages.
You call .iterdir() on MultiplexedPath to iterate through all the files in all the paths, essentially iterating through all the files contained within the data_repos namespace.
Once the target file is found, you take the file extension and check to see if you’ve got a reader for that file format. If you do, then you use the reader to process the data.
Although you could achieve something similar without using namespace packages, there’s something quite elegant about being able to tie in to the existing Python import system in this way.
In the next section, you’ll take things even further and see how you could implement another level of namespace packages to support a plugin system so a subpackage could easily implement its own reader function.
Extending DataRepos to Include a Plugin System
While plugin systems aren’t the main use case for a namespace package, you can get an interesting plugin system working. In this section, you’ll work on extending DataRepos to create a proof-of-concept plugin system.
The way plugin systems typically work is that you have some mechanism for registering your plugins. But there are some plugin systems that magically detect the existence of functions and are able to make those available without any extra code. You’ll experiment with the second kind here, even though it may not be the best choice for plugin systems in general.
In this example, you’ll take the DataRepos package and extend it to include a readers namespace package inside the data_repos namespace package. This new data_repos.readers namespace package will allow users to include their own readers in the same namespace.
Here’s how your plugin system will work at the user level:
- The user can include a Python module in the
data_repos.readersnamespace, and it should be named after the file extension that it’s meant to support—for example,json.py. - Each module should contain a
read()function.
With this setup, you can extend the read.py module to collect all these plugins to populate the readers dictionary and, in that way, support as many file extensions as you like.
To start off, make a package structure that looks like the below:
data-repos-plugs/
│
├── data_repos/
│   ├── read.py
│   │
│   └── readers/
│       └── csv.py
│
└── pyproject.toml
You’ve named your new DataRepos DataReposPlugs. Its pip name will be data-repos-plugs, and its import name will again be data_repos. It’s very similar to the original DataRepos, except the read.py file is slightly different, and it also has another namespace package called data_repos.readers nested inside the original data_repos namespace package.
Now it’s time to update the read.py file:
# data-repos-plugs/data_repos/read.py

from importlib import resources

def collect():
    print("Collecting readers")
    readers = {}
    for item in resources.files(f"{__package__}.readers").iterdir():
        if item.stem == "__pycache__":
            continue
        try:
            read_function = import_module(
                f"{__package__}.readers.{item.stem}"
            ).read
            if callable(read_function):
              readers[item.stem] = read_function
        except ImportError:
            continue
        except AttributeError:
            if item.is_dir():
                continue
            print(f"No read() function in {item}")
            continue

    return readers

def data(name): ... # No change

def path(name): ... # No change

readers = collect()
The main change here is your inclusion of a collect() function that you run on import. With this function, you search through all the files in the data_repos.readers namespace for any Python modules. If you find a Python module, then you try to import a read() function from that module if you can.
With a reference to the read() function of a plugin, you populate the readers dictionary with a new entry, using the module name as a key and the read() function as a value.
To see this in action, you can move most of the csv() function that you had earlier into the new csv.py file:
# data-repos-plugs/data_repos/readers/csv.py

import pandas as pd

def read(data_path):
    """Read CSV file from a path."""
    return pd.read_csv(data_path)
This file will now get imported whenever the data_repos.read module is imported. That means that all you need to do is to execute from data_repos import read, and then you’ll be able to rely on all the readers that you may have in the data_repos.readers namespace.
This type of structure lets you or a user augment this base package with both data and readers. For example, if you declared the the DataReposPlugs package as a dependency for a new DataReposTrains project, then you could include a JSON reader:
# data-repos-trains/data_repos/readers/json.py

import pandas as pd

def read(data_path):
    """Read JSON file from a path."""
    return pd.read_json(data_path)
Again, this function is just a light wrapper around the pandas library. The DataReposTrains project structure would look like this:
data-repos-trains/
│
├── data_repos/
│   ├── trains.json
│   │
│   └── readers/
│       └── json.py
│
└── pyproject.toml
The trains.json file is picked up by the base DataReposPlugs but doesn’t have a JSON reader by default. But since you included a json.py module with a read() function in the data_repos.readers namespace, everything works!
A potential downside of this kind of plugin structure is that it’s serving as a very thin wrapper around the import system. For many, this would probably be an unnecessary abstraction around something that any intermediate Python coder would already know. It also makes the system less flexible and more prone to strange errors if you include files where the system doesn’t expect them to be.
That said, it could be the basis for a stricter framework geared to one particular use case. Or you could use it to build a system for people who have no intention of becoming proficient with Python but need to use it for some basic tasks nonetheless.
Conclusion
In this tutorial, you’ve dived into what namespace packages are, how they work, and when and how to use them. You’ve explored the DataRepos package, which leverages namespace packages, and you’ve even extended it into a prototype plugin system.
While you may never have the pleasure of working with namespace packages, at least now you know what they are and when you might want to reach for them. So the next time you include a blank __init__.py file, you can have a much clearer idea of what that does.
Free Source Code: Click here to download the free source code that you’ll use to explore Python namespace packages.
Take the Quiz: Test your knowledge with our interactive “Python Namespace Packages” quiz. You’ll receive a score upon completion to help you track your learning progress:
Interactive Quiz
Python Namespace PackagesPractice your knowledge about namespace packages in Python. Revisit managing multiple packages without an __init__.py file.