You can use several Python game engines for crafting video games using your existing Python skills. Popular Python game engines are Pygame, Arcade, and Ren’Py, each offering unique features. In this tutorial, you’ll learn how to install and use them, and how these engines differ from traditional stand-alone game engines.
By the end of this tutorial, you’ll understand that:
- Pygame, Arcade, adventurelib, and Ren’Py are some of the top Python game engines, each with unique features.
- Python game engines are straightforward to use for Python developers but may require more effort for cross-platform support compared to other engines.
- Pygame Zero is designed for beginners, offering simplified game development requiring less manual code than Pygame.
- Creating mobile games with Python game engines isn’t straightforward and requires additional effort for optimization and compatibility.
- You can use Python to create 3D games using frameworks like Panda 3D.
Using Python, and a host of great Python game engines, makes crafting great computer games much easier than in the past. In this tutorial, you’ll explore several of these game engines, learning what you need to start crafting your own Python video games!
To get the most out of this tutorial, you should be well-versed in Python programming, including object-oriented programming. An understanding of basic game concepts is helpful, but not necessary.
Ready to dive in? Click the link below to download the source code for all the games that you’ll be creating:
Get Source Code: Click here to get the source code you’ll use to try out Python game engines.
Python Game Engines Overview
Game engines for Python most often take the form of Python libraries, which can be installed in a variety of ways. Most are available on PyPI and can be installed with pip. However, a few are available only on GitHub, GitLab, or other code sharing locations, and they may require other installation steps. This article will cover installation methods for all the engines discussed.
Python is a general purpose programming language, and it’s used for a variety of tasks other than writing computer games. In contrast, there are many different stand-alone game engines that are tailored specifically to writing games. Some of these include:
These stand-alone game engines differ from Python game engines in several key aspects:
- Language support: Languages like C++, C#, and JavaScript are popular for games written in stand-alone game engines, as the engines themselves are often written in these languages. Very few stand-alone engines support Python.
- Proprietary scripting support: In addition, many stand-alone game engines maintain and support their own scripting languages, which may not resemble Python. For example, Unity uses C# natively, while Unreal works best with C++.
- Platform support: Many modern stand-alone game engines can produce games for a variety of platforms, including mobile and dedicated game systems, with very little effort. In contrast, porting a Python game across various platforms, especially mobile platforms, can be a major undertaking.
- Licensing options: Games written using a stand-alone game engine may have different licensing options and restrictions, based on the engine used.
So why use Python to write games at all? In a word, Python. Using a stand-alone game engine often requires you to learn a new programming or scripting language. Python game engines leverage your existing knowledge of Python, reducing the learning curve and getting you moving forward quickly.
There are many game engines available for the Python environment. The engines that you’ll learn about here all share the following criteria:
- They’re relatively popular engines, or they cover aspects of gaming that aren’t usually covered.
- They’re currently maintained.
- They have good documentation available.
For each engine, you’ll learn about:
- Installation methods
- Basic concepts, as well as assumptions that the engine makes
- Major features and capabilities
- Two game implementations, to allow for comparison
Where appropriate, you should install these game engines in a virtual environment. Full source code for the games in this tutorial is available for download at the link below and will be referenced throughout the article:
Get Source Code: Click here to get the source code you’ll use to try out Python game engines.
With the source code downloaded, you’re ready to begin.
Pygame
When people think of Python game engines, the first thought many have is Pygame. In fact, there’s already a great primer on Pygame available at Real Python.
Written as a replacement for the stalled PySDL library, Pygame wraps and extends the SDL library, which stands for Simple DirectMedia Layer. SDL provides cross-platform access to your system’s underlying multimedia hardware components, such as sound, video, mouse, keyboard, and joystick. The cross-platform nature of both SDL and Pygame means that you can write games and rich multimedia Python programs for every platform that supports them!
Pygame Installation
Pygame is available on PyPI, so after creating and activating a virtual environment, you can install it using the appropriate pip command:
(venv) $ python -m pip install pygame
Once that’s done, you can verify the installation by running an example that comes with the library:
(venv) $ python -m pygame.examples.aliens
Now that you’ve installed Pygame, you can begin using it right away. If you run into problems during installation, then the Getting Started guide outlines some known issues and possible solutions for all platforms.
Basic Concepts
Pygame is organized into several different modules, which provide abstracted access to your computer graphics, sound, and input hardware. Pygame also defines numerous classes, which encapsulate concepts that aren’t hardware dependent. For example, drawing is done on Surface objects, whose rectangular limits are defined by their Rect object.
Every game utilizes a game loop to control game play. This loop iterates constantly as the game progresses. Pygame provides methods and functions to implement a game loop, but it doesn’t provide one automatically. The game author is expected to implement the functionality of a game loop.
Each iteration of the game loop is called a frame. Every frame, the game performs four vital actions:
-
Processing user input. User input in Pygame is handled using an event model. Mouse and keyboard input generate events, which can be read and handled, or ignored as you see fit. Pygame itself doesn’t provide any event handlers.
-
Updating the state of game objects. Game objects can be represented using any Pygame data structure or special Pygame class. Objects such as sprites, images, fonts, and colors can be created and extended in Python to provide as much state information as necessary.
-
Updating the display and audio output. Pygame provides abstract access to display and sound hardware. The
display,mixer, andmusicmodules allow game authors flexibility in game design and implementation. -
Maintaining the speed of the game. Pygame’s
timemodule allows game authors to control the game speed. By ensuring each frame completes within a specified time limit, game authors can ensure the game runs similarly on different hardware.
You can see these concepts come together in a basic example.
Basic Application
This basic Pygame program draws a few shapes and some text on the screen:
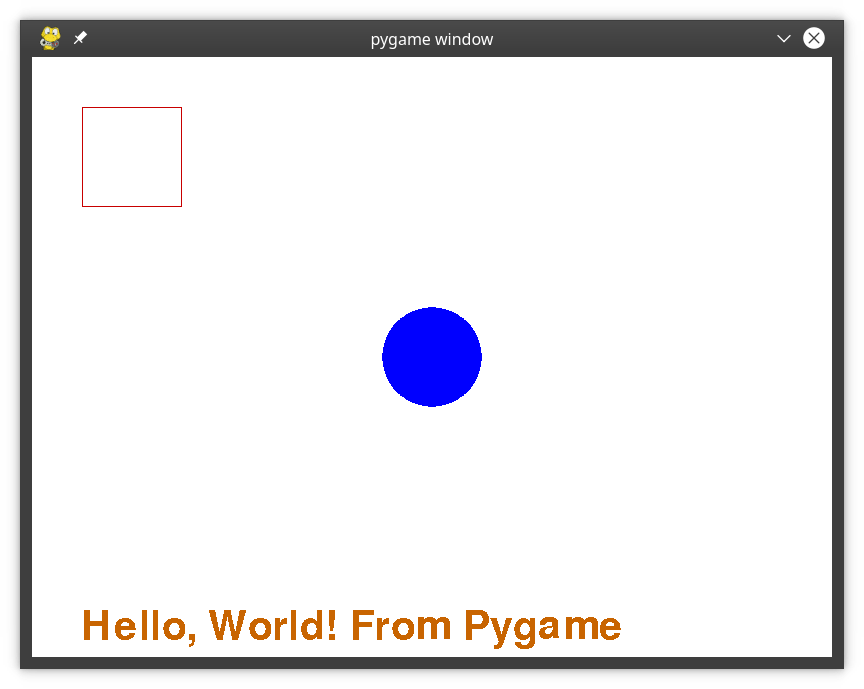
The code for this sample can be found below and in the downloadable materials:
pygame_basic.py
 1"""
 2Basic "Hello, World!" program in Pygame
 3
 4This program is designed to demonstrate the basic capabilities
 5of Pygame. It will:
 6- Create a game window
 7- Fill the background with white
 8- Draw some basic shapes in different colors
 9- Draw some text in a specified size and color
10- Allow you to close the window
11"""
12
13# Import and initialize the pygame library
14import pygame
15
16pygame.init()
17
18# Set the width and height of the output window, in pixels
19WIDTH = 800
20HEIGHT = 600
21
22# Set up the drawing window
23screen = pygame.display.set_mode([WIDTH, HEIGHT])
24
25# Run until the user asks to quit
26running = True
27while running:
28
29    # Did the user click the window close button?
30    for event in pygame.event.get():
31        if event.type == pygame.QUIT:
32            running = False
33
34    # Fill the background with white
35    screen.fill((255, 255, 255))
36
37    # Draw a blue circle with a radius of 50 in the center of the screen
38    pygame.draw.circle(screen, (0, 0, 255), (WIDTH // 2, HEIGHT // 2), 50)
39
40    # Draw a red-outlined square in the top-left corner of the screen
41    red_square = pygame.Rect((50, 50), (100, 100))
42    pygame.draw.rect(screen, (200, 0, 0), red_square, 1)
43
44    # Draw an orange caption along the bottom in 60-point font
45    text_font = pygame.font.SysFont("any_font", 60)
46    text_block = text_font.render(
47        "Hello, World! From Pygame", False, (200, 100, 0)
48    )
49    screen.blit(text_block, (50, HEIGHT - 50))
50
51    # Flip the display
52    pygame.display.flip()
53
54# Done! Time to quit.
55pygame.quit()
Despite its humble aspirations, even this basic Pygame program requires a game loop and event handlers. The game loop begins on line 27 and is controlled by the running variable. Setting this variable to False will end the program.
Event handling begins on line 30 with an event loop. Events are retrieved from a queue using pygame.event.get() and are processed one at a time during every loop iteration. In this case, the only event being handled is the pygame.QUIT event, which is generated when the user closes the game window. When this event is processed, you set running = False, which will eventually end the game loop and the program.
Pygame provides various methods for drawing basic shapes, such as circles and rectangles. In this sample, a blue circle is drawn on line 38, and a red square is drawn on lines 41 and 42. Note that drawing a rectangle requires you to create a Rect object first.
Drawing text on the screen is a little more involved. First, on line 45, you select a font and create a font object. Using that font on lines 46 to 48, you call the .render() method. This creates a Surface object containing the text rendered in the specified font and color. Finally, you copy Surface to the screen using the .blit() method on line 49.
The end of the game loop occurs on line 52, when everything that was previously drawn is shown on the display. Without this line, nothing would be displayed.
To run this code, use the following command:
(venv) $ python pygame/pygame_basic.py
You should see a window appear with the image shown above. Congratulations! You just ran your first Pygame program!
Advanced Application
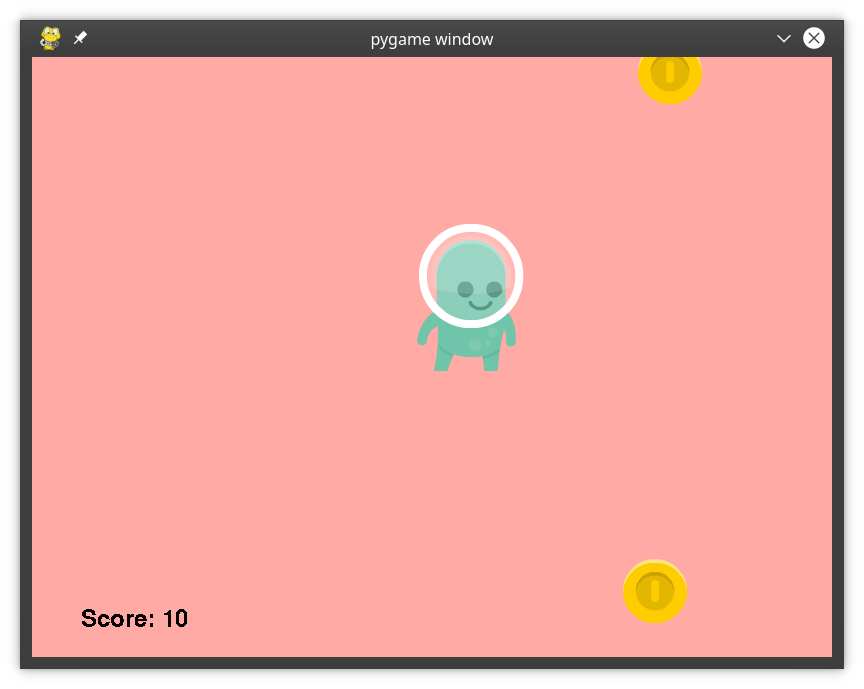
Of course, Pygame was designed to write games in Python. To explore the capabilities and requirements of an actual Pygame game, you’ll examine a game written in Pygame with the following details:
- The player is a single sprite on the screen, controlled by moving the mouse.
- At regular intervals, coins appear on the screen one by one.
- As the player moves over each coin, it disappears and the player is awarded ten points.
- As the game progresses, coins are added more quickly.
- The game ends when there are more than ten coins visible on the screen.
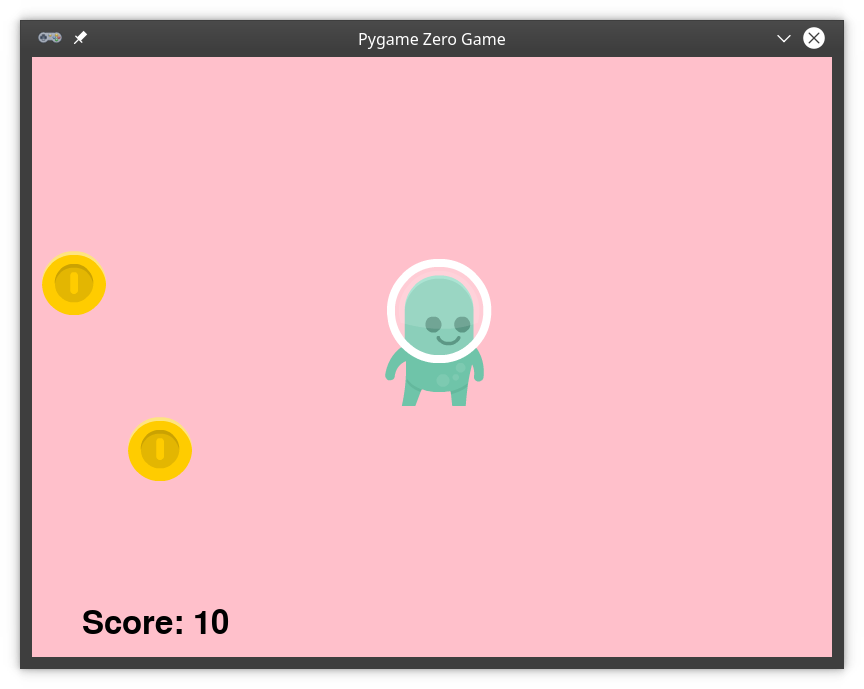
When done, the game will look something like this:
The complete code for this game can be found in the downloaded materials and below:
pygame_game.py
  1"""
  2Complete Game in Pygame
  3
  4This game demonstrates some of the more advanced features of
  5Pygame, including:
  6- Using sprites to render complex graphics
  7- Handling user mouse input
  8- Basic sound output
  9"""
 10
 11# Import and initialize the pygame library
 12import pygame
 13
 14# To randomize coin placement
 15from random import randint
 16
 17# To find your assets
 18from pathlib import Path
 19
 20# For type hinting
 21from typing import Tuple
 22
 23# Set the width and height of the output window, in pixels
 24WIDTH = 800
 25HEIGHT = 600
 26
 27# How quickly do you generate coins? Time is in milliseconds
 28coin_countdown = 2500
 29coin_interval = 100
 30
 31# How many coins can be on the screen before you end?
 32COIN_COUNT = 10
 33
 34# Define the Player sprite
 35class Player(pygame.sprite.Sprite):
 36    def __init__(self):
 37        """Initialize the player sprite"""
 38        super(Player, self).__init__()
 39
 40        # Get the image to draw for the player
 41        player_image = str(
 42            Path.cwd() / "pygame" / "images" / "alien_green_stand.png"
 43        )
 44        # Load the image, preserve alpha channel for transparency
 45        self.surf = pygame.image.load(player_image).convert_alpha()
 46        # Save the rect so you can move it
 47        self.rect = self.surf.get_rect()
 48
 49    def update(self, pos: Tuple):
 50        """Update the position of the player
 51
 52        Arguments:
 53            pos {Tuple} -- the (X,Y) position to move the player
 54        """
 55        self.rect.center = pos
 56
 57# Define the Coin sprite
 58class Coin(pygame.sprite.Sprite):
 59    def __init__(self):
 60        """Initialize the coin sprite"""
 61        super(Coin, self).__init__()
 62
 63        # Get the image to draw for the coin
 64        coin_image = str(Path.cwd() / "pygame" / "images" / "coin_gold.png")
 65
 66        # Load the image, preserve alpha channel for transparency
 67        self.surf = pygame.image.load(coin_image).convert_alpha()
 68
 69        # The starting position is randomly generated
 70        self.rect = self.surf.get_rect(
 71            center=(
 72                randint(10, WIDTH - 10),
 73                randint(10, HEIGHT - 10),
 74            )
 75        )
 76
 77# Initialize the Pygame engine
 78pygame.init()
 79
 80# Set up the drawing window
 81screen = pygame.display.set_mode(size=[WIDTH, HEIGHT])
 82
 83# Hide the mouse cursor
 84pygame.mouse.set_visible(False)
 85
 86# Set up the clock for a decent frame rate
 87clock = pygame.time.Clock()
 88
 89# Create a custom event for adding a new coin
 90ADDCOIN = pygame.USEREVENT + 1
 91pygame.time.set_timer(ADDCOIN, coin_countdown)
 92
 93# Set up the coin_list
 94coin_list = pygame.sprite.Group()
 95
 96# Initialize the score
 97score = 0
 98
 99# Set up the coin pickup sound
100coin_pickup_sound = pygame.mixer.Sound(
101    str(Path.cwd() / "pygame" / "sounds" / "coin_pickup.wav")
102)
103
104# Create a player sprite and set its initial position
105player = Player()
106player.update(pygame.mouse.get_pos())
107
108# Run until you get to an end condition
109running = True
110while running:
111
112    # Did the user click the window close button?
113    for event in pygame.event.get():
114        if event.type == pygame.QUIT:
115            running = False
116
117        # Should you add a new coin?
118        elif event.type == ADDCOIN:
119            # Create a new coin and add it to the coin_list
120            new_coin = Coin()
121            coin_list.add(new_coin)
122
123            # Speed things up if fewer than three coins are on-screen
124            if len(coin_list) < 3:
125                coin_countdown -= coin_interval
126            # Need to have some interval
127            if coin_countdown < 100:
128                coin_countdown = 100
129
130            # Stop the previous timer by setting the interval to 0
131            pygame.time.set_timer(ADDCOIN, 0)
132
133            # Start a new timer
134            pygame.time.set_timer(ADDCOIN, coin_countdown)
135
136    # Update the player position
137    player.update(pygame.mouse.get_pos())
138
139    # Check if the player has collided with a coin, removing the coin if so
140    coins_collected = pygame.sprite.spritecollide(
141        sprite=player, group=coin_list, dokill=True
142    )
143    for coin in coins_collected:
144        # Each coin is worth 10 points
145        score += 10
146        # Play the coin collected sound
147        coin_pickup_sound.play()
148
149    # Are there too many coins on the screen?
150    if len(coin_list) >= COIN_COUNT:
151        # This counts as an end condition, so you end your game loop
152        running = False
153
154    # To render the screen, first fill the background with pink
155    screen.fill((255, 170, 164))
156
157    # Draw the coins next
158    for coin in coin_list:
159        screen.blit(coin.surf, coin.rect)
160
161    # Then draw the player
162    screen.blit(player.surf, player.rect)
163
164    # Finally, draw the score at the bottom left
165    score_font = pygame.font.SysFont("any_font", 36)
166    score_block = score_font.render(f"Score: {score}", False, (0, 0, 0))
167    screen.blit(score_block, (50, HEIGHT - 50))
168
169    # Flip the display to make everything appear
170    pygame.display.flip()
171
172    # Ensure you maintain a 30 frames per second rate
173    clock.tick(30)
174
175# Done! Print the final score
176print(f"Game over! Final score: {score}")
177
178# Make the mouse visible again
179pygame.mouse.set_visible(True)
180
181# Quit the game
182pygame.quit()
Sprites in Pygame provide some basic functionality, but they’re designed to be subclassed rather than used on their own. Pygame sprites don’t have images associated with them by default, and they can’t be positioned on their own.
To properly draw and manage the player and the coins on-screen, a Player class is created on lines 35 to 55, and a Coin class on lines 58 to 75. When each sprite object is created, it first locates and loads the image it’ll display, saving it in self.surf. The self.rect property positions and moves the sprite on the screen.
Adding coins to the screen at regular intervals is done with a timer. In Pygame, events are fired whenever a timer expires, and game creators can define their own events as integer constants. The ADDCOIN event is defined on line 90, and the timer fires the event after coin_countdown milliseconds on line 91.
Since ADDCOIN is an event, it needs to be handled in an event loop, which happens on lines 118 to 134. The event creates a new Coin object and adds it to the existing coin_list. The number of coins on-screen is checked. If there are fewer than three, then coin_countdown is reduced. Finally, the previous timer is stopped, and a new one starts.
As the player moves, they collide with coins, collecting them as they do. This removes each collected coin from the coin_list automatically. This also updates the score and plays a sound.
Player movement occurs on line 137. Collisions with coins on the screen are checked on lines 140 to 142. The dokill=True parameter removes the coin from the coin_list automatically. Finally, lines 143 to 147 update the score and play the sound for each coin collected.
The game ends when the user either closes the window, or when there are more than ten coins on the screen. Checking for more than ten coins is done on lines 150 to 152.
Because Pygame sprites have no built-in knowledge of an image, they also don’t know how to draw themselves on the screen. The game author needs to clear the screen, draw all the sprites in the correct order, draw the on-screen score, then .flip() the display to make everything appear. That all happens on lines 155 to 170.
Pygame is a very powerful and well-established library, but it has its drawbacks. Pygame makes game authors work to get their results. It’s up to the game author to implement basic sprite behavior and implement key game requirements such as game loops and basic event handlers. Next up, you’ll see how other game engines deliver similar results while reducing the amount of work you have to do.
Pygame Zero
There are many things Pygame does well, but others where its age is evident. For game-writing beginners, a better option can be found in Pygame Zero. Designed for education, Pygame Zero is guided by a simple set of principles aimed at being perfect for young and beginning programmers:
- Make it accessible: Everything is designed for beginning programmers.
- Be conservative: Support the common platform and avoid experimental features.
- Just work: Make sure everything works without a lot of fuss.
- Minimize runtime costs: If something might fail, fail early.
- Error clearly: Nothing’s worse than not knowing why something went wrong.
- Document well: A framework is only as good as its docs.
- Minimize breaking changes: Upgrading shouldn’t require rewriting your game.
The documentation for Pygame Zero is very accessible for beginning programmers, and it includes a complete step-by-step tutorial. Further, the Pygame Zero team recognizes that many beginning programmers start coding with Scratch, so they provide a tutorial demonstrating how to migrate a Scratch program to Pygame Zero.
Pygame Zero Installation
Pygame Zero is available on PyPI, and you can install it like any other Python library on Windows, macOS, or Linux:
(venv) $ python -m pip install pgzero
Pygame Zero, as its name suggests, is built on Pygame, so this step also installs Pygame as a dependent library. Pygame Zero is installed by default on the Raspberry Pi platform, on Raspbian Jessie or a later release.
Basic Concepts
Pygame Zero automates many things that programmers have to do manually in Pygame. By default, Pygame Zero provides the game creator:
- A game loop, so there’s no need to write one
- An event model to handle drawing, update, and input handling
- Uniform image, text, and sound handling
- A usable sprite class and useful animation methods for user sprites
Because of these provisions, a basic Pygame Zero program can be very short:
pygame_zero_basic.py
 1"""
 2Basic "Hello, World!" program in Pygame Zero
 3
 4This program is designed to demonstrate the basic capabilities
 5of Pygame Zero. It will:
 6- Create a game window
 7- Fill the background with white
 8- Draw some basic shapes in different colors
 9- Draw some text in a specified size and color
10"""
11
12# Import pgzrun allows the program to run in Python IDLE
13import pgzrun
14
15# Set the width and height of your output window, in pixels
16WIDTH = 800
17HEIGHT = 600
18
19def draw():
20    """Draw is called once per frame to render everything on the screen"""
21
22    # Clear the screen first
23    screen.clear()
24
25    # Set the background color to white
26    screen.fill("white")
27
28    # Draw a blue circle with a radius of 50 in the center of the screen
29    screen.draw.filled_circle(
30        (WIDTH // 2, HEIGHT // 2), 50, "blue"
31    )
32
33    # Draw a red-outlined square in the top-left corner of the screen
34    red_square = Rect((50, 50), (100, 100))
35    screen.draw.rect(red_square, (200, 0, 0))
36
37    # Draw an orange caption along the bottom in 60-point font
38    screen.draw.text(
39        "Hello, World! From Pygame Zero!",
40        (100, HEIGHT - 50),
41        fontsize=60,
42        color="orange",
43    )
44
45# Run the program
46pgzrun.go()
Pygame Zero recognizes that the constants WIDTH and HEIGHT on lines 16 and 17 refer to the size of the window and automatically uses those dimensions to create it. Plus, Pygame Zero provides a built-in game loop and calls the draw() function defined on lines 19 to 43 once per frame to render the screen.
Because Pygame Zero is based on Pygame, some shape drawing code is inherited. You can see the similarities in drawing the circle on line 29 and the square on lines 34 to 35:
However, text drawing is now a single function call on lines 38 to 43, rather than three separate functions.
Pygame Zero also provides basic window-handling code, so you can close the window by clicking the appropriate close button, without requiring an event handler.
You can find code demonstrating some of Pygame Zero’s basic capabilities in the downloadable materials:
Get Source Code: Click here to get the source code you’ll use to try out Python game engines.
Running Pygame Zero programs is done from the command line using the command:
(venv) $ python pygame_zero/pygame_zero_basic.py
Running this command will start your Pygame Zero game. You should see a window appear with basic shapes and your Pygame Zero greeting.
Sprites and Images
Sprites are called Actors in Pygame Zero, and they have a few characteristics which require some explanation:
- Pygame Zero provides the
Actorclass. EachActorhas, at minimum, an image and a position. - All images used in a Pygame Zero program must be located in a subfolder called
./images/, and be named using lowercase letters, numbers, and underscores only. - Images are referenced using only the base name of the image. For example, if your image is called
alien.png, you reference it in your program as"alien".
Because of these built-in features of Pygame Zero, drawing sprites on the screen requires very little code:
 1alien = Actor("alien")
 2alien.pos = 100, 56
 3
 4WIDTH = 500
 5HEIGHT = alien.height + 20
 6
 7def draw():
 8    screen.clear()
 9    alien.draw()
Now you’ll break this small sample down line by line:
- Line 1 creates the new
Actorobject, giving it the name of the image to draw. - Line 2 sets the initial x and y position of the
Actor. - Lines 4 and 5 set the size of the Pygame Zero window. Notice that
HEIGHTis based on the.heightattribute of the sprite. This value comes from the height of the image used to create the sprite. - Line 9 draws the sprite by calling
.draw()on theActorobject. This draws the sprite image on the screen at the location provided by.pos.
You’ll use these techniques in a more advanced game next.
Advanced Application
To demonstrate the difference between the game engines, you’ll revisit the same advanced game that you saw in the Pygame section, now written using Pygame Zero. As a reminder, the key details of that game are:
- The player is a single sprite on the screen, controlled by moving the mouse.
- At regular intervals, coins appear on the screen one by one.
- As the player moves over each coin, it disappears and the player is awarded ten points.
- As the game progresses, coins are added more quickly.
- The game ends when there are more than ten coins visible on the screen.
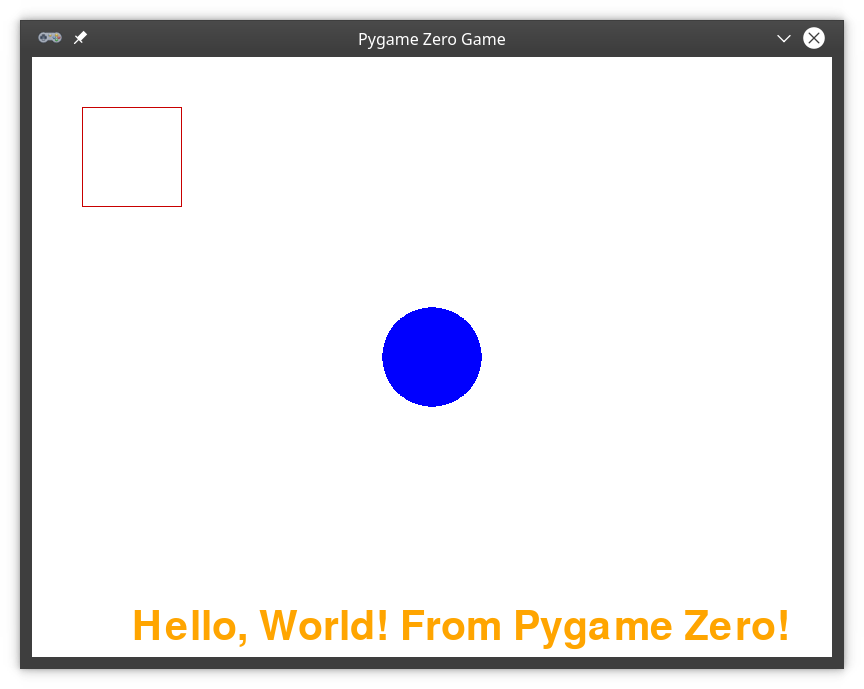
This game should look and behave identically to the Pygame version demonstrated earlier, with only the window title bar betraying the Pygame Zero origin:
You can find the complete code for this sample in the downloaded materials and below:
pygame_zero_game.py
  1"""
  2Complete game in Pygame Zero
  3
  4This game demonstrates some of the more advanced features of
  5Pygame Zero, including:
  6- Using sprites to render complex graphics
  7- Handling user input
  8- Sound output
  9
 10"""
 11
 12# Import pgzrun allows the program to run in Python IDLE
 13import pgzrun
 14
 15# For type-hinting support
 16from typing import Tuple
 17
 18# To randomize coin placement
 19from random import randint
 20
 21# Set the width and height of your output window, in pixels
 22WIDTH = 800
 23HEIGHT = 600
 24
 25# Set up the player
 26player = Actor("alien_green_stand")
 27player_position = WIDTH // 2, HEIGHT // 2
 28player.center = player_position
 29
 30# Set up the coins to collect
 31COIN_COUNT = 10
 32coin_list = list()
 33
 34# Set up a timer to create new coins
 35coin_countdown = 2.5
 36coin_interval = 0.1
 37
 38# Score is initially zero
 39score = 0
 40
 41def add_coin():
 42    """Adds a new coin to playfield, then
 43    schedules the next coin to be added
 44    """
 45    global coin_countdown
 46
 47    # Create a new coin Actor at a random location
 48    new_coin = Actor(
 49        "coin_gold", (randint(10, WIDTH - 10), randint(10, HEIGHT - 10))
 50    )
 51
 52    # Add it to the global coin list
 53    coin_list.append(new_coin)
 54
 55    # Decrease the time between coin appearances if there are
 56    # fewer than three coins on the screen.
 57    if len(coin_list) < 3:
 58        coin_countdown -= coin_interval
 59
 60    # Make sure you don't go too quickly
 61    if coin_countdown < 0.1:
 62        coin_countdown = 0.1
 63
 64    # Schedule the next coin addition
 65    clock.schedule(add_coin, coin_countdown)
 66
 67def on_mouse_move(pos: Tuple):
 68    """Called whenever the mouse changes position
 69
 70    Arguments:
 71        pos {Tuple} -- The current position of the mouse
 72    """
 73    global player_position
 74
 75    # Set the player to the mouse position
 76    player_position = pos
 77
 78    # Ensure the player doesn't move off the screen
 79    if player_position[0] < 0:
 80        player_position[0] = 0
 81    if player_position[0] > WIDTH:
 82        player_position[0] = WIDTH
 83
 84    if player_position[1] < 0:
 85        player_position[1] = 0
 86    if player_position[1] > HEIGHT:
 87        player_position[1] = HEIGHT
 88
 89def update(delta_time: float):
 90    """Called every frame to update game objects
 91
 92    Arguments:
 93        delta_time {float} -- Time since the last frame
 94    """
 95    global score
 96
 97    # Update the player position
 98    player.center = player_position
 99
100    # Check if the player has collided with a coin
101    # First, set up a list of coins to remove
102    coin_remove_list = []
103
104    # Check each coin in the list for a collision
105    for coin in coin_list:
106        if player.colliderect(coin):
107            sounds.coin_pickup.play()
108            coin_remove_list.append(coin)
109            score += 10
110
111    # Remove any coins with which you collided
112    for coin in coin_remove_list:
113        coin_list.remove(coin)
114
115    # The game is over when there are too many coins on the screen
116    if len(coin_list) >= COIN_COUNT:
117        # Stop making new coins
118        clock.unschedule(add_coin)
119
120        # Print the final score and exit the game
121        print(f"Game over! Final score: {score}")
122        exit()
123
124def draw():
125    """Render everything on the screen once per frame"""
126
127    # Clear the screen first
128    screen.clear()
129
130    # Set the background color to pink
131    screen.fill("pink")
132
133    # Draw the remaining coins
134    for coin in coin_list:
135        coin.draw()
136
137    # Draw the player
138    player.draw()
139
140    # Draw the current score at the bottom
141    screen.draw.text(
142        f"Score: {score}",
143        (50, HEIGHT - 50),
144        fontsize=48,
145        color="black",
146    )
147
148# Schedule the first coin to appear
149clock.schedule(add_coin, coin_countdown)
150
151# Run the program
152pgzrun.go()
Creating the player Actor is done on lines 26 to 28. The initial position is the center of the screen.
The clock.schedule() method handles creating coins at regular intervals. This method takes a function to call and the number of seconds to delay before calling that function.
Lines 41 to 65 define the add_coin() function that will be scheduled. It creates a new coin Actor at a random location on lines 48 to 50 and adds it to a global list of visible coins.
As the game progresses, coins should appear more and more quickly, but not too quickly. Managing the interval is done on lines 57 to 62. Because clock.schedule() will only fire a single time, you schedule another call on line 65.
Mouse movement is processed in the on_mouse_move() event handler on lines 67 to 87. The mouse position is captured and stored in a global variable on line 76. Lines 79 to 87 ensure this position is never off the screen.
Storing the player position in a global variable is a convenience that simplifies the code and focuses allows you to focus on the capabilities of Pygame Zero. Your design choices may differ in more complete games.
The update() function defined on lines 89 to 122 is called once per frame by Pygame Zero. You use this to move Actor objects and update the state of all your game objects. The position of the player Actor is updated to track the mouse on line 98.
Collisions with coins are handled on lines 102 to 113. If the player has collided with a coin, then the coin is added to coin_remove_list, the score is incremented, and a sound is played. When all the collisions have been processed, you remove the coins which were added to coin_remove_list on lines 112 to 113.
After coin collisions are handled, you check to see if there are still too many coins on the screen on line 116. If so, the game is over, so you stop creating new coins, print the final score, and end the game on lines 118 to 122.
Of course, all this updating needs to be reflected on the screen. The draw() function on lines 124 to 146 is called after update() once per frame. After clearing the screen and filling it with a background color on lines 128 and 131, the player Actor and all the coins are drawn on lines 134 to 138. The current score is the last thing drawn on lines 141 to 146.
The Pygame Zero implementation used 152 lines of code to deliver the same game as 182 lines of Pygame code. While these line counts are comparable, the Pygame Zero version is arguably cleaner, more modular, and possibly easier to understand and code than the Pygame version.
Of course, there’s always one more way to write a game.
Arcade
Arcade is a modern Python framework for crafting games with compelling graphics and sound. Object-oriented by design, Arcade provides game authors with a modern set of tools for crafting great Python game experiences.
Designed by Professor Paul Craven from Simpson College in Iowa, USA, Arcade is built on top of the pyglet windowing and multimedia library. It provides a set of improvements, modernizations, and enhancements that compare favorably with both Pygame and Pygame Zero:
- Supports modern OpenGL graphics
- Supports Python 3 type hinting
- Has support for frame-based animated sprites
- Incorporates consistent command, function, and parameter names
- Encourages separation of game logic from display code
- Requires less boilerplate code
- Provides well-maintained and up-to-date documentation, including several tutorials and complete Python game examples
- Has built-in physics engines for top-down and platform games
Arcade is under constant development, is well supported in the community, and has an author who’s very responsive to issues, bug reports, and potential fixes.
Arcade Installation
To install Arcade and its dependencies, use the appropriate pip command:
(venv) $ python -m pip install arcade
Complete installation instructions based on your platform are available for Windows, macOS, and Linux. You can even install arcade directly from source if you’d prefer.
Basic Concepts
Everything in Arcade occurs in a window that’s created with a user-defined size. The coordinate system assumes that the origin (0, 0) is located in the lower-left corner of the screen, with the y-coordinates increasing as you move up. This is different from many other game engines, which place (0, 0) in the upper left and increase the y-coordinates moving down.
At its heart, Arcade is an object-oriented library. While it’s possible to write Arcade applications procedurally, its real power is revealed when you create fully object-oriented code.
Arcade, like Pygame Zero, provides a built-in game loop and a well-defined event model, so you end up with very clean and readable game code. Also like Pygame Zero, Arcade provides a powerful sprite class which aids rendering, positioning, and collision detection. In addition, Arcade sprites can be animated by providing multiple images.
The code for a basic Arcade application listed below is provided in the tutorial’s source code as arcade_basic.py:
arcade_basic.py
 1"""
 2Basic "Hello, World!" program in Arcade
 3
 4This program is designed to demonstrate the basic capabilities
 5of Arcade. It will:
 6- Create a game window
 7- Fill the background with white
 8- Draw some basic shapes in different colors
 9- Draw some text in a specified size and color
10"""
11
12# Import arcade allows the program to run in Python IDLE
13import arcade
14
15# Set the width and height of your output window, in pixels
16WIDTH = 800
17HEIGHT = 600
18
19# Classes
20class ArcadeBasic(arcade.Window):
21    """Main game window"""
22
23    def __init__(self, width: int, height: int, title: str):
24        """Initialize the window to a specific size
25
26        Arguments:
27            width {int} -- Width of the window
28            height {int} -- Height of the window
29            title {str} -- Title for the window
30        """
31
32        # Call the parent class constructor
33        super().__init__(width, height, title)
34
35        # Set the background window
36        arcade.set_background_color(color=arcade.color.WHITE)
37
38    def on_draw(self):
39        """Called once per frame to render everything on the screen"""
40
41        # Start rendering
42        arcade.start_render()
43
44        # Draw a blue circle with a radius of 50 in the center of the screen
45        arcade.draw_circle_filled(
46            center_x=WIDTH // 2,
47            center_y=HEIGHT // 2,
48            radius=50,
49            color=arcade.color.BLUE,
50            num_segments=50,
51        )
52
53        # Draw a red-outlined square in the top-left corner of the screen
54        arcade.draw_lrtb_rectangle_outline(
55            left=50,
56            top=HEIGHT - 50,
57            bottom=HEIGHT - 100,
58            right=100,
59            color=arcade.color.RED,
60            border_width=3,
61        )
62
63        # Draw an orange caption along the bottom in 60-point font
64        arcade.draw_text(
65            text="Hello, World! From Arcade!",
66            start_x=100,
67            start_y=50,
68            font_size=28,
69            color=arcade.color.ORANGE,
70        )
71
72# Run the program
73if __name__ == "__main__":
74    arcade_game = ArcadeBasic(WIDTH, HEIGHT, "Arcade Basic Game")
75    arcade.run()
To run this code, use the following command:
(venv) $ python arcade/arcade_basic.py
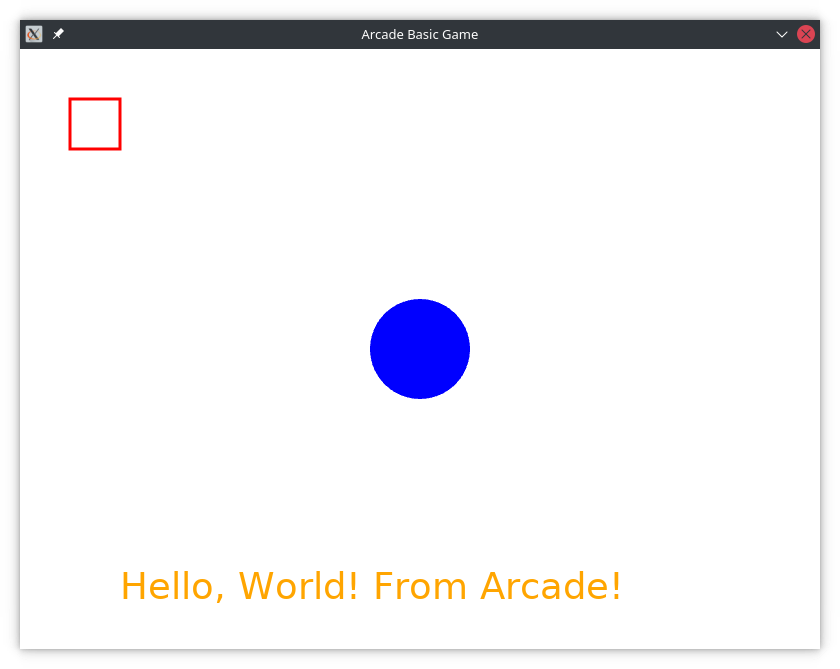
This program draws a few shapes and some text on the screen, as in the basic examples previously shown:
As mentioned above, Arcade programs can be written as fully object-oriented code. The arcade.Window class is designed to be subclassed by your games, as shown on line 20. Calling super().__init() on line 33 ensures the game window is set up properly.
Arcade calls the .on_draw() event handler defined on lines 38 to 70 once per frame to render everything to the screen. This method starts with a call to .start_render(), which tells Arcade to prepare the window for drawing. This is comparable to the pygame.flip() call required at the end of the Pygame drawing step.
Each of the basic shape-drawing methods in Arcade starts with draw_* and requires a single line to complete. Arcade has built-in drawing support for numerous shapes.
Arcade comes loaded with hundreds of named colors in the arcade.color package, but you’re also free to pick your own colors using RGB or RGBA tuples.
Advanced Application
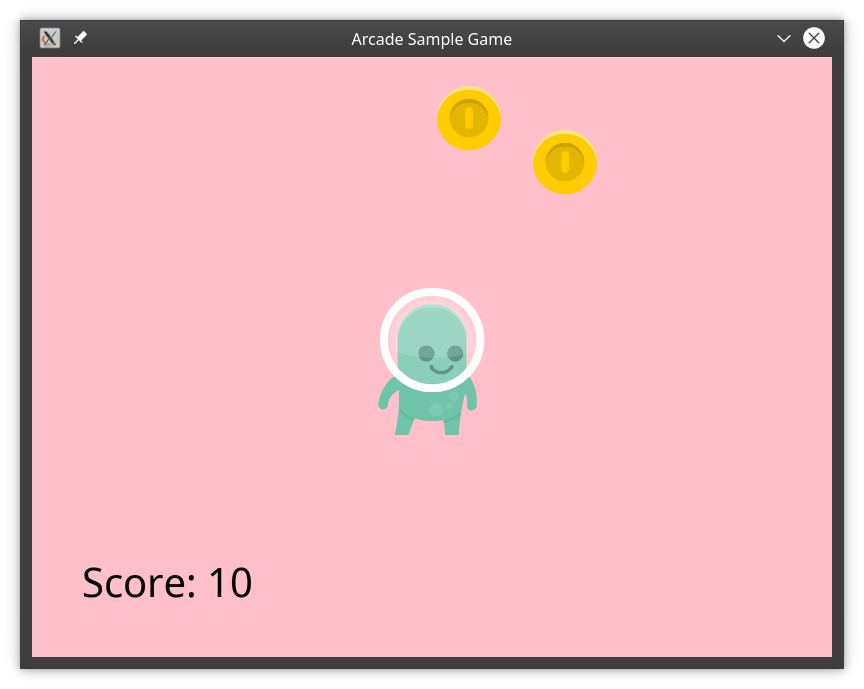
To show how Arcade is different from other game engines, you’ll see the same game from before, now implemented in Arcade. As a reminder, here are the key details of the game:
- The player is a single sprite on the screen, controlled by moving the mouse.
- At regular intervals, coins appear on the screen one by one.
- As the player moves over each coin, it disappears and the player is awarded ten points.
- As the game progresses, coins are added more quickly.
- The game ends when there are more than ten coins visible on the screen.
Again, the game should act the same as the previous examples:
The code for the full Arcade game listed below is provided in the downloadable materials as arcade_game.py:
arcade_basic.py
  1"""
  2Complete game in Arcade
  3
  4This game demonstrates some of the more advanced features of
  5Arcade, including:
  6- Using sprites to render complex graphics
  7- Handling user input
  8- Sound output
  9"""
 10
 11# Import arcade allows the program to run in Python IDLE
 12import arcade
 13
 14# To randomize coin placement
 15from random import randint
 16
 17# To locate your assets
 18from pathlib import Path
 19
 20# Set the width and height of your game window, in pixels
 21WIDTH = 800
 22HEIGHT = 600
 23
 24# Set the game window title
 25TITLE = "Arcade Sample Game"
 26
 27# Location of your assets
 28ASSETS_PATH = Path.cwd() / "assets"
 29
 30# How many coins must be on the screen before the game is over?
 31COIN_COUNT = 10
 32
 33# How much is each coin worth?
 34COIN_VALUE = 10
 35
 36# Classes
 37class ArcadeGame(arcade.Window):
 38    """The Arcade Game class"""
 39
 40    def __init__(self, width: float, height: float, title: str):
 41        """Create the main game window
 42
 43        Arguments:
 44            width {float} -- Width of the game window
 45            height {float} -- Height of the game window
 46            title {str} -- Title for the game window
 47        """
 48
 49        # Call the super class init method
 50        super().__init__(width, height, title)
 51
 52        # Set up a timer to create new coins
 53        self.coin_countdown = 2.5
 54        self.coin_interval = 0.1
 55
 56        # Score is initially zero
 57        self.score = 0
 58
 59        # Set up empty sprite lists
 60        self.coins = arcade.SpriteList()
 61
 62        # Don't show the mouse cursor
 63        self.set_mouse_visible(False)
 64
 65    def setup(self):
 66        """Get the game ready to play"""
 67
 68        # Set the background color
 69        arcade.set_background_color(color=arcade.color.PINK)
 70
 71        # Set up the player
 72        sprite_image = ASSETS_PATH / "images" / "alien_green_stand.png"
 73        self.player = arcade.Sprite(
 74            filename=sprite_image, center_x=WIDTH // 2, center_y=HEIGHT // 2
 75        )
 76
 77        # Spawn a new coin
 78        arcade.schedule(
 79            function_pointer=self.add_coin, interval=self.coin_countdown
 80        )
 81
 82        # Load your coin collision sound
 83        self.coin_pickup_sound = arcade.load_sound(
 84            ASSETS_PATH / "sounds" / "coin_pickup.wav"
 85        )
 86
 87    def add_coin(self, dt: float):
 88        """Add a new coin to the screen, reschedule the timer if necessary
 89
 90        Arguments:
 91            dt {float} -- Time since last call (unused)
 92        """
 93
 94        # Create a new coin
 95        coin_image = ASSETS_PATH / "images" / "coin_gold.png"
 96        new_coin = arcade.Sprite(
 97            filename=coin_image,
 98            center_x=randint(20, WIDTH - 20),
 99            center_y=randint(20, HEIGHT - 20),
100        )
101
102        # Add the coin to the current list of coins
103        self.coins.append(new_coin)
104
105        # Decrease the time between coin appearances, but only if there are
106        # fewer than three coins on the screen.
107        if len(self.coins) < 3:
108            self.coin_countdown -= self.coin_interval
109
110            # Make sure you don't go too quickly
111            if self.coin_countdown < 0.1:
112                self.coin_countdown = 0.1
113
114            # Stop the previously scheduled call
115            arcade.unschedule(function_pointer=self.add_coin)
116
117            # Schedule the next coin addition
118            arcade.schedule(
119                function_pointer=self.add_coin, interval=self.coin_countdown
120            )
121
122    def on_mouse_motion(self, x: float, y: float, dx: float, dy: float):
123        """Processed when the mouse moves
124
125        Arguments:
126            x {float} -- X Position of the mouse
127            y {float} -- Y Position of the mouse
128            dx {float} -- Change in x position since last move
129            dy {float} -- Change in y position since last move
130        """
131
132        # Ensure the player doesn't move off-screen
133        self.player.center_x = arcade.clamp(x, 0, WIDTH)
134        self.player.center_y = arcade.clamp(y, 0, HEIGHT)
135
136    def on_update(self, delta_time: float):
137        """Update all the game objects
138
139        Arguments:
140            delta_time {float} -- How many seconds since the last frame?
141        """
142
143        # Check if you've picked up a coin
144        coins_hit = arcade.check_for_collision_with_list(
145            sprite=self.player, sprite_list=self.coins
146        )
147
148        for coin in coins_hit:
149            # Add the coin score to your score
150            self.score += COIN_VALUE
151
152            # Play the coin sound
153            arcade.play_sound(self.coin_pickup_sound)
154
155            # Remove the coin
156            coin.remove_from_sprite_lists()
157
158        # Are there more coins than allowed on the screen?
159        if len(self.coins) > COIN_COUNT:
160            # Stop adding coins
161            arcade.unschedule(function_pointer=self.add_coin)
162
163            # Show the mouse cursor
164            self.set_mouse_visible(True)
165
166            # Print the final score and exit the game
167            print(f"Game over! Final score: {self.score}")
168            exit()
169
170    def on_draw(self):
171        """Draw everything"""
172
173        # Start the rendering pass
174        arcade.start_render()
175
176        # Draw the coins
177        self.coins.draw()
178
179        # Draw the player
180        self.player.draw()
181
182        # Draw the score in the lower-left corner
183        arcade.draw_text(
184            text=f"Score: {self.score}",
185            start_x=50,
186            start_y=50,
187            font_size=32,
188            color=arcade.color.BLACK,
189        )
190
191if __name__ == "__main__":
192    arcade_game = ArcadeGame(WIDTH, HEIGHT, TITLE)
193    arcade_game.setup()
194    arcade.run()
The object-oriented nature of Arcade allows you to quickly implement different levels by separating the initialization of the game from the initialization of each different level. The game is initialized in the .__init__() method on lines 40 to 63, while levels are set up and can be restarted using the separate .setup() method on lines 65 to 85. This is a great pattern to use even for games that have a single level, like this one.
Sprites are defined by creating an object of the class arcade.Sprite, and providing the path to an image. Arcade supports pathlib paths, which eases the creation of the player sprite on lines 72 to 75.
Creating new coins is handled on lines 78 to 80, which call arcade.schedule() to call the self.add_coin() method at regular intervals.
The .add_coin() method defined on lines 87 to 120 creates a new coin sprite at a random location and adds it to a list to simplify drawing as well as collision handling later.
To move the player using the mouse, you implement the .on_mouse_motion() method on lines 122 to 134. The arcade.clamp() method ensures the player’s center coordinates are never off the screen.
Checking for collisions between the player and the coin is handled in the .on_update() method on lines 144 to 156. The arcade.check_for_collision_with_list() method returns a list of all the sprites in the list that have collided with the specified sprite. The code walks through that list, incrementing the score and playing a sound effect before removing each coin from play.
The .on_update() method also checks if there are too many coins on the screen on lines 159 to 168. If so, it ends the game.
This Arcade implementation is just as readable and well structured as the Pygame Zero code, although it took over 27% more code, with 194 lines written. The longer code may be worth it, as Arcade offers many more features not demonstrated here, such as:
- Animated sprites
- Several built-in physics engines
- Support for third-party game maps
- Updated particle and shader systems
New game authors coming from Python Zero will find Arcade similar in structure while offering more powerful and extensive features.
adventurelib
Of course, not every game requires a colorful player moving on the screen, avoiding obstacles, and killing bad guys. Classic computer games like Zork showed off the power of good storytelling while still providing a great gaming experience. Crafting these text-based games, also called interactive fiction, can be difficult in any language. Luckily for the Python programmer, there’s adventurelib:
adventurelib provides basic functionality for writing text-based adventure games, with the aim of making it easy enough for young teenagers to do. (Source)
It’s not just for teenagers, though! adventurelib is great for anyone who wants to write a text-based game without having to also write a natural language parser to do so.
adventurelib was created by the folks behind Pygame Zero, and it tackles more advanced computer science topics such as state management, business logic, naming and references, and set manipulation, to name a few. This makes it a great next step for educators, parents, and mentors helping young people learn computer science through the creation of games. It’s also great for broadening your own game-coding skills.
adventurelib Installation
adventurelib is available on PyPI and can be installed using the appropriate pip command:
(venv) $ python -m pip install adventurelib
adventurelib is a single file, so it can also be downloaded from the GitHub repo, saved in the same folder as your game, and used directly.
Basic Concepts
To learn the basics of adventurelib, you’ll see a small game with three rooms and a key to unlock a door to the final room below. The code for this sample game is provided in the downloadable materials in adventurelib_basic.py:
adventurelib_basic.py
  1"""
  2Basic "Hello, World!" program in adventurelib
  3
  4This program is designed to demonstrate the basic capabilities
  5of adventurelib. It will:
  6- Create a basic three-room world
  7- Add a single inventory item
  8- Require that inventory item to move to the final room
  9"""
 10
 11# Import the library contents
 12import adventurelib as adv
 13
 14# Define your rooms
 15bedroom = adv.Room(
 16    """
 17You are in your bedroom. The bed is unmade, but otherwise
 18it's clean. Your dresser is in the corner, and a desk is
 19under the window.
 20"""
 21)
 22
 23living_room = adv.Room(
 24    """
 25The living room stands bright and empty. The TV is off,
 26and the sun shines brightly through the curtains.
 27"""
 28)
 29
 30front_porch = adv.Room(
 31    """
 32The creaky boards of your front porch welcome you as an
 33old friend. Your front door mat reads 'Welcome'.
 34"""
 35)
 36
 37# Define the connections between the rooms
 38bedroom.south = living_room
 39living_room.east = front_porch
 40
 41# Define a constraint to move from the bedroom to the living room
 42# If the door between the living room and front porch door is locked,
 43# you can't exit
 44living_room.locked = {"east": True}
 45
 46# None of the other rooms have any locked doors
 47bedroom.locked = dict()
 48front_porch.locked = dict()
 49
 50# Set the starting room as the current room
 51current_room = bedroom
 52
 53# Define functions to use items
 54def unlock_living_room(current_room):
 55
 56    if current_room == living_room:
 57        print("You unlock the door.")
 58        current_room.locked["east"] = False
 59    else:
 60        print("There is nothing to unlock here.")
 61
 62# Create your items
 63key = adv.Item("a front door key", "key")
 64key.use_item = unlock_living_room
 65
 66# Create empty Bags for room contents
 67bedroom.contents = adv.Bag()
 68living_room.contents = adv.Bag()
 69front_porch.contents = adv.Bag()
 70
 71# Put the key in the bedroom
 72bedroom.contents.add(key)
 73
 74# Set up your current empty inventory
 75inventory = adv.Bag()
 76
 77# Define your movement commands
 78@adv.when("go DIRECTION")
 79@adv.when("north", direction="north")
 80@adv.when("south", direction="south")
 81@adv.when("east", direction="east")
 82@adv.when("west", direction="west")
 83@adv.when("n", direction="north")
 84@adv.when("s", direction="south")
 85@adv.when("e", direction="east")
 86@adv.when("w", direction="west")
 87def go(direction: str):
 88    """Processes your moving direction
 89
 90    Arguments:
 91        direction {str} -- which direction does the player want to move
 92    """
 93
 94    # What is your current room?
 95    global current_room
 96
 97    # Is there an exit in that direction?
 98    next_room = current_room.exit(direction)
 99    if next_room:
100        # Is the door locked?
101        if direction in current_room.locked and current_room.locked[direction]:
102            print(f"You can't go {direction} --- the door is locked.")
103        else:
104            current_room = next_room
105            print(f"You go {direction}.")
106            look()
107
108    # No exit that way
109    else:
110        print(f"You can't go {direction}.")
111
112# How do you look at the room?
113@adv.when("look")
114def look():
115    """Looks at the current room"""
116
117    # Describe the room
118    adv.say(current_room)
119
120    # List the contents
121    for item in current_room.contents:
122        print(f"There is {item} here.")
123
124    # List the exits
125    print(f"The following exits are present: {current_room.exits()}")
126
127# How do you look at items?
128@adv.when("look at ITEM")
129@adv.when("inspect ITEM")
130def look_at(item: str):
131
132    # Check if the item is in your inventory or not
133    obj = inventory.find(item)
134    if not obj:
135        print(f"You don't have {item}.")
136    else:
137        print(f"It's an {obj}.")
138
139# How do you pick up items?
140@adv.when("take ITEM")
141@adv.when("get ITEM")
142@adv.when("pickup ITEM")
143def get(item: str):
144    """Get the item if it exists
145
146    Arguments:
147        item {str} -- The name of the item to get
148    """
149    global current_room
150
151    obj = current_room.contents.take(item)
152    if not obj:
153        print(f"There is no {item} here.")
154    else:
155        print(f"You now have {item}.")
156        inventory.add(obj)
157
158# How do you use an item?
159@adv.when("unlock door", item="key")
160@adv.when("use ITEM")
161def use(item: str):
162    """Use an item, consumes it if used
163
164    Arguments:
165        item {str} -- Which item to use
166    """
167
168    # First, do you have the item?
169    obj = inventory.take(item)
170    if not obj:
171        print(f"You don't have {item}")
172
173    # Try to use the item
174    else:
175        obj.use_item(current_room)
176
177if __name__ == "__main__":
178    # Look at the starting room
179    look()
180
181    adv.start()
To run this code, use the following command:
(venv) $ python adventurelib/adventurelib_basic.py
Text-based games rely heavily on parsing user input to drive the game forward. adventurelib defines the text that a player types as a command and provides the @when() decorator to define commands.
A good example of a command is the look command defined on lines 113 to 125. The @when("look") decorator adds the text look to a list of valid commands and connects it to the look() function. Whenever the player types look, adventurelib will call the look() function.
Commands are case-insensitive when typed by the player. The player can type look, LOOK, Look, or even lOOk, and adventurelib will find the correct command.
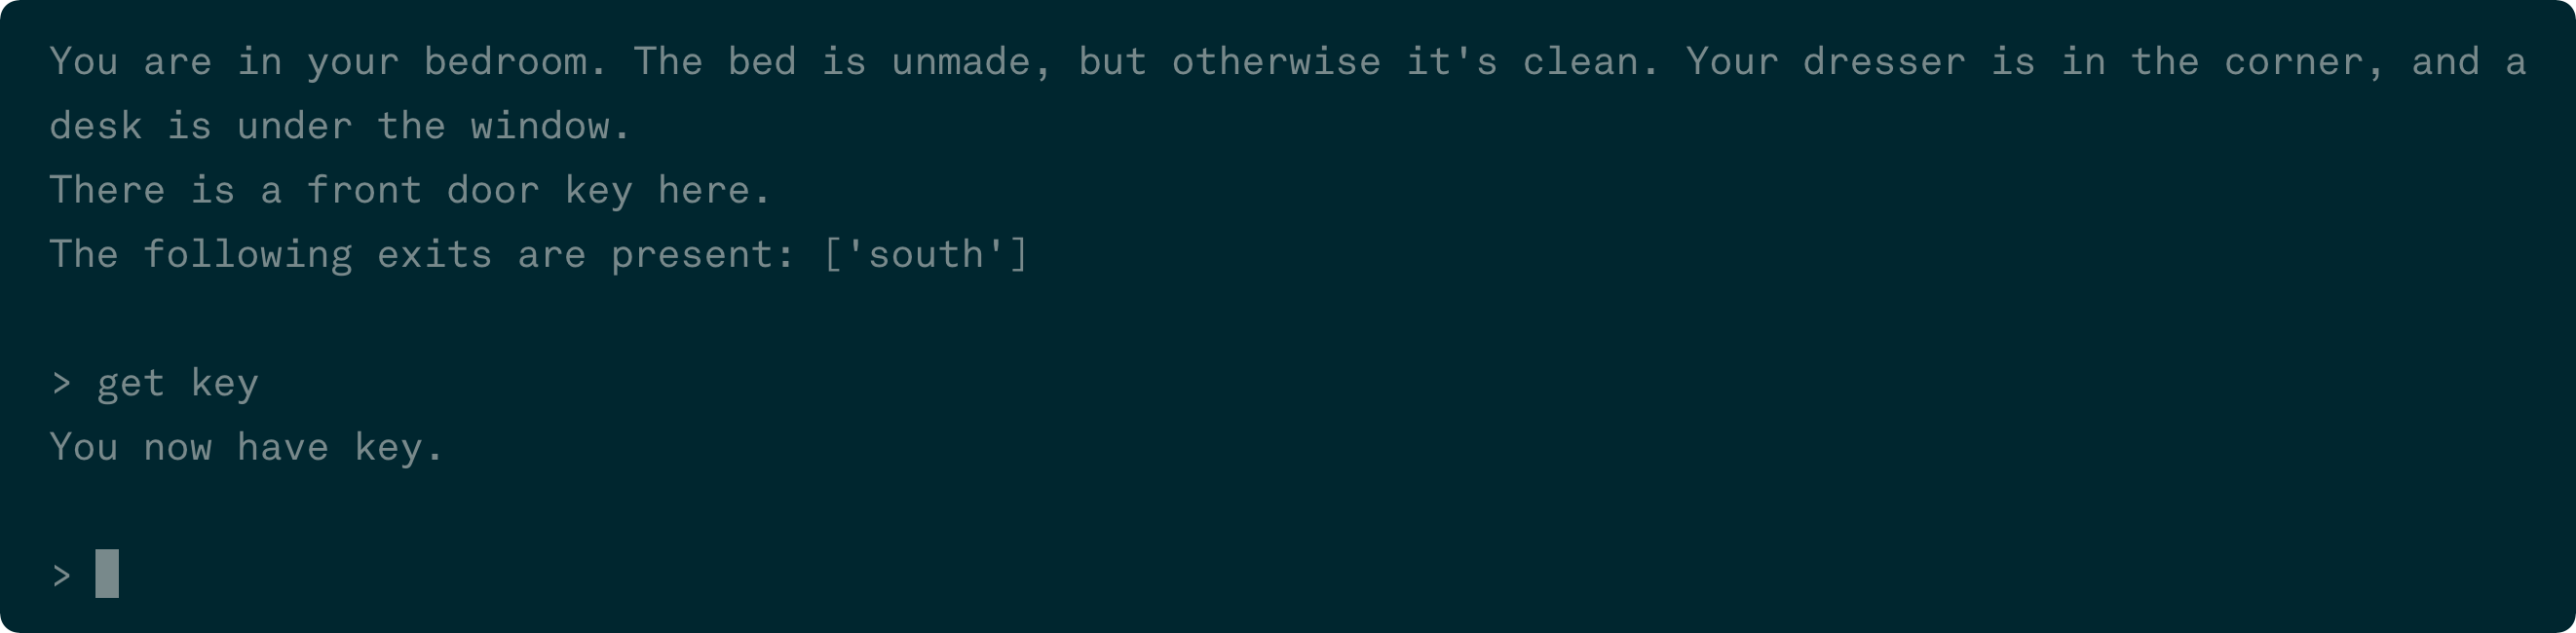
Multiple commands can all use the same function, as seen with the go() function on lines 78 to 110. This function is decorated with nine separate commands, allowing the player several different ways to move around the game world. In the game play example below, the commands south, east, and north are all used, but each results in the same function being called:

Sometimes the commands that a player types are directed at a specific item. For example, the player may want to look at a particular thing or go in a specific direction. The game designer can capture additional command context by specifying capitalized words in the @when() decorator. These are treated as variable names, and the text that the player types in their place are the values.
This can be seen in the look_at() function on lines 128 to 137. This function defines a single string parameter called item. In the @when() decorators defining the look at and inspect commands, the word ITEM acts as a placeholder for any text following the command. This text is then passed to the look_at() function as the item parameter. For example, if the player types look at book, then the parameter item will get the value "book".
The strength of a text-based game relies on the descriptiveness of its text. While you can and should certainly use print() functions, printing numerous lines of text in response to user commands can introduce difficulties spanning text over multiple lines and determining line breaks. adventurelib eases this burden with the say() function, which works well with triple-quoted multiline strings.
You can see the say() function in action on line 118 in the look() function. Whenever the player types look, the say() function outputs the description of the current room to the console.
Of course, your commands need places to occur. adventurelib provides the Room class to define different areas of your game world. Rooms are created by providing a description of the room, and they can be connected to other rooms by using the .north, .south, .east, and .west properties. You can also define custom properties that apply to either the entire Room class or individual objects.
The three rooms in this game are created on lines 15 to 35. The Room() constructor accepts a description as a string, or in this case, as a multiline string. Once you’ve created the rooms, then you connect them on lines 38 to 39. Setting bedroom.south to living_room implies that living_room.north will be bedroom. adventurelib is smart enough to make this connection automatically.
You also create a constraint on line 44 to indicate a locked door between the living room and the front porch. Unlocking this door will require the player to locate an item.
Text-based games often feature items which must be collected to open new areas of the game or to solve certain puzzles. Items can also represent non-player characters with whom the player can interact. adventurelib provides the Item class to define both collectable items and non-player characters by their names and aliases. For example, the alias key refers to the front door key:
On line 63, you define the key used to unlock the door between the living room and the front porch. The Item() constructor takes one or more strings. The first is the default or full name of the item, and it’s used when printing the name of the item. All other names are used as aliases so the player doesn’t have to type the full name of the item.
The key doesn’t just have a name and aliases. It also has an intended use, which is defined on line 64. key.use_item refers to a function that will be called when a player tries to use the item by typing "use key". This function is called in the use() command handler defined on lines 159 to 175.
Collections of items, such as the player’s inventory or items on the ground in a room, can be stored in a Bag object. You can add items to the bag, remove items from the bag, and inspect the bag’s contents. Bag objects are iterable in Python, so you can also use in to test if something is in the bag and loop over the bag’s contents in a for loop.
Four different Bag objects are defined on lines 67 to 75. Each of the three rooms has a Bag to hold items in the room, and the player also has a Bag to hold their inventory of items they pick up. The key item is placed in its starting location in the bedroom.
Items are added to the player’s inventory by the get() function defined on lines 140 to 156. When the player types get key, you attempt to take() the item from the room’s contents bag on line 151. If the key is returned, it’s also removed from the room’s contents. You then add the key to the player’s inventory on line 156.
Advanced Application
Of course, there’s much more to adventurelib. To show off its other capabilities, you’ll craft a more involved text adventure with the following backstory:
- You live in a small, quiet hamlet.
- Recently, your neighbors have begun complaining of missing livestock.
- As a member of a night patrol, you notice a broken fence and a trail leading away from it.
- You decide to investigate, armed only with a wooden practice sword.
The game has several areas to describe and define:
- Your small, quiet hamlet
- The trail leading away from the field
- A nearby village where you can buy a better weapon
- A side path leading to a wizard who can enchant your weapon
- A cave containing the giant who has been taking your livestock
There are several items to collect, such as weapons and food, and characters with which to interact. You also need a basic battle system to allow you to fight the giant and win the game.
All of the code for this game is listed below, and can be found in the downloaded materials:
Get Source Code: Click here to get the source code you’ll use to try out Python game engines.
To keep things organized, you break your game into different files:
adventurelib_game_rooms.pydefines the rooms and areas.adventurelib_game_items.pydefines the items and their attributes.adventurelib_game_characters.pydefines the characters with which you can interact.adventurelib_game.pypulls everything together, adds commands, and starts the game.
adventurelib_game.py
  1"""
  2Complete game written in adventurelib
  3
  4This program is designed to demonstrate the capabilities
  5of adventurelib. It will:
  6- Create a large world in which to wander
  7- Contain several inventory items
  8- Set contexts for moving from one area to another
  9- Require some puzzle-solving skills
 10"""
 11
 12# Import the library contents
 13# from adventurelib import *
 14import adventurelib as adv
 15
 16# Import your rooms, which imports your items and characters
 17import adventurelib_game_rooms
 18
 19import adventurelib_game_items
 20
 21# For your battle sequence
 22from random import randint
 23
 24# To allow you to exit the game
 25import sys
 26
 27# Set the first room
 28current_room = adventurelib_game_rooms.home
 29current_room.visited = False
 30
 31# How many HP do you have?
 32hit_points = 20
 33
 34# How many HP does the giant have?
 35giant_hit_points = 50
 36
 37# Your current inventory
 38inventory = adv.Bag()
 39
 40# Some basic item commands
 41@adv.when("inventory")
 42@adv.when("inv")
 43@adv.when("i")
 44def list_inventory():
 45    if inventory:
 46        print("You have the following items:")
 47        for item in inventory:
 48            print(f"  - {item.description}")
 49    else:
 50        print("You have nothing in your inventory.")
 51
 52@adv.when("look at ITEM")
 53def look_at(item: str):
 54    """Prints a short description of an item if it is either:
 55    1. in the current room, or
 56    2. in our inventory
 57
 58    Arguments:
 59        item {str} -- the item to look at
 60    """
 61
 62    global inventory, current_room
 63
 64    # Check if the item is in the room
 65    obj = current_room.items.find(item)
 66    if not obj:
 67        # Check if the item is in your inventory
 68        obj = inventory.find(item)
 69        if not obj:
 70            print(f"I can't find {item} anywhere.")
 71        else:
 72            print(f"You have {item}.")
 73    else:
 74        print(f"You see {item}.")
 75
 76@adv.when("describe ITEM")
 77def describe(item: str):
 78    """Prints a description of an item if it is either:
 79    1. in the current room, or
 80    2. in your inventory
 81
 82    Arguments:
 83        item {str} -- the item to look at
 84    """
 85
 86    global inventory, current_room
 87
 88    # Check if the item is in the room
 89    obj = current_room.items.find(item)
 90    if not obj:
 91        # Check if the item is in your inventory
 92        obj = inventory.find(item)
 93        if not obj:
 94            print(f"I can't find {item} anywhere.")
 95        else:
 96            print(f"You have {obj.description}.")
 97    else:
 98        print(f"You see {obj.description}.")
 99
100@adv.when("take ITEM")
101@adv.when("get ITEM")
102@adv.when("pickup ITEM")
103@adv.when("pick up ITEM")
104@adv.when("grab ITEM")
105def take_item(item: str):
106    global current_room
107
108    obj = current_room.items.take(item)
109    if not obj:
110        print(f"I don't see {item} here.")
111    else:
112        print(f"You now have {obj.description}.")
113        inventory.add(obj)
114
115@adv.when("eat ITEM")
116def eat(item: str):
117    global inventory
118
119    # Make sure you have the thing first
120    obj = inventory.find(item)
121
122    # Do you have this thing?
123    if not obj:
124        print(f"You don't have {item}.")
125
126    # Is it edible?
127    elif obj.edible:
128        print(f"You savor every bite of {obj.description}.")
129        inventory.take(item)
130
131    else:
132        print(f"How do you propose we eat {obj.description}?")
133
134@adv.when("wear ITEM")
135@adv.when("put on ITEM")
136def wear(item: str):
137    global inventory
138
139    # Make sure you have the thing first
140    obj = inventory.find(item)
141
142    # Do you have this thing?
143    if not obj:
144        print(f"You don't have {item}.")
145
146    # Is it wearable?
147    elif obj.wearable:
148        print(f"The {obj.description} makes a wonderful fashion statement!")
149
150    else:
151        print(
152            f"""This is no time for avant garde fashion choices!
153            Wear a {obj.description}? Really?"""
154        )
155
156# Some character-specific commands
157@adv.when("talk to CHARACTER")
158def talk_to(character: str):
159    global current_room
160
161    char = current_room.characters.find(character)
162
163    # Is the character there?
164    if not char:
165        print(f"Sorry, I can't find {character}.")
166
167    # It's a character who is there
168    else:
169        # Set the context, and start the encounter
170        adv.set_context(char.context)
171        adv.say(char.greeting)
172
173@adv.when("yes", context="elder")
174def yes_elder():
175    global current_room
176
177    adv.say(
178        """
179    It is not often one of our number leaves, and rarer still if they leave
180    to defend our Home. Go with our blessing, and our hope for a successful
181    journey and speedy return. To help, we bestow three gifts.
182
183    The first is one of knowledge. There is a blacksmith in one of the
184    neighboring villages. You may find help there.
185
186    Second, seek a wizard who lives as a hermit, who may be persuaded to
187    give aid. Be wary, though! The wizard does not give away his aid for
188    free. As he tests you, remember always where you started your journey.
189
190    Lastly, we don't know what dangers you may face. We are peaceful people,
191    but do not wish you to go into the world undefended. Take this meager
192    offering, and use it well!
193    """
194    )
195    inventory.add(adventurelib_game_items.wooden_sword)
196    current_room.locked_exits["south"] = False
197
198@adv.when("thank you", context="elder")
199@adv.when("thanks", context="elder")
200def thank_elder():
201    adv.say("It is we who should thank you. Go with our love and hopes!")
202
203@adv.when("yes", context="blacksmith")
204def yes_blacksmith():
205    global current_room
206
207    adv.say(
208        """
209        I can see you've not a lot of money. Usually, everything here
210        if pretty expensive, but I just might have something...
211
212        There's this steel sword here, if you want it. Don't worry --- it
213        doesn't cost anything! It was dropped off for repair a few weeks
214        ago, but the person never came back for it. It's clean, sharp,
215        well-oiled, and will do a lot more damage than that
216        fancy sword-shaped club you've got. I need it gone to clear some room.
217
218        If you want, we could trade even up --- the wooden sword for the
219        steel one. I can use yours for fire-starter. Deal?
220        """
221    )
222    adv.set_context("blacksmith.trade")
223
224@adv.when("yes", context="blacksmith.trade")
225def trade_swords_yes():
226    print("Great!")
227    inventory.take("wooden sword")
228    inventory.add(adventurelib_game_items.steel_sword)
229
230@adv.when("no", context="blacksmith.trade")
231def trade_swords_no():
232    print("Well, that's all I have within your budget. Good luck!")
233    adv.set_context(None)
234
235@adv.when("yes", context="wizard")
236def yes_wizard():
237    global current_room
238
239    adv.say(
240        """
241    I can make your weapon more powerful than it is, but only if
242    you can answer my riddle:
243
244    What has one head...
245        One foot...
246            But four legs?
247    """
248    )
249
250    adv.set_context("wizard.riddle")
251
252@adv.when("bed", context="wizard.riddle")
253@adv.when("a bed", context="wizard.riddle")
254def answer_riddle():
255    adv.say("You are smarter than you believe yourself to be! Behold!")
256
257    obj = inventory.find("sword")
258    obj.bonus = 2
259    obj.description += ", which glows with eldritch light"
260
261    adv.set_context(None)
262    current_room.locked_exits["west"] = False
263
264@adv.when("fight CHARACTER", context="giant")
265def fight_giant(character: str):
266
267    global giant_hit_points, hit_points
268
269    sword = inventory.find("sword")
270
271    # The player gets a swing
272    player_attack = randint(1, sword.damage + 1) + sword.bonus
273    print(f"You swing your {sword}, doing {player_attack} damage!")
274    giant_hit_points -= player_attack
275
276    # Is the giant dead?
277    if giant_hit_points <= 0:
278        end_game(victory=True)
279
280    print_giant_condition()
281    print()
282
283    # Then the giant tries
284    giant_attack = randint(0, 5)
285    if giant_attack == 0:
286        print("The giant's arm whistles harmlessly over your head!")
287    else:
288        print(
289            f"""
290            The giant swings his mighty fist,
291            and does {giant_attack} damage!
292            """
293        )
294        hit_points -= giant_attack
295
296    # Is the player dead?
297    if hit_points <= 0:
298        end_game(victory=False)
299
300    print_player_condition()
301    print()
302
303def print_giant_condition():
304
305    if giant_hit_points < 10:
306        print("The giant staggers, his eyes unfocused.")
307    elif giant_hit_points < 20:
308        print("The giant's steps become more unsteady.")
309    elif giant_hit_points < 30:
310        print("The giant sweats and wipes the blood from his brow.")
311    elif giant_hit_points < 40:
312        print("The giant snorts and grits his teeth against the pain.")
313    else:
314        print("The giant smiles and readies himself for the attack.")
315
316def print_player_condition():
317
318    if hit_points < 4:
319        print("Your eyes lose focus on the giant as you sway unsteadily.")
320    elif hit_points < 8:
321        print(
322            """
323            Your footing becomes less steady
324            as you swing your sword sloppily.
325            """
326        )
327    elif hit_points < 12:
328        print(
329            """
330            Blood mixes with sweat on your face
331            as you wipe it from your eyes.
332            """
333        )
334    elif hit_points < 16:
335        print("You bite down as the pain begins to make itself felt.")
336    else:
337        print("You charge into the fray valiantly!")
338
339def end_game(victory: bool):
340    if victory:
341        adv.say(
342            """
343        The giant falls to his knees as the last of his strength flees
344        his body. He takes one final swing at you, which you dodge easily.
345        His momentum carries him forward, and he lands face down in the dirt.
346        His final breath escapes his lips as he succumbs to your attack.
347
348        You are victorious! Your name will be sung for generations!
349        """
350        )
351
352    else:
353        adv.say(
354            """
355        The giant's mighty fist connects with your head, and the last
356        sound you hear are the bones in your neck crunching. You spin
357        and tumble down, your sword clattering to the floor
358        as the giant laughs.
359        Your eyes see the giant step towards you, his mighty foot
360        raised to crash down on you.
361        Oblivion takes over before you experience anything else...
362
363        You have been defeated! The giant is free to ravage your town!
364        """
365        )
366
367    sys.exit()
368
369@adv.when("flee", context="giant")
370def flee():
371    adv.say(
372        """
373    As you turn to run, the giant reaches out and catches your tunic.
374    He lifts you off the ground, grabbing your dangling sword-arm
375    as he does so. A quick twist, and your sword tumbles to the ground.
376    Still holding you, he reaches his hand to your throat and squeezes,
377    cutting off your air supply.
378
379    The last sight you see before blackness takes you are
380    the rotten teeth of the evil grin as the giant laughs
381    at your puny attempt to stop him...
382
383    You have been defeated! The giant is free to ravage your town!
384    """
385    )
386
387    sys.exit()
388
389@adv.when("goodbye")
390@adv.when("bye")
391@adv.when("adios")
392@adv.when("later")
393def goodbye():
394
395    # Are you fighting the giant?
396    if adv.get_context() == "giant":
397        # Not so fast!
398        print("The giant steps in front of you, blocking your exit!")
399
400    else:
401        # Close the current context
402        adv.set_context(None)
403        print("Fare thee well, traveler!")
404
405# Define some basic commands
406@adv.when("look")
407def look():
408    """Print the description of the current room.
409    If you've already visited it, print a short description.
410    """
411    global current_room
412
413    if not current_room.visited:
414        adv.say(current_room)
415        current_room.visited = True
416    else:
417        print(current_room.short_desc)
418
419    # Are there any items here?
420    for item in current_room.items:
421        print(f"There is {item.description} here.")
422
423@adv.when("describe")
424def describe_room():
425    """Print the full description of the room."""
426    adv.say(current_room)
427
428    # Are there any items here?
429    for item in current_room.items:
430        print(f"There is {item.description} here.")
431
432# Define your movement commands
433@adv.when("go DIRECTION")
434@adv.when("north", direction="north")
435@adv.when("south", direction="south")
436@adv.when("east", direction="east")
437@adv.when("west", direction="west")
438@adv.when("n", direction="north")
439@adv.when("s", direction="south")
440@adv.when("e", direction="east")
441@adv.when("w", direction="west")
442def go(direction: str):
443    """Processes your moving direction
444
445    Arguments:
446        direction {str} -- which direction does the player want to move
447    """
448
449    # What is your current room?
450    global current_room
451
452    # Is there an exit in that direction?
453    next_room = current_room.exit(direction)
454    if next_room:
455        # Is the door locked?
456        if (
457            direction in current_room.locked_exits
458            and current_room.locked_exits[direction]
459        ):
460            print(f"You can't go {direction} --- the door is locked.")
461        else:
462            # Clear the context if necessary
463            current_context = adv.get_context()
464            if current_context == "giant":
465                adv.say(
466                    """Your way is currently blocked.
467                    Or have you forgotten the giant you are fighting?"""
468                )
469            else:
470                if current_context:
471                    print("Fare thee well, traveler!")
472                    adv.set_context(None)
473
474                current_room = next_room
475                print(f"You go {direction}.")
476                look()
477
478    # No exit that way
479    else:
480        print(f"You can't go {direction}.")
481
482# Define a prompt
483def prompt():
484    global current_room
485
486    # Get possible exits
487    exits_string = get_exits(current_room)
488
489    # Are you in battle?
490    if adv.get_context() == "giant":
491        prompt_string = f"HP: {hit_points} > "
492    else:
493        prompt_string = f"({current_room.title}) > "
494
495    return f"""({exits_string}) {prompt_string}"""
496
497def no_command_matches(command: str):
498    if adv.get_context() == "wizard.riddle":
499        adv.say("That is not the correct answer. Begone!")
500        adv.set_context(None)
501        current_room.locked_exits["west"] = False
502    else:
503        print(f"What do you mean by '{command}'?")
504
505def get_exits(room):
506    exits = room.exits()
507
508    exits_string = ""
509    for exit in exits:
510        exits_string += f"{exit[0].upper()}|"
511
512    return exits_string[:-1]
513
514# Start the game
515if __name__ == "__main__":
516    # No context is normal
517    adv.set_context(None)
518
519    # Set the prompt
520    adv.prompt = prompt
521
522    # What happens with unknown commands
523    adv.no_command_matches = no_command_matches
524
525    # Look at your starting room
526    look()
527
528    # Start the game
529    adv.start()
adventurelib_game_rooms.py
  1"""
  2Rooms for the adventurelib game
  3"""
  4
  5# Import the library contents
  6import adventurelib as adv
  7
  8# Import your items as well
  9import adventurelib_game_items
 10
 11# And your characters
 12import adventurelib_game_characters
 13
 14# Create a subclass of Rooms to track some custom properties
 15class GameArea(adv.Room):
 16    def __init__(self, description: str):
 17
 18        super().__init__(description)
 19
 20        # All areas can have locked exits
 21        self.locked_exits = {
 22            "north": False,
 23            "south": False,
 24            "east": False,
 25            "west": False,
 26        }
 27        # All areas can have items in them
 28        self.items = adv.Bag()
 29
 30        # All areas can have characters in them
 31        self.characters = adv.Bag()
 32
 33        # All areas may have been visited already
 34        # If so, you can print a shorter description
 35        self.visited = False
 36
 37        # Which means each area needs a shorter description
 38        self.short_desc = ""
 39
 40        # Each area also has a very short title for the prompt
 41        self.title = ""
 42
 43# Your home
 44home = GameArea(
 45    """
 46You wake as the sun streams in through the single
 47window into your small room. You lie on your feather bed which
 48hugs the north wall, while the remains of last night's
 49fire smolders in the center of the room.
 50
 51Remembering last night's discussion with the council, you
 52throw back your blanket and rise from your comfortable
 53bed. Cold water awaits you as you splash away the night's
 54sleep, grab an apple to eat, and prepare for the day.
 55"""
 56)
 57home.title = "Home"
 58home.short_desc = "This is your home."
 59
 60# Hamlet
 61hamlet = GameArea(
 62    """
 63From the center of your small hamlet, you can see every other
 64home. It doesn't really even have an official name --- folks
 65around here just call it Home.
 66
 67The council awaits you as you approach. Elder Barron beckons you
 68as you exit your home.
 69"""
 70)
 71hamlet.title = "Hamlet"
 72hamlet.short_desc = "You are in the hamlet."
 73
 74# Fork in road
 75fork = GameArea(
 76    """
 77As you leave your hamlet, you think about how unprepared you
 78really are. Your lack of experience and pitiful equipment
 79are certainly no match for whatever has been stealing
 80the villages livestock.
 81
 82As you travel, you come across a fork in the path. The path of
 83the livestock thief continues east. However, you know
 84the village of Dunhaven lies to the west, where you may
 85get some additional help.
 86"""
 87)
 88fork.title = "Fork in road"
 89fork.short_desc = "You are at a fork in the road."
 90
 91# Village of Dunhaven
 92village = GameArea(
 93    """
 94A short trek up the well-worn path brings you the village
 95of Dunhaven. Larger than your humble Home, Dunhaven sits at
 96the end of a supply route from the capitol. As such, it has
 97amenities and capabilities not found in the smaller farming
 98communities.
 99
100As you approach, you hear the clang-clang of hammer on anvil,
101and inhale the unmistakable smell of the coal-fed fire of a
102blacksmith shop to your south.
103"""
104)
105village.title = "Village of Dunhaven"
106village.short_desc = "You are in the village of Dunhaven."
107
108# Blacksmith shop
109blacksmith_shop = GameArea(
110    """
111As you approach the blacksmith, the sounds of the hammer become
112clearer and clearer. Passing the front door, you head towards
113the sound of the blacksmith, and find her busy at the furnace.
114"""
115)
116blacksmith_shop.title = "Blacksmith Shop"
117blacksmith_shop.short_desc = "You are in the blacksmith shop."
118
119# Side path away from fork
120side_path = GameArea(
121    """
122The path leads away from the fork to Dunhaven. Fresh tracks of
123something big, dragging something behind it, lead away to the south.
124"""
125)
126side_path.title = "Side path"
127side_path.short_desc = "You are standing on a side path."
128
129# Wizard's Hut
130wizard_hut = GameArea(
131    """
132The path opens into a shaded glen. A small stream wanders down the
133hills to the east and past an unassuming hut. In front of the hut,
134the local wizard Trent sits smoking a long clay pipe.
135"""
136)
137wizard_hut.title = "Wizard's Hut"
138wizard_hut.short_desc = "You are at the wizard's hut."
139
140# Cave mouth
141cave_mouth = GameArea(
142    """
143The path from Trent's hut follows the stream for a while before
144turning south away from the water. The trees begin closing overhead,
145blocking the sun and lending a chill to the air as you continue.
146
147The path finally terminates at the opening of a large cave. The
148tracks you have been following mix and mingle with others, both
149coming and going, but all the same. Whatever has been stealing
150your neighbor's livestock lives here, and comes and goes frequently.
151"""
152)
153cave_mouth.title = "Cave Mouth"
154cave_mouth.short_desc = "You are at the mouth of large cave."
155
156# Cave of the Giant
157giant_cave = GameArea(
158    """
159You take a few tentative steps into the cave. It feels much warmer
160and more humid than the cold sunless forest air outside. A steady
161drip of water from the rocks is the only sound for a while.
162
163You begin to make out a faint light ahead. You hug the wall and
164press on, as the light becomes brighter. You finally enter a
165chamber at least 20 meters across, with a fire blazing in the center.
166Cages line one wall, some empty, but others containing cows and
167sheep stolen from you neighbors. Opposite them are piles of the bones
168of the creatures unlucky enough to have already been devoured.
169
170As you look around, you become aware of another presence in the room.
171"""
172)
173giant_cave.title = "Cave of the Giant"
174giant_cave.short_desc = "You are in the giant's cave."
175
176# Set up the paths between areas
177home.south = hamlet
178hamlet.south = fork
179fork.west = village
180fork.east = side_path
181village.south = blacksmith_shop
182side_path.south = wizard_hut
183wizard_hut.west = cave_mouth
184cave_mouth.south = giant_cave
185
186# Lock some exits, since you can't leave until something else happens
187hamlet.locked_exits["south"] = True
188wizard_hut.locked_exits["west"] = True
189
190# Place items in different areas
191# These are just for flavor
192home.items.add(adventurelib_game_items.apple)
193fork.items.add(adventurelib_game_items.cloak)
194cave_mouth.items.add(adventurelib_game_items.slug)
195
196# Place characters where they should be
197hamlet.characters.add(adventurelib_game_characters.elder_barron)
198blacksmith_shop.characters.add(adventurelib_game_characters.blacksmith)
199wizard_hut.characters.add(adventurelib_game_characters.wizard_trent)
200giant_cave.characters.add(adventurelib_game_characters.giant)
adventurelib_game_items.py
 1"""
 2Items for the adventurelib Game
 3"""
 4
 5# Import the adventurelib library
 6import adventurelib as adv
 7
 8# All items have some basic properties
 9adv.Item.color = "undistinguished"
10adv.Item.description = "a generic thing"
11adv.Item.edible = False
12adv.Item.wearable = False
13
14# Create your "flavor" items
15apple = adv.Item("small red apple", "apple")
16apple.color = "red"
17apple.description = "a small ripe red apple"
18apple.edible = True
19apple.wearable = False
20
21cloak = adv.Item("wool cloak", "cloak")
22cloak.color = "grey tweed"
23cloak.description = (
24    "a grey tweed cloak, heavy enough to keep the wind and rain at bay"
25)
26cloak.edible = False
27cloak.wearable = True
28
29slug = adv.Item("slimy brown slug", "slug")
30slug.color = "slimy brown"
31slug.description = "a fat, slimy, brown slug"
32slug.edible = True
33slug.wearable = False
34
35# Create the real items you need
36wooden_sword = adv.Item("wooden sword", "sword")
37wooden_sword.color = "brown"
38wooden_sword.description = (
39    "a small wooden practice sword, not even sharp enough to cut milk"
40)
41wooden_sword.edible = False
42wooden_sword.wearable = False
43wooden_sword.damage = 4
44wooden_sword.bonus = 0
45
46steel_sword = adv.Item("steel sword", "sword")
47steel_sword.color = "steely grey"
48steel_sword.description = (
49    "a finely made steel sword, honed to a razor edge, ready for blood"
50)
51steel_sword.edible = False
52steel_sword.wearable = False
53steel_sword.damage = 10
54steel_sword.bonus = 0
adventurelib_game_characters.py
 1"""
 2Characters for the adventurelib Game
 3"""
 4
 5# Import the adventurelib library
 6import adventurelib as adv
 7
 8# All characters have some properties
 9adv.Item.greeting = ""
10adv.Item.context = ""
11
12# Your characters
13elder_barron = adv.Item("Elder Barron", "elder", "barron")
14elder_barron.description = """Elder Barron, a tall distinguished member
15of the community. His steely grey hair and stiff beard inspire confidence."""
16elder_barron.greeting = (
17    "I have some information for you. Would you like to hear it?"
18)
19elder_barron.context = "elder"
20
21blacksmith = adv.Item("Alanna Smith", "Alanna", "blacksmith", "smith")
22blacksmith.description = """Alanna the blacksmith stands just 1.5m tall,
23and her strength lies in her arms and heart"""
24blacksmith.greeting = (
25    "Oh, hi! I've got some stuff for sale. Do you want to see it?"
26)
27blacksmith.context = "blacksmith"
28
29wizard_trent = adv.Item("Trent the Wizard", "Trent", "wizard")
30wizard_trent.description = """Trent's wizardly studies have apparently
31aged him past his years, but they have also preserved his life longer than
32expected."""
33wizard_trent.greeting = (
34    "It's been a long time since I've had a visitor? Do you seek wisdom?"
35)
36wizard_trent.context = "wizard"
37
38giant = adv.Item("hungry giant", "giant")
39giant.description = """Almost four meters of hulking brutish strength
40stands before you, his breath rank with rotten meat, his mangy hair
41tangled and matted"""
42giant.greeting = "Argh! Who dares invade my home? Prepare to defend yourself!"
43giant.context = "giant"
You can start this game with the following command:
(venv) $ python adventurelib/adventurelib_game.py
After defining the backstory, you mapped out the different game areas and the paths which the player uses move between them:

Each area has various properties associated with it, including:
- Items and characters that are in that area
- Some exits that are locked
- A title, a short description, and a longer description
- An indication of whether the player has been in this area or not
To ensure that each area has its own instance of each of these properties, you create a subclass of Room called GameArea in adventurelib_game_rooms.py on lines 15 to 41. Items in each room are held in a Bag object called items, while characters are stored in characters, defined on lines 28 and 31. Now you can create GameArea objects, describe them, and populate them with unique items and characters, which are all imported on lines 9 and 12.
Some game items are required to finish the game, while others are just there for flavor and to add interest. Flavor items are identified and placed on lines 192 to 194, followed by characters on lines 197 to 200.
All of your game items are defined in adventurelib_game_items.py as objects of type Item(). Game items have properties that define them, but because you’ve used the Item base class, some basic universal properties are added to the class on lines 9 to 12. These properties are used when the item is created. For example, the apple object is created on lines 15 to 19 and defines each of the universal properties when it is created.
Some items, however, have specific properties unique to the item. For example, the wooden_sword and steel_sword items need properties to track the damage they do and any magical bonuses they carry. Those are added on lines 43 to 44 and 53 to 54.
Interacting with characters helps drive the game story forward and often gives the player a reason to explore. Characters in adventurelib are created as Item objects, and for this game are defined in adventurelib_game_characters.py.
Each character, like each item, has universal properties associated with it, such as a long description and the greeting used when the player encounters it for the first time. These properties are declared on lines 9 and 10, and they’re defined for each character when the character is created.
Of course, if you have characters, then it makes sense for the player to talk to and interact with them. It’s often a good idea to know when you’re interacting with a character, and when you’re just in the same game area with one.
This is done by using an adventurelib concept called a context. Contexts allow you to turn on different commands for different situations. They also allow certain commands to behave differently, and they track additional information about actions that the player may have taken.
When the game starts, there’s no context set. As the player progresses, they first encounter Elder Barron. When the player types "talk to elder", the context is set to elder.context, which in this case is elder.
Elder Barron’s greeting ends with a yes or no question to the player. If the player types "yes", then the command handler on line 173 in adventurelib_game.py is triggered, which is defined as @when("yes", context="elder"), as shown below:
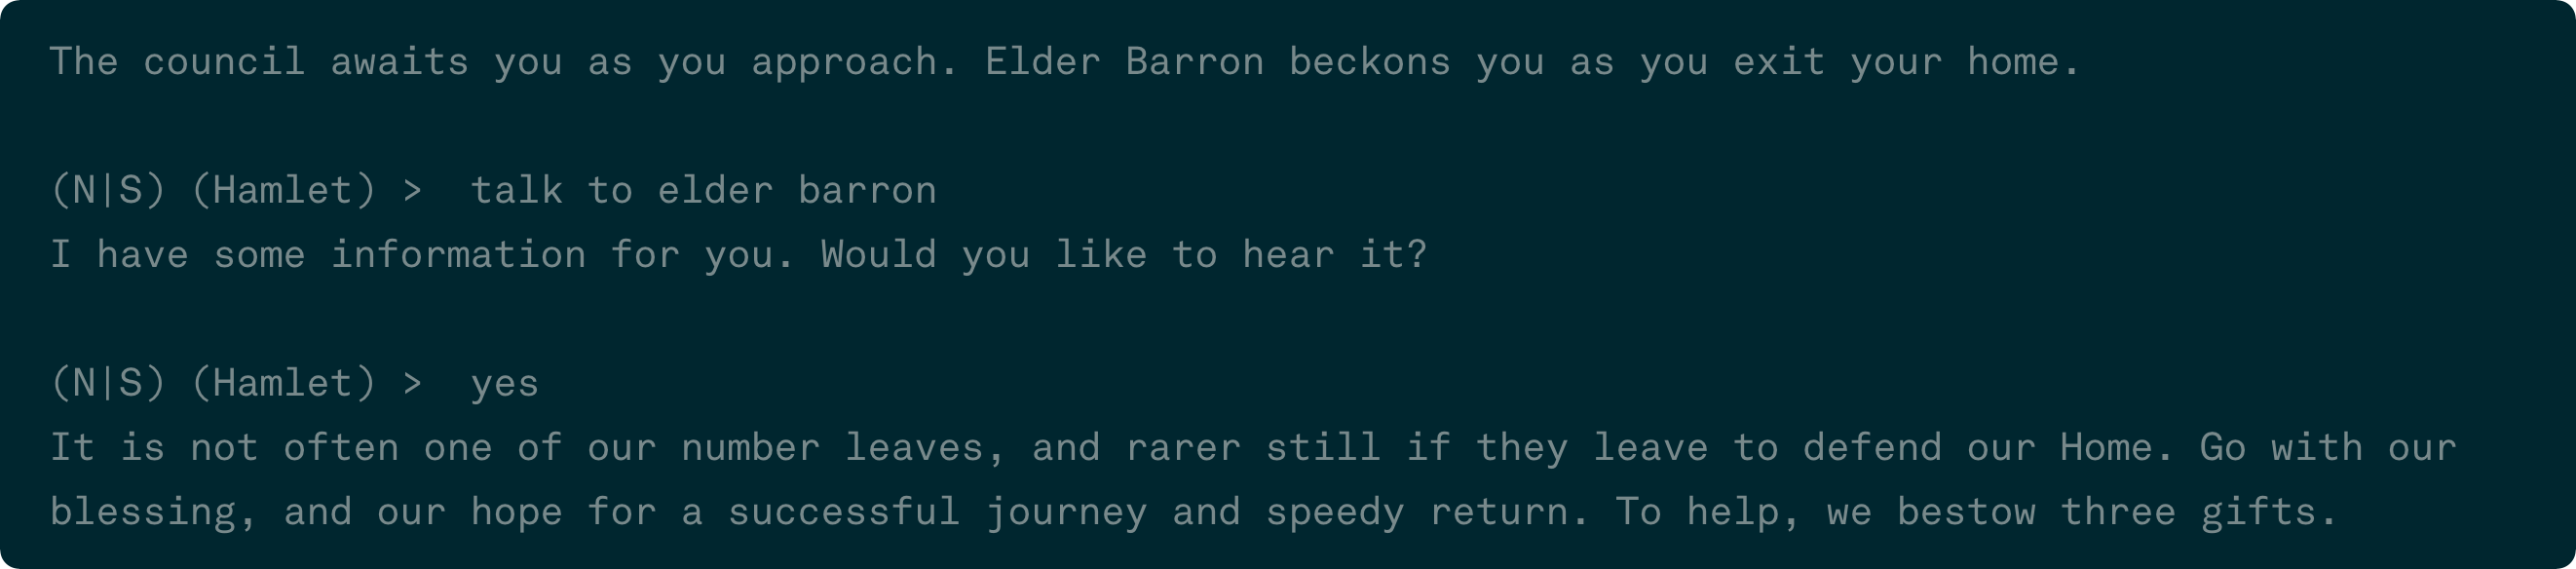
Later, when the player is talking to the blacksmith, a second level of context is added to reflect that they’re engaged in a possible weapon trade. Lines 203 to 233 define the discussion with the blacksmith, which includes the offer of a weapons trade. A new context is defined on line 222, which allows the same "yes" command to be used elegantly in multiple ways.
You can also check the context in a command handler. For example, the player cannot simply leave the fight with the giant by ending the conversation. The "goodbye" command handler defined on lines 389 to 403 checks if the player is in the "giant" context, which is entered when they start fighting the giant. If so, they’re not allowed to stop the conversation — it’s a fight to the death!
You can also ask questions of the player requiring a specific answer. When the player talks to the wizard Trent, they’re asked to solve a riddle. An incorrect answer will end the interaction. While the correct answer is handled with the command handler on lines 252 to 262, one of the nearly infinite wrong answers won’t match any handler.
Commands with no matches are handled by the no_command_matches() function on lines 497 to 503. You leverage this to handle incorrect answers to the wizard’s riddle by checking for the wizard.riddle context on line 498. Any incorrect answer to the riddle will result in the wizard ending the conversation. You connect this to adventurelib on line 523 by setting adventurelib.no_command_matches to your new function.
You can customize the prompt shown to the player by writing a function that returns the new prompt. Your new prompt is defined on lines 483 to 495 and connected to adventurelib on line 520.
Of course, there’s always more that you could add. Creating a complete text adventure game is challenging, and adventurelib makes sure the the main challenge lies in painting a picture with words.
Ren’Py
The modern descendant of the pure text adventure is the visual novel, which highlights the storytelling aspect of the game, limiting player interactions while adding visuals and sound to heighten the experience. Visual novels are the graphic novels of the game world — modern, innovative, and extremely compelling to create and consume.
Ren’Py is a tool based on Pygame and designed specifically to create visual novels. Ren’Py takes its name from the Japanese word for romantic love and provides tools and a framework for crafting compelling visual novels.
To be fair, Ren’Py is not strictly a Python library that you can pip install and use. Ren’Py games are created using the Ren’Py Launcher, which comes with the full Ren’Py SDK. This launcher also features a game editor, although you can edit your game in your editor of choice. Ren’Py also features its own scripting language for game creation. However, Ren’Py is based on Pygame, and it’s extendable using Python, which warrants its appearance here.
Ren’Py Installation
As mentioned, Ren’Py requires not only the SDK, but also the Ren’Py Launcher. These are packaged together in a single unit, which you need to download.
Knowing which package to download and how to install it depends on your platform. Ren’Py provides installers and instructions for Windows, macOS, and Linux users:
After the package is installed, you can navigate to the folder containing the SDK then run the Ren’Py Launcher. Windows users should use renpy.exe, while macOS and Linux users should run renpy.sh. This will start the Ren’Py Launcher for the first time:
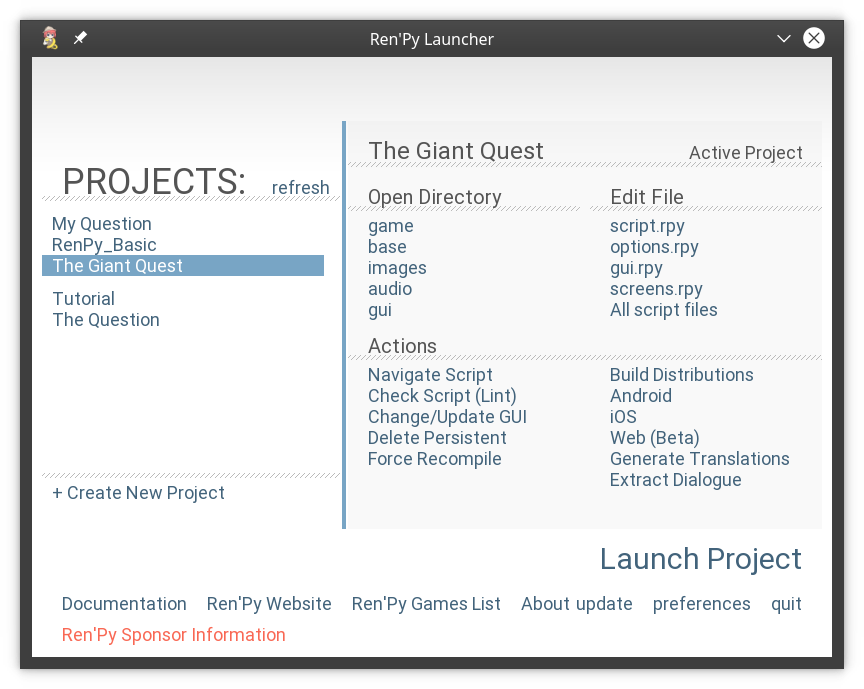
This is where you’ll start new Ren’Py projects, work on existing projects, and set overall preferences for Ren’Py.
Basic Concepts
Ren’Py games start as new projects in the Ren’Py Launcher. Creating one will set up the proper file and folder structure for a Ren’Py game. After the project is set up, you can use your own editor to write your game, although the Ren’Py Launcher is required to run the game:
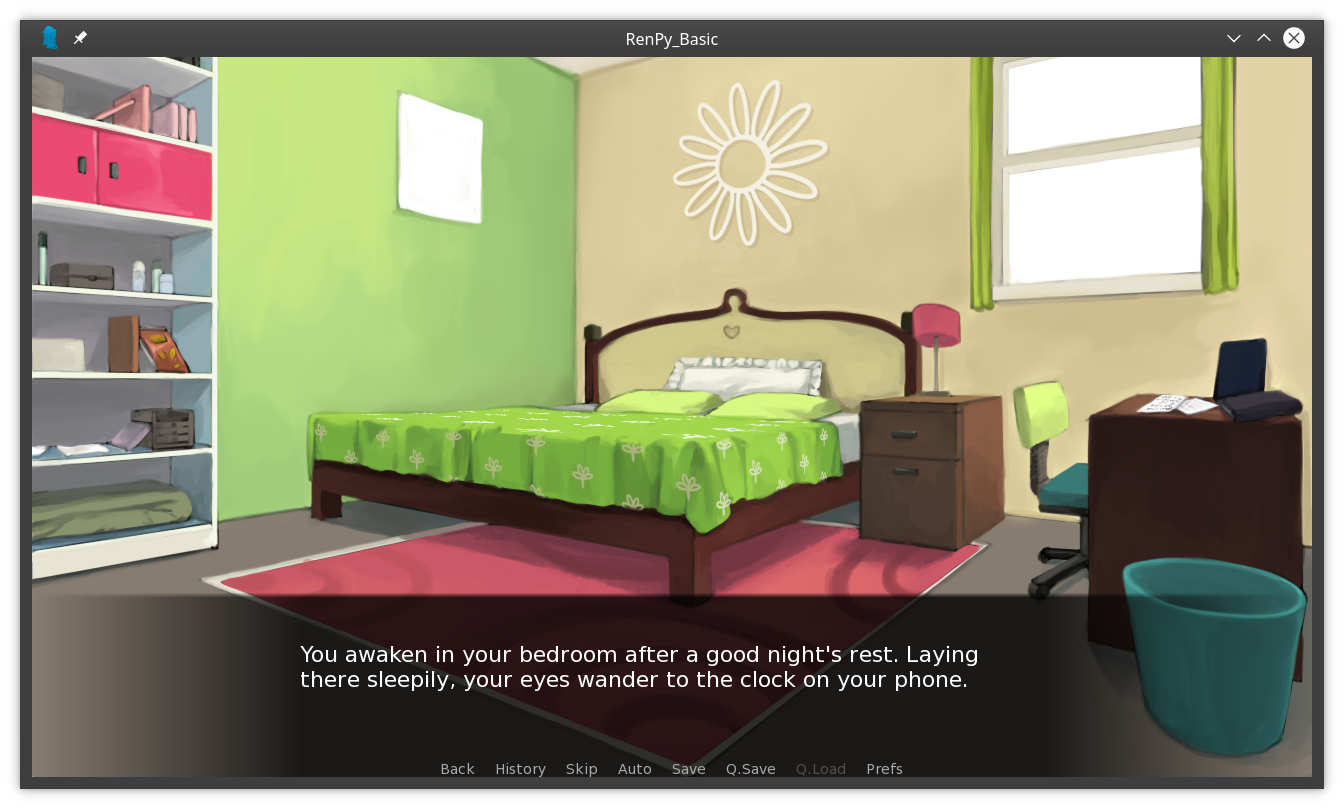
Ren’Py games are contained in files called scripts. Don’t think of Ren’Py scripts as you would shell scripts. They’re more analogous to scripts for plays or television shows. Ren’Py scripts have the extension .rpy and are written in the Ren’Py language. Your game can consist of as many scripts as you like, which are all stored in the game/ subfolder of your project folder.
When you create a new Ren’Py project, the following scripts are created for you to use and update:
gui.rpy, which defines the look of all UI elements used in your gameoptions.rpy, which defines changeable options to customize your gamescreens.rpy, which defines the styles used for dialogue, menus, and other game outputscript.rpy, which is where you start writing your game
To run the sample games from the downloaded materials for this tutorial, you’ll use the following process:
- Start the Ren’Py Launcher.
- Click Preferences, then Projects Directory.
- Change the Projects Directory to the
renpyfolder in the repository that you downloaded. - Click Return to return to the main Ren’Py Launcher page.
You’ll see basic_game and giant_quest_game in the Projects list on the left. Select the one that you wish to run, then click Launch Project.
For this example, you’ll only modify the script.rpy file for basic_game. The complete code for this game can be found in the downloaded materials, as well as below:
script.rpy
 1# The script of the game goes in this file.
 2
 3# Declare characters used by this game. The color argument colorizes the
 4# name of the character.
 5
 6define kevin = Character("Kevin", color="#c8ffc8")
 7define mom = Character("Mom", color="#c8ffff")
 8define me = Character("Me", color="#c8c8ff")
 9
10# The game starts here.
11
12label start:
13
14    # Some basic narration to start the game
15
16    "You hear your alarm going off, and your mother calling to you."
17
18    mom "It's time to wake up. If I can hear your alarm,
19    you can hear it to - let's go!"
20
21    "Reluctantly you open your eyes."
22
23    # Show a background.
24
25    scene bedroom day
26
27    # This shows the basic narration
28
29    "You awaken in your bedroom after a good night's rest.
30    Laying there sleepily, your eyes wander to the clock on your phone."
31
32    me "Yoinks! I'm gonna be late!"
33
34    "You leap out of bed and quickly put on some clothes.
35    Grabbing your book bag, you sprint for the door to the living room."
36
37    scene hallway day
38
39    "Your brother is waiting for you in the hall."
40
41    show kevin normal
42
43    kevin "Let's go, loser! We're gonna be late!"
44
45    mom "Got everything, honey?"
46
47    menu:
48        "Yes, I've got everything.":
49            jump follow_kevin
50
51        "Wait, I forgot my phone!":
52            jump check_room
53
54label check_room:
55
56    me "Wait! My phone!"
57
58    kevin "Whatever. See you outside!"
59
60    "You sprint back to your room to get your phone."
61
62    scene bedroom day
63
64    "You grab the phone from the nightstand and sprint back to the hall."
65
66    scene hallway day
67
68    "True to his word, Kevin is already outside."
69
70    jump outside
71
72label follow_kevin:
73
74    kevin "Then let's go!"
75
76    "You follow Kevin out to the street."
77
78label outside:
79
80    scene street
81
82    show kevin normal
83
84    kevin "About time you got here. Let's Go!"
85
86    # This ends the game
87    return
Labels define entry points into your story, and are often used to start new scenes and provide alternate paths through the story. All Ren’Py games start running at the line label start:, which can appear in any script you choose. You can see this on line 12 of script.rpy.
You can also use labels to define background images, set up transitions between scenes, and control the appearance of characters. In the sample, a second scene starts on line 54 with the line label check_room:.
Text enclosed in double-quotes on a line is called a say statement. A single string on a line is treated as narration. Two strings get treated as dialogue, identifying a character first and then providing the line that they’re speaking.
At the beginning of the game, narration is seen on line 16, which sets the scene. Dialogue is provided on line 18, when your mom calls to you.
You can define characters by simply naming them in the story. However, you can also define characters at the top of your script. You can see this on lines 6 to 8, where you, your brother Kevin, and your mom are defined. The define statement initializes the three variables as Characters, giving them a display name, followed by a text color used to display the name.
Of course, this is a visual novel, so it makes sense that Ren’Py would have a way to handle images. Like Pygame Zero, Ren’Py requires that all images and sounds used in the game reside in specific folders. Images are found in the game/images/ folder, and sounds are in the game/audio/ folder. In the game script, you refer to them by filename without any file extension.
Line 25 shows this in action, when you open your eyes and see your bedroom for the first time. The scene keyword clears the screen, then displays the bedroom day.png image. Ren’Py supports the JPG, WEBP, and PNG image formats.
You can also display characters on the screen using the show keyword and the same naming convention for the image. Line 41 shows a picture of your brother Kevin, stored as kevin normal.png.
Of course, it’s not much of a game if you can’t make decisions to affect the outcome. In Ren’Py, players make choices from a menu presented to them in the course of the game. The game reacts by jumping to predefined labels, changing character images, playing sounds, or taking other actions as necessary.
A basic choice in this sample is shown on lines 47 to 52, where you realize you’ve forgotten your phone. In a more complete story, this choice may have consequences later.
Of course, you can do much more with Ren’Py. You can control transitions between scenes, have characters enter and leave scenes in specific ways, and include sound and music for your game. Ren’Py also supports writing more complex Python code, including using Python data types and making direct Python function calls. Now take a closer look at these capabilities in a more advanced application.
Advanced Application
To show the depth of Ren’Py, you’ll implement the same game as you did for adventurelib. As a reminder, here’s the basic design of that game:
- You live in a small, quiet hamlet.
- Recently, your neighbors have begun complaining of missing livestock.
- As a member of a night patrol, you notice a broken fence and a trail leading away from it.
- You decide to investigate, armed only with a wooden practice sword.
The game has several areas to define and provide images for. For example, you’ll need images and definitions for your small, quiet hamlet, and the trail leading away from the field. You’ll also need images for a nearby village where you can buy a better weapon, a side path leading to a wizard who can enchant your weapon, and the cave containing the giant who has been taking your livestock.
There are also a few characters to define and provide images for. You need a blacksmith who can give you a better weapon, a wizard who can enchant your weapon, and the giant whom you need to defeat.
For this example, you’ll create four separate scripts:
script.rpy, which is where the game startstown.rpy, which contains the story of the nearby villagepath.rpy, which contains the path between villagesgiant.rpy, which contains the logic for the giant battle
You can create the wizard encounter as an independent exercise.
The complete code for this game can be found in the downloaded materials at renpy_sample/giant_quest/ and is also available below:
script.rpy
 1#
 2# Complete game in Ren'Py
 3#
 4# This game demonstrates some of the more advanced features of
 5# Ren'Py, including:
 6# - Multiple sprites
 7# - Handling user input
 8# - Selecting alternate outcomes
 9# - Tracking score and inventory
10#
11
12## Declare characters used by this game. The color argument colorizes the
13## name of the character.
14define player = Character("Me", color="#c8ffff")
15define smith = Character("Miranda, village blacksmith", color="#99ff9c")
16define wizard = Character("Endeavor, cryptic wizard", color="#f4d3ff")
17define giant = Character("Maull, terrifying giant", color="#ff8c8c")
18
19## Images used in the game
20# Backgrounds
21image starting path = "BG10a_1280.jpg"
22image crossroads = "BG19a01_1280.jpg"
23
24# Items
25image wooden sword = "SwordWood.png"
26image steel sword = "Sword.png"
27image enchanted sword = "SwordT2.png"
28
29## Default settings
30# What is the current weapon?
31default current_weapon = "wooden sword"
32
33# What is the weapon damage?
34# These change when the weapon is upgraded or enchanted
35default base_damage = 4
36default multiplier = 1
37default additional = 0
38
39# Did they cross the bridge to town?
40default cross_bridge = False
41
42# You need this for the giant battle later
43
44init python:
45    from random import randint
46
47# The game starts here.
48
49label start:
50
51    # Show the initial background.
52
53    scene starting path
54    with fade
55
56    # Begin narration
57
58    "Growing up in a small hamlet was boring, but reliable and safe.
59    At least, it was until the neighbors began complaining of missing
60    livestock. That's when the evening patrols began."
61
62    "While on patrol just before dawn, your group noticed broken fence
63    around a cattle paddock. Beyond the broken fence,
64    a crude trail had been blazed to a road leading away from town."
65
66    # Show the current weapon
67    show expression current_weapon at left
68    with moveinleft
69
70    "After reporting back to the town council, it was decided that you
71    should follow the tracks to discover the fate of the livestock.
72    You picked up your only weapon, a simple wooden practice sword,
73    and set off."
74
75    scene crossroads
76    with fade
77
78    show expression current_weapon at left
79
80    "Following the path, you come to a bridge across the river."
81
82    "Crossing the bridge will take you to the county seat,
83    where you may hear some news or get supplies.
84    The tracks, however, continue straight on the path."
85
86    menu optional_name:
87        "Which direction will you travel?"
88
89        "Cross the bridge":
90            $ cross_bridge = True
91            jump town
92        "Continue on the path":
93            jump path
94
95    "Your quest is ended!"
96
97    return
town.rpy
  1##
  2## Code for the interactions in town
  3##
  4
  5## Backgrounds
  6image distant town = "4_road_a.jpg"
  7image within town = "3_blacksmith_a.jpg"
  8
  9# Characters
 10image blacksmith greeting = "blacksmith1.png"
 11image blacksmith confused = "blacksmith2.png"
 12image blacksmith happy = "blacksmith3.png"
 13image blacksmith shocked = "blacksmith4.png"
 14
 15label town:
 16
 17    scene distant town
 18    with fade
 19
 20    show expression current_weapon at left
 21
 22    "Crossing the bridge, you stride away from the river along a
 23    well worn path. The way is pleasant, and you find yourself humming
 24    a tune as you break into a small clearing."
 25
 26    "From here, you can make out the county seat of Fetheron.
 27    You feel confident you can find help for your quest here."
 28
 29    scene within town
 30    with fade
 31
 32    show expression current_weapon at left
 33
 34    "As you enter town, you immediately begin seeking the local blacksmith.
 35    After asking one of the townsfolk, you find the smithy on the far
 36    south end of town. You approach the smithy,
 37    smelling the smoke of the furnace long before you hear
 38    the pounding of hammer on steel."
 39
 40    player "Hello! Is the smith in?"
 41
 42    smith "Who wants to know?"
 43
 44    show blacksmith greeting
 45
 46    "The blacksmith appears from her bellows.
 47    She greets you with a warm smile."
 48
 49    smith "Oh, hello! You're from the next town over, right?"
 50
 51    menu:
 52        "Yes, from the other side of the river.":
 53            show blacksmith happy
 54
 55            smith "I thought I recognized you. Nice to see you!"
 56
 57        "Look, I don't have time for pleasantries, can we get to business?":
 58            show blacksmith shocked
 59
 60            smith "Hey, just trying to make conversation"
 61
 62    smith "So, what can I do for you?"
 63
 64    player "I need a better weapon than this wooden thing."
 65
 66    show blacksmith confused
 67
 68    smith "Are you going to be doing something dangerous?"
 69
 70    player "Have you heard about the missing livestock in town?"
 71
 72    smith "Of course. Everyone has. What do you know about it?"
 73
 74    player "Well, I'm tracking whatever took them from our town."
 75
 76    smith "Oh, I see. So you want something better to fight with!"
 77
 78    player "Exactly! Can you help?"
 79
 80    smith "I've got just the thing. Been working on it for a while,
 81    but didn't know what to do with it. Now I know."
 82
 83    "Miranda walks back past the furnace to a small rack.
 84    On it, a gleaming steel sword rests.
 85    She picks it up and walks back to you."
 86
 87    smith "Will this do?"
 88
 89    menu:
 90        "It's perfect!":
 91            show blacksmith happy
 92
 93            smith "Wonderful! Give me the wooden one -
 94            I can use it in the furnace!"
 95
 96            $ current_weapon = "steel sword"
 97            $ base_damage = 6
 98            $ multiplier = 2
 99
100        "Is that piece of junk it?":
101            show blacksmith confused
102
103            smith "I worked on this for weeks.
104            If you don't want it, then don't take it."
105
106    # Show the current weapon
107    show expression current_weapon at left
108
109    smith "Anything else?"
110
111    player "Nope, that's all."
112
113    smith "Alright. Good luck!"
114
115    scene distant town
116    with fade
117
118    show expression current_weapon at left
119
120    "You make your way back through town.
121    Glancing back at the town, you wonder if
122    you can keep them safe too."
123
124    jump path
path.rpy
 1##
 2## Code for the interactions in town
 3##
 4
 5## Backgrounds
 6image path = "1_forest_a.jpg"
 7image wizard hut = "BG600a_1280.jpg"
 8
 9# Characters
10image wizard greeting = "wizard1.png"
11image wizard happy = "wizard2.png"
12image wizard confused = "wizard3.png"
13image wizard shocked = "wizard4.png"
14
15label path:
16
17    scene path
18    with fade
19
20    show expression current_weapon at left
21
22    "You pick up the tracks as you follow the path through the woods."
23
24    jump giant_battle
giant.rpy
  1##
  2## Code for the giant battle
  3##
  4
  5## Backgrounds
  6image forest = "forest_hill_night.jpg"
  7
  8# Characters
  9image giant greeting = "giant1.png"
 10image giant unhappy = "giant2.png"
 11image giant angry = "giant3.png"
 12image giant hurt = "giant4.png"
 13
 14# Text of the giant encounter
 15label giant_battle:
 16
 17    scene forest
 18    with fade
 19
 20    show expression current_weapon at left
 21
 22    "As you follow the tracks down the path, night falls.
 23    You hear sounds in the distance:
 24    cows, goats, sheep. You've found the livestock!"
 25
 26    show giant greeting
 27
 28    "As you approach the clearing and see your villages livestock,
 29    a giant appears."
 30
 31    giant "Who are you?"
 32
 33    player "I've come to get our livestock back."
 34
 35    giant "You and which army, little ... whatever you are?"
 36
 37    show giant unhappy
 38
 39    "The giant bears down on you - the battle is joined!"
 40
 41python:
 42
 43    def show_giant_condition(giant_hp):
 44        if giant_hp < 10:
 45            renpy.say(None, "The giant staggers, his eyes unfocused.")
 46        elif giant_hp < 20:
 47            renpy.say(None, "The giant's steps become more unsteady.")
 48        elif giant_hp < 30:
 49            renpy.say(
 50                None, "The giant sweats and wipes the blood from his brow."
 51            )
 52        elif giant_hp < 40:
 53            renpy.say(
 54                None,
 55                "The giant snorts and grits his teeth against the pain.",
 56            )
 57        else:
 58            renpy.say(
 59                None,
 60                "The giant smiles and readies himself for the attack.",
 61            )
 62
 63    def show_player_condition(player_hp):
 64        if player_hp < 4:
 65            renpy.say(
 66                None,
 67                "Your eyes lose focus on the giant as you sway unsteadily.",
 68            )
 69        elif player_hp < 8:
 70            renpy.say(
 71                None,
 72                "Your footing becomes less steady as you swing your sword sloppily.",
 73            )
 74        elif player_hp < 12:
 75            renpy.say(
 76                None,
 77                "Blood mixes with sweat on your face as you wipe it from your eyes.",
 78            )
 79        elif player_hp < 16:
 80            renpy.say(
 81                None,
 82                "You bite down as the pain begins to make itself felt.",
 83            )
 84        else:
 85            renpy.say(None, "You charge into the fray valiantly!")
 86
 87    def fight_giant():
 88
 89        # Default values
 90        giant_hp = 50
 91        player_hp = 20
 92        giant_damage = 4
 93
 94        battle_over = False
 95        player_wins = False
 96
 97        # Keep swinging until something happens
 98        while not battle_over:
 99
100            renpy.say(
101                None,
102                "You have {0} hit points. Do you want to fight or flee?".format(
103                    player_hp
104                ),
105                interact=False,
106            )
107            battle_over = renpy.display_menu(
108                [("Fight!", False), ("Flee!", True)]
109            )
110
111            if battle_over:
112                player_wins = False
113                break
114
115            # The player gets a swing
116            player_attack = (
117                randint(1, base_damage + 1) * multiplier + additional
118            )
119            renpy.say(
120                None,
121                "You swing your {0}, doing {1} damage!".format(
122                    current_weapon, player_attack
123                ),
124            )
125            giant_hp -= player_attack
126
127            # Is the giant dead?
128            if giant_hp <= 0:
129                battle_over = True
130                player_wins = True
131                break
132
133            show_giant_condition(giant_hp)
134
135            # Then the giant tries
136            giant_attack = randint(0, giant_damage)
137            if giant_attack == 0:
138                renpy.say(
139                    None,
140                    "The giant's arm whistles harmlessly over your head!",
141                )
142            else:
143                renpy.say(
144                    None,
145                    "The giant swings his mighty fist, and does {0} damage!".format(
146                        giant_attack
147                    ),
148                )
149                player_hp -= giant_attack
150
151            # Is the player dead?
152            if player_hp <= 0:
153                battle_over = True
154                player_wins = False
155
156            show_player_condition(player_hp)
157
158        # Return who died
159        return player_wins
160
161    # fight_giant returns True if the player wins.
162    if fight_giant():
163        renpy.jump("player_wins")
164    else:
165        renpy.jump("giant_wins")
166
167label player_wins:
168
169    "The giant's eyes glaze over as he falls heavily to the ground.
170    The earth shakes as his bulk lands face down,
171    and his death rattle fills the air."
172
173    hide giant
174
175    "You are victorious! The land is safe from the giant!"
176
177    return
178
179label giant_wins:
180
181    "The giant takes one last swing, knocking you down.
182    Your vision clouds, and you see the ground rising to meet you.
183    As you slowly lose consciousness, your last vision is
184    the smiling figure of the giant as he advances on you."
185
186    "You have lost!"
187
188    return
As in the previous example, you define Character() objects before the script begins on lines 14 to 17 of script.rpy.
You can also define background or character image objects for later use. Lines 21 to 27 define several images which you refer to later, both to use as backgrounds and to display as items. Using this syntax allows you to assign shorter and more descriptive internal names for images. Later, you’ll see how they’re displayed.
You also need to track the capabilities of the equipped weapon. This is done on lines 31 to 37, using default variable values, which you’ll use during the giant battle later.
To indicate which weapon is enabled, you show the image as an expression. Ren’Py expressions are small images displayed in the corners of the game window and are used to show a wide variety of information. For this game, you use an expression to show the weapon using show expression first on lines 67 and 68.
The show command has a number of modifiers documented. The with moveinleft modifier causes the current_weapon image to slide onto the screen from the left. Also, it’s important to remember that every time scene changes, the entire screen is cleared, requiring you to show the current weapon again. You can see that on lines 75 to 78.
When you enter the town in town.rpy, you meet the blacksmith, who greets you:
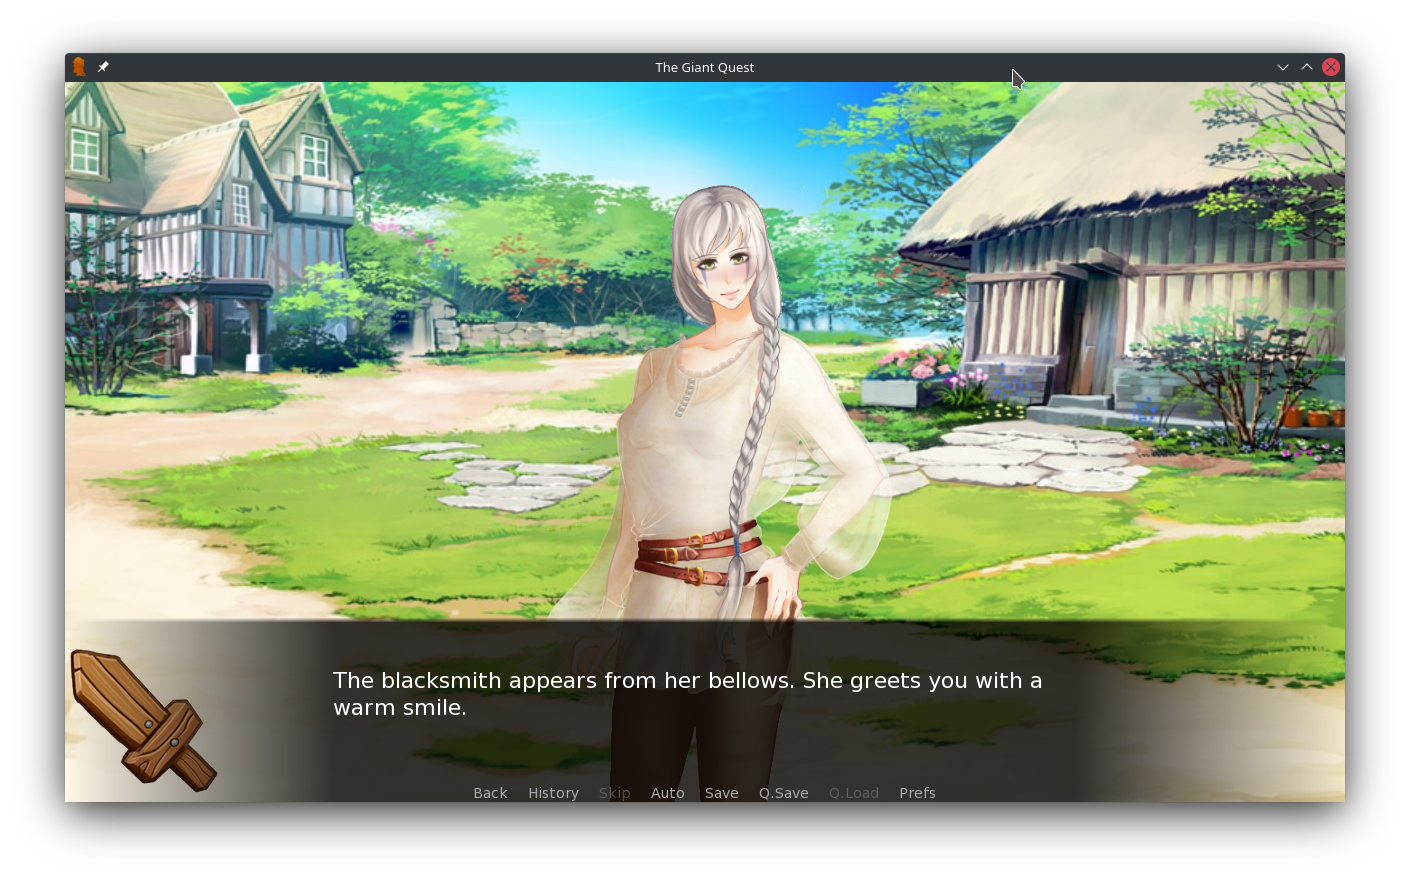
The blacksmith offers you the opportunity to upgrade your weapon. If you choose to do so, then you update the values for current_weapon and the weapon stats. This is done on lines 93 to 98.
Lines that begin with the $ character are interpreted by Ren’Py as Python statements, allowing you to write arbitrary Python code as necessary. Updating the current_weapon and weapon stats is done using three Python statements on lines 96 to 98, which change the values of the the default variables that you defined at the top of script.rpy.
You can also define a large block of Python code using a python: section, as shown in giant.rpy starting on line 41.
Lines 43 to 61 contain a helper function to show the condition of the giant, based on the giant’s remaining hit points. It uses the renpy.say() method to output narration back to the main Ren’Py window. A similar helper function to show the player’s condition is seen on lines 63 to 85.
The battle is controlled by fight_giant() on lines 87 to 159. The game loop is implemented on line 98 and is controlled by the battle_over variable. Player choices of fight or flee are displayed using the renpy.display_menu() method.
If the player fights, then a random amount of damage is done on lines 116 to 118, and the giant’s hit points are adjusted. If the giant is still alive, then they get to attack in a similar fashion on lines 136 to 149. Note that the giant has a chance to miss, while the player always hits. The fight continues either until the player or the giant has zero hit points or until the player flees:
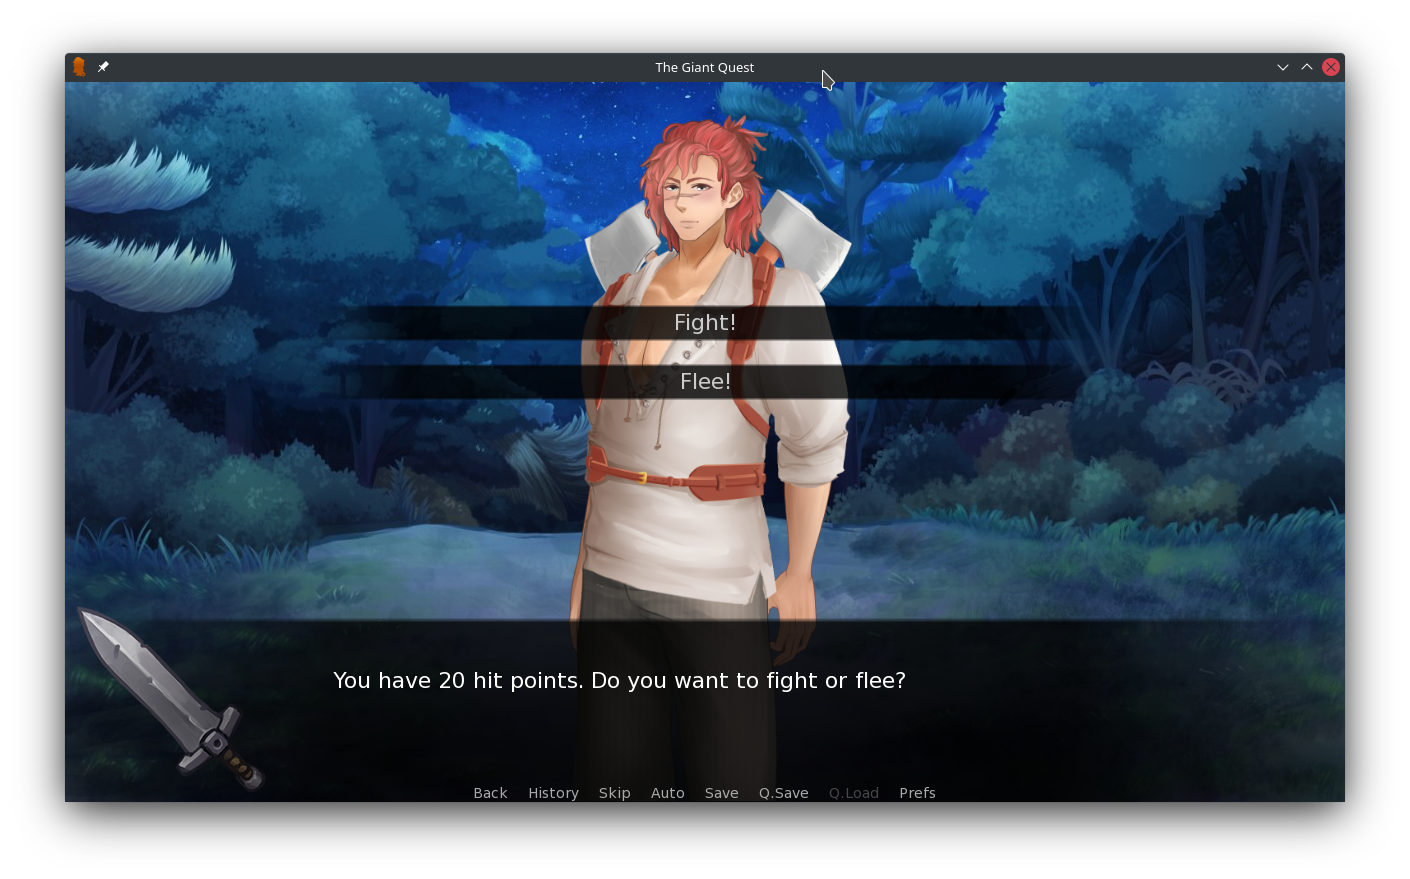
It’s important note that this code is very similar to the code that you used in the adventurelib battle. This shows how you can drop full Python code into your Ren’Py games without needing to translate it into Ren’Py script.
There’s much more to Ren’Py than what you’ve tried out here. Consult the Ren’Py documentation for more complete details.
Other Notable Python Game Engines
These five engines are only a small sampling of the many different Python game engines available. There are dozens of others available, and a few are worth noting here:
-
Wasabi 2D is developed by the team behind Pygame Zero. It’s a modern framework built on moderngl that automates rendering, provides coroutines for animation effects, has built-in particle effects, and uses an event-driven model for game play.
-
cocos2d is a framework designed for coding cross-platform games. Sadly, cocos2d-python hasn’t been updated since 2020.
-
Panda 3D is an open-source framework for creating 3D games and 3D renderings. Panda 3D is portable across platforms, supports multiple asset types, connects out of the box with numerous third-party libraries, and provides built-in pipeline profiling.
-
Ursina is built on top of Panda 3D and provides a dedicated game development engine that simplifies many aspects of Panda 3D. Well supported and well documented, Ursina is under active development at the time of this writing.
-
PursuedPyBear is billed as an educational library. It boasts a scene management system, frame-based animated sprites which can be paused, and a low barrier to entry. Documentation is sparse, but help is only a GitHub discussion away.
New Python game engines are created every day. If you find one that suits your needs and wasn’t mentioned here, please sing its praises in the comments!
Sources for Game Assets
Often, creating game assets is the biggest issue facing game authors. Large video game companies employ teams of artists, animators, and musicians to design the look and sound of their games. Solo game developers with a background in coding may find this aspect of game development daunting. Luckily, there are many different sources for game assets available. Here are some that were vital in locating assets for the games in this tutorial:
-
OpenGameArt.org hosts a wide variety of game art, music, backgrounds, icons, and other assets for both 2D and 3D games. Artists and musicians list their assets for download, which you can download and use in your games. Most assets are freely available, and licensing terms may apply to many of them.
-
Kenney.nl hosts a set of free and paid assets, many of which can be found nowhere else. Donations are always welcome to support the free assets, which are all licensed for use in commercial games.
-
Itch.io is a marketplace for digital creators focused on independent game development. Here you can find digital assets for just about any purpose, both free and paid, along with complete games. Individual creators control their own content here, so you’re always working directly with talented individuals.
Most assets available from third-parties carry licensing terms dictating the proper and allowable use of the assets. As the user of these assets, it’s your responsibility to read, understand, and comply with the licensing terms as defined by the asset owner. If you have questions or concerns about those terms, please consult a legal professional for assistance.
All of the assets used in the games referenced in this article conform to their respective licensing requirements.
Conclusion
Congratulations, great game design is now within your reach! Thanks to Python and a buffet of highly capable Python game engines, you can create quality computer games much more easily than before. In this tutorial, you’ve explored several such game engines, learning the information that you need to start crafting your own Python video games!
By now, you’ve seen some of the top Python game engines in action, and you’ve:
- Explored the pros and cons of several popular Python game engines
- Experienced how they compare to stand-alone game engines
- Learned about other Python game engines available
If you’d like to review the code for the games in this tutorial, you can do so by clicking the link below:
Get Source Code: Click here to get the source code you’ll use to try out Python game engines.
Now you can choose the best Python game engine for your purpose. So what are you waiting for? Get out there and write some games!
Frequently Asked Questions
Now that you have some experience with Python game engines, you can use the questions and answers below to check your understanding and recap what you’ve learned.
These FAQs are related to the most important concepts you’ve covered in this tutorial. Click the Show/Hide toggle beside each question to reveal the answer.
Some of the top Python game engines include Pygame, Pygame Zero, Arcade, adventurelib, and Ren’Py.
Python game engines often leverage Python’s simplicity and readability, focusing on educational and beginner-friendly environments, whereas other engines may prioritize performance and support for multiple programming languages.
Pygame Zero is a beginner-friendly framework built on Pygame that simplifies game development by providing a game loop, event model, and sprite handling to reduce the amount of boilerplate code you need to write.
While you can use Python game engines like Pygame and Arcade to develop games, porting them to mobile platforms can be challenging and may require additional tools or frameworks.
Yes, Python can make 3D games using engines like Panda 3D and Ursina, which provide the necessary tools and libraries to create 3D graphics and environments.