AI debugging is fixing broken code by pairing with an AI coding agent instead of hunting down bugs on your own. In this tutorial, you’ll debug Python code with an AI agent by reproducing a bug with a failing test, giving your agent the context it needs, and verifying the fix that gets your program running again.
Most developers seek what’s called a flow state when building programs or fixing code. This is a state of high focus. However, it can occasionally be interrupted by bugs. While debugging has for decades been largely carried out by humans aided by tools like pdb, AI coding agents have now become instrumental to the process, helping to make it faster.
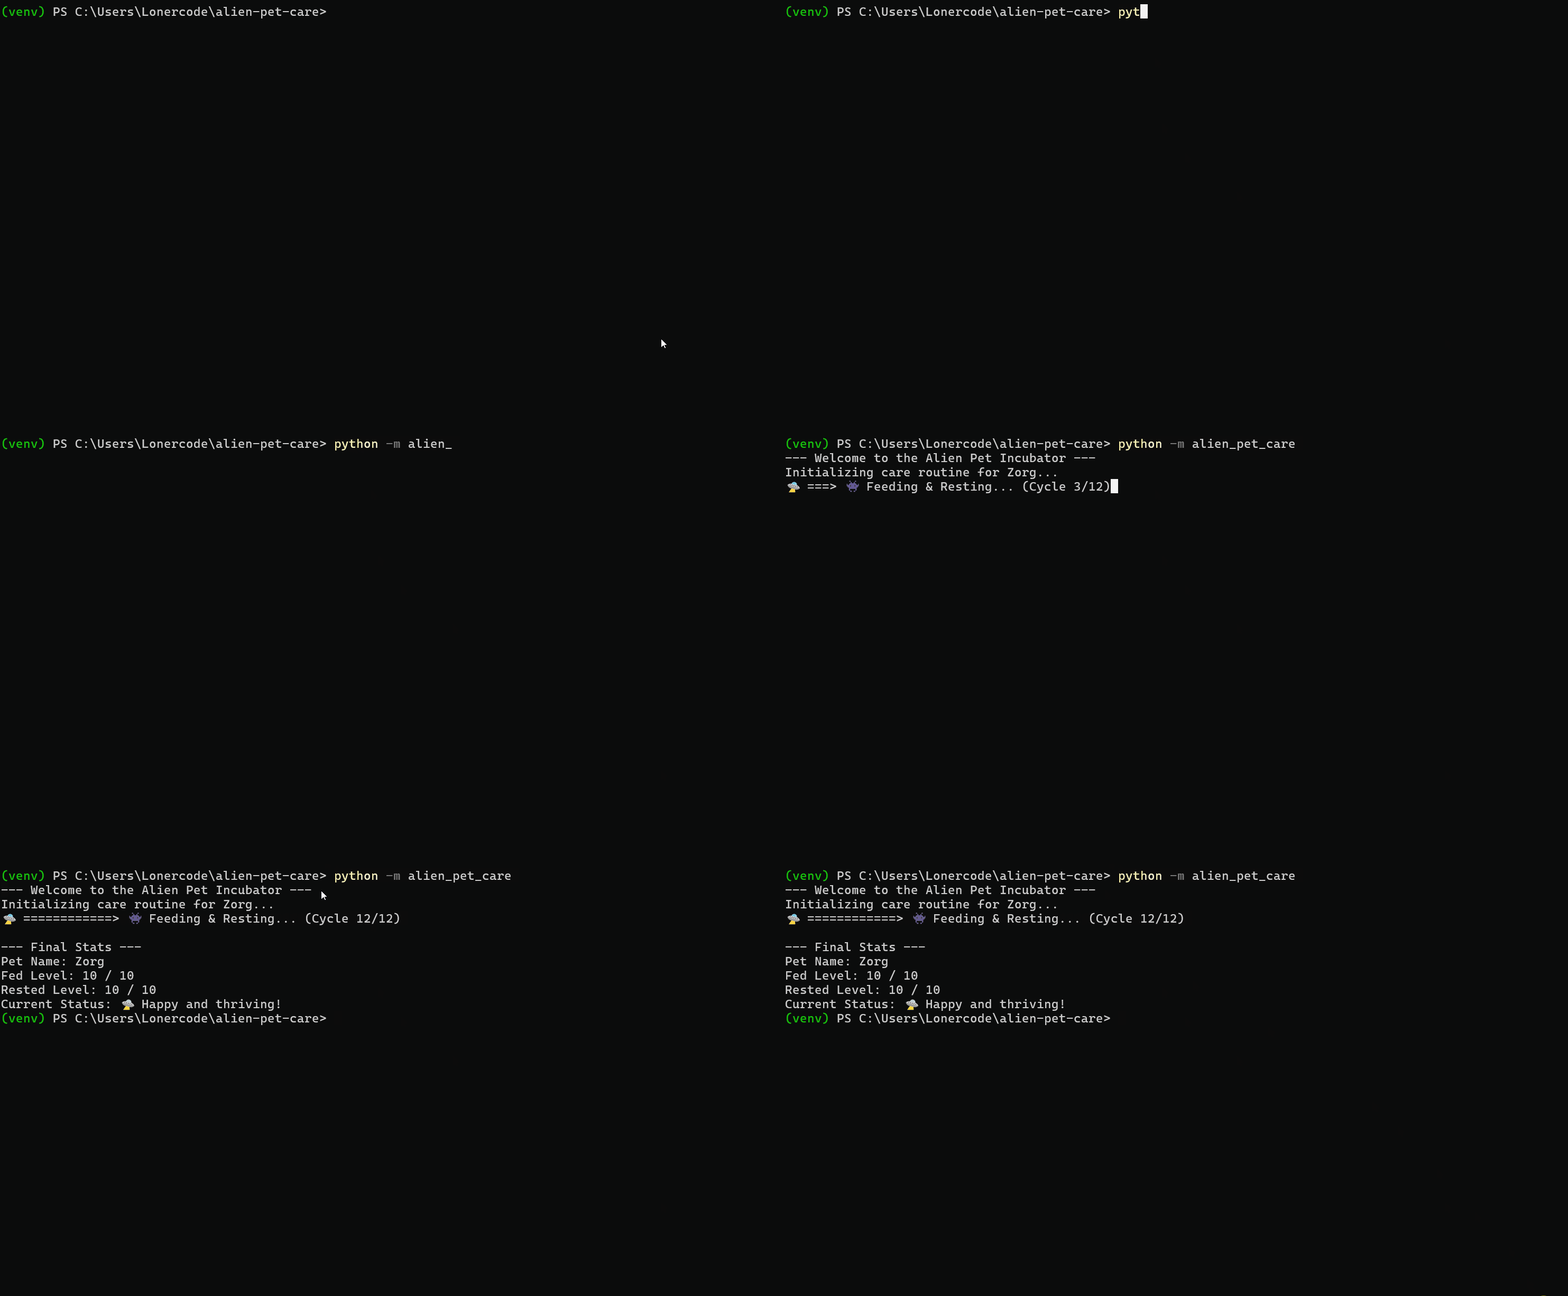
The Python project that you’ll debug in this guide places you in the position of an alien pet owner using a tool to keep your pet happy. This tool has checks for when your pet is well fed and well rested. However, you’ve learned that your pet is never happy no matter how often it eats or rests. You suspect a bug, and your AI agent has come to the rescue.
By applying the steps in this tutorial, you’ll get this broken pet project back into a working state:
You’ll use the newly released Antigravity CLI by Google to see this workflow play out in real time. But if that’s not your preferred coding agent, that’s fine too, and you can still follow along with the steps.
Get Your Code: Click here to download the free sample code you’ll use to debug the broken alien pet project with an AI coding agent.
Take the Quiz: Test your knowledge with our interactive “How to Debug Python Code With an AI Agent” quiz. You’ll receive a score upon completion to help you track your learning progress:
Interactive Quiz
How to Debug Python Code With an AI AgentTest your understanding of debugging Python code with an AI agent, from reproducing a bug with a failing test to verifying the fix.
Prerequisites
To work through this tutorial comfortably, you should have the following at your fingertips:
- Git commands: You should be comfortable setting up Git in your project’s root folder and working with a few basic commands.
- Python 3.11 or newer: You’ll need Python to run the sample project.
- A working AI coding agent: You’ll be using one to debug, so being familiar with an agent that can read and write files is important. This tutorial uses Antigravity CLI, and Step 1 walks through the setup.
- Python testing with
pytest: You should be comfortable reading and writing tests withpytest. You’ll write a failing test to reproduce the bug, then rerun it to confirm your agent’s fix works.
With these prerequisites in place, you’re ready to set up the alien pet project and start tracking down the bug that’s keeping your pet unhappy.
Step 1: Set Up Your Workspace for AI Debugging
If you already have a preferred agent set up, or you’ve already installed Antigravity CLI, skip the setup below and scroll to the directory tree to add the required files to your workspace.
To set up Antigravity CLI for this tutorial, you’ll need to have a Google account. If you’re familiar with the just-retired Gemini CLI, you’ll find that the setup processes are quite similar. First, go to the Antigravity CLI installation guide for instructions on installing it.
Choose the appropriate installation command for your operating system and run it in your terminal:
Once that’s done, your new AI coding agent is successfully installed. Next, create your project folder, initialize a virtual environment to safely isolate your dependencies, and activate it:
$ mkdir alien-pet-care
$ cd alien-pet-care
$ python -m venv venv
$ source venv/bin/activate
Activating the virtual environment ensures that any packages you install moving forward remain self-contained within this project directory. Depending on your operating system, your terminal prompt should now show the (venv) prefix.
Note: If you’re a Windows user running PowerShell, activate your environment using venv\Scripts\activate. If your system blocks the script, you can temporarily permit execution for your current session by running Set-ExecutionPolicy -ExecutionPolicy RemoteSigned -Scope Process.
Now, launch the CLI configuration inside your project directory by typing the following command:
(venv) $ agy
This triggers a first-launch setup, where you’ll be prompted to log in with your Google account details. You’ll be redirected to a page or instructed to paste an authorization code in an input field:
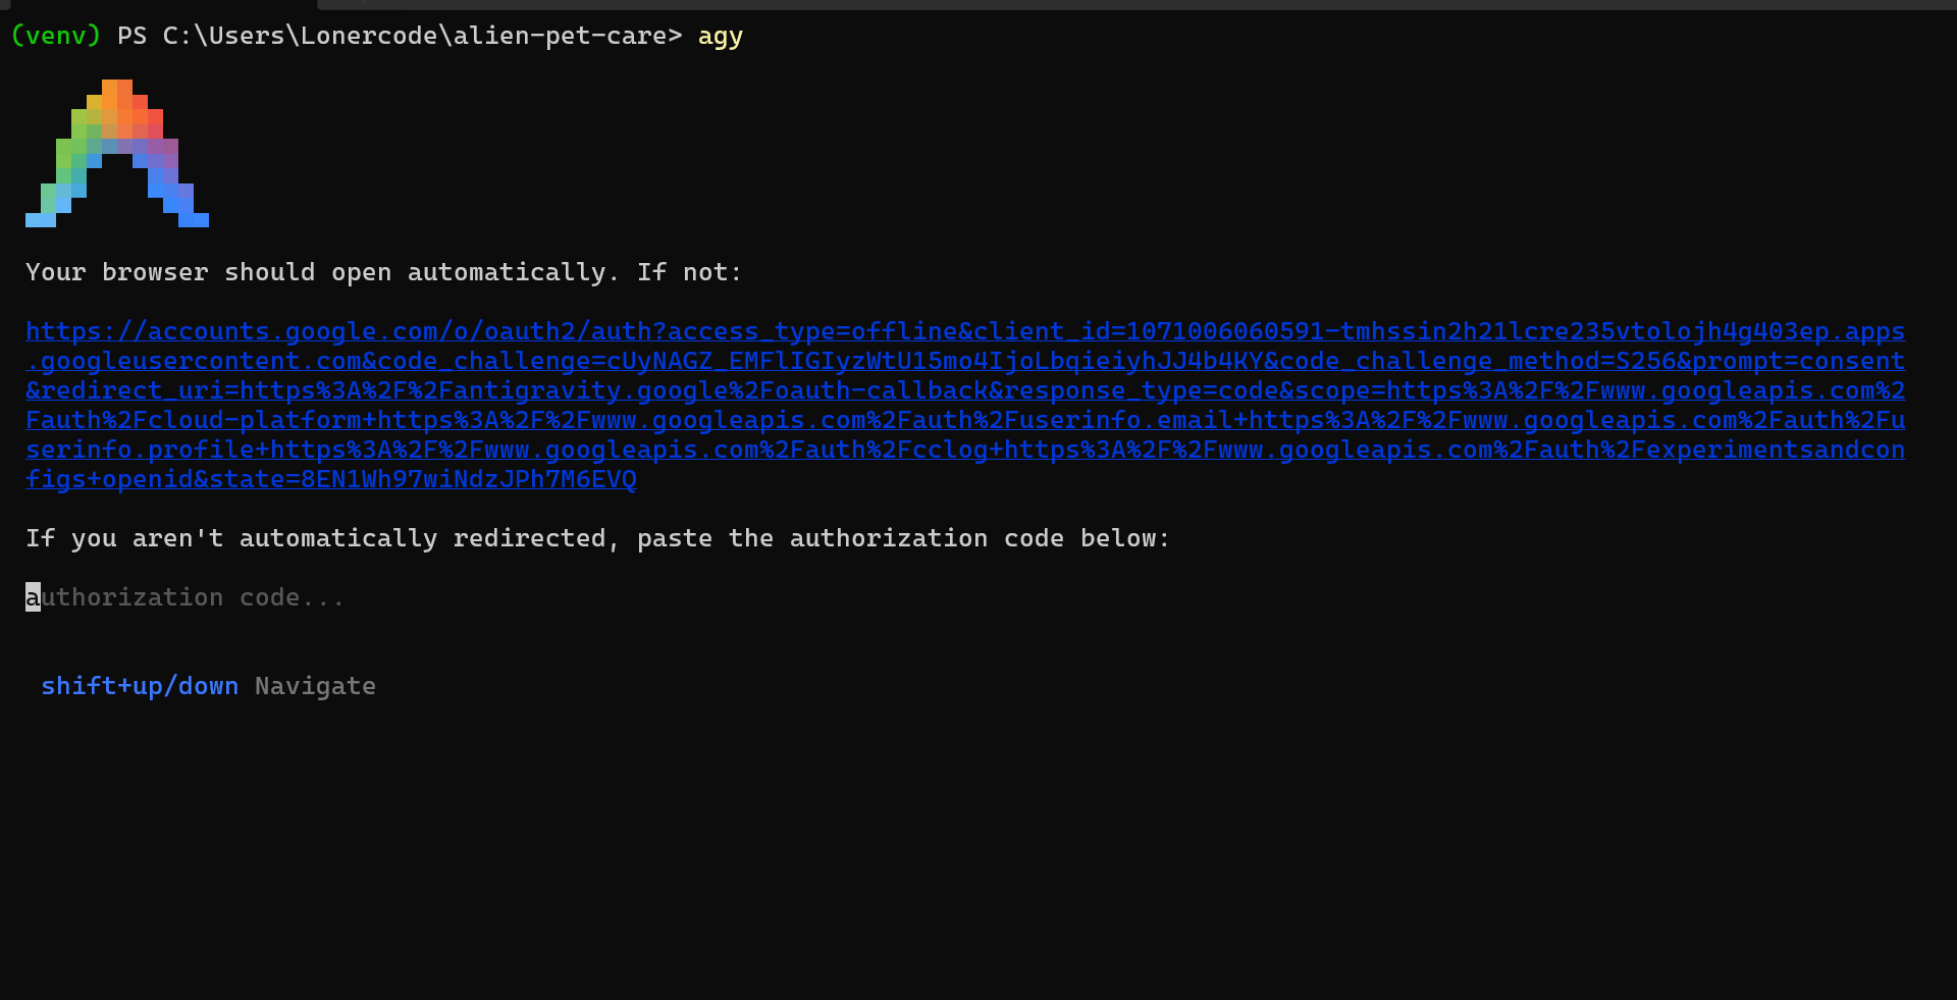
After you input the authorization code as shown above, you’ll be logged in. You can also select your color scheme and other options.
Once you finish these steps, a prompt box appears, and you’ll be free to ask Antigravity anything. Well, almost anything—for this tutorial, you’re a distraught alien pet owner with a tricky bug that could use some debugging assistance.
To learn about the commands available in Antigravity CLI, have a look at the CLI reference. Back in your terminal, a screen like the one below should appear:
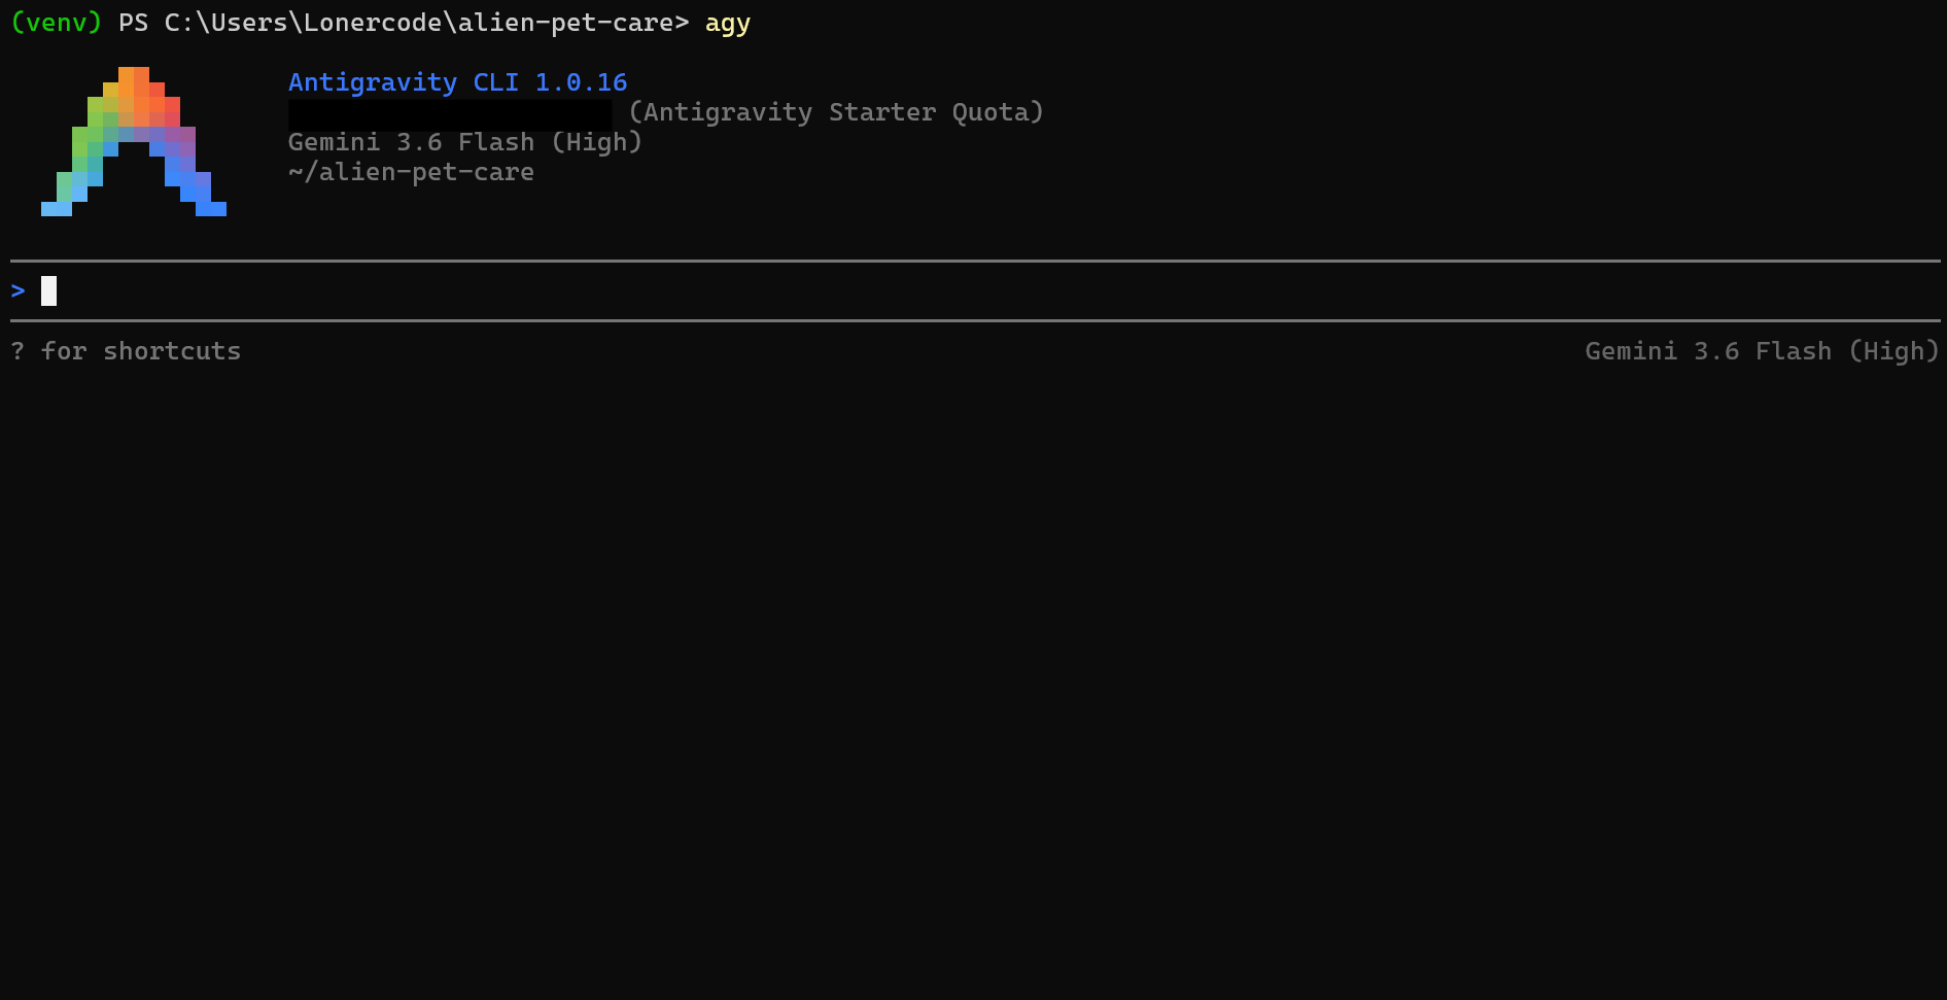
Your screen looks great with the blinking cursor and your agent patiently awaiting your request. For the agent to debug, you need to give it some files to work with. Add the files shown below to your workspace. The directory tree below will make the file structure clear:
alien-pet-care/
│
├── alien_pet_care/
│   ├── __init__.py
│   ├── __main__.py
│   └── pet.py
│
└── tests/
    ├── __init__.py
    └── test_pet.py
With your workspace structured like this, you can now install pytest so you can run tests:
(venv) $ python -m pip install -U pytest
The bug is hidden within the files. Your agent shouldn’t have access to any extra information, so you can watch the gears turn in real time. Open pet.py and populate it with the code shown below:
alien_pet_care/pet.py
class AlienPet:
    def __init__(self, name):
        self.name = name
        self.fed_level = 0
        self.rested_level = 0
        self.MAX_STATUS = 10

    def feed(self):
        """Increments the feeding level."""
        if self.fed_level <= self.MAX_STATUS:
            self.fed_level += 1

    def rest(self):
        """Increments the rested level."""
        if self.rested_level <= self.MAX_STATUS:
            self.rested_level += 1

    def is_happy(self) -> bool:
        """The pet is genuinely happy only when fully fed and rested."""
        return (
            self.fed_level == self.MAX_STATUS
            and self.rested_level == self.MAX_STATUS
        )

    def get_status(self) -> str:
        if self.is_happy():
            return "🛸 Happy and thriving!"
        if self.fed_level < 5:
            return "👾 Starving! Please feed me."
        return "Doing okay, but still feels a bit empty..."
The file pet.py contains the core logic for managing your pet’s vitals. It handles initialization, tracks individual stat levels, and determines whether the pet has reached full happiness.
To see this behavior play out on your terminal, you need a way to run the simulation and print the final results. Open __main__.py and add the following CLI runner script to see the bug in action:
alien_pet_care/__main__.py
import time

from alien_pet_care.pet import AlienPet


def main():
    print("--- Welcome to the Alien Pet Incubator ---")
    pet = AlienPet(name="Zorg")

    print(f"Initializing care routine for {pet.name}...")
    time.sleep(0.5)

    for i in range(12):
        pet.feed()
        pet.rest()
        beam = "=" * (i + 1)
        print(
            f"\r🛸 {beam}> 👾 Feeding & Resting... (Cycle {i + 1}/12)",
            end="",
            flush=True,
        )
        time.sleep(0.15)

    print("\n\n--- Final Stats ---")
    print(f"Pet Name: {pet.name}")
    print(f"Fed Level: {pet.fed_level} / 10")
    print(f"Rested Level: {pet.rested_level} / 10")
    print(f"Current Status: {pet.get_status()}")


if __name__ == "__main__":
    main()
This script runs a quick loop that feeds and rests your pet twelve times in a row. However, because of the bug, poor Zorg will be left perpetually unhappy.
To be sure your agent has cracked the case, you’ll need a test that verifies the fix works. Paste the following code in tests/test_pet.py:
tests/test_pet.py
import pytest

from alien_pet_care.pet import AlienPet


@pytest.fixture
def pet():
    return AlienPet("Zorg")


@pytest.mark.parametrize(
    "fed, rested, expected",
    [(10, 10, True), (9, 10, False), (10, 9, False)],
)
def test_is_happy(pet, fed, rested, expected):
    pet.fed_level, pet.rested_level = fed, rested
    assert pet.is_happy() is expected


@pytest.mark.parametrize(
    "fed, rested, expected",
    [
        (10, 10, "🛸 Happy and thriving!"),
        (4, 0, "👾 Starving! Please feed me."),
        (5, 0, "Doing okay, but still feels a bit empty..."),
    ],
)
def test_get_status(pet, fed, rested, expected):
    pet.fed_level, pet.rested_level = fed, rested
    assert pet.get_status() == expected
Now that you’ve added the files, make sure to set up a Git repository in your project’s root folder. This will track your baseline code so you can run git diff later to analyze your agent’s changes or use git restore to revert them if needed.
To initialize your repository, run the following:
(venv) $ git init
(venv) $ git add .
(venv) $ git commit -m "initial commit"
Now that you’ve set up your workspace, you’ll reproduce the bug with a failing test to confirm its behavior before your AI agent tries to fix it.
Step 2: Reproduce the Bug With a Failing Test
Before you ask your AI agent to take a look at the bug, try running the program to confirm that Zorg is indeed having a bad day:
(venv) $ python -m alien_pet_care
--- Welcome to the Alien Pet Incubator ---
Initializing care routine for Zorg...
🛸 ============> 👾 Feeding & Resting... (Cycle 12/12)

--- Final Stats ---
Pet Name: Zorg
Fed Level: 11 / 10
Rested Level: 11 / 10
Current Status: Doing okay, but still feels a bit empty...
You’ll notice that your pet never becomes happy, even after being fed and allowed to rest twelve times. Both levels have even sailed past their maximum and landed on 11. Something is clearly off, but you’ll let the agent pinpoint exactly where.
Try running the tests:
(venv) $ pytest
Even though you just watched Zorg stay unhappy, your tests show all green. These tests aren’t checking the actual values that feed() and rest() produce, so they can’t catch the real issue. You’ll fix that next.
Modify tests/test_pet.py by adding the lines highlighted below:
tests/test_pet.py
import pytest

from alien_pet_care.pet import AlienPet


@pytest.fixture
def pet():
    return AlienPet("Zorg")


@pytest.mark.parametrize("times, expected", [(1, 1), (10, 10), (15, 10)])
def test_feed_caps_at_max(pet, times, expected):
    for _ in range(times):
        pet.feed()
    assert pet.fed_level == expected


@pytest.mark.parametrize("times, expected", [(1, 1), (10, 10), (15, 10)])
def test_rest_caps_at_max(pet, times, expected):
    for _ in range(times):
        pet.rest()
    assert pet.rested_level == expected


@pytest.mark.parametrize(
    "fed, rested, expected",
    [(10, 10, True), (9, 10, False), (10, 9, False)],
)
def test_is_happy(pet, fed, rested, expected):
    pet.fed_level, pet.rested_level = fed, rested
    assert pet.is_happy() is expected


@pytest.mark.parametrize(
    "fed, rested, expected",
    [
        (10, 10, "🛸 Happy and thriving!"),
        (4, 0, "👾 Starving! Please feed me."),
        (5, 0, "Doing okay, but still feels a bit empty..."),
    ],
)
def test_get_status(pet, fed, rested, expected):
    pet.fed_level, pet.rested_level = fed, rested
    assert pet.get_status() == expected
Run the tests to be sure that they actually fail. Otherwise, a passing test would give you false confidence that there’s no bug. Because your test code explicitly checks for that maximum value of ten, running the tests right now will cleanly surface the off-by-one logic flaw as a clear assertion failure. This failure is precisely what your AI agent will need to verify its work later on.
To run the tests, execute pytest again:
(venv) $ pytest
You’ll see some failing tests letting you know that something is amiss, just like in the image below:
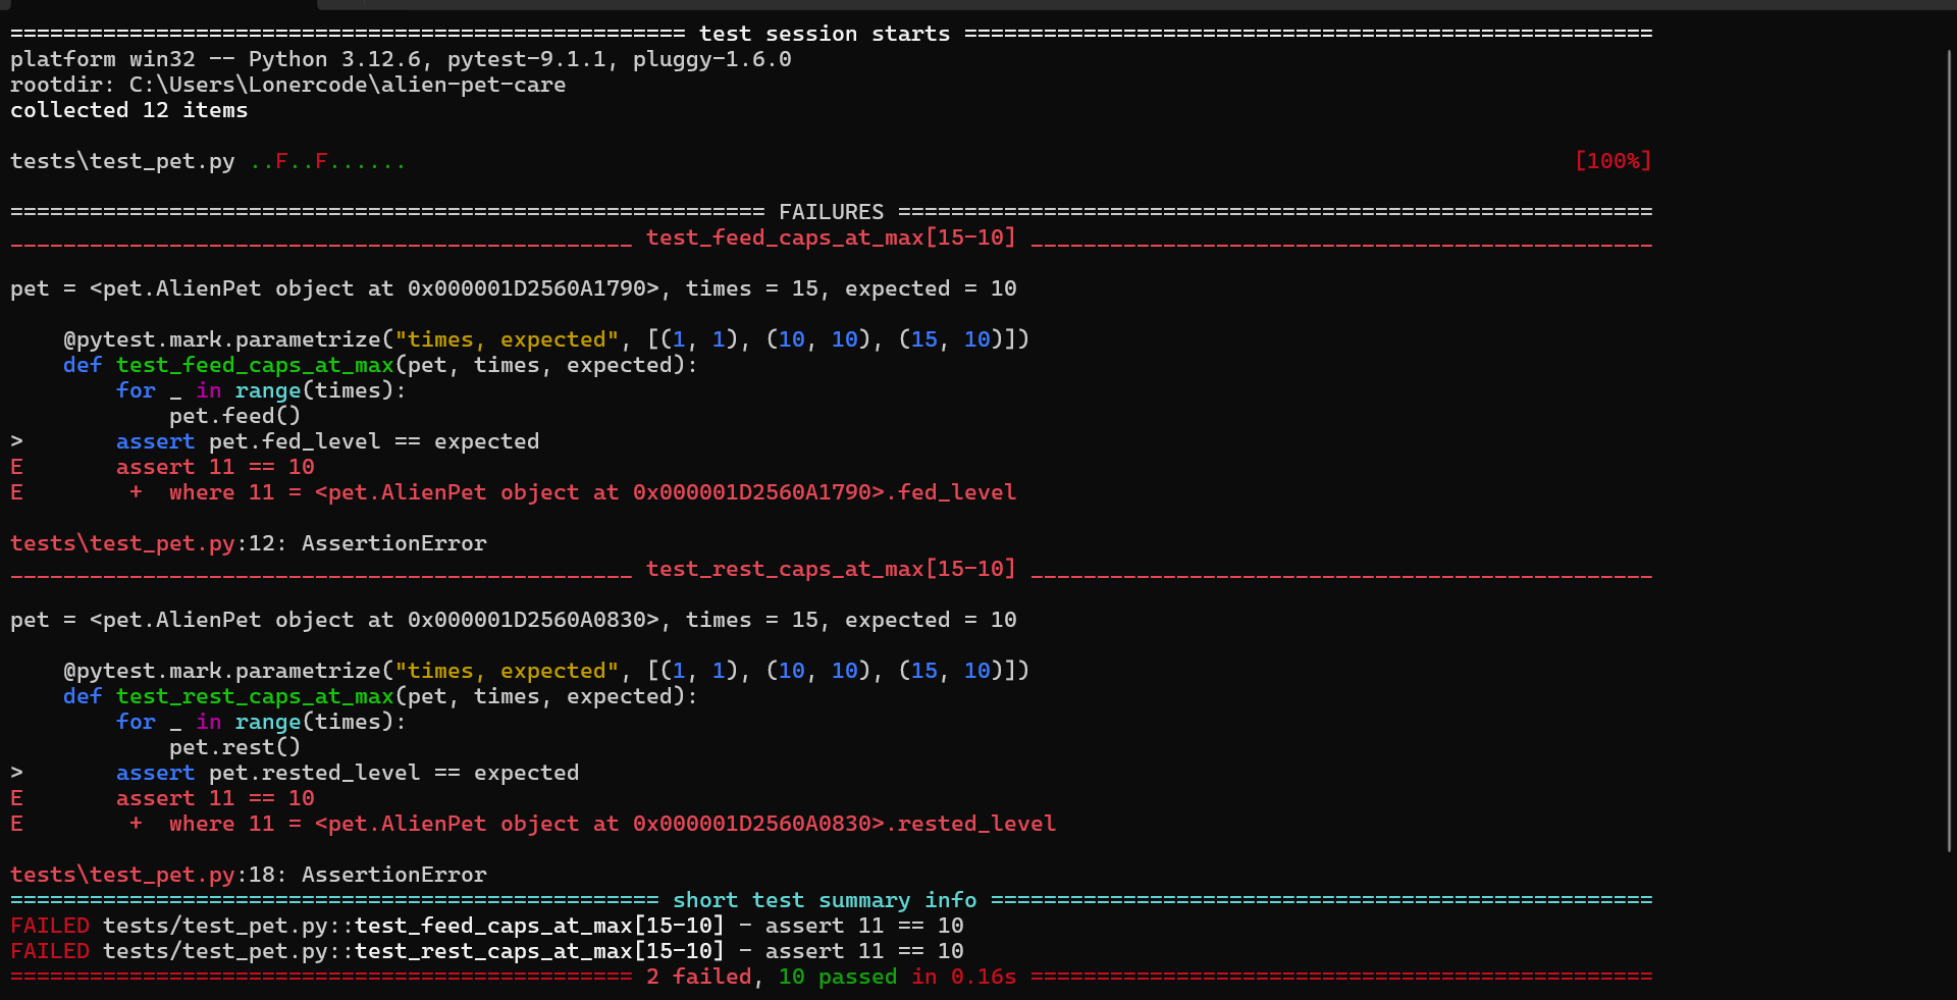
With this clear failure of the tests confirmed, you’re ready to ask Antigravity CLI, or your preferred agent, for some help.
Step 3: Provide Debugging Context to the Agent
You’re now at the stage where you must give your agent some context. Before you go down that path, it helps to know the several forms that context can take.
-
GitHub issue numbers: Some agents provide assistance when just handed a GitHub issue number. The agent reads the issue and works from it to debug.
-
Error traceback: You can also provide the error traceback to your agent exactly as it is. Be sure to add a sentence or two of context information to support the traceback so your agent doesn’t drift off and dance around the real issue.
-
Failing test reports: If you already have a test suite, you can copy the failing
pytestoutput directly into the chat and ask your agent to fix the code. This works well when your tests pinpoint the exact expected versus actual mismatch. -
Natural language description: You can also describe the bug in your own words, though this one’s trickier to get right. Be precise—vague wording gives your agent little to act on. For instance, instead of “I’ve noticed that the pet is never happy,” say “After 12 feed/rest cycles,
.fed_leveland.rested_levelread11, not the expected10.” The more specific your description, the more effective the fix. -
Images and bug research: You can also provide screenshots of the bug. Depending on your agent, you can paste the image directly into the chat window or pass its file path. Most modern AI coding agents can extract information from images and resolve the bugs those images show. Bug research also comes in handy, with your agent gathering information on the bug from relevant sources and implementing a fix with the collected data.
For this tutorial, use a Markdown file with a natural language description of the symptom, allowing the agent to analyze your workspace and hunt down the cause.
Alternatively, you can skip the Markdown file and paste the failing pytest output straight into the chat window, asking your agent to fix the problem from the failing output.
Take another look at your screen and add a new file to your project’s root folder. Name this file bug_report.md. Your file structure should now look like this:
alien-pet-care/
│
├── alien_pet_care/
│   ├── __init__.py
│   ├── __main__.py
│   └── pet.py
│
├── tests/
│   ├── __init__.py
│   └── test_pet.py
│
└── bug_report.md
After creating the file, open it and type in the following:
# Ticket: Alien Pet Always Unhappy

## Problem Description

You have a virtual Alien Pet simulation where users can feed and rest
their pet to keep it happy.

To achieve a "Happy" state, the pet's `.fed_level` and `.rested_level`
attributes need to reach a threshold of `10`.

However, users are reporting a bug: **No matter how much they feed or
rest the alien pet, it never reaches the "Happy" state.** It seems to
stay perpetually unhappy.
Now go back to your chat window with your AI agent and type in the following:
Please read the bug details outlined in bug_report.md
and fix the issue in the codebase.
The purpose of this is to refer your agent to the Markdown file, instructing it to devise a fix. After some time, you’ll notice your agent spin up as it works toward a solution to your bug:
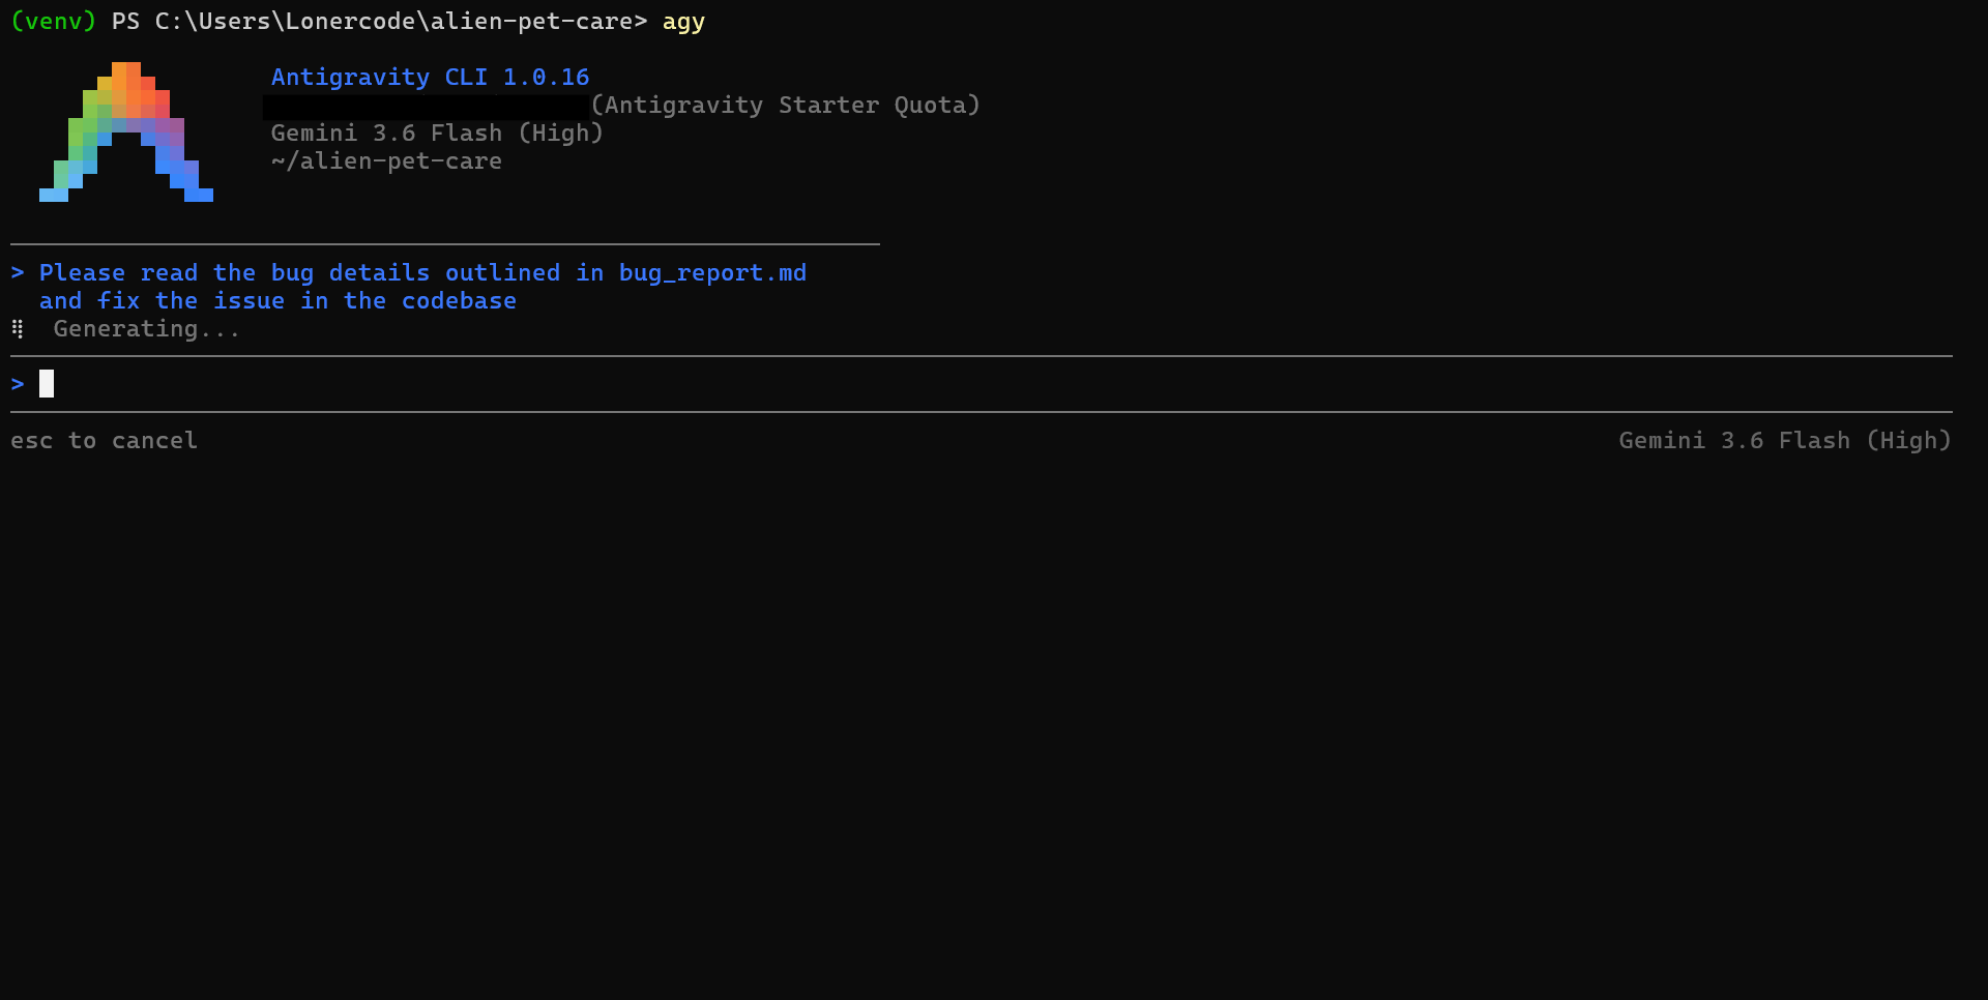
Your AI agent will begin proposing a fix for the bug and may ask for your permission to make its changes. It’s up to you to accept or refuse them.
You’re probably wondering how much confidence you should place in the fixes your agent proposes. If you’re no stranger to AI tools, then you know that they can sometimes be prone to hallucinations and errors. In the fourth and final step, you’ll look at ways to build confidence in your debugged code.
Step 4: Apply and Verify the Bug Fix
To confirm that your agent’s fix does what you expect, you can work through a few checks. First, make sure your agent’s explanation is sound before you approve the fix. Follow its logic carefully so you can catch any gaps or hallucinations. If anything’s unclear, ask follow-up questions.
If you’re using Antigravity CLI, you can review the changes right in the session with the /diff slash command. Alternatively, if you want a tool-agnostic method or you’ve already left the session with /exit, drop back to your shell and run git diff to inspect the changes your agent made:
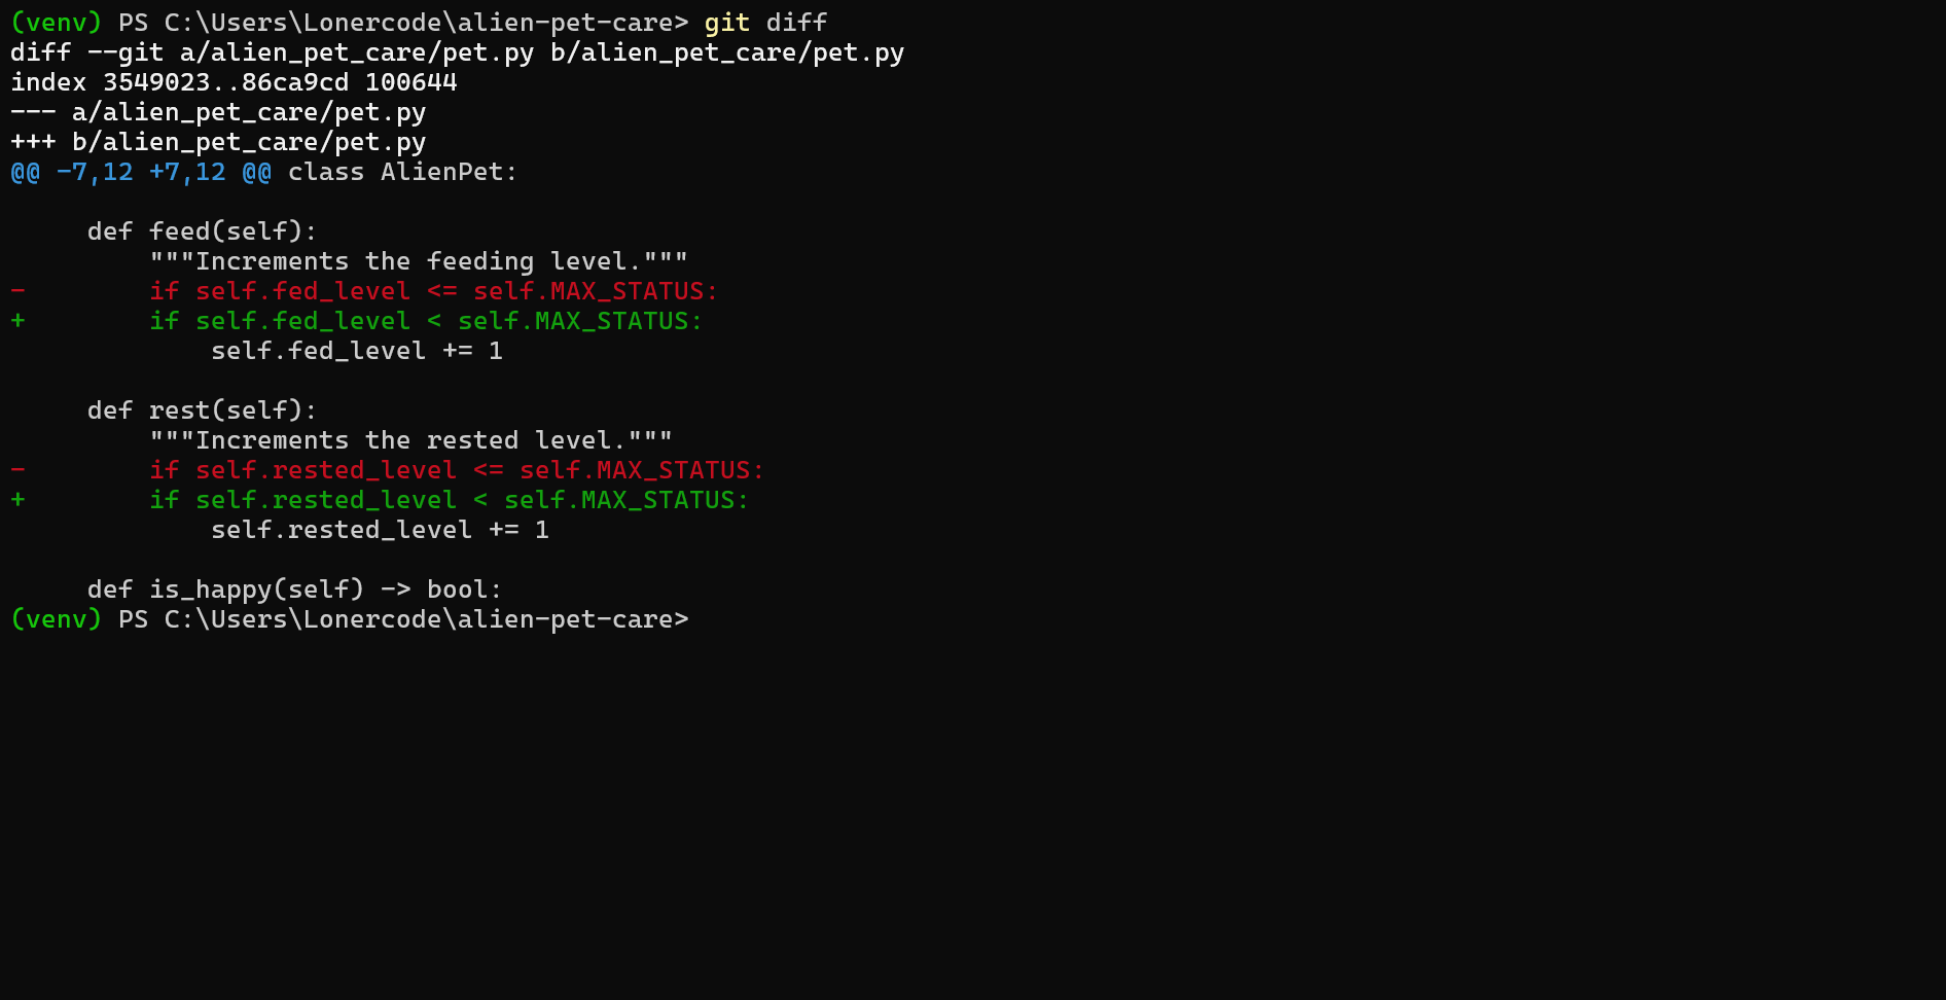
In the image above, you’ll see the exact edits Antigravity CLI made to fix the bug.
The entire fix is a single character in each of the two methods: <= becomes <. Toggle the operator below and press Run to see why that one character decides whether Zorg ever reaches the happy state:
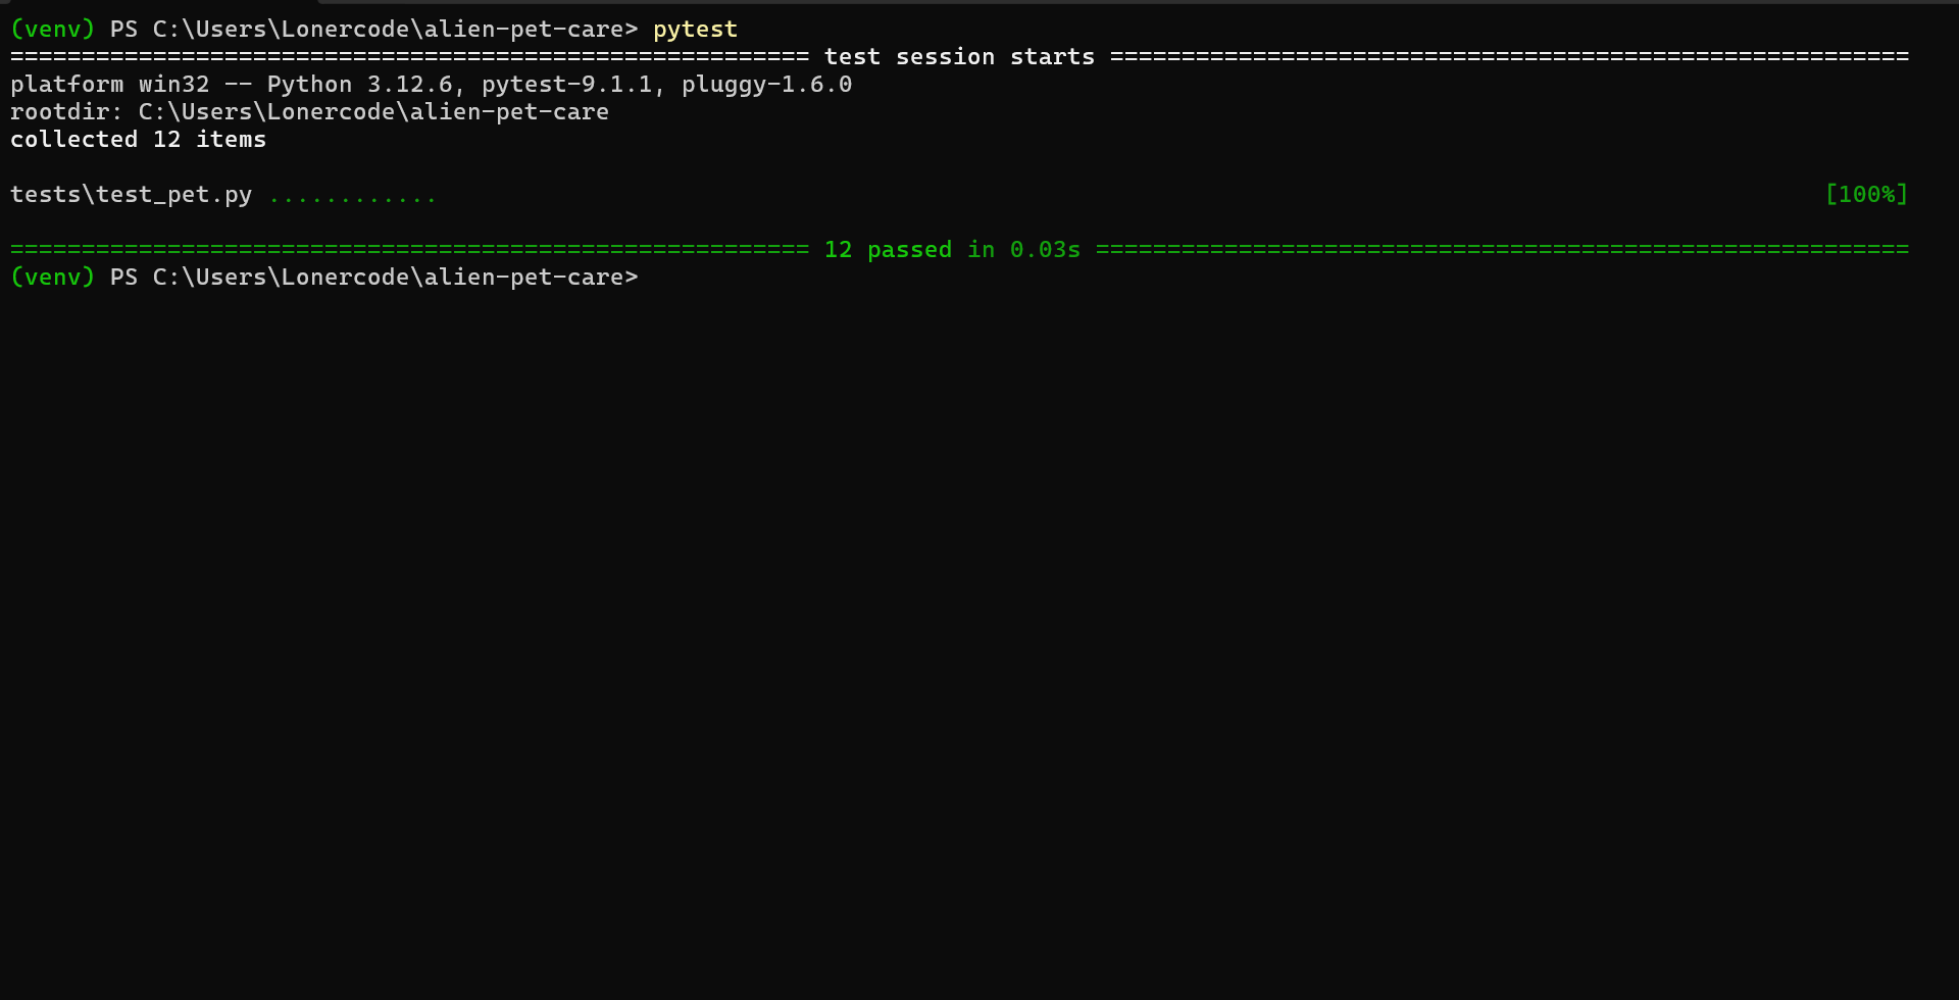
Finally, recall the tests you ran earlier and run them again to make sure they pass before you accept the fix. If you’d like to write more tests to confirm other aspects of the program, feel free to do so. In addition, running the code and seeing your pet’s fed and rested levels go up may be sufficient proof that your debugging session was successful. The tests pass now:
Your AI agent isn’t infallible. If its fix doesn’t work, feed the failing output back to your agent via the chat window. Be careful, though, and watch out for superficial fixes that make a test pass without actually solving the underlying bug. Keep iterating until your program runs as expected.
Conclusion
You’ve successfully fixed an off-by-one error by using an AI coding agent. By walking through these core AI-assisted debugging practices, you’ve learned a process you can follow whenever you debug with AI coding agents.
In this tutorial, you’ve:
- Set up your workspace for AI debugging
- Reproduced an issue by writing a targeted test case and confirming its failure
- Learned to leverage real-world context forms like images, error tracebacks, and natural language to tell your AI agent exactly what’s wrong
- Created a Markdown file to cleanly pass the bug details over to your agent
- Verified the code fixes and rerun your tests to protect your project from AI hallucinations
No matter which agent you reach for, the workflow stays the same: reproduce the bug with a failing test, give your agent clear context, then verify the fix before you trust it. Keep that loop in mind, and you’ll have a repeatable process for tackling your next Python bug with confidence.
Next Steps
To explore even more ways to work effectively, try any of these next steps:
- Master context engineering: Your
bug_report.mdfile was a great start. Take it a step further by learning about advanced context framing and prompt curation in Context Engineering for Python Codebases. - Deepen your testing automation: AI agents often rely on your tests to verify their work. Build more resilient test suites by diving into pytest Tutorial: Effective Python Testing.
- Integrate AI tools locally: If you enjoyed using terminal-based assistants, Real Python’s Python Coding With AI learning path pulls together tutorials and video courses on AI-assisted coding so you can keep building with a structured curriculum.
Get Your Code: Click here to download the free sample code you’ll use to debug the broken alien pet project with an AI coding agent.
Frequently Asked Questions
Now that you have some experience debugging Python code with an AI agent, you can use the questions and answers below to check your understanding and recap what you’ve learned.
These FAQs cover the most important concepts you’ve learned in this tutorial. Click the Show/Hide toggle beside each question to reveal the answer.
Yes. AI coding agents like Antigravity CLI can read your project, analyze a described symptom, and propose a fix for the underlying bug. They work best when you give them clear context and a failing test to confirm the result.
You can hand the agent a GitHub issue number, an error traceback, failing pytest output, or a plain-language description of the symptom. The more specific you are about the expected versus actual behavior, the more reliably the agent finds the real cause.
Tests provide the agent with a clear target and a way to verify the fix works. Without a failing test to reproduce the bug, you can’t be sure the agent addressed the real issue instead of just hiding it.
Read the agent’s explanation to make sure the logic is sound, then review the change with a tool like git diff. Finally, rerun your tests to confirm they pass and that the fix didn’t introduce new problems.
Take the Quiz: Test your knowledge with our interactive “How to Debug Python Code With an AI Agent” quiz. You’ll receive a score upon completion to help you track your learning progress:
Interactive Quiz
How to Debug Python Code With an AI AgentTest your understanding of debugging Python code with an AI agent, from reproducing a bug with a failing test to verifying the fix.