Watch Now This tutorial has a related video course created by the Real Python team. Watch it together with the written tutorial to deepen your understanding: Python Turtle for Beginners
When I was a kid, I used to learn Logo, a programming language that involved a turtle that you could move around the screen with just a few commands. I remember feeling like a computer genius as I controlled this little object on my screen, and this was what got me interested in programming in the first place. The Python turtle library comes with a similar interactive feature that gives new programmers a taste of what it’s like to work with Python.
In this tutorial, you will:
- Understand what the Python
turtlelibrary is - Learn how to set
turtleup on your computer - Program with the Python
turtlelibrary - Grasp some important Python concepts and
turtlecommands - Develop a short but entertaining game using what you’ve learned
If you’re a beginner to Python, then this tutorial will help you as you take your first steps into the world of programming with the help of the Python turtle library!
Free Bonus: Click here to get a Python Cheat Sheet and learn the basics of Python 3, like working with data types, dictionaries, lists, and Python functions.
Getting to Know the Python turtle Library
turtle is a pre-installed Python library that enables users to create pictures and shapes by providing them with a virtual canvas. The onscreen pen that you use for drawing is called the turtle and this is what gives the library its name. In short, the Python turtle library helps new programmers get a feel for what programming with Python is like in a fun and interactive way.
turtle is mainly used to introduce children to the world of computers. It’s a straightforward yet versatile way to understand the concepts of Python. This makes it a great avenue for kids to take their first steps in Python programming. That being said, the Python turtle library is not restricted to little ones alone! It’s also proved extremely useful for adults who are trying their hands at Python, which makes it great for Python beginners.
With the Python turtle library, you can draw and create various types of shapes and images. Here’s a sample of the kinds of drawings you can make with turtle:
Cool, right? This is just one of many different drawings you can make using the Python turtle library. Most developers use turtle to draw shapes, create designs, and make images. Others use turtle to create mini-games and animations, just like the one you saw above.
Getting Started With turtle
Before you continue, there are two important things that you’ll need to do to make the most of this tutorial:
-
Python Environment: Make sure that you’re familiar with your programming environment. You can use applications like IDLE or Jupyter Notebook to program with
turtle. However, if you’re not comfortable with them, then you can program with the REPL, which you’ll use in this tutorial. -
Python Version: Ensure that you have version 3 of Python on your computer. If not, then you can download it from the Python website. For help setting things up, check out Python 3 Installation & Setup Guide.
The good thing about turtle is that it’s a built-in library, so you don’t need to install any new packages. All you need to do is import the library into your Python environment, which in this case would be the REPL. Once you open your REPL application, you can run Python 3 on it by typing the following line of code:
>>> python3
This calls Python 3 into your REPL application and opens up the environment for you.
Before you begin your Python programming, you need to understand what a library is. In the non-computer world, a library is a place where different types of books are stored. You can access these books at any time, take whatever information you need from them, and return them to the same place.
In the computer world, a library works similarly. By definition, a library is a set of important functions and methods that you can access to make your programming easier. The Python turtle library contains all the methods and functions that you’ll need to create your images. To access a Python library, you need to import it into your Python environment, like this:
>>> import turtle
Now that you have turtle in your Python environment, you can begin programming with it. turtle is a graphical library, which means you’ll need to create a separate window (called the screen) to carry out each drawing command. You can create this screen by initializing a variable for it.
In Python, you use variables to store information that you’ll use later on in your program. You initialize a variable when you assign a starting value to it. Since the value of the variable isn’t constant, it can change several times during the execution of your program.
Now, to open the turtle screen, you initialize a variable for it in the following way:
>>> s = turtle.getscreen()
You should see a separate window open up:
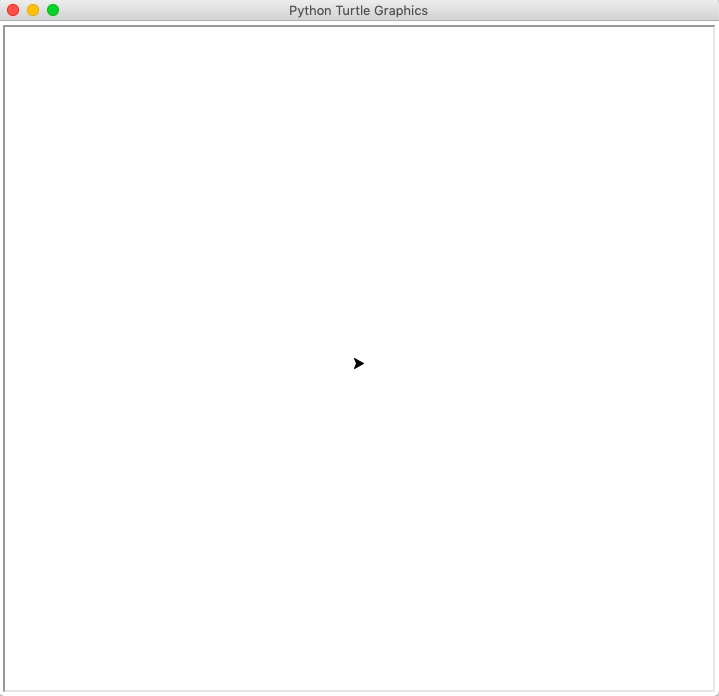
This window is called the screen. It’s where you can view the output of your code. The little black triangular shape in the middle of the screen is called the turtle.
Note: Keep in mind that when you name a variable, you need to pick a name that can be easily understood by anyone who’s looking at your program. However, you must also choose a name that’s convenient for you to use, especially because you’ll be calling it very often throughout your program!
For example, choosing a name like my_turtle_screen_name would be tedious to keep typing, while a name like Joe or a would appear to be very random. Using a single alphabet character, like s in this case, would be much more suitable. That’s because it’s short and sweet, and it’s clear to remember that the letter s refers to the screen.
Next, you initialize the variable t, which you’ll then use throughout the program to refer to the turtle:
>>> t = turtle.Turtle()
Just like for the screen, you can also give this variable another name like a or Jane or even my_turtle, but in this case, you’ll stick with t.
You now have your screen and your turtle. The screen acts as a canvas, while the turtle acts like a pen. You can program the turtle to move around the screen. The turtle has certain changeable characteristics, like size, color, and speed. It always points in a specific direction, and will move in that direction unless you tell it otherwise:
- When it’s up, it means that no line will be drawn when it moves.
- When it’s down, it means that a line will be drawn when it moves.
In the next section, you’ll explore the different ways of programming with the Python turtle library.
Programming With turtle
The first thing you’ll learn when it comes to programming with the Python turtle library is how to make the turtle move in the direction you want it to go. Next, you’ll learn how to customize your turtle and its environment. Finally, you’ll learn a couple of extra commands with which you can perform some special tasks.
Moving the Turtle
There are four directions that a turtle can move in:
- Forward
- Backward
- Left
- Right
The turtle moves .forward() or .backward() in the direction that it’s facing. You can change this direction by turning it .left() or .right() by a certain degree. You can try each of these commands like so:
>>> t.right(90)
>>> t.forward(100)
>>> t.left(90)
>>> t.backward(100)
When you run these commands, the turtle will turn right by ninety degrees, go forward by a hundred units, turn left by ninety degrees, and move backward by a hundred units. You can see how this looks in the image below:
You can use the shortened versions of these commands as well:
t.rt()instead oft.right()t.fd()instead oft.forward()t.lt()instead oft.left()t.bk()instead oft.backward()
You can also draw a line from your current position to any other arbitrary position on the screen. This is done with the help of coordinates:
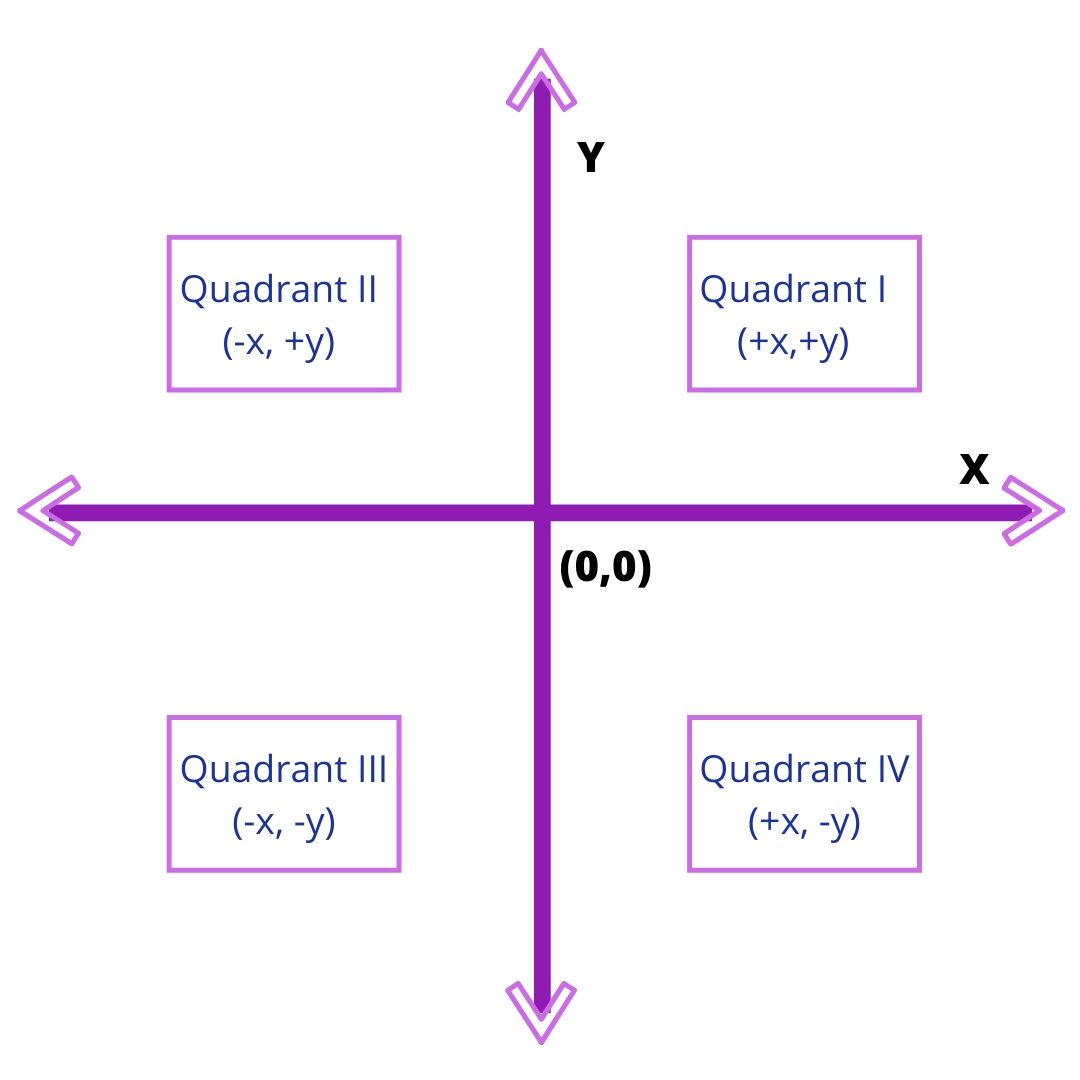
The screen is divided into four quadrants. The point where the turtle is initially positioned at the beginning of your program is (0,0). This is called Home. To move the turtle to any other area on the screen, you use .goto() and enter the coordinates like this:
>>> t.goto(100,100)
Your output will look like this:
You’ve drawn a line from your current position to the point (100,100) on the screen.
To bring the turtle back to its home position, you type the following:
>>> t.home()
This is like a shortcut command that sends the turtle back to the point (0,0). It’s quicker than typing t.goto(0,0).
Drawing a Shape
Now that you know the movements of the turtle, you can move on to making actual shapes. You can start by drawing polygons since they all consist of straight lines connected at certain angles. Here’s an example that you can try:
>>> t.fd(100)
>>> t.rt(90)
>>> t.fd(100)
>>> t.rt(90)
>>> t.fd(100)
>>> t.rt(90)
>>> t.fd(100)
Your output will look like this:
Well done! You’ve just drawn a square. In this way, the turtle can be programmed to create different shapes and images.
Now, try drawing a rectangle, using this code as a template. Remember, in a rectangle, all four sides are not equal. You’ll need to change the code accordingly. Once you do that, you can even try creating other polygons by increasing the number of sides and changing the angles.
Drawing Preset Figures
Suppose you want to draw a circle. If you attempt to draw it in the same way as you drew the square, then it would be extremely tedious, and you’d have to spend a lot of time just for that one shape. Thankfully, the Python turtle library provides a solution for this. You can use a single command to draw a circle:
>>> t.circle(60)
You’ll get an output like this:
The number within the brackets is the radius of the circle. You can increase or decrease the size of the circle by changing the value of its radius.
In the same way, you can also draw a dot, which is nothing but a filled-in circle. Type in this command:
>>> t.dot(20)
You’ll get a filled-in circle like this:

The number within the brackets is the diameter of the dot. Just like with the circle, you can increase or decrease the size of the dot by changing the value of its diameter.
Great job so far! You’ve learned how to move the turtle around and create different shapes with it. In the next few sections, you’ll see how you can customize your turtle and its environment, based on your requirements.
Changing the Screen Color
By default, turtle always opens up a screen with a white background. However, you can change the color of the screen at any time using the following command:
>>> turtle.bgcolor("blue")
You can replace "blue" with any other color. Try "green" or "red". You’ll get a result like this:
You can use a variety of colors for your screen just by typing in their hex code number. To learn more about using different colors, check out the Python turtle library documentation.
Changing the Screen Title
Sometimes, you may want to change the title of your screen. You can make it more personal, like "My Turtle Program", or more suitable to what you’re working on, like "Drawing Shapes With Turtle". You can change the title of your screen with the help of this command:
>>> turtle.title("My Turtle Program")
Your title bar will now display this:
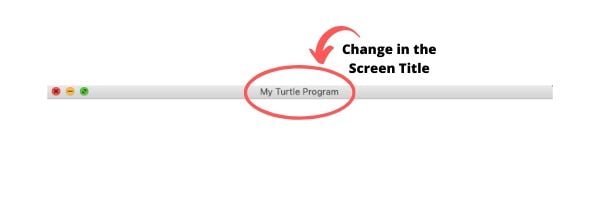
In this way, you can change the heading of your screen according to your preference.
Changing the Turtle Size
You can increase or decrease the size of the onscreen turtle to make it bigger or smaller. This changes only the size of the shape without affecting the output of the pen as it draws on the screen. Try typing in the following commands:
>>> t.shapesize(1,5,10)
>>> t.shapesize(10,5,1)
>>> t.shapesize(1,10,5)
>>> t.shapesize(10,1,5)
Your outputs will look like this:
The numbers given are the parameters for the size of the turtle:
- Stretch length
- Stretch width
- Outline width
You can change these according to your preference. In the example given above, you can see a visible difference in the appearance of the turtle. For more information on how you can change the size of the turtle, check out the Python turtle library documentation.
Changing the Pen Size
The previous command changed the size of the turtle’s shape only. However, sometimes, you may need to increase or decrease the thickness of your pen. You can do this using the following command:
>>> t.pensize(5)
>>> t.forward(100)
This results in an outcome like this:
As you can see, the size of your pen is now five times the original size (which was one). Try drawing some more lines of various sizes, and compare the difference in thickness between them.
Changing the Turtle and Pen Color
When you first open a new screen, the turtle starts out as a black figure and draws with black ink. Based on your requirements, you can do two things:
- Change the color of the turtle: This changes the fill color.
- Change the color of the pen: This changes the outline or the ink color.
You can even choose both of these if you wish. Before you change the colors, increase the size of your turtle to help you see the color difference more clearly. Type in this code:
>>> t.shapesize(3,3,3)
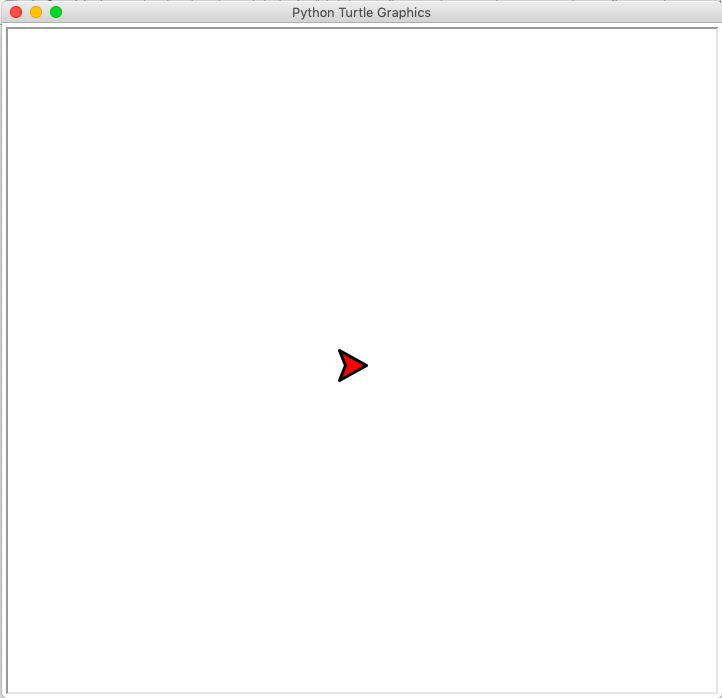
Now, to change the color of the turtle (or the fill), you type the following:
>>> t.fillcolor("red")
Your turtle will look like this:
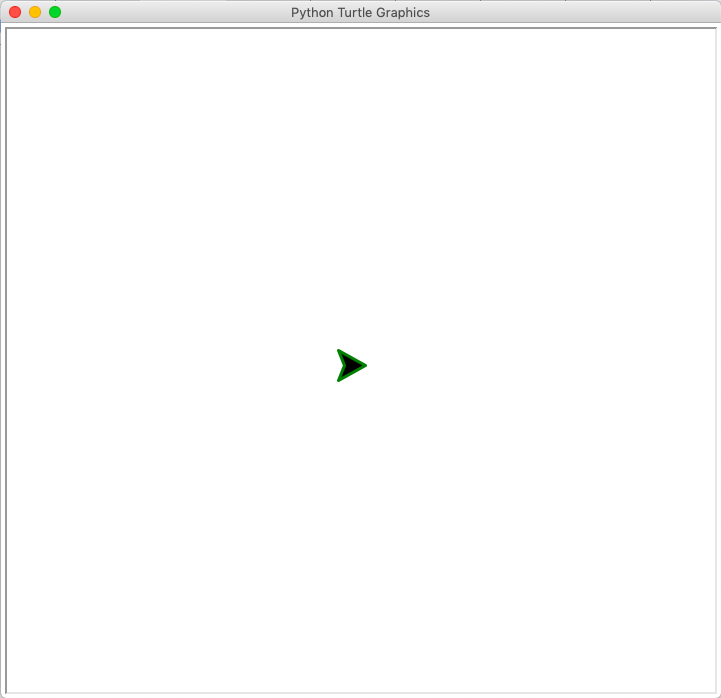
To change the color of the pen (or the outline), you type the following:
>>> t.pencolor("green")
Your turtle will look like this:
To change the color of both, you type the following:
>>> t.color("green", "red")
Your turtle will look like this:
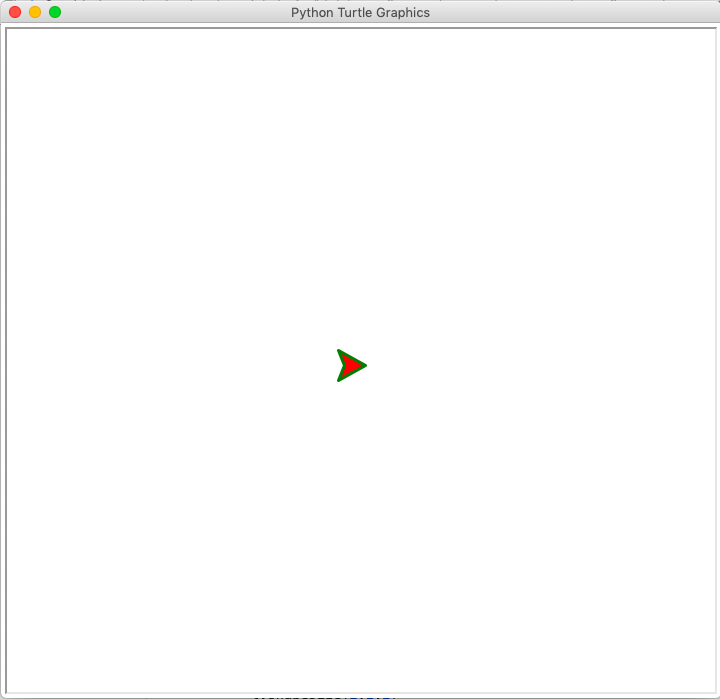
Here, the first color is for the pen, and the second is for the fill. Note that changing the color of the pen and the fill also changes the color of the onscreen turtle accordingly.
Filling in an Image
Coloring in an image usually makes it look better, doesn’t it? The Python turtle library gives you the option to add color to your drawings. Try typing in the following code and see what happens:
>>> t.begin_fill()
>>> t.fd(100)
>>> t.lt(120)
>>> t.fd(100)
>>> t.lt(120)
>>> t.fd(100)
>>> t.end_fill()
When you execute this code, you’ll get a triangle that’s filled in with a solid color, like this:
When you use .begin_fill(), you’re telling your program that you’re going to be drawing a closed shape which will need to be filled in. Then, you use .end_fill() to indicate that you’re done creating your shape and it can now be filled in.
Changing the Turtle Shape
The initial shape of the turtle isn’t really a turtle, but a triangular figure. However, you can change the way the turtle looks, and you do have a couple of options when it comes to doing so. You can have a look at some of them by typing in the following commands:
>>> t.shape("turtle")
>>> t.shape("arrow")
>>> t.shape("circle")
The shape of the turtle will change accordingly, like this:
You have a couple of other options that you can try as well:
- Square
- Arrow
- Circle
- Turtle
- Triangle
- Classic
The classic shape is the original shape. Check out the Python turtle library documentation to learn more about the types of shapes that you can use.
Changing the Pen Speed
The turtle generally moves at a moderate pace. If you want to decrease or increase the speed to make your turtle move slower or faster, then you can do so by typing the following:
>>> t.speed(1)
>>> t.forward(100)
>>> t.speed(10)
>>> t.forward(100)
This code will first decrease the speed and move the turtle forward, then increase the speed and move the turtle forward again, like this:
The speed can be any number ranging from 0 (the slowest speed) to 10 (the highest speed). You can play around with your code to see how fast or slow the turtle will go.
Customizing in One Line
Suppose you want to set your turtle’s characteristics to the following:
- Pen color: purple
- Fill color: orange
- Pen size: 10
- Pen speed: 9
From what you’ve just learned, the code should look something like this:
>>> t.pencolor("purple")
>>> t.fillcolor("orange")
>>> t.pensize(10)
>>> t.speed(9)
>>> t.begin_fill()
>>> t.circle(90)
>>> t.end_fill()
It’s pretty long, but not that bad, right?
Now, just imagine if you had ten different turtles. Changing all of their characteristics would be extremely tiresome for you to do! The good news is that you can reduce your workload by altering the parameters in just a single line of code, like this:
>>> t.pen(pencolor="purple", fillcolor="orange", pensize=10, speed=9)
>>> t.begin_fill()
>>> t.circle(90)
>>> t.end_fill()
This will give you a result like this:
This single line of code changed the entire pen, without you having to change each characteristic individually. To learn more about this command, check out the Python turtle library documentation.
Great job! Now that you’ve learned to customize your turtle and the screen, take a look at some other important commands that are required while drawing with the Python turtle library.
Picking the Pen Up and Down
Sometimes, you may want to move your turtle to another point on the screen without drawing anything on the screen itself. To do this, you use .penup(). Then, when you want to start drawing again, you use .pendown(). Give it a shot using the code that you used previously to draw a square. Try typing the following code:
>>> t.fd(100)
>>> t.rt(90)
>>> t.penup()
>>> t.fd(100)
>>> t.rt(90)
>>> t.pendown()
>>> t.fd(100)
>>> t.rt(90)
>>> t.penup()
>>> t.fd(100)
>>> t.pendown()
When you run this code, your output will look like this:
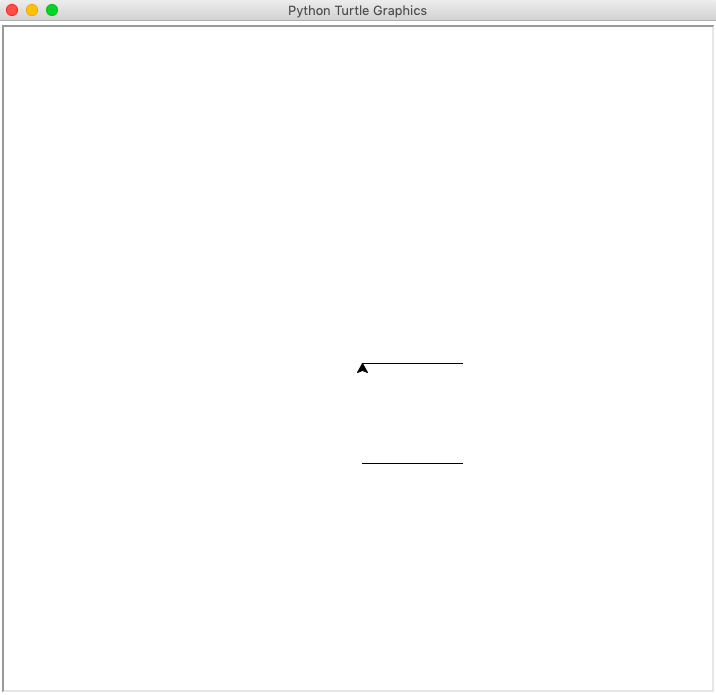
Here, you’ve obtained two parallel lines instead of a square by adding some extra commands in between the original program.
Undoing Changes
No matter how careful you are, there’s always a possibility of making a mistake. Don’t worry, though! The Python turtle library gives you the option to undo what you’ve done. If you want to undo the very last thing you did, then type in the following:
>>> t.undo()
This undoes the last command that you ran. If you want to undo your last three commands, then you would type t.undo() three times.
Clearing the Screen
Right now, you probably have a lot on your screen since you’ve started this tutorial. To make room for more, just type in the following command:
>>> t.clear()
This will clean up your screen so that you can continue drawing. Note here that your variables will not change, and the turtle will remain in the same position. If you have other turtles on your screen other than the original turtle, then their drawings will not be cleared out unless you specifically call them out in your code.
Resetting the Environment
You also have the option to start on a clean slate with a reset command. The screen will get cleared up, and the turtle’s settings will all be restored to their default parameters. All you need to to do is type in the following command:
>>> t.reset()
This clears the screen and takes the turtle back to its home position. Your default settings, like the turtle’s size, shape, color, and other features, will also be restored.
Now that you’ve learned the fundamentals of programming with the Python turtle library, you’ll check out some bonus features that you may want to use while programming.
Leaving a Stamp
You have the option of leaving a stamp of your turtle on the screen, which is nothing but an imprint of the turtle. Try typing in this code to see how it works:
>>> t.stamp()
8
>>> t.fd(100)
>>> t.stamp()
9
>>> t.fd(100)
Your output will look like this:
The numbers that appear are the turtle’s location or stamp ID. Now, if you want to remove a particular stamp, then just use the following:
>>> t.clearstamp(8)
This will clear the one with the stamp ID of 8.
Cloning Your Turtle
Sometimes, you may need to have more than one turtle on your screen. You’ll see an example of this later on in the final project. For now, you can get another turtle by cloning your current turtle into your environment. Try running this code to create a clone turtle, c, and then move both the turtles on the screen:
>>> c = t.clone()
>>> t.color("magenta")
>>> c.color("red")
>>> t.circle(100)
>>> c.circle(60)
The output will look like this:
Awesome!
Now that you have an idea of some important commands from the Python turtle library, you’re ready to move on to a few more concepts that you’ll need to understand. These concepts are very much needed when it comes to programming in any language.
Using Loops and Conditional Statements
When you get into higher-level programming, you’ll find yourself using loops and conditional statements very often. That’s why, in this section, you’ll be going through a couple of turtle programs that make use of these types of commands. This will give you a practical approach when it comes to understanding these concepts. Before you begin, however, here are three definitions for you to keep in mind:
- Loops are a set of instructions that are continuously repeated until a particular condition is satisfied.
- Conditional statements carry out a certain task based on a condition that’s satisfied.
- Indentations are used to define blocks of code, especially when using loops and conditional statements. In general, you create an indentation by tapping the Tab key on the keyboard.
Now, let’s go ahead and explore these commands!
for Loops
Do you remember the program that you used to create a square? You had to repeat the same line of code four times, like this:
>>> t.fd(100)
>>> t.rt(90)
>>> t.fd(100)
>>> t.rt(90)
>>> t.fd(100)
>>> t.rt(90)
>>> t.fd(100)
>>> t.rt(90)
A much shorter way to do this is with the help of a for loop. Try running this code:
>>> for i in range(4):
...     t.fd(100)
...     t.rt(90)
Here, the i is like a counter that starts from zero and keeps increasing by 1. When you say in range(4), you’re telling the program that the value of this i should be less than 4. It will terminate the program before i reaches 4.
Here’s a breakdown of how the program works:
- At i = 0, the turtle moves forward by 100 units and then turns 90 degrees to the right.
- At i = 0 + 1 = 1, the turtle moves forward by 100 units and then turns 90 degrees to the right.
- At i = 1 + 1 = 2, the turtle moves forward by 100 units and then turns 90 degrees to the right.
- At i = 2 + 1 = 3, the turtle moves forward by 100 units and then turns 90 degrees to the right.
The turtle will then exit the loop. To check the value of i, type i and then press the Enter key. You’ll get the value of i equal to 3:
>>> i
3
Note that the whitespace that comes before line 2 and line 3 in the program is the indentation. This indicates that all 3 lines form a single block of code. To learn more about for loops in Python, check out Python “for” Loops (Definite Iteration).
while Loops
The while loop is used to perform a certain task while a condition is still satisfied. If the condition is no longer satisfied, then your code will terminate the process. You can use a while loop to create a series of circles by typing in this code:
>>> n=10
>>> while n <= 40:
...     t.circle(n)
...     n = n+10
When you run this code, you’ll see the circles appearing one after the other, and each new circle will be larger than the previous one:
Here, n is used as a counter. You’ll need to specify by how much you want the value of n to increase in each loop. Take a look at this mini walk-through to see how the program works:
- At n = 10, the turtle draws a circle with a radius of 10 units. After that, the value of
nis increased by 10. - At n = 20, the turtle draws a circle with a radius of 20 units. Once again, the value of
nis increased by 10. - At n = 30, the turtle draws a circle with a radius of 30 units. For the third time, the value of
nis increased by 10. - At n = 40, the turtle draws a circle with a radius of 40 units. For the last time, the value of
nis increased by 10. - At n = 50,
nis no longer less than or equal to 40. The loop is terminated.
To read more about while loops, check out Python “while” Loops (Indefinite Iteration).
Conditional Statements
You use conditional statements to check if a given condition is true. If it is, then the corresponding command is executed. Try typing in this program:
>>> u = input("Would you like me to draw a shape? Type yes or no: ")
>>> if u == "yes":
...     t.circle(50)
input() is used to obtain input from the user. Here, it will store the user’s response under the variable u. Next, it will compare the value of u with the condition provided and check whether the value of u is "yes". If it’s "yes", then your program draws a circle. If the user types in anything else, then the program won’t do anything.
Note: The comparison operator == indicates a comparison. It’s used to check if the value of something is equal to something else. The assignment operator = is used to assign a value to something. To learn more about the differences between the two, check out Operators and Expressions in Python.
When you add an else clause to an if statement, you can specify two results based on whether the condition is true or false. Let’s see this in a program:
>>> u = input("Would you like me to draw a shape? Type yes or no: ")
>>> if u == "yes":
...     t.circle(50)
>>> else:
...     print("Okay")
Here, you tell the program to display a particular output even when the user does not say "yes". You use print() to display some pre-defined characters on the screen.
Note that the user doesn’t need to type "no". They can type anything else, in which case, the result will always be "Okay", because you’re not explicitly telling the program that the user needs to type "no". Not to worry, however, as that can be fixed. You can add an elif clause to provide the program with several conditions and their respective outputs, as you can observe here:
>>> u = input("Would you like me to draw a shape? Type yes or no: ")
>>> if u == "yes":
...     t.circle(50)
>>> elif u == "no":
...     print("Okay")
>>> else:
...     print("Invalid Reply")
As you can see, this program now has more than one outcome, depending on the input it receives. Here’s how this code works:
- If you type in
"yes", then the code processes the input and draws a circle, as per your instructions. - If you type in
"no", then the code prints out"Okay"and your program is terminated. - If you type in anything else, like
"Hello"or"Sandwich", then the code prints"Invalid Reply"and your program is terminated.
Note that this program is case-sensitive, so when you’re trying it out, be sure to put the strings in upper-case or lower-case accordingly.
To learn more about conditional statements, check out Conditional Statements in Python.
Final Project: The Python Turtle Race
So far, you’ve learned how to customize your turtle environment, program your turtle to move around the screen, and use loops and conditional statements to improve your code. Now it’s time for the most important part of your programming journey. In this section, you’ll be implementing all that you’ve learned into a single program by creating a fun game that you can play with your friends.
Before you begin, here’s what you need to know about the game:
-
The Objective: The player whose turtle reaches its home first wins the game.
-
How to Play:
- Each player rolls a dice to get a number.
- The player then moves their turtle by that many steps.
- The players alternate turns until one of them wins.
-
The Structure:
- Each player had a turtle indicated by a different color. You can have more than two players, but for the sake of this tutorial, you’ll be creating a two-player game.
- Each turtle has a home position that it must reach.
- Each player uses a die to choose a value at random for their turn. In your program, the die is represented by a list of numbers from 1 to 6.
Now that you’ve understood the logic of the game, you can go ahead and begin creating it! First, you’ll need to set up the environment.
Setting Up the Game Environment
Start by importing the Python turtle library. After this, import the built-in random library, which you’ll use randomly select an item from a list:
>>> import turtle
>>> import random
Once these libraries are successfully called into your environment, you can proceed with the rest of your program.
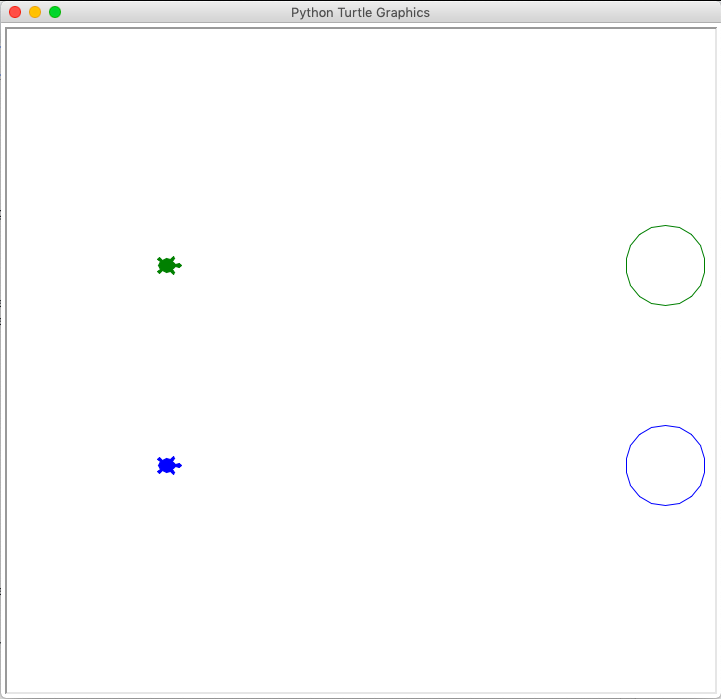
Setting Up the Turtles and Homes
You now have to create the two turtles that will represent the players. Each turtle will be a different color, corresponding to the different players. Here, player one is green and player two is blue:
>>> player_one = turtle.Turtle()
>>> player_one.color("green")
>>> player_one.shape("turtle")
>>> player_one.penup()
>>> player_one.goto(-200,100)
>>> player_two = player_one.clone()
>>> player_two.color("blue")
>>> player_two.penup()
>>> player_two.goto(-200,-100)
One you’ve created the turtles, you place them at their starting positions and make sure that these positions are aligned. Note that you created player two’s turtle by cloning player one’s turtle, changing its color, and placing it at a different starting point.
You now need to set up homes for the turtles. These homes will act as the finishing points for each turtle. Each of the turtles’ homes will be represented by a circle. Here, you need to make sure that both homes are equidistant from the starting point:
>>> player_one.goto(300,60)
>>> player_one.pendown()
>>> player_one.circle(40)
>>> player_one.penup()
>>> player_one.goto(-200,100)
>>> player_two.goto(300,-140)
>>> player_two.pendown()
>>> player_two.circle(40)
>>> player_two.penup()
>>> player_two.goto(-200,-100)
After drawing the respective homes, you send the turtles back to their starting positions:
Awesome! The visual aspects of your game are complete. You can now create the die that you’ll be using to play the game.
Creating the Die
You can create a virtual die for your game with a list, which is an ordered sequence of items. In real life, you might prepare grocery lists and to-do lists to help you stay organized. In Python, lists work in a similar way.
In this case, you’ll be using a list to create your die. First, you define your list of numbers in ascending order from 1 to 6. You can define a list by giving it a name and then enclosing its items within square brackets, like this:
>>> die = [1,2,3,4,5,6]
This list has now become your die. To roll the dice, all you have to do is program your system to randomly select a number from it. The number that is selected will be considered as the output of the die.
Developing the Game
It’s time to develop the code for the rest of the game. You’ll be using loops and conditional statements here, so you need to be careful with the indentations and spaces. To start, take a look at the steps your program will need to take to run the game:
- Step 1: You’ll start by telling your program to check if either turtle has reached its home.
- Step 2: If they haven’t, then you’ll tell your program to allow the players to continue trying.
- Step 3: In each loop, you tell your program to roll the die by randomly picking a number from the list.
- Step 4: You then tell it to move the respective turtle accordingly, with the number of steps based on the outcome of this random selection.
The program keeps repeating this process, and stops once one of the turtles reaches the goal. Here’s how the code looks:
 1>>> for i in range(20):
 2...     if player_one.pos() >= (300,100):
 3...             print("Player One Wins!")
 4...             break
 5...     elif player_two.pos() >= (300,-100):
 6...             print("Player Two Wins!")
 7...             break
 8...     else:
 9...             player_one_turn = input("Press 'Enter' to roll the die ")
10...             die_outcome = random.choice(die)
11...             print("The result of the die roll is: ")
12...             print(die_outcome)
13...             print("The number of steps will be: ")
14...             print(20*die_outcome)
15...             player_one.fd(20*die_outcome)
16...             player_two_turn = input("Press 'Enter' to roll the die ")
17...             die_outcome = random.choice(die)
18...             print("The result of the die roll is: ")
19...             print(die_outcome)
20...             print("The number of steps will be: ")
21...             print(20*die_outcome)
22...             player_two.fd(20*die_outcome)
Your final output will look a little something like this:

In summary, this is what the code is doing:
-
Line 1 sets up a
forloop with a range from 1 to 20. -
Lines 2 through 7 check if either player has reached their goal. If one of them has, then the program prints out the corresponding statement and breaks the loop.
-
Line 8 moves the program on to the next set of steps if neither player has won.
-
Line 9 prints out a statement asking player one to press the Enter key to roll the die.
-
Line 10 takes a random value from the list
dieand stores it indie_outcome. -
Line 11 prints a statement prior to displaying the outcome of the dice roll.
-
Line 12 prints the dice outcome.
-
Line 14 multiplies this value by 20 to reduce the overall number of steps required to complete the game.
-
Line 15 moves player one’s turtle forward by this number of steps.
-
Lines 16 to 22 repeat these steps for player two.
The entire for loop is repeated until one of the player’s turtles reaches the final position.
Note: In Python, you use the asterisk (*) to indicate multiplication. This is known as an arithmetic operator. You can also use the plus sign (+) for addition, the minus sign (-) for subtraction, and a slash (/) for division. To learn more about arithmetic operators, check out the Arithmetic Operators section of Operators and Expressions in Python.
Remember, you can customize the game however you want, so go ahead and play around with it! You can add more turtles, change the colors, change the speed, or even create some obstacles to challenge your players. It’s all up to you as the developer of the game!
Conclusion
In this tutorial, you’ve learned how to program with the Python turtle library and grasped some very important programming concepts. You know how to deal with variable initialization, loops, conditional statements, indentations, lists, and operators. This is a great start for you, especially if you’re new to the Python programming language!
Now you can:
- Set up the Python
turtlelibrary - Move your turtle around
- Customize your turtle and its environment
- Program your turtle
- Use basic programming concepts
- Create a game that you can play with friends
Now you’re ready to venture into some higher-level Python programming. To progress further in your Python journey, check out Introduction to Python and 11 Beginner Tips for Learning Python Programming. Just remember to work hard and keep practicing, and you’ll find that you’re a Python expert in no time!
Watch Now This tutorial has a related video course created by the Real Python team. Watch it together with the written tutorial to deepen your understanding: Python Turtle for Beginners