You’re stuck inside because of torrential rains—again! You wonder what the weather’s like in that faraway city where your friends from the Real Python community live. You’d rather stick around in your command-line interface (CLI) than look it up in your browser. If that sounds like a task you’d want to tackle by building a command-line weather app using only the Python standard library, then this tutorial is for you.
In this tutorial, you’ll learn how to:
- Build a functional weather lookup tool using only Python standard library modules
- Build a Python CLI app using
argparse - Use
configparserto handle API secrets - Make API calls from your Python script
- Create visually attractive CLI output using ANSI escape codes, emojis, f-strings, and Python’s string mini-language
Looking out the window confirms your decision. With that rain, there’s no way to frolic in the meadows today. Time to write a Python weather app and dream of distant places right from your CLI! You might even discover a couple of surprising city names along the way.
Get Source Code: Click here to get the source code you’ll use to build your weather app.
Demo
While you wait for a rainbow to appear outside your window, you’ll add your own colors to your weather app. For that, you’ll use some formatting tricks that’ll make the CLI output snazzier than plain text:
If you like the look of this command-line app and want to train your Python coding skills while using the standard library, then you’ve come to the right place!
Note: This app was developed on macOS for the Zsh shell. Your mileage with some of the color display and emojis may vary depending on your setup. On Windows, PowerShell displays the formatting reasonably well, and if you’re on a newer version of the operating system, you should see good results with the defaults in Windows Terminal.
If you’d prefer another color scheme or want to use different emojis for your own app, you’ll be able to customize it while working along with this tutorial.
Project Overview
Before you start to write any code, it’s often a good idea to think about the specifications of the program you’re planning to build. First, take out a pen and paper and jot down your ideas for what a perfect weather app would look like. Once you’ve noted your ideas, you can click on the heading below to read what specifications you’ll consider when working through this tutorial:
The weather app you’ll build in this tutorial will:
- Take a city name as required input
- Take an optional flag to display the output in Fahrenheit instead of Celsius, if desired
- Call an online weather API to fetch the weather data
- Display the city name, the current weather conditions, and the current temperature
- Format the output visually using colors, spacing, and emojis
With these quick notes, you have a rough plan of what you’ll build, and you’ve defined the scope of what the app will be able to do.
If you have different or additional features in mind, then keep your notes around and implement them on top of your weather app once you’ve finished building this initial version.
Note: Writing great command-line interfaces can be challenging. You want your app to be user-friendly and still provide all the functionality you need. Using higher-level libraries might make it easier for you to build out your applications.
In this tutorial, you’ll work with Python’s built-in argparse module, which assists you in creating user-friendly CLI apps, for example by providing a useful --help option out of the box.
You’ll get the current weather data by city name from different locations around the world, using the weather API from OpenWeather. This application programming interface (API) is free to use, with a generous quota of API calls. However, you’ll need to create a personal API key to make requests, which you’ll do in just a moment.
Before you start digging in, take another look at the expected prerequisites so that you know where you can brush up on your skills in case you get stuck somewhere along the way.
Prerequisites
To complete this tutorial, you should be comfortable with the following concepts:
- Building command-line interfaces using
argparse - Reading public data from the Internet with APIs
- Integrating APIs in Python code
- Working with JSON data
- Importing modules and libraries
- Defining your own functions
- Handling errors with Python exceptions
- Formatting your text using f-strings
- Using conditional expressions
You’ll also need an API key for the weather API from OpenWeather, and you’ll learn how to get access to one in the upcoming section.
If you don’t have all of the prerequisite knowledge before starting this tutorial, that’s okay! In fact, you might learn more by going ahead and getting started. You can always stop and review the resources linked here if you get stuck.
Step 1: Get Access to a Suitable Weather API
In this step, you’ll select a suitable weather API for your project, you’ll gain access to your personal API key, and you’ll learn how to request information from the API. You’ll also understand the shape and content of the data that you get as a response from a call to that weather API.
Get an OpenWeather API Key
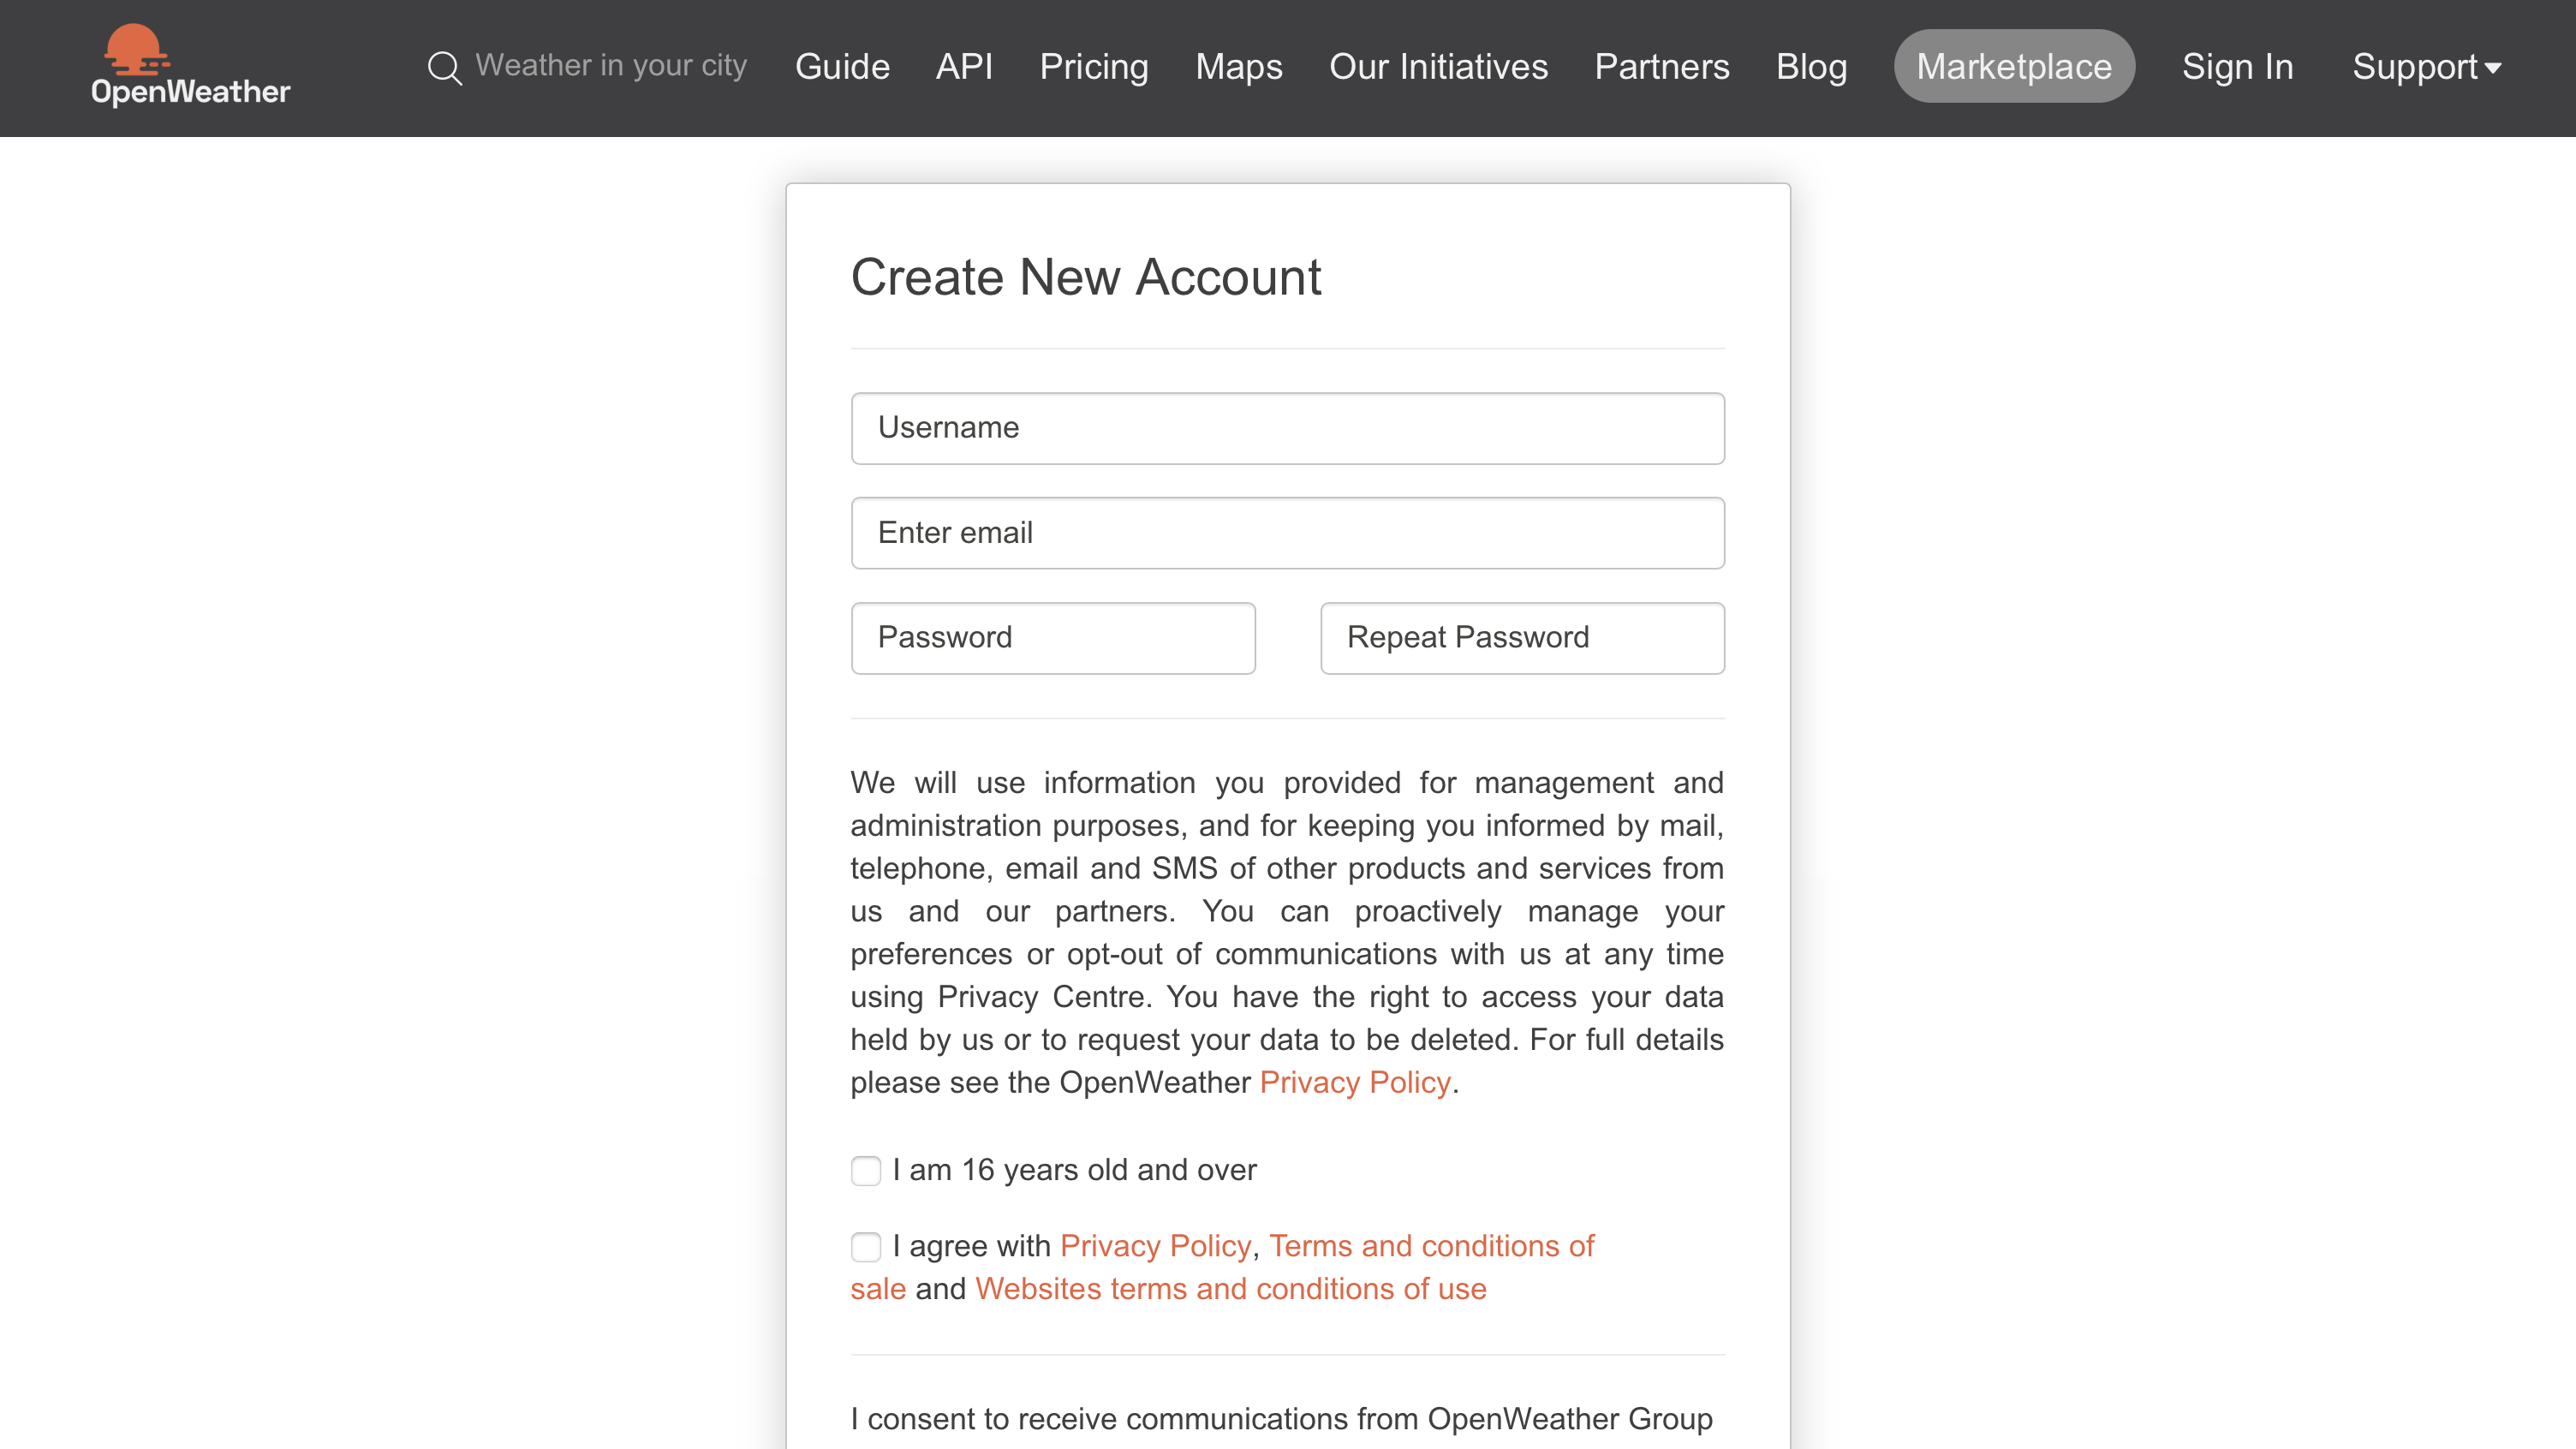
The team behind OpenWeather wants to share their technology for free. To provide that service, they need to monitor the calls each person makes, which they do by requiring you to use an API key. You’ll need to sign up in their platform to get your personal API key.
Navigate to OpenWeather’s sign-up page and enter your information:
Once you’ve successfully signed up, then you’ll receive a confirmation email with your API key. You can now also log in to the OpenWeather web interface and view your API key by navigating to the API keys tab of your account page:
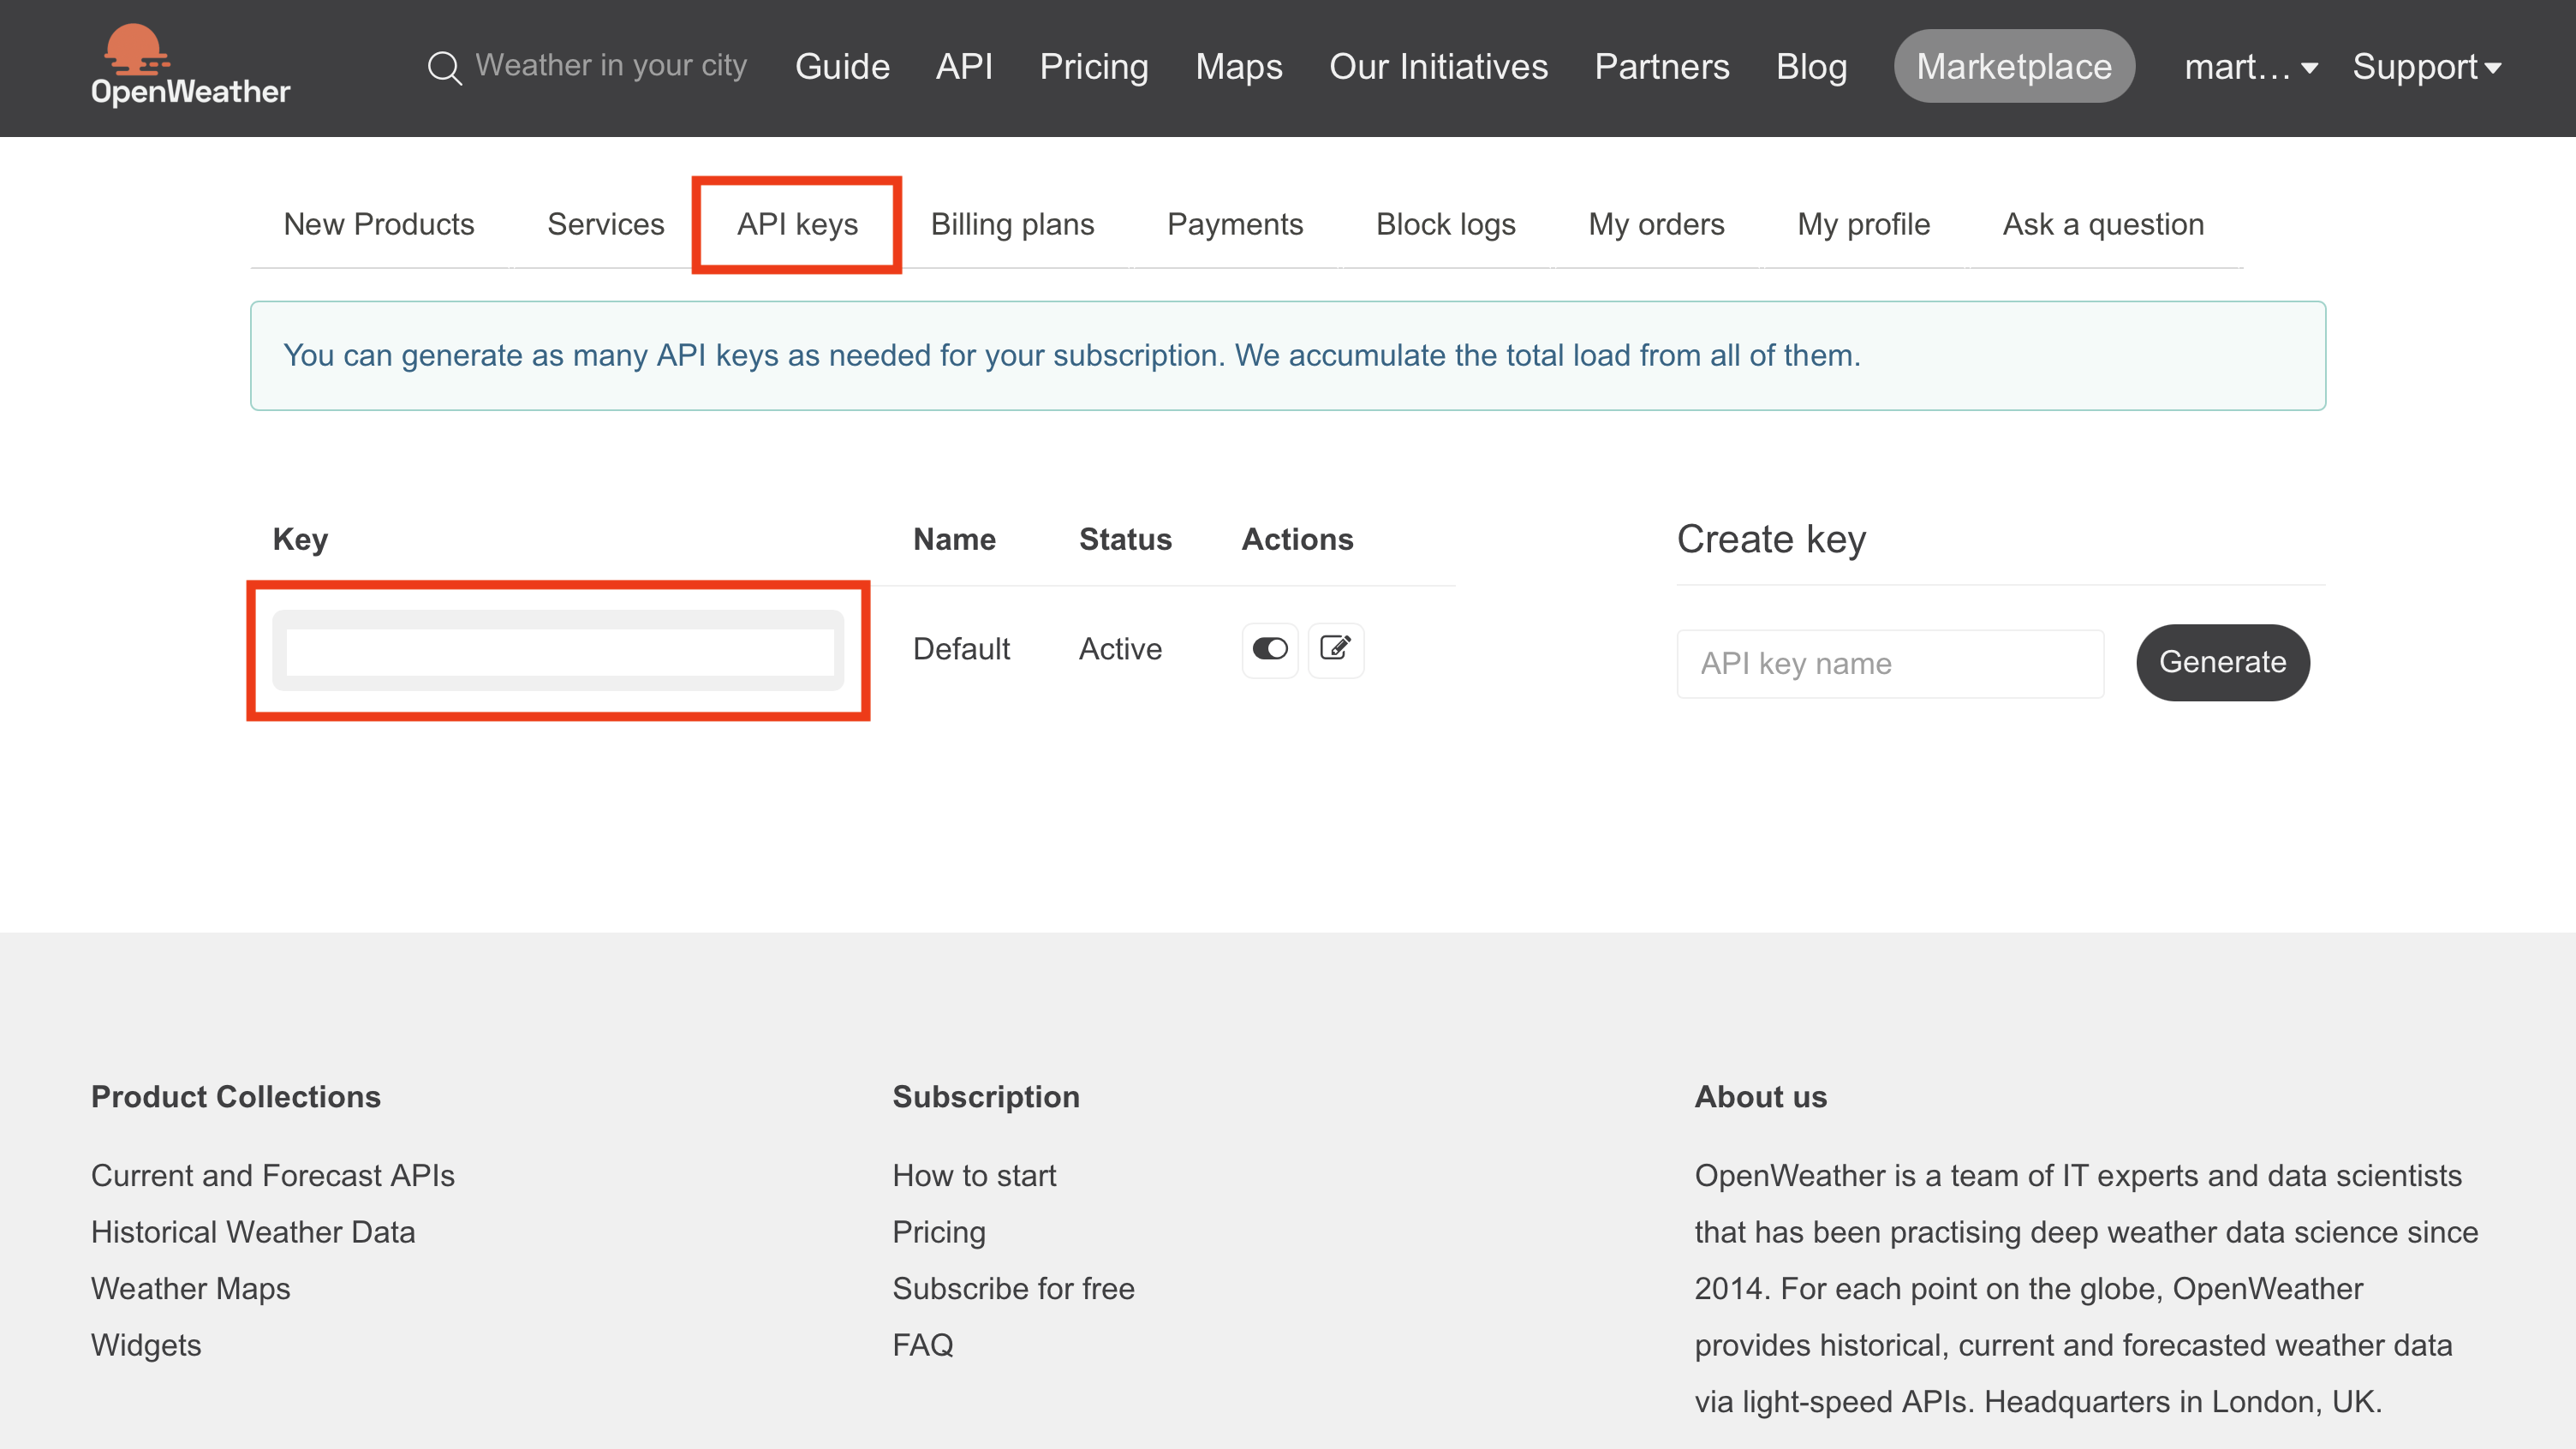
On this page, you can view your API keys. Copy the existing one, with the name Default. You’ll use it in the next section to call the weather API right from within your browser.
Make an API Request and Inspect the Data
You’ll use the current weather data endpoint for your Python weather app, and you’ll let your users call it by passing a city name to your CLI.
Note: It may take a couple of hours for your API key to activate after you sign up.
Before you start writing any code, make sure that you can call the API and peek at what the data it returns looks like. The API documentation on OpenWeather’s website displays example requests you can make to their endpoints to receive weather data:
api.openweathermap.org/data/2.5/weather?q={city name}&appid={API key}
You’ll need to replace the two variables shown in curly braces ({}) with your input:
- Replace
{city name}withvienna, or another city name. - Replace
{API key}with your API key, which you copied earlier.
After replacing these two values, you can paste the URL into your browser and see the API response:
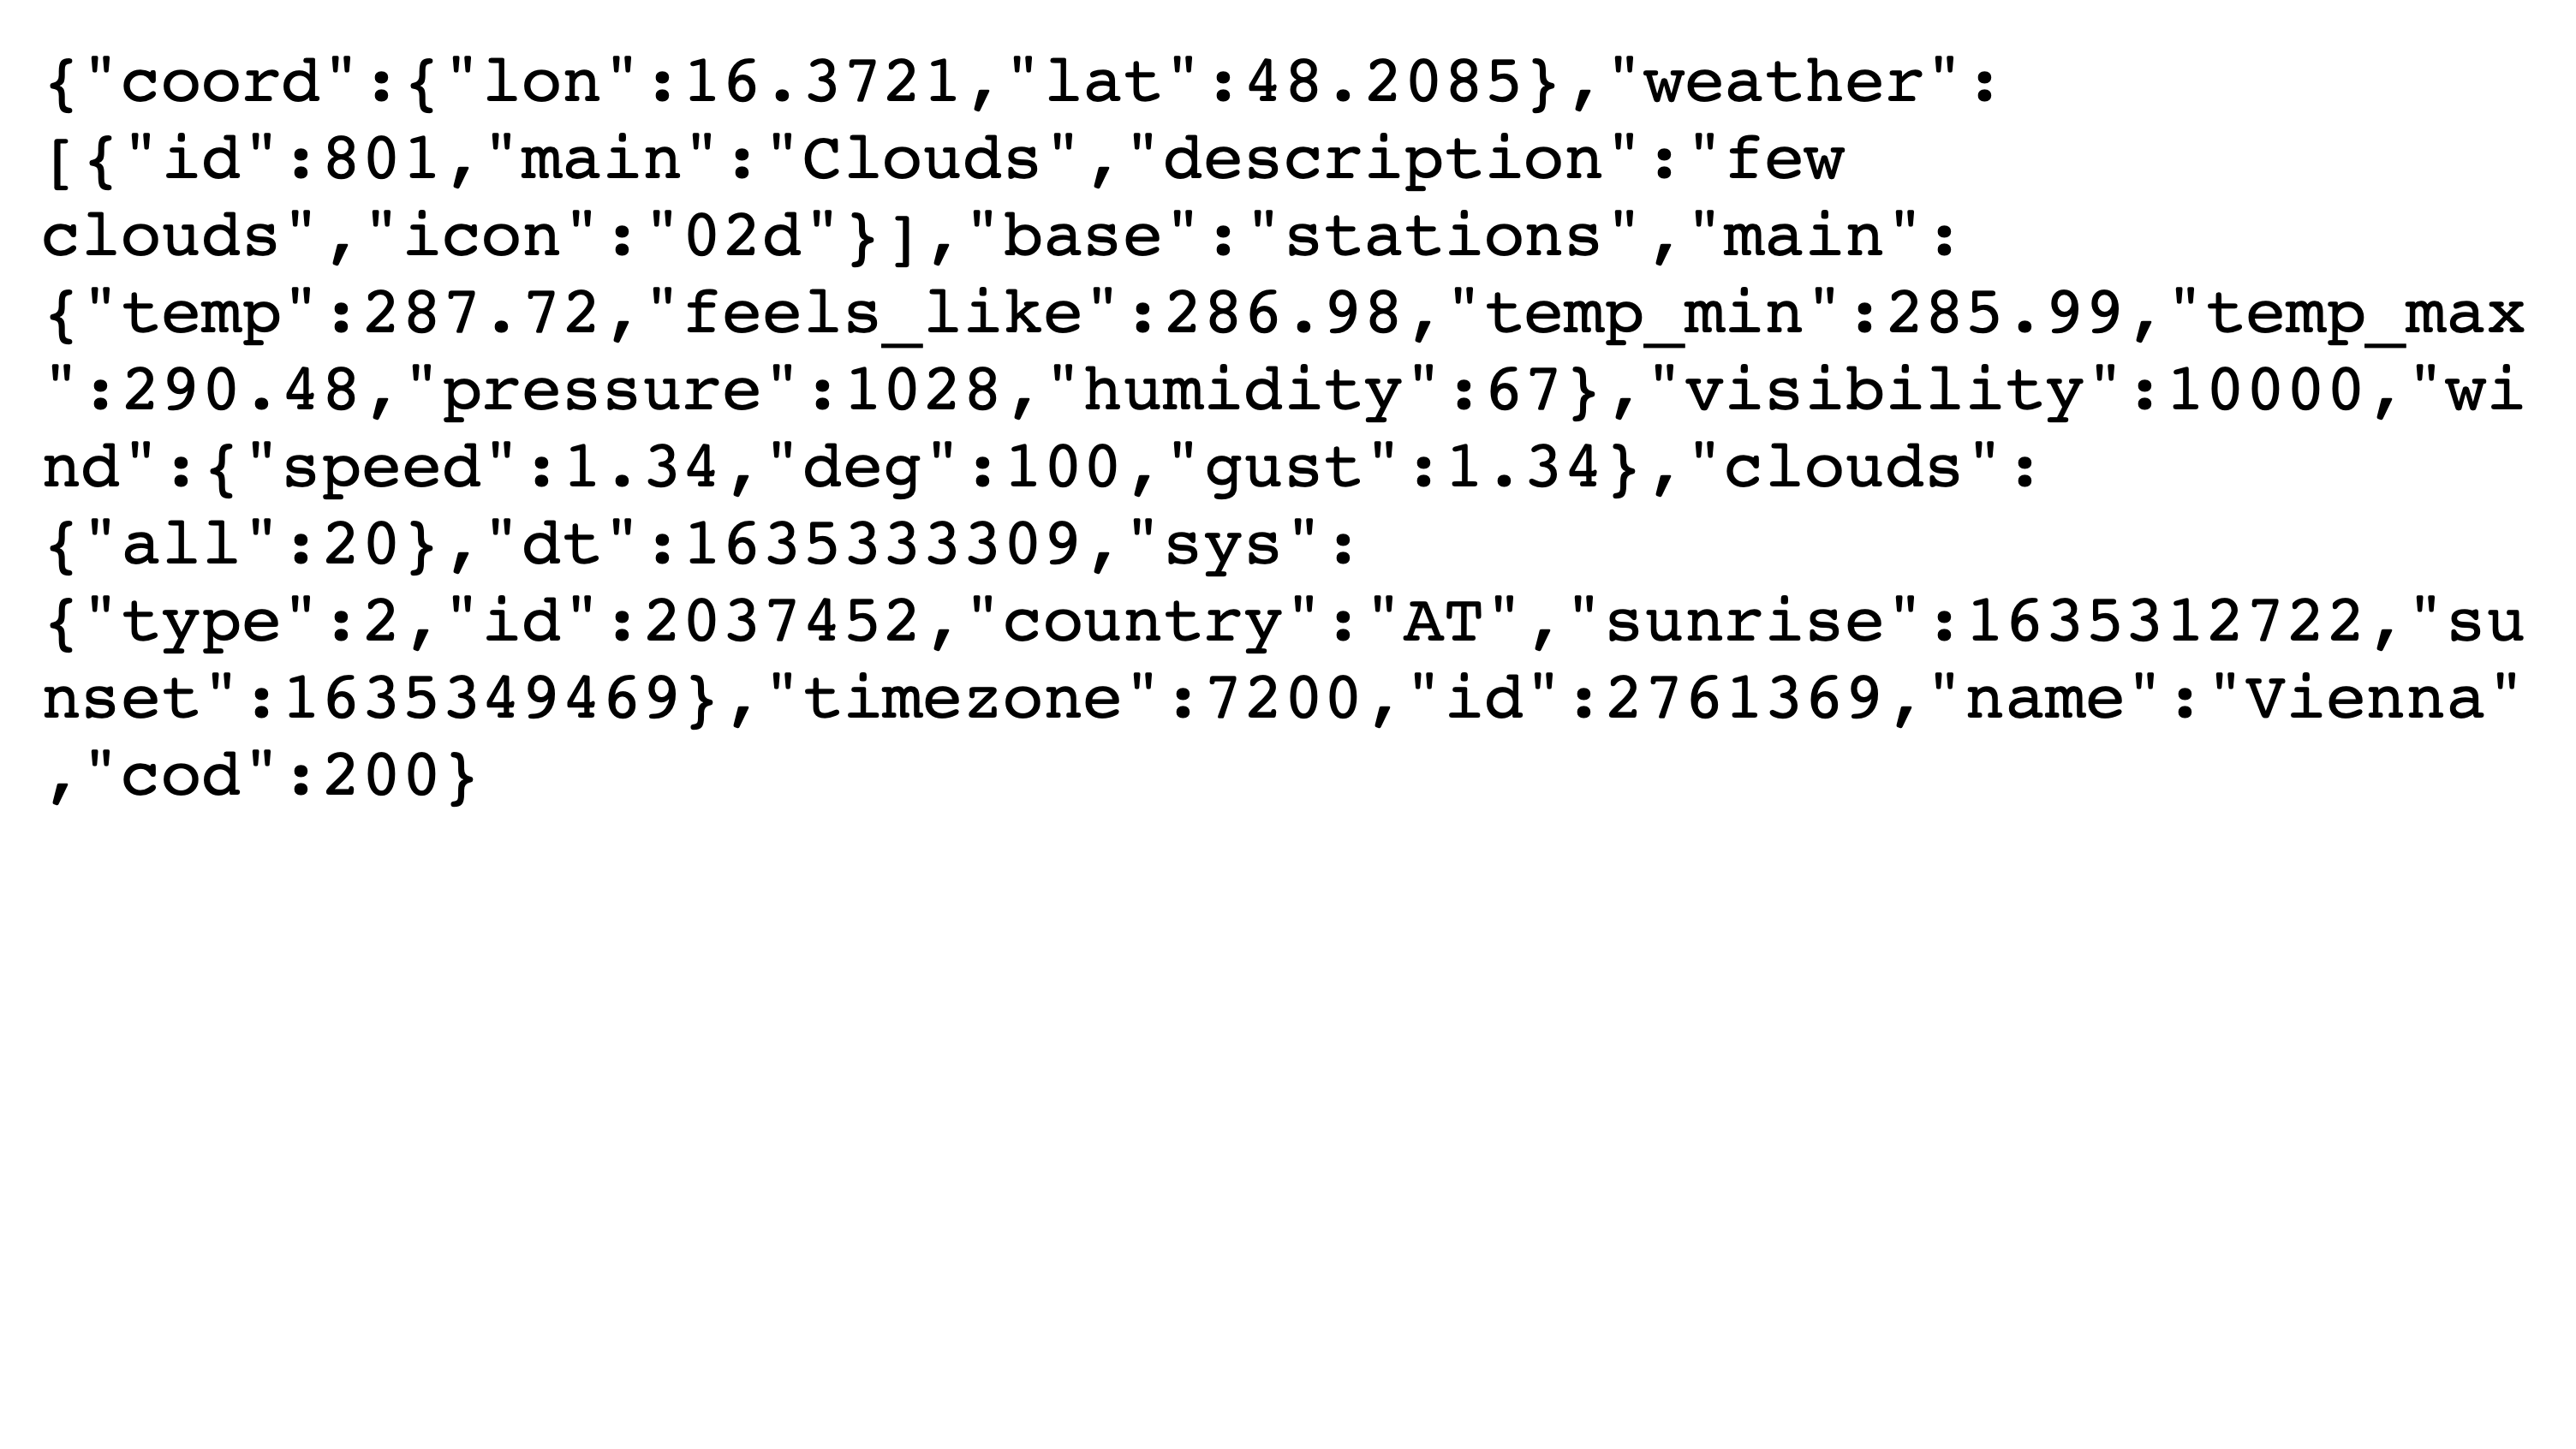
In your browser, you’ll see text similar to what’s shown in the screenshot above. This text is OpenWeather’s JSON API response to your request. Without formatting, the content of the response is pretty hard to read. Expand the block below for a formatted, more readable JSON response:
 1{
 2  "coord": {
 3    "lon": 16.3721,
 4    "lat": 48.2085
 5  },
 6  "weather": [
 7    {
 8      "id": 801,
 9      "main": "Clouds",
10      "description": "few clouds",
11      "icon": "02d"
12    }
13  ],
14  "base": "stations",
15  "main": {
16    "temp": 287.72,
17    "feels_like": 286.98,
18    "temp_min": 285.99,
19    "temp_max": 290.48,
20    "pressure": 1028,
21    "humidity": 67
22  },
23  "visibility": 10000,
24  "wind": {
25    "speed": 1.34,
26    "deg": 100,
27    "gust": 1.34
28  },
29  "clouds": {
30    "all": 20
31  },
32  "dt": 1635333309,
33  "sys": {
34    "type": 2,
35    "id": 2037452,
36    "country": "AT",
37    "sunrise": 1635312722,
38    "sunset": 1635349469
39  },
40  "timezone": 7200,
41  "id": 2761369,
42  "name": "Vienna",
43  "cod": 200
44}
Inspect the data you receive in the JSON response and identify the pieces of information you’ll want to select from it for the initial version of your weather app.
You decided earlier that you want to display at least three items:
- City name
- Weather conditions
- Temperature
If you search for this information in the provided JSON response, you’ll see that they’re all in there:
- Line 42 shows the city name
"Vienna"under the key"name". - Line 10 holds detailed weather information under the key
"weather"and the subkey"description". - Line 16 gives you access to temperature information under the key
"main"and the subkey"temp".
Does the temperature information look suspiciously hot? If you check back in the API documentation, you’ll see that the default temperature scale is Kelvin. However, in your weather app, you’ll want your temperature scale to default to Celsius instead.
Note: If you hail from the US and like your temperatures in imperial units, you might prefer to choose Fahrenheit as the default temperature. But hold your horses and stick with the tutorial! You’ll implement an optional flag for displaying the temperature in Fahrenheit later on. If you want, you can then swap out the defaults.
Go ahead and edit the query parameters in your URL to get the same result, but with the temperature displayed in Celsius instead:
api.openweathermap.org/data/2.5/weather?q=vienna&units=metric&appid={API key}
If you add the query parameter &units=metric to the URL, you’ll receive the temperature results displayed in Celsius:
"main": {
  "temp": 14.57,
  "feels_like": 13.83,
  "temp_min": 12.84,
  "temp_max": 17.33,
  "pressure": 1028,
  "humidity": 67
},
That looks much colder but also more realistic. When you build the code for your Python weather app, you’ll point the units query parameter to metric by default, but you’ll also add an optional flag for users who want to display the temperature in Fahrenheit.
In this step, you signed up for an account at OpenWeather to get access to a free API key. Then, you used that API key to make requests to the OpenWeather API from within your browser. You inspected the JSON data that the API returns and identified the data that you’ll want to use for your Python weather CLI app.
In the next step, you’ll set up the basic structure of your Python project, handle your API key through a config file, and write the necessary code to get access to that information from within your Python script.
Step 2: Handle Secrets in Your Code
In this step, you’ll finish setting up your project structure, including most of the files you’ll use. You’ll also add your API key to a configuration file and write code to import it into your main script. As a measure to avoid accidentally pushing the API key to version control, you’ll make a .gitignore file.
In short, by the end of this step, you’ll be all set up to start writing the main logic of your Python weather app.
Create Your Project Folder Structure
As mentioned at the beginning of this tutorial, you won’t need any external packages for this CLI project. All you’ll need is an installation of Python. Confirm that you have Python 3.6 or above because you’ll use Python f-strings for string formatting later in the tutorial. Python started supporting this formatting technique from version 3.6 onward.
Once you’ve installed a modern Python version on your system, you’re ready to select your operating system below and set up your project folder structure:
If you run these commands in your shell, you’ll create a folder named weather-app/, which contains three files:
.gitignorewill stop you from accidentally committing your API key to version control.secrets.iniwill hold your API key.weather.pywill contain the main code logic for your Python weather app.
You can open the project folder in your favorite code editor or IDE, and it should have a structure like what’s shown below:
weather-app/
├── .gitignore
├── secrets.ini
└── weather.py
You’ll build the majority of your CLI app in weather.py. However, before you start writing that code logic, you need to ensure that you’ll have access to the OpenWeather API key in your Python script and that it’s safe from accidentally leaking into the great wide plains of the open-source world.
Protect Your API Key
You’ll use secrets.ini to store the API key that you need for this project. To make sure that you won’t accidentally commit it to open source, start by opening your .gitignore file and adding secrets.ini to the ignored files:
# .gitignore

secrets.ini
By adding the name of your config file, secrets.ini, as a new line in your otherwise empty .gitignore file, you’ve preemptively let Git know that you don’t want it to record that config file under version control. This safeguard will only have an effect if you decide to track your project using Git. Still, it can help to safeguard you from accidentally registering your API key to version control and pushing it to GitHub, for example.
Note: Always make sure to keep your API keys, passwords, and other secrets away from public repositories and version control. Once you push an API key to GitHub, you should consider it compromised, remove it, and create a new one.
Even if you start to develop your project locally, you might later choose to share it with the world. You’re less likely to accidentally leak your API key if you keep it out of your main script and don’t register your configuration file to version control.
Access Your API Key in Your Python Code
After you’ve set up a safety barrier, you can add the API key that you created in step one to your secrets.ini file. Open the file and add the information, following the INI file format:
; secrets.ini

[openweather]
api_key=<YOUR-OPENWEATHER-API-KEY>
With this setup, you’ve created a section named openweather with a property named api_key, whose value is your OpenWeather API key.
Next, you’ll need to use Python’s configparser module to get access to your API key in your weather.py file:
 1# weather.py
 2
 3from configparser import ConfigParser
 4
 5def _get_api_key():
 6    """Fetch the API key from your configuration file.
 7
 8    Expects a configuration file named "secrets.ini" with structure:
 9
10        [openweather]
11        api_key=<YOUR-OPENWEATHER-API-KEY>
12    """
13    config = ConfigParser()
14    config.read("secrets.ini")
15    return config["openweather"]["api_key"]
You’ve created a module non-public function named _get_api_key(), which encapsulates the code logic for accessing your OpenWeather API key:
- Line 3 imports
ConfigParserfrom Python’sconfigparsermodule. - Line 5 defines
_get_api_key(), starting the name with an underscore (_) character. This naming convention indicates that the function should be considered non-public. - Lines 6 to 12 compose a docstring for the function.
- Line 13 instantiates a
ConfigParserobject that you namedconfig. - Line 14 uses
.read()to load the information you saved insecrets.iniinto your Python script. - Line 15 returns the value of your API key by accessing the dictionary value using the square bracket notation.
You might notice that configparser turns both the section and property names of your secrets.ini file into dictionary keys with nested structures.
If you call _get_api_key(), it’ll now return the value of your OpenWeather API key, which is ready to use in your API requests. At the same time, the value of the API key is outside your main code file, meaning you’re less likely to accidentally compromise it.
In this step, you’ve learned how you can use Python’s configparser module to read information from INI configuration files. You’ve excluded your secrets.ini configuration file preemptively from version control by registering it in your .gitignore file.
In the upcoming step of this tutorial, you’ll create the code that’ll enable the CLI interactions for your Python weather app.
Step 3: Create a CLI for Your Python Weather App
In this step, you’ll write a command-line input parser that takes user-provided information for a city and an optional parameter about what temperature scale to use. To build this functionality, you’ll work with Python’s argparse module.
Set Up an Argument Parser
Start by remembering what information you decided to collect from your users:
- City name
- Temperature scale, with a default value of Celsius
To collect these two values through the command-line interface and use them in your Python weather app, you’ll work with Python’s built-in argparse module. The code you’ll add will not display the user input yet, but it’ll collect it:
 1# weather.py
 2
 3import argparse
 4from configparser import ConfigParser
 5
 6def read_user_cli_args():
 7    """Handles the CLI user interactions.
 8
 9    Returns:
10        argparse.Namespace: Populated namespace object
11    """
12    parser = argparse.ArgumentParser(
13        description="gets weather and temperature information for a city"
14    )
15    return parser.parse_args()
16
17# ...
18
19if __name__ == "__main__":
20    read_user_cli_args()
After importing argparse on line 3, you define read_user_cli_args() starting on line 6:
- Lines 12 to 14 create an instance of
argparse.ArgumentParser, to which you pass an optional description of the parser on line 13. - Line 15 returns the results of a call to
.parse_args(), which will eventually be the user-input values. - Line 19 opens a conditional block after checking for Python’s
"__main__"namespace, which allows you to define code that should run when you’re executingweather.pyas a script. - Line 20 calls
read_user_cli_args(), effectively running the CLI parsing code logic you wrote further up.
If you give your script a spin at this stage, it’ll execute without any complaints. However, there also won’t be any output:
$ python weather.py
$
If you attempt to pass a city name to your CLI app, Python will complain and your script will exit, but you’ll also get a free help message with the minimal setup of ArgumentParser that you wrote in read_user_cli_args():
$ python weather.py vienna
usage: weather.py [-h]
weather.py: error: unrecognized arguments: vienna
Python first prints usage information to your console. This information hints at the built-in help (-h) that ArgumentParser provides. Then, it tells you that your parser didn’t recognize the argument that you passed to the program using your CLI. Since you haven’t set up any arguments in read_user_cli_args() yet, you can’t really get mad at Python for complaining.
Parse Input Arguments
Of course, your app will be more helpful if you allow users to input a city and select their chosen temperature scale. To do this, you’ll add two arguments to the parser that you created before:
 1# weather.py
 2
 3import argparse
 4from configparser import ConfigParser
 5
 6def read_user_cli_args():
 7    """Handles the CLI user interactions.
 8
 9    Returns:
10        argparse.Namespace: Populated namespace object
11    """
12    parser = argparse.ArgumentParser(
13        description="gets weather and temperature information for a city"
14    )
15    parser.add_argument(
16        "city", nargs="+", type=str, help="enter the city name"
17    )
18    parser.add_argument(
19        "-i",
20        "--imperial",
21        action="store_true",
22        help="display the temperature in imperial units",
23    )
24    return parser.parse_args()
25
26# ...
27
28if __name__ == "__main__":
29    read_user_cli_args()
By adding these two calls to .add_argument(), you’ve set up your parser to collect the user input submitted through the CLI:
-
Lines 15 to 17 define the
"city"argument that’ll take one or many inputs separated by whitespace. By setting the number of arguments (nargs) to"+", you allow users to pass city names that are made up of more than one word, such as New York. -
Lines 18 to 23 define the optional Boolean argument
imperial. You set theactionkeyword argument to"store_true", which means that the value forimperialwill beTrueif users add the optional flag, andFalseif they don’t.
Both added arguments also have a keyword argument help, which you used to define the help text that argparse then makes available through the -h flag:
 1$ python weather.py -h
 2usage: weather.py [-h] [-i] city [city ...]
 3
 4gets weather and temperature information for a city
 5
 6positional arguments:
 7  city            enter the city name
 8
 9optional arguments:
10  -h, --help      show this help message and exit
11  -i, --imperial  display the temperature in imperial units
In this console output, you can see the description text of your parser in line 4, while the help text for each of your arguments shows up next to its description in line 7 or 11, respectively.
However, if you run the script and pass it a city name as input, you still can’t see any output displayed back to your console. Head back over to weather.py and edit the code in your conditional code block at the bottom of the file:
# weather.py

# ...

if __name__ == "__main__":
    user_args = read_user_cli_args()
    print(user_args.city, user_args.imperial)
Now you’ve captured the returned value of read_user_cli_args() in the user_args variable and added a call to print() in order to display the user-input values back to the console:
$ python weather.py vienna
['vienna'] False

$ python weather.py new york -i
['new', 'york'] True

$ python weather.py ho chi minh city --imperial
['ho', 'chi', 'minh', 'city'] True
You can now pass multiple words that compose the name of a city to your CLI, and it’ll correctly collect them all as strings in a list. Further, you can optionally pass the -i or --imperial flags to save True as the value for user_args.imperial. Your Python weather CLI app is all set to collect the user input you need!
In this section, you’ve worked with argparse to receive and process information that your users will pass through their command-line interface. You made sure that city names can consist of more than one word and that there’s a way to optionally request the temperature in imperial units.
While your users can now enter city names and temperature scale preferences, you’re not currently doing anything with their input. In the next step, you’ll use the values that they submit to call the OpenWeather API and get the weather information for a specific city.
Step 4: Get the Weather Information
How’s the weather outside? Is it still raining? If you’re lucky enough to have a window close by, you could just take a look. But any real-life window in your house is farther away than your next terminal window, so it’s time to fetch the weather information from that closest window by using your Python script.
In this step, you’ll concatenate the user input into a valid URL that you’ll use to send API requests to OpenWeather’s API. You’ll also encapsulate all the necessary code logic into public and non-public functions to follow best practices and add exception handling so that your users won’t run into unexpected errors.
Build the URL
If you think back to step one, you may remember the URL that you used to make a successful API call with your browser:
api.openweathermap.org/data/2.5/weather?q={city name}&appid={API key}
What you’ll do in your Python code will be similar, so you’ll need a valid URL like this one. The base URL before passing any query parameters will be the same for any call to this endpoint.
Note: You may notice that the URL contains a number, 2.5, that represents the version of the API at the time of writing. If the API gets an update, this number will be different. Check the current version of the API and confirm in your URL that you’re using the version that you want to use.
Because the base of your URL will stay the same for all calls, it’s a good idea to define it as a constant at the top of your code:
# weather.py

import argparse
from configparser import ConfigParser

BASE_WEATHER_API_URL = "http://api.openweathermap.org/data/2.5/weather"

# ...
With this single line of code, you’ve added the base URL that all API calls will share as a constant.
Note: Keep in mind that Python constants aren’t technically constant, because you can change their value any time. However, you can indicate that you don’t intend to change a value throughout your program by formatting it in all capital letters, as described in PEP 8 – Style Guide for Python Code.
But the URL in BASE_WEATHER_API_URL isn’t complete and, until now, you only have a city name in a list of one or more strings, along with a Boolean value. It’s time to create a complete URL from the input you can get:
 1# weather.py
 2
 3import argparse
 4from configparser import ConfigParser
 5from urllib import parse
 6
 7BASE_WEATHER_API_URL = "http://api.openweathermap.org/data/2.5/weather"
 8
 9def read_user_cli_args():
10    # ...
11
12def build_weather_query(city_input, imperial=False):
13    """Builds the URL for an API request to OpenWeather's weather API.
14
15    Args:
16        city_input (List[str]): Name of a city as collected by argparse
17        imperial (bool): Whether or not to use imperial units for temperature
18
19    Returns:
20        str: URL formatted for a call to OpenWeather's city name endpoint
21    """
22    api_key = _get_api_key()
23    city_name = " ".join(city_input)
24    url_encoded_city_name = parse.quote_plus(city_name)
25    units = "imperial" if imperial else "metric"
26    url = (
27        f"{BASE_WEATHER_API_URL}?q={url_encoded_city_name}"
28        f"&units={units}&appid={api_key}"
29    )
30    return url
31
32# ...
You started by adding a new import statement on line 5. You’ll use a function from the urllib.parse module on line 24 to help sanitize the user input so that the API can safely consume it.
On line 12, you’ve defined build_weather_query(), which takes two inputs that correspond to the user input you collected through your CLI:
city_inputis the list of strings that you collected inuser_args.city.imperialis the Boolean value that’ll decide whether to display the temperature in Celsius or Fahrenheit. The default for this argument isFalse.
The function that you wrote consists of a few lines of code, with a descriptive docstring:
-
Line 22 calls
_get_api_key()to fetch the OpenWeather API key from your config file and saves it asapi_key. -
Line 23 uses
str.join()to concatenate the words that make up a city name with a whitespace character (" ") if a city name consists of more than one word. -
Line 24 passes
city_nametoparse.quote_plus(), which encodes the string so that you can make a valid HTTP request to the API. Aside from converting certain characters through UTF-8 encoding, this function also converts whitespace characters to plus symbols (+), which is a form of URL encoding that’s necessary for proper calls to this API. -
Line 25 uses a conditional expression to assign either
"imperial"or"metric"tounits, depending on whether theimperialparameter isTrueorFalse. -
Lines 26 to 29 build the complete URL that you can use to make a successful API call. You’re using an f-string to compose the URL from the
BASE_WEATHER_API_URLand the variables that you assigned in previous lines. -
Line 30 finally returns the fully formed URL.
Calling build_weather_query() returns a URL that you can use to make a valid API call to a specific endpoint of the weather API provided by OpenWeather. If you call the function at the bottom of weather.py, then you can generate and display the URL:
# weather.py

# ...

if __name__ == "__main__":
    user_args = read_user_cli_args()
    query_url = build_weather_query(user_args.city, user_args.imperial)
    print(query_url)
If you execute weather.py after applying these changes and pass the CLI arguments that your program expects, it’ll print a URL to your console that you can copy and paste into your browser to make an API call just like you did in step one:
$ python weather.py bee
http://api.openweathermap.org/data/2.5/weather?q=bee&units=metric&appid=<YOUR-OPENWEATHER-API-KEY>

$ python weather.py zap -i
http://api.openweathermap.org/data/2.5/weather?q=zap&units=imperial&appid=<YOUR-OPENWEATHER-API-KEY>
Give it a try and paste a URL that your script generated into your browser search bar. Remember that <YOUR-OPENWEATHER-API-KEY> should hold the API key value that your script fetched from your secrets.ini config file. And yes, both bee and zap are actual city names for which OpenWeather provides weather information :)
Now that you know that you can generate valid URLs, it’s time to let Python make the requests and stop having to copy and paste URLs into your browser.
Make an HTTP Request With Python
You’ll use Python’s urllib module to make an HTTP GET request to the weather API endpoint using the URL that you generated with build_weather_query() and your user’s CLI input. You’ll need some additional built-in modules from Python’s standard library to build the code logic for this step:
# weather.py

import argparse
import json
from configparser import ConfigParser
from urllib import parse, request

# ...
You’ll use urllib.request to make the request, and you’ll use json to convert the data of the API response into a Python dictionary:
 1# weather.py
 2
 3# ...
 4
 5def get_weather_data(query_url):
 6    """Makes an API request to a URL and returns the data as a Python object.
 7
 8    Args:
 9        query_url (str): URL formatted for OpenWeather's city name endpoint
10
11    Returns:
12        dict: Weather information for a specific city
13    """
14    response = request.urlopen(query_url)
15    data = response.read()
16    return json.loads(data)
17
18
19if __name__ == "__main__":
20    user_args = read_user_cli_args()
21    query_url = build_weather_query(user_args.city, user_args.imperial)
22    weather_data = get_weather_data(query_url)
23    print(weather_data)
By adding this code, you’ve moved all the functionality that you previously handled through your browser into your Python script:
-
Line 5 defines
get_weather_data(), which is the function you’ll use to make a request to the weather API endpoint. -
Lines 6 to 13 compose a docstring for the function.
-
Line 14 uses
urllib.request.urlopen()to make an HTTP GET request to thequery_urlparameter and saves the result asresponse. -
Line 15 extracts the data from the response.
-
Line 16 returns a call to
json.loads()withdataas the argument. The function returns a Python object holding the JSON information fetched fromquery_url. -
Line 22 calls
get_weather_data()passing thequery_urlyou’ve generated withbuild_weather_query()then saves the dictionary toweather_data. -
Line 23 finally prints the weather data to your console.
If you run your weather CLI app after adding this code, you’ll see output similar to what you got in your browser earlier:
$ python weather.py antananarivo
{'coord': {'lon': 47.5361, 'lat': -18.9137}, 'weather': [{'id': 500, 'main':
 'Rain', 'description': 'light rain', 'icon': '10d'}], 'base': 'stations',
 'main': {'temp': 21.98, 'feels_like': 21.8, 'temp_min': 21.98, 'temp_max':
 21.98, 'pressure': 1016, 'humidity': 60}, 'visibility': 10000, 'wind':
 {'speed': 4.12, 'deg': 120}, 'rain': {'1h': 0.15}, 'clouds': {'all': 75},
 'dt': 1635501615, 'sys': {'type': 1, 'id': 2136, 'country': 'MG', 'sunrise':
 1635473461, 'sunset': 1635519356}, 'timezone': 10800, 'id': 1070940,
 'name': 'Antananarivo', 'cod': 200}
But what happens if you get too creative and type a city name for which OpenWeather doesn’t have any weather data? Try passing some of the following city names to your CLI:
- Normal
- 1770
- Why
- Truth or consequences
- Nowhere else
- Cheesequake
While all of the cities in this list exist—who would’ve thought?—the final one, Cheesequake, doesn’t have weather data that you can access through this API:
$ python weather.py cheesequake
Traceback (most recent call last):

  ...

urllib.error.HTTPError: HTTP Error 404: Not Found
Your Python weather CLI app won’t be incredibly user-friendly if it brings up a hefty stack trace every time one of your users gets too creative. You can improve on this by adding some exception handling to your code.
Handle Exceptions in Your Code
You’ve encountered an HTTPError when you played around with your command-line app. That doesn’t make for a good user experience. Because you already know which error to catch, you can add a specific exception to your code:
 1# weather.py
 2
 3import argparse
 4import json
 5import sys
 6from configparser import ConfigParser
 7from urllib import error, parse, request
 8
 9# ...
10
11def get_weather_data(query_url):
12
13    # ...
14
15    try:
16        response = request.urlopen(query_url)
17    except error.HTTPError:
18        sys.exit("Can't find weather data for this city.")
19
20    data = response.read()
21    return json.loads(data)
22
23# ...
By adding these additional lines of code and creating a try … except block, you’re now successfully handling errors that result from requests for cities that don’t have their data in the API:
-
Line 5 imports the built-in
sysmodule that allows you to gracefully exit the program without a traceback, which you do in line 18. -
Line 7 adds
errorto the imports fromurllib. -
Line 15 starts the
try…exceptblock, and you’ve moved the line of code that performs the HTTP request into thetryblock on line 16. -
Line 17 catches any
error.HTTPErrorthat occurs during the HTTP request on line 16. It opens up anexceptblock. -
Line 18 calls
sys.exit()to gracefully quit your application if the HTTP error occurrs. You’re also passing a descriptive message that your CLI will display when there’s no weather data found for the user input.
That’s already a significant improvement to the user experience of your Python weather app:
$ python weather.py why not
Can't find weather data for this city.
The weather API doesn’t have data for a a city called Why Not, and with this descriptive message, your users will understand that.
While the message is correct in this case, your app will currently also catch other exceptions that are subclasses of HTTPError. For example, it’ll show the same message if your API key becomes outdated or if you forget to provide one. This mix-up happens because the weather API will return an HTTP error with the status code 401 Unauthorized if you send a request without a valid API key.
You can improve your exception handling by making your messages more specific to different HTTP error codes:
 1# weather.py
 2
 3# ...
 4
 5def get_weather_data(query_url):
 6
 7    # ...
 8
 9    try:
10        response = request.urlopen(query_url)
11    except error.HTTPError as http_error:
12        if http_error.code == 401:  # 401 - Unauthorized
13            sys.exit("Access denied. Check your API key.")
14        elif http_error.code == 404:  # 404 - Not Found
15            sys.exit("Can't find weather data for this city.")
16        else:
17            sys.exit(f"Something went wrong... ({http_error.code})")
18
19    data = response.read()
20    return json.loads(data)
21
22# ...
With these additions, you’ve drilled more deeply into the HTTP error response that you receive from the API after making it available as http_error in the except block:
-
Lines 12 to 13 catch HTTP 401 Unauthorized errors that indicate that either your API key is outdated or you’re not providing it correctly.
-
Lines 14 to 15 catch HTTP 404 Not Found errors that inform you that the weather API couldn’t find any data for the city name that you provided as input.
-
Lines 16 to 17 catch all other HTTP errors that might occur, then exit the program and print a message that includes the HTTP error code.
Your error handling in regards to HTTP errors is now more granular than it was before. It’ll help your users to better identify what issue they’re running into.
For good measure, you’ll add another try … except block to tackle potentially malformed JSON that the API might send to you:
# weather.py

# ...

def get_weather_data(query_url):

    # ...

    try:
        response = request.urlopen(query_url)
    except error.HTTPError as http_error:
        if http_error.code == 401:  # 401 - Unauthorized
            sys.exit("Access denied. Check your API key.")
        elif http_error.code == 404:  # 404 - Not Found
            sys.exit("Can't find weather data for this city.")
        else:
            sys.exit(f"Something went wrong... ({http_error.code})")

    data = response.read()

    try:
        return json.loads(data)
    except json.JSONDecodeError:
        sys.exit("Couldn't read the server response.")

# ...
Here, you’ve wrapped the code that tries to decode the JSON response into another try … except block to handle a JSONDecodeError exception that might pop up at this stage. Python will raise this exception if it isn’t able to convert the server’s JSON response into a valid Python object. If that happens, you’re now gracefully exiting the program and displaying a descriptive message to your users.
Note: With these additions, you’ve made your Python weather app more soothing to use for developers and non-developers alike!
In this section, you wrote the Python code to make web requests from within your script using the urllib module. To achieve this, you first built the URL necessary for a valid API request, then used it in get_weather_data() to make the request and receive the JSON response. You converted the JSON response to a Python dictionary and displayed it back to your console.
You also added exception handling to avoid displaying long error messages and give descriptive feedback instead, and you encountered at least one new city name that you hadn’t heard of before!
At this point, you might wonder how you can find weather information for duplicate city names:
If you live in London, Ontario, in Canada, you might worry that you’ll never get to see the weather for your home city because of your city name sibling London, England. The OpenWeather API has a solution for this! You can pass the alpha-2 code of the ISO 3166-1 country code standard as a comma-separated value to the city name API call:
$ python weather.py london, ca
Give it a spin in your console! You’ll see that you get different results for cities named London depending on whether you’re passing the alpha-2 code ca, which stands for Canada, or not.
While you can access the weather information for many cities around the world, including several different Londons, the output of your CLI app is still hard to read. There’s too much information at once, and it isn’t well formatted. In the next step, you’ll isolate the essentials and learn how to display them to the console in a prettier way.
Step 5: Display the Output of Your Python Weather App
In this step, you’ll filter the weather data down to the essential pieces of information that you want to use in your output. You’ll also use pprint, f-strings, and Python’s string formatting mini-language to make the output more readable.
Identify the Relevant Data
The current state of your Python weather app already collects user input and returns the weather information for an existing city to the terminal:
$ python weather.py boring
{'coord': {'lon': -76.8223, 'lat': 39.5316}, 'weather': [{'id': 501, 'main':
'Rain', 'description': 'moderate rain', 'icon': '10n'}], 'base': 'stations',
'main': {'temp': 11.78, 'feels_like': 11.36, 'temp_min': 10.69, 'temp_max':
13.25, 'pressure': 993, 'humidity': 90}, 'visibility': 10000, 'wind': {'speed':
1.34, 'deg': 136, 'gust': 3.58}, 'rain': {'1h': 1.83}, 'clouds': {'all': 90},
'dt': 1635497629, 'sys': {'type': 2, 'id': 2032439, 'country': 'US', 'sunrise':
1635507144, 'sunset': 1635545363}, 'timezone': -14400, 'id': 4347790,
'name': 'Boring', 'cod': 200}
But this might be hard to read, considering the dim light caused by the thunderstorm going on outside—or maybe it’s just too boring to go through? You can use Python’s pprint module to get a cleaner representation in your terminal:
# weather.py

from pprint import pp

# ...

if __name__ == "__main__":

    # ...

    pp(weather_data)
By adding the import statement and calling pp() instead of print(), you’ve told Python to nicely format the output for you and make it more readable:
$ python weather.py bat cave
{'coord': {'lon': -82.2871, 'lat': 35.4515},
 'weather': [{'id': 803,
              'main': 'Clouds',
              'description': 'broken clouds',
              'icon': '04n'}],
 'base': 'stations',
 'main': {'temp': 10.99,
          'feels_like': 10.7,
          'temp_min': 8.64,
          'temp_max': 12.96,
          'pressure': 997,
          'humidity': 98},
 'visibility': 10000,
 'wind': {'speed': 0.9, 'deg': 245, 'gust': 1.05},
 'clouds': {'all': 65},
 'dt': 1635498584,
 'sys': {'type': 2,
         'id': 2017496,
         'country': 'US',
         'sunrise': 1635508089,
         'sunset': 1635547041},
 'timezone': -14400,
 'id': 4456121,
 'name': 'Bat Cave',
 'cod': 200}
Well, that’s a little more exciting! Who knew weather phenomena could happen inside a bat cave?!
This more readable display of the nested dictionary makes it possible to identify the three pieces of information that you want to collect from the API response:
- City name through
weather_data['name'] - Weather description through
weather_data['weather'][0]['description'] - Temperature through
weather_data['main']['temp']
Head back to your main script file and remove the use of pprint. Then pick the data that you’re interested in from the weather_data dictionary so that you can print only the relevant information:
# weather.py

# Removed: from pprint import pp

# ...
if __name__ == "__main__":

    # ...

    print(
      f"{weather_data['name']}: "
      f"{weather_data['weather'][0]['description']} "
      f"({weather_data['main']['temp']})"
      )
You replaced pp() with a standard call to print() and added three f-strings that filter weather_data for the information that you’re interested in and display it back to your console:
$ python weather.py zig zag
Zig Zag: light rain (12.95)
This output looks much more readable than before! However, currently it’s still hard to know whether the temperature information is in Celsius or Fahrenheit. You could add the appropriate symbol right here into your print() call, but because you’ll eventually add even more styling to your CLI output, it’s a good idea to create a dedicated function for printing the result. You’ll tackle just that in the next section.
Build a Display Function
Inside of weather.py, scroll to the bottom of your file. Just above if __name__ == "__main__": is a good place to create this new function:
 1# weather.py
 2
 3# ...
 4
 5def display_weather_info(weather_data, imperial=False):
 6    """Prints formatted weather information about a city.
 7
 8    Args:
 9        weather_data (dict): API response from OpenWeather by city name
10        imperial (bool): Whether or not to use imperial units for temperature
11
12    More information at https://openweathermap.org/current#name
13    """
14    city = weather_data["name"]
15    weather_description = weather_data["weather"][0]["description"]
16    temperature = weather_data["main"]["temp"]
17
18    print(f"{city}", end="")
19    print(f"\t{weather_description.capitalize()}", end=" ")
20    print(f"({temperature}°{'F' if imperial else 'C'})")
21
22
23if __name__ == "__main__":
24
25    # ...
26
27    display_weather_info(weather_data, user_args.imperial)
In this function, you’ve first created variables for the data that you want to display, then separated the string argument that you previously passed to print() into three individual calls to print():
-
Line 5 defines
display_weather_info()with two parameters,weather_dataandimperial. The second parameter defaults toFalse. -
Lines 14 to 16 pick the relevant data for
city,weather_description, andtemperaturefrom theweather_datadictionary and assign them to variables. -
Line 18 prints the name of the city that your API call returned. You prevent a line break by passing an empty string (
"") instead of the default newline character (\n). The next call toprint()will therefore continue displaying text in the same line. -
Line 19 prints the information about the current weather, starting with a tab character (
\t) to separate it from the previous output. You also call.capitalize()to capitalize the string information that the weather API returns, which is by default in all lowercase. Finally, you useend=" "to set the final character to a whitespace character instead of the default newline character. -
Line 20 starts by printing the temperature information, then uses a conditional expression that hinges on the Boolean value of
imperialto decide whether to print anFfor Fahrenheit or aCfor Celsius. -
Line 27 replaces the previous call to
print()with a call todisplay_weather_info(), passing it the necessary arguments.
You’ve separated the calls to print() into three distinct function calls on separate lines. You split them up like this to leave space for code that you’ll add later, which will change the display colors in between.
If you give your updated display function a spin by running your Python weather app from your command line, you’ll see that the information still neatly displays in a single line of output:
$ python weather.py bitter end -i
Bitter End      Scattered clouds (27.93°F)
You’ll also notice that your app now correctly picks the fitting temperature scale, depending on whether or not you pass the -i flag. The tab character you used after the city name will additionally help to keep the information a little more consistently displayed, even if you look up cities with names of different lengths:
$ python weather.py antananarivo
Antananarivo    Scattered clouds (29.98°C)

$ python weather.py double trouble -i
Double Trouble  Clear sky (37.11°F)
Now the weather output is nicely aligned! However, this won’t work for all city names, and your weather info will display in different spots when the city name’s length goes into another tab character:
$ python weather.py gotham -i
Gotham  Broken clouds (49.8°F)

$ python weather.py national city -i
National City   Few clouds (46.65°F)
You can improve this by adding string padding to the output strings using Python’s format specification mini-language, which you’ll do next.
Add String Padding to Your Output
Python provides a built-in mini-language that allows you to apply specifications within a format string.
In order to center your city and weather_description strings within a consistent length of characters, you can add a colon (:) after the variable name followed by an alignment option character (^) and an integer that defines the total length, for example 20:
print(f"{city:^20}", end="")
print(
    f"\t{weather_description.capitalize():^20}",
    end=" ",
)
print(f"({temperature}°{'F' if imperial else 'C'})")
With this addition, you tell Python to keep the string output at a consistent length of 20 characters and pad any string that is shorter with whitespaces to the left and right:
$ python weather.py antananarivo
    Antananarivo          Scattered clouds   (23.98°C)

$ python weather.py eureka -i
       Eureka             Scattered clouds   (9.85°C)
Eureka, it worked! Both the long city name, Antananarivo, and the short city name, Eureka, fit within the 20 character padding. Now the tab character aligns the weather description for both cities at the same point in your CLI output.
However, 20 characters is just some number that seemed to work well for these city names. You might want to change the padding when you give your weather app its final touches. Therefore, it’s best to avoid adding 20 as a magic number and instead define it as a constant at the top of your script:
# weather.py

import argparse
import json
import sys
from configparser import ConfigParser

from urllib import error, parse, request

BASE_WEATHER_API_URL = "http://api.openweathermap.org/data/2.5/weather"
PADDING = 20

# ...

def display_weather_info(weather_data, imperial=False):

    # ...

    print(f"{city:^{PADDING}}", end="")
    print(
        f"\t{weather_description.capitalize():^{PADDING}}",
        end=" ",
    )
    print(f"({temperature}°{'F' if imperial else 'C'})")
By adding the value for your visual padding as a constant to your code, you’ll be able to swap it out quickly and play around until you find the perfect padding for an exquisite visual display of your Python weather app.
You’ve come a long way with this project and endured droughts and thunderstorms to build this fully functional Python weather app. If you want to compare the code you wrote to a snapshot of the project at its current state, you can click to expand the full code for weather.py:
# weather.py

import argparse
import json
import sys
from configparser import ConfigParser
from urllib import error, parse, request

BASE_WEATHER_API_URL = "http://api.openweathermap.org/data/2.5/weather"
PADDING = 20

def read_user_cli_args():
    """Handles the CLI user interactions.

    Returns:
        argparse.Namespace: Populated namespace object
    """
    parser = argparse.ArgumentParser(
        description="gets weather and temperature information for a city"
    )
    parser.add_argument(
        "city", nargs="+", type=str, help="enter the city name"
    )
    parser.add_argument(
        "-i",
        "--imperial",
        action="store_true",
        help="display the temperature in imperial units",
    )
    return parser.parse_args()


def build_weather_query(city_input, imperial=False):
    """Builds the URL for an API request to OpenWeather's weather API.

    Args:
        city_input (List[str]): Name of a city as collected by argparse
        imperial (bool): Whether or not to use imperial units for temperature

    Returns:
        str: URL formatted for a call to OpenWeather's city name endpoint
    """
    api_key = _get_api_key()
    city_name = " ".join(city_input)
    url_encoded_city_name = parse.quote_plus(city_name)
    units = "imperial" if imperial else "metric"
    url = (
        f"{BASE_WEATHER_API_URL}?q={url_encoded_city_name}"
        f"&units={units}&appid={api_key}"
    )
    return url


def _get_api_key():
    """Fetch the API key from your configuration file.

    Expects a configuration file named "secrets.ini" with structure:

        [openweather]
        api_key=<YOUR-OPENWEATHER-API-KEY>
    """
    config = ConfigParser()
    config.read("secrets.ini")
    return config["openweather"]["api_key"]


def get_weather_data(query_url):
    """Makes an API request to a URL and returns the data as a Python object.

    Args:
        query_url (str): URL formatted for OpenWeather's city name endpoint

    Returns:
        dict: Weather information for a specific city
    """
    try:
        response = request.urlopen(query_url)
    except error.HTTPError as http_error:
        if http_error.code == 401:  # 401 - Unauthorized
            sys.exit("Access denied. Check your API key.")
        elif http_error.code == 404:  # 404 - Not Found
            sys.exit("Can't find weather data for this city.")
        else:
            sys.exit(f"Something went wrong... ({http_error.code})")

    data = response.read()

    try:
        return json.loads(data)
    except json.JSONDecodeError:
        sys.exit("Couldn't read the server response.")


def display_weather_info(weather_data, imperial=False):
    """Prints formatted weather information about a city.

    Args:
        weather_data (dict): API response from OpenWeather by city name
        imperial (bool): Whether or not to use imperial units for temperature

    More information at https://openweathermap.org/current#name
    """
    city = weather_data["name"]
    weather_description = weather_data["weather"][0]["description"]
    temperature = weather_data["main"]["temp"]

    print(f"{city:^{PADDING}}", end="")
    print(
        f"\t{weather_description.capitalize():^{PADDING}}",
        end=" ",
    )
    print(f"({temperature}°{'F' if imperial else 'C'})")


if __name__ == "__main__":
    user_args = read_user_cli_args()
    query_url = build_weather_query(user_args.city, user_args.imperial)
    weather_data = get_weather_data(query_url)
    display_weather_info(weather_data, user_args.imperial)
Congratulations! Your script looks great, and you’ve put a good chunk of time into building it. Maybe it’s time to go out for a walk? No, looks like it’s still raining outside.
That gives you time to improve the appearance and style of your app’s output. What about adding some weather emojis for more pizzazz and replacing the grim black-and-white text with rainbow colors?
Step 6: Style the Weather App’s Output
At this point, your Python weather CLI app displays all the relevant information in a readable and understandable manner. However, the output still looks a little weathered.
In this step, you’ll add color and flashy emojis to your weather app to make it pop. Your app will display different symbols and text in various colors depending on the current weather in the place you’re querying.
Change Terminal Output Colors
You can change the color and other display aspects of the text that you print to your CLI. You’ll use special character sequences to highlight the city name by reversing the colors:
# weather.py

# ...

PADDING = 20
REVERSE = "\033[;7m"
RESET = "\033[0m"

# ...

def display_weather_info(weather_data, imperial=False):

    # ...

    city = weather_data["name"]
    weather_description = weather_data["weather"][0]["description"]
    temperature = weather_data["main"]["temp"]

    print(f"{REVERSE}{city:^{PADDING}}{RESET}", end="")
    print(
        f"\t{weather_description.capitalize():^{PADDING}}",
        end=" ",
    )
    print(f"({temperature}°{'F' if imperial else 'C'})")

# ...
You defined two new constants at the top of your file, REVERSE and RESET. These are strings that start with the ASCII escape character \033, followed by an opening square bracket ([) and finally some SGR parameters.
Note: While you can go pretty deep if you want to learn more about how ANSI escape codes work, you can also just accept this syntax for now and find a list of color codes online to play with.
You don’t have to take that syntax on faith, though. The 7 in REVERSE turns on reverse video, which swaps the text (foreground) and background colors. Toggle it below and watch the two trade places—and notice that \033[0m is the same kind of sequence, just with the code 0 that switches everything back off:
The two sequences you’ve defined in the code snippet shown above invert the terminal colors and reset them to the default, respectively:
\033[;7minverts the terminal background and foreground colors. The leading semicolon is just an empty parameter that you’ll add to later on, so it’s equivalent to the simpler\033[7mshown in the widget above.\033[0mresets everything to the default.
Then, you use these character sequences in the string you pass to print(). With the first sequence, you invert the colors before your CLI app prints the city name. With the second sequence, you reset it after it prints the city name.
If you give it a spin, you’ll see that the city name is highlighted and sticks out more than before:
Wow! This looks nice, and you’re probably eager to add some colors to your output next. You might want to add all sorts of style and flair to your Python weather app, and this can quickly get out of hand. So, before getting into that, you’ll want to keep all the style-related settings and color definitions in a separate Python file that you’ll call style.py. Select your operating system below to refactor the code:
Open the new empty Python file that you just created in your weather-app/ directory and add the code that you used for adding style to the CLI output, as well as PADDING that you’ve defined earlier:
# style.py

PADDING = 20

REVERSE = "\033[;7m"
RESET = "\033[0m"

def change_color(color):
    print(color, end="")
You’ve moved your style-related constants from weather.py to the new file style.py. You also anticipated that you might want to make a lot of calls to print() to change the colors of your output, so you wrote change_color() to handle that for you.
Now you can head back to weather.py and refactor your main app code to reflect your new project organization, where you keep the style-related code in a separate style module:
 1# weather.py
 2
 3import argparse
 4import json
 5import sys
 6from configparser import ConfigParser
 7from urllib import error, request
 8
 9import style
10
11BASE_WEATHER_API_URL = "http://api.openweathermap.org/data/2.5/weather"
12# Remove: PADDING = 20
13# Remove: REVERSE = "\033[;7m"
14# Remove: RESET = "\033[0m"
15
16# ...
17
18def display_weather_info(weather_data, imperial=False):
19
20    # ...
21
22    city = weather_data["name"]
23    weather_description = weather_data["weather"][0]["description"]
24    temperature = weather_data["main"]["temp"]
25
26    style.change_color(style.REVERSE)
27    print(f"{city:^{style.PADDING}}", end="")
28    style.change_color(style.RESET)
29    print(
30        f"\t{weather_description.capitalize():^{style.PADDING}}",
31        end=" ",
32    )
33    print(f"({temperature}°{'F' if imperial else 'C'})")
34
35# ...
With this refactoring, you imported your new style module and removed the style-related constants that you had previously defined in weather.py. Then you refactored the call to print() to use the descriptive style.change_color() that you defined in your new module.
You replaced both mentions of PADDING with style.PADDING on lines 27 and 30 so that they refer to the updated location of that value.
You also passed the constants that you moved to style.py to change_color() by using their descriptive namespaces.
Now all your style-related explorations have a designated place, and you’re ready to pop some color into that output. In style.py, add additional color identifiers:
# style.py

PADDING = 20

RED = "\033[1;31m"
BLUE = "\033[1;34m"
CYAN = "\033[1;36m"
GREEN = "\033[0;32m"
YELLOW = "\033[33m"
WHITE = "\033[37m"

REVERSE = "\033[;7m"
RESET = "\033[0m"

def change_color(color):
    print(color, end="")
With that in place, you can format the weather description with an eye-grabbing red color, then reset it to the default before displaying the temperature:
# weather.py

# ...

def display_weather_info(weather_data, imperial=False):

    # ...

    city = weather_data["name"]
    weather_description = weather_data["weather"][0]["description"]
    temperature = weather_data["main"]["temp"]

    style.change_color(style.REVERSE)
    print(f"{city:^{style.PADDING}}", end="")
    style.change_color(style.RESET)

    style.change_color(style.RED)
    print(
        f"\t{weather_description.capitalize():^{style.PADDING}}",
        end=" ",
    )
    style.change_color(style.RESET)

    print(f"({temperature}°{'F' if imperial else 'C'})")

# ...
Using the same approach as you did when changing the display for the city name, you successfully changed the font color for the weather description to red:
Red is just one code in the palette. Use the widget below to combine an intensity, a foreground color, a background, and reverse, then watch the exact escape string each choice produces—and how it renders in a terminal:
It’s great to have some color in your weather app, but wouldn’t it be nice if the color could hold some meaning beyond just looking pretty? Moving forward, you’ll use the weather ID to format different weather types in different colors.
Format Weather Types in Different Colors
Similar to HTTP response codes, the weather API delivers a weather condition code with each response. That code categorizes the weather conditions into groups defined by a range of ID numbers.
You can use this information to choose a display color based on which weather condition group a response belongs to. For example, you could display Rain conditions in blue and Clear conditions in yellow.
To set that up, you first need to describe the ranges for the weather condition codes in your script:
# weather.py

import argparse
import json
import sys
from configparser import ConfigParser
from urllib import error, parse, request

import style

BASE_WEATHER_API_URL = "http://api.openweathermap.org/data/2.5/weather"

# Weather Condition Codes
# https://openweathermap.org/weather-conditions#Weather-Condition-Codes-2
THUNDERSTORM = range(200, 300)
DRIZZLE = range(300, 400)
RAIN = range(500, 600)
SNOW = range(600, 700)
ATMOSPHERE = range(700, 800)
CLEAR = range(800, 801)
CLOUDY = range(801, 900)

# ...
Note that each of these ranges covers multiple individual weather conditions. You use the ranges to describe the larger groups. It seems like a good compromise to give each of these groups a fitting color rather than addressing each ID separately.
Now you can pick the weather condition code from the response dictionary and make decisions based on that value:
 1# weather.py
 2
 3# ...
 4
 5def display_weather_info(weather_data, imperial=False):
 6
 7    # ...
 8
 9    city = weather_data["name"]
10    weather_id = weather_data["weather"][0]["id"]
11    weather_description = weather_data["weather"][0]["description"]
12    temperature = weather_data["main"]["temp"]
13
14    style.change_color(style.REVERSE)
15    print(f"{city:^{style.PADDING}}", end="")
16    style.change_color(style.RESET)
17
18    if weather_id in THUNDERSTORM:
19        style.change_color(style.RED)
20    elif weather_id in DRIZZLE:
21        style.change_color(style.CYAN)
22    elif weather_id in RAIN:
23        style.change_color(style.BLUE)
24    elif weather_id in SNOW:
25        style.change_color(style.WHITE)
26    elif weather_id in ATMOSPHERE:
27        style.change_color(style.BLUE)
28    elif weather_id in CLEAR:
29        style.change_color(style.YELLOW)
30    elif weather_id in CLOUDY:
31        style.change_color(style.WHITE)
32    else:  # In case the API adds new weather codes
33        style.change_color(style.RESET)
34    print(
35        f"\t{weather_description.capitalize():^{style.PADDING}}",
36        end=" ",
37    )
38    style.change_color(style.RESET)
39
40    print(f"({temperature}°{'F' if imperial else 'C'})")
41
42# ...
Now, you’re picking the weather condition code from the response dictionary and assigning it to weather_id on line 10. Then, in a massive conditional statement extending from line 18 to line 33 in the code block shown above, you’re changing the display color depending on the weather condition group the weather_id falls into.
Note: If you’re working with a Python version above 3.10, you could try an alternative implementation that involves the match … case statement instead of this lengthy conditional statement.
If you give your weather app another spin after making these adjustments, you’ll see that your terminal will display different weather conditions in different colors:
You’re heating up with this appealing terminal user interface! However, adding that conditional code block right into display_weather_info() isn’t all that beautiful. Therefore, you’ll refactor your code some more and move the conditional statements into a separate, non-public function.
And while you’re at it, you’ll also add some weather-related emojis to top off the visual storm you’ve been cooking up!
Refactor Your Code and Add Emojis
You’ll start by moving the conditional statement that you used to choose the display color for each weather description into a separate, non-public function:
# weather.py

# ...

def display_weather_info(weather_data, imperial=False):

    # ...

    city = weather_data["name"]
    weather_id = weather_data["weather"][0]["id"]
    weather_description = weather_data["weather"][0]["description"]
    temperature = weather_data["main"]["temp"]

    style.change_color(style.REVERSE)
    print(f"{city:^{style.PADDING}}", end="")
    style.change_color(style.RESET)

    color = _select_weather_display_params(weather_id)

    style.change_color(color)
    print(
        f"\t{weather_description.capitalize():^{style.PADDING}}",
        end=" ",
    )
    style.change_color(style.RESET)

    print(f"({temperature}°{'F' if imperial else 'C'})")

def _select_weather_display_params(weather_id):
    if weather_id in THUNDERSTORM:
        color = style.RED
    elif weather_id in DRIZZLE:
        color = style.CYAN
    elif weather_id in RAIN:
        color = style.BLUE
    elif weather_id in SNOW:
        color = style.WHITE
    elif weather_id in ATMOSPHERE:
        color = style.BLUE
    elif weather_id in CLEAR:
        color = style.YELLOW
    elif weather_id in CLOUDY:
        color = style.WHITE
    else:  # In case the API adds new weather codes
        color = style.RESET
    return color

# ...
With this change, you moved the conditional statements into _select_weather_display_params() and added a call to that function as a replacement into display_weather_info(). That way, you’re keeping the information more focused and granular, and this change also makes it clear where you can add additional style-related display parameters.
You’ll practice improving the style of your output in this contained manner by adding emojis:
 1# weather.py
 2
 3# ...
 4
 5def display_weather_info(weather_data, imperial=False):
 6
 7    # ...
 8
 9    city = weather_data["name"]
10    weather_id = weather_data["weather"][0]["id"]
11    weather_description = weather_data["weather"][0]["description"]
12    temperature = weather_data["main"]["temp"]
13
14    style.change_color(style.REVERSE)
15    print(f"{city:^{style.PADDING}}", end="")
16    style.change_color(style.RESET)
17
18    weather_symbol, color = _select_weather_display_params(weather_id)
19
20    style.change_color(color)
21    print(f"\t{weather_symbol}", end=" ")
22    print(
23        f"{weather_description.capitalize():^{style.PADDING}}",
24        end=" ",
25    )
26    style.change_color(style.RESET)
27
28    print(f"({temperature}°{'F' if imperial else 'C'})")
29
30def _select_weather_display_params(weather_id):
31    if weather_id in THUNDERSTORM:
32        display_params = ("💥", style.RED)
33    elif weather_id in DRIZZLE:
34        display_params = ("💧", style.CYAN)
35    elif weather_id in RAIN:
36        display_params = ("💦", style.BLUE)
37    elif weather_id in SNOW:
38        display_params = ("⛄️", style.WHITE)
39    elif weather_id in ATMOSPHERE:
40        display_params = ("🌀", style.BLUE)
41    elif weather_id in CLEAR:
42        display_params = ("🔆", style.YELLOW)
43    elif weather_id in CLOUDY:
44        display_params = ("💨", style.WHITE)
45    else:  # In case the API adds new weather codes
46        display_params = ("🌈", style.RESET)
47    return display_params
48
49# ...
With this update, you added an emoji to each weather ID and summed up the two display parameters in a tuple. On line 47, at the end of _select_weather_display_params(), you returned this tuple.
When you called _select_weather_display_params() on line 18, you used tuple unpacking to assign the two values it contains to weather_symbol and color, respectively.
Finally, you added a new call to print() on line 21 that displays weather_symbol, and you moved the tab character from line 23 to line 21. In this way, you added the emoji to your CLI output by including weather_symbol in the output string.
Note: Feel free to change the formatting however you like by adding whitespace, different padding, or additional tab characters. There’s also a whole range of fun weather-related emojis you can choose from, so feel free to pick different ones instead. You can share your favorite weather-related emojis in the comments below!
With this last change set up in your Python weather app, you’ve finished building your CLI tool. You can now head to your favorite search engine, look for some fun city names, and spend the rest of this rainy day finding a place where you can dream of spending your next vacation.
Conclusion
You’ve come a long way and built a slick command-line app that can display essential weather information for thousands of cities around the world in your terminal. To set this up, you used the weather API from OpenWeather and a range of Python standard library modules. As a bonus, you might have started brainstorming an itinerary for a tour of uniquely named cities around the world.
In this tutorial, you learned how to:
- Build a functional weather lookup tool using only Python standard library modules
- Build a Python CLI app using
argparse - Use
configparserto handle API secrets - Make API calls from your Python script
- Create visually attractive CLI output using ANSI escape codes, emojis, f-strings, and Python’s string mini-language
If you’d like to review the source code, you can do so by clicking below:
Get Source Code: Click here to get the source code you’ll use to build your weather app.
In the meantime, it looks like the sun finally came out again! How quickly time passes when you’re having fun. But wait, before you go outside—how did the weather change in all these other places?
Next Steps
If the thunderstorm where you are just won’t die down, and you want to continue working on this project, you can consider the following ideas to take your weather app to the next level:
- Customize the style so that it fits your personal palate.
- Enrich your weather report with more information from the JSON response data.
- Refactor the CLI using Typer.
- Install a Python version above 3.10, and replace the code in
_select_weather_display_params()with amatch…casestatement. - Package the CLI for distribution using Python’s
zipapp, or create a package you can publish to PyPI.
What other ideas can you come up with to extend this project? Be creative and have fun!