Creating a simple graphical user interface (GUI) that works across multiple platforms can be complicated. But it doesn’t have to be that way. You can use Python and the PySimpleGUI package to create nice-looking user interfaces that you and your users will enjoy! PySimpleGUI is a new Python GUI library that has been gaining a lot of interest recently.
In this tutorial, you’ll learn how to:
- Install the PySimpleGUI package
- Create basic user interface elements with PySimpleGUI
- Create applications, such as a PySimpleGUI image viewer
- Integrate PySimpleGUI with Matplotlib
- Use computer vision in PySimpleGUI
- Package your PySimpleGUI application for Windows
Now it’s time to get started!
Free Bonus: Click here to get our free Python Cheat Sheet that shows you the basics of Python 3, like working with data types, dictionaries, lists, and Python functions.
Getting Started With PySimpleGUI
PySimpleGUI was launched in 2018, so it’s a relatively new package compared with the likes of wxPython or PyQt.
PySimpleGUI has four ports:
PySimpleGUI wraps portions of each of these other packages and makes them easier to use. However, each of the ports has to be installed separately.
PySimpleGUI wraps the entirety of Tkinter, which comes with Python. PySimpleGUI has wrapped most of PySide2, but only a small portion of wxPython. When you install PySimpleGUI, you get the Tkinter variant by default. For more information about Tkinter, check out Python GUI Programming With Tkinter.
Depending on which variant of PySimpleGUI you use, applications that you create with PySimpleGUI may not look native to their platform. But don’t let this stop you from giving PySimpleGUI a try. PySimpleGUI is still quite powerful and can get most things done with a little work.
Installing PySimpleGUI
Installing PySimpleGUI is easy if you use pip. For the purposes of this tutorial, you’ll learn how to install the regular PySimpleGUI port, which is the Tkinter variant.
Here’s how to do it:
$ python -m pip install pysimplegui
This will install PySimpleGUI to whatever your system Python is set to. You can also install PySimpleGUI to a Python virtual environment. If you’re unfamiliar with Python virtual environments, then you should read Python Virtual Environments: A Primer.
Note: Since June 2024, PySimpleGUI is licensed under a commercial model. See PySimpleGUI.com for more information.
If you prefer to try the PyQt variant, then you can use pip install PySimpleGUIQt instead. Now that you have PySimpleGUI installed, it’s time to find out how to use it!
Creating Basic UI Elements in PySimpleGUI
If you’ve ever used a GUI toolkit before, then you may have heard the term widgets. A widget is a generic term used to describe the elements that make up the user interface (UI), such as buttons, labels, windows, and more. In PySimpleGUI, widgets are referred to as elements, which you may sometimes see capitalized elsewhere as Elements.
One of the basic building blocks of PySimpleGUI is the Window(). To create a Window(), you can do the following:
# hello_world.py

import PySimpleGUI as sg

sg.Window(title="Hello World", layout=[[]], margins=(100, 50)).read()
Window() takes lots of different arguments—too many to be listed here. However, for this example you can give the Window() a title and a layout and set the margins, which is how big the UI window will be in pixels.
read() returns any events that are triggered in the Window() as a string as well as a values dictionary. You’ll learn more about these in later sections of this tutorial.
When you run this code, you should see something like this:
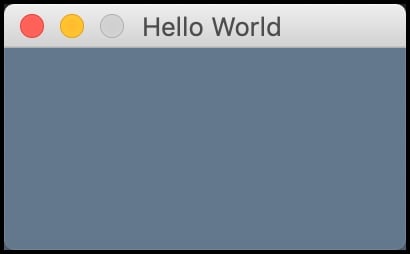
This example doesn’t really do much of anything other than possibly displaying a message to the user.
Normally, you would have other elements besides a Window() in your application, so let’s add some text and a button to the mix.
Create a new file named hello_psg.py and add this code:
# hello_psg.py

import PySimpleGUI as sg

layout = [[sg.Text("Hello from PySimpleGUI")], [sg.Button("OK")]]

# Create the window
window = sg.Window("Demo", layout)

# Create an event loop
while True:
    event, values = window.read()
    # End program if user closes window or
    # presses the OK button
    if event == "OK" or event == sg.WIN_CLOSED:
        break

window.close()
Most GUI toolkits allow you to lay out the elements using absolute positioning or by allowing the GUI to lay them out dynamically. For example, wxPython uses Sizers to lay out elements dynamically. If you’d like to learn more about wxPython, then check out How to Build a Python GUI Application With wxPython.
PySimpleGUI uses nested Python lists to lay out its elements. In this case, you add a Text() element and a Button() element. Then you create the window and pass in your custom layout.
The last block of code is the event loop. A graphical user interface needs to run inside a loop and wait for the user to do something. For example, the user might need to press a button in your UI or type something with their keyboard. When they do that, those events are processed by the event loop.
When you use PySimpleGUI, you make an event loop by creating an infinite while loop that reads events from the window object. If the user presses the OK button or the Exit button, then you want the program to end. To accomplish that, you break out of the loop and close() the window.
The code above creates an application that looks like this:
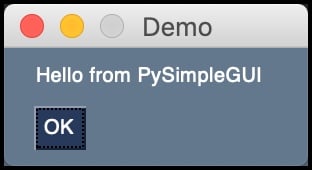
Now you’re ready to create an actual application!
Creating Simple Applications
You can create a large variety of different cross-platform GUIs using PySimpleGUI. The demos that are included with the package are extensive. You can create anything from desktop widgets to full-blown user interfaces.
In the next few sections, you’ll see a few different ways to use PySimpleGUI. However, there’s a lot more that you can do beyond what can be covered in a single tutorial. If you want more detail, be sure to check out the other demos that are included with PySimpleGUI.
Creating a PySimpleGUI Image Viewer
One of the demos on PySimpleGUI’s GitHub page is an image viewer. Being able to write your own custom image viewer with Python is fun. You can use this code to view your own photos or incorporate it to view photos that you download or read from a database.
To keep things simple, you’ll use PySimpleGUI’s built-in Image() element for viewing images. Unfortunately, the Image() element can only display PNG and GIF formats in the regular version of PySimpleGUI.
If you’d like to be able to open other image file types, then you can download Pillow, which supports TIFF, JPG, and BMP formats. Check out the PySimpleGUI demo folder on GitHub for an example that shows how to do this.
On the other hand, if you install the PySimpleGUIQt port, then you’ll find that Qt supports more image formats out of the box than Tkinter.
Here’s a mock-up of what the image viewer should look like at the end:
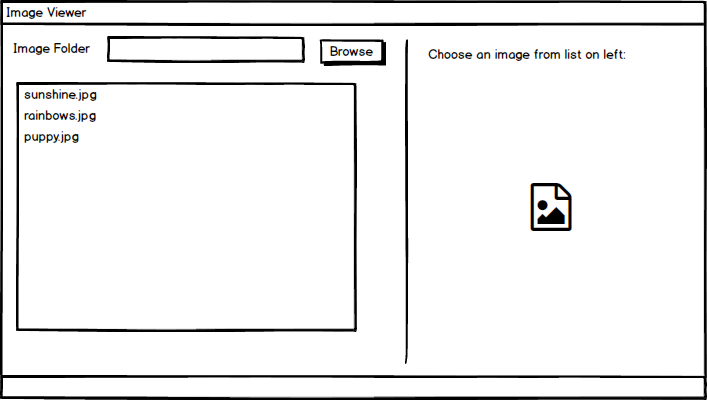
There will be a lot of code for this example, but don’t worry. You’ll go over it in smaller chunks afterward.
You can create a file named img_viewer.py in your Python editor of choice. Then add the following code:
 1# img_viewer.py
 2
 3import PySimpleGUI as sg
 4import os.path
 5
 6# First the window layout in 2 columns
 7
 8file_list_column = [
 9    [
10        sg.Text("Image Folder"),
11        sg.In(size=(25, 1), enable_events=True, key="-FOLDER-"),
12        sg.FolderBrowse(),
13    ],
14    [
15        sg.Listbox(
16            values=[], enable_events=True, size=(40, 20), key="-FILE LIST-"
17        )
18    ],
19]
20
21# For now will only show the name of the file that was chosen
22image_viewer_column = [
23    [sg.Text("Choose an image from list on left:")],
24    [sg.Text(size=(40, 1), key="-TOUT-")],
25    [sg.Image(key="-IMAGE-")],
26]
27
28# ----- Full layout -----
29layout = [
30    [
31        sg.Column(file_list_column),
32        sg.VSeperator(),
33        sg.Column(image_viewer_column),
34    ]
35]
36
37window = sg.Window("Image Viewer", layout)
38
39# Run the Event Loop
40while True:
41    event, values = window.read()
42    if event == "Exit" or event == sg.WIN_CLOSED:
43        break
44    # Folder name was filled in, make a list of files in the folder
45    if event == "-FOLDER-":
46        folder = values["-FOLDER-"]
47        try:
48            # Get list of files in folder
49            file_list = os.listdir(folder)
50        except:
51            file_list = []
52
53        fnames = [
54            f
55            for f in file_list
56            if os.path.isfile(os.path.join(folder, f))
57            and f.lower().endswith((".png", ".gif"))
58        ]
59        window["-FILE LIST-"].update(fnames)
60    elif event == "-FILE LIST-":  # A file was chosen from the listbox
61        try:
62            filename = os.path.join(
63                values["-FOLDER-"], values["-FILE LIST-"][0]
64            )
65            window["-TOUT-"].update(filename)
66            window["-IMAGE-"].update(filename=filename)
67
68        except:
69            pass
70
71window.close()
Phew! That’s quite a few lines of code! Let’s go over it piece by piece.
Here are the first few lines:
 1# img_viewer.py
 2
 3import PySimpleGUI as sg
 4import os.path
 5
 6# First the window layout in 2 columns
 7
 8file_list_column = [
 9    [
10        sg.Text("Image Folder"),
11        sg.In(size=(25, 1), enable_events=True, key="-FOLDER-"),
12        sg.FolderBrowse(),
13    ],
14    [
15        sg.Listbox(
16            values=[], enable_events=True, size=(40, 20), key="-FILE LIST-"
17        )
18    ],
19]
Here, on lines 3 and 4, you import PySimpleGUI and Python’s os module. Then, on lines 8 through 19, you create a nested list of elements that represent a vertical column of the user interface. This will create a Browse button that you’ll use to find a folder that has images in it.
The key parameter is important. This is what you use to identify a specific element in your GUI. For the In() input text control, you give it an identity of "-FOLDER-". You’ll use this later to access the contents of the element. You can turn events on or off for each element via the enable_events parameter.
The Listbox() element will display a list of paths to the images that you can then choose from to display. You can prefill the Listbox() with values by passing in a list of strings.
When you first load up your user interface, you want the Listbox() to be empty, so you pass it an empty list. You turn on events for this element, set its size, and give it a unique identifier like you did with the input element.
Now you can look at the right-hand column of elements:
21# For now will only show the name of the file that was chosen
22image_viewer_column = [
23    [sg.Text("Choose an image from list on left:")],
24    [sg.Text(size=(40, 1), key="-TOUT-")],
25    [sg.Image(key="-IMAGE-")],
26]
The list of lists on lines 22 through 26 creates three elements. The first element tells the user that they should choose an image to display. The second element displays the name of the selected file. The third displays the Image().
Note that the Image() element also has a key set so you can easily refer back to the element later. For more information on the Image() element, check out the documentation.
The next piece of code defines your layout:
28# ----- Full layout -----
29layout = [
30    [
31        sg.Column(file_list_column),
32        sg.VSeperator(),
33        sg.Column(image_viewer_column),
34    ]
35]
The last list, on lines 29 to 35, contains the code that controls how the elements are laid out on the screen. This code contains two Column() elements with a VSeperator() between them. VSeperator() is an alias for VerticalSeparator(). You can learn more about how Column() and VSeperator() work by reading their respective documentation pages.
To add the layout to your window, you can do this:
37window = sg.Window("Image Viewer", layout)
Now that you have the user interface figured out, you can look at the event loop code. Here’s the first piece:
39while True:
40    event, values = window.read()
41    if event == "Exit" or event == sg.WIN_CLOSED:
42        break
The event loop contains the logic of your program. Here, you extract the events and values from the window. The event will be the key string of whichever element the user interacts with. The values variable contains a Python dictionary that maps the element key to a value. For example, if the user picks a folder, then "-FOLDER-" will map to the folder path.
The conditional statements are used to control what happens. If the event equals "Exit" or the user closes the window, then you break out of the loop.
Now you can take a look at the first part of the next conditional statement in the loop:
44# Folder name was filled in, make a list of files in the folder
45if event == "-FOLDER-":
46    folder = values["-FOLDER-"]
47    try:
48        # Get list of files in folder
49        file_list = os.listdir(folder)
50    except:
51        file_list = []
52
53    fnames = [
54        f
55        for f in file_list
56        if os.path.isfile(os.path.join(folder, f))
57        and f.lower().endswith((".png", ".gif"))
58    ]
59    window["-FILE LIST-"].update(fnames)
This time you check the event against the "-FOLDER-" key, which refers to the In() element you created earlier. If the event exists, then you know the user has chosen a folder, and you use os.listdir() to get a file listing. Then you filter that list down to only the files with the extension ".png" or ".gif".
Note: As mentioned earlier, you can avoid having to narrow down your image file types by using Pillow or PySimpleGUIQt instead.
Now you can take a look at the next part of the conditional statement:
60elif event == "-FILE LIST-":  # A file was chosen from the listbox
61    try:
62        filename = os.path.join(
63            values["-FOLDER-"], values["-FILE LIST-"][0]
64        )
65        window["-TOUT-"].update(filename)
66        window["-IMAGE-"].update(filename=filename)
67    except:
68        pass
If the event equals "-FILE LIST-", then you know the user has chosen a file in the Listbox(), and you want to update the Image() element as well as the Text() element that shows the selected filename on the right.
The last bit of code is how you end the program:
71window.close()
When the user presses the Exit button, the application must close. To do that, you can use window.close().
You can technically leave this line off your code and Python will still end the program, but it’s always a good idea to clean up after yourself. Also, if you’re using the web port of PySimpleGUI and you don’t close the window properly, then you’ll end up leaving a port open.
Now run the code, and you should see an interface like this:
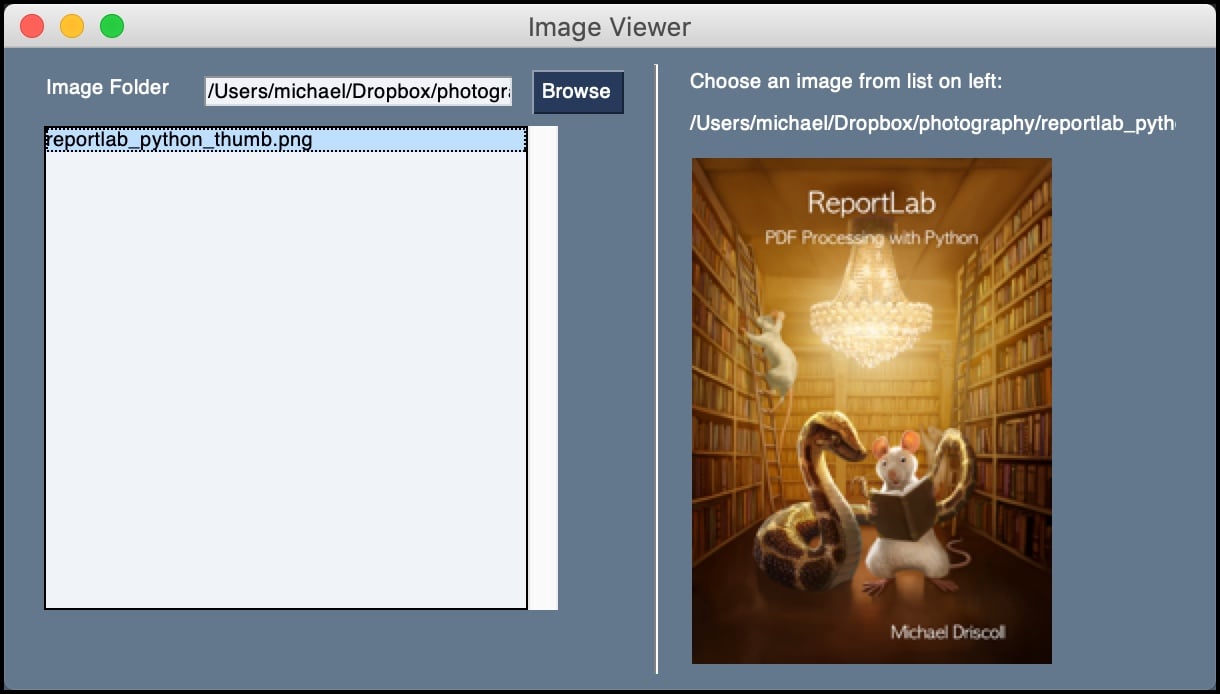
You can use the Browse button to find a folder on your computer with images in it so that you can try this code out. Or you can copy and paste a path to a file into the Text() element.
Once you’re done viewing your images, you’re ready to learn how to use Matplotlib with PySimpleGUI.
Integrating Matplotlib With PySimpleGUI
Creating graphs is a great way to share information with your colleagues. One of the most popular graphing packages for Python is Matplotlib. Matplotlib can create all kinds of different graphs. If you’d like to know more about it, check out Python Plotting With Matplotlib (Guide).
Matplotlib can be integrated with PySimpleGUI, so you can add graphs to your GUI fairly easily if you already know how to use Matplotlib.
If you don’t have Matplotlib installed, then you can do so using pip:
$ python -m pip install matplotlib
For this example, you use one of PySimpleGUI’s demos. Matplotlib uses NumPy, so you’ll want to install it as well:
$ python -m pip install numpy
Now that you have all the pieces you need to write the code, you can create a new file and name it psg_matplotlib.py.
The demo code is a little long, so you add the code in pieces starting with this:
import numpy as np
from matplotlib.backends.backend_tkagg import FigureCanvasTkAgg
import PySimpleGUI as sg
import matplotlib
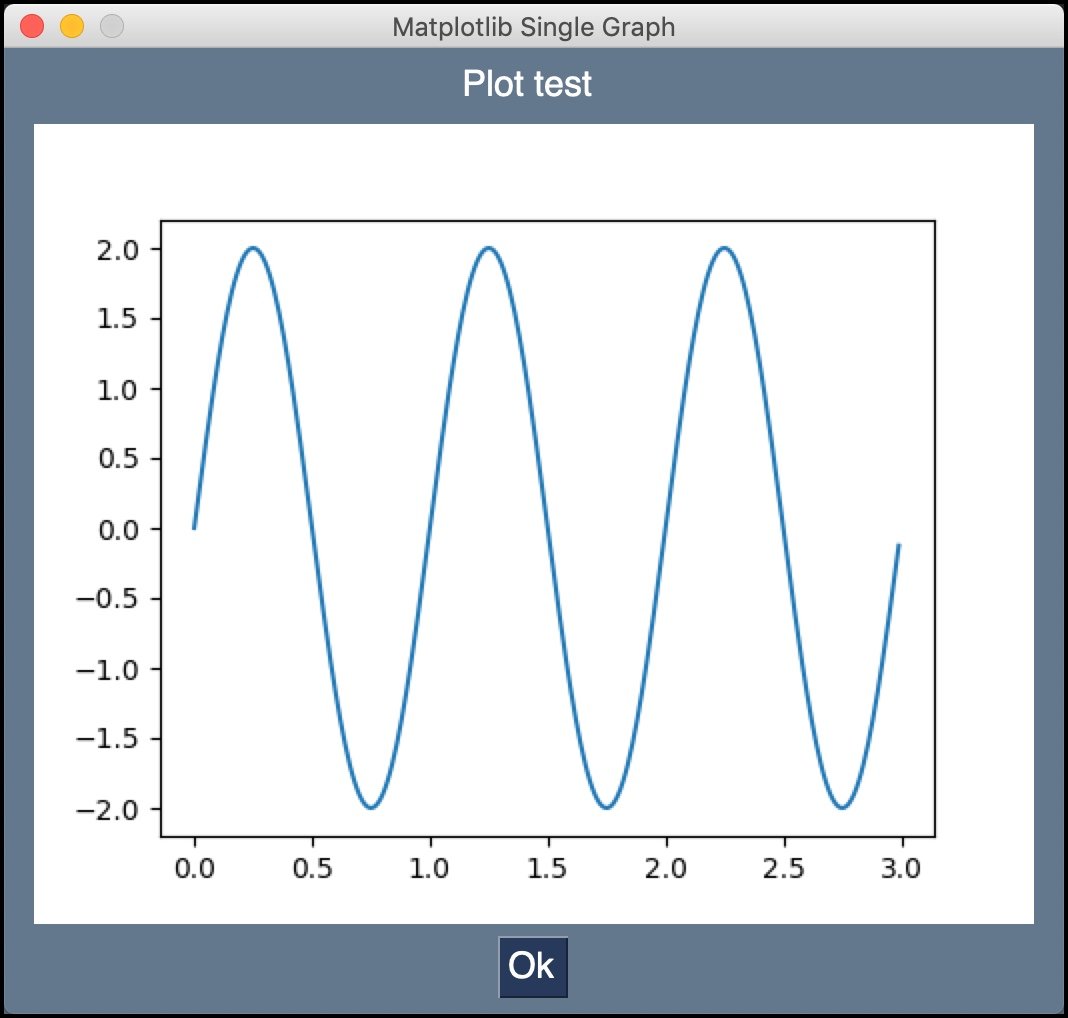
fig = matplotlib.figure.Figure(figsize=(5, 4), dpi=100)
t = np.arange(0, 3, .01)
fig.add_subplot(111).plot(t, 2 * np.sin(2 * np.pi * t))
These are the imports that you’ll need to make your code work. This code also sets up the Matplotlib Figure() and adds a plot using add_subplot(). For more details, you may want to refer to the documentation. The PySimpleGUIQt port doesn’t work in the same way currently, but that’s being worked on for a future release.
In both PySimpleGUI and Tkinter, you use the Canvas() element for drawing. You can read more about this element in the documentation.
Now you can create a helper function to draw the figure on PySimpleGUI’s Canvas(). A helper function is repetitive code that you don’t want to write multiple times. Take a look:
matplotlib.use("TkAgg")

def draw_figure(canvas, figure):
    figure_canvas_agg = FigureCanvasTkAgg(figure, canvas)
    figure_canvas_agg.draw()
    figure_canvas_agg.get_tk_widget().pack(side="top", fill="both", expand=1)
    return figure_canvas_agg
You’ll use figure_canvas_agg.draw() to draw the plots to PySimpleGUI’s Canvas() element.
To use PySimpleGUI’s Canvas(), you need to pass it into FigureCanvasTkAgg() along with the Matplotlib figure object. FigureCanvasTkAgg() comes from Matplotlib and is used by Tkinter to embed the plots in PySimpleGUI. This would work differently if you were using PySimpleGUIQt.
The last step is to write the user interface with PySimpleGUI:
# Define the window layout
layout = [
    [sg.Text("Plot test")],
    [sg.Canvas(key="-CANVAS-")],
    [sg.Button("Ok")],
]

# Create the form and show it without the plot
window = sg.Window(
    "Matplotlib Single Graph",
    layout,
    location=(0, 0),
    finalize=True,
    element_justification="center",
    font="Helvetica 18",
)

# Add the plot to the window
draw_figure(window["-CANVAS-"].TKCanvas, fig)

event, values = window.read()

window.close()
To create the user interface, all you need is a Text() element, a Canvas() element, and a Button() element. Then you add all of those to a Window() and call your draw_figure() helper function to draw the plot.
You don’t need the event loop here because you won’t be interacting with the elements in this user interface.
Here’s what the graph will look like:
There are other Matplotlib demos included with PySimpleGUI that you should check out.
Now you can learn how to use OpenCV with PySimpleGUI.
Integrating OpenCV With PySimpleGUI
Computer vision is a hot topic right now. Python allows you get into computer vision by using the opencv-python package, which is a wrapper around the popular OpenCV application. If you’re interested in learning more about computer vision, then check out Face Recognition with Python, in Under 25 Lines of Code.
PySimpleGUI features straightforward integration with the OpenCV library. However, you’ll first need to install OpenCV using pip:
$ python -m pip install opencv-python
Now that you have OpenCV installed, you can write a fun application!
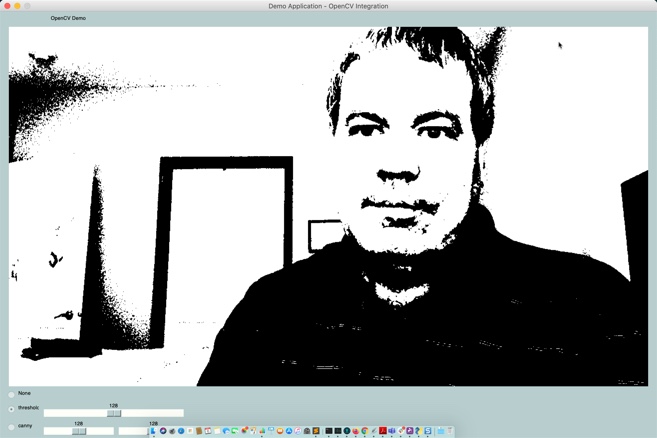
You’ll look at another PySimpleGUI demo that uses OpenCV and your computer’s webcam. This application will let you apply some common filters to your video in real time.
The code for this example is long, but no need to worry. It’ll be explained in smaller chunks afterwards. Go ahead and create a file named psg_opencv.py and add the following code:
  1import PySimpleGUI as sg
  2import cv2
  3import numpy as np
  4
  5def main():
  6    sg.theme("LightGreen")
  7
  8    # Define the window layout
  9    layout = [
 10        [sg.Text("OpenCV Demo", size=(60, 1), justification="center")],
 11        [sg.Image(filename="", key="-IMAGE-")],
 12        [sg.Radio("None", "Radio", True, size=(10, 1))],
 13        [
 14            sg.Radio("threshold", "Radio", size=(10, 1), key="-THRESH-"),
 15            sg.Slider(
 16                (0, 255),
 17                128,
 18                1,
 19                orientation="h",
 20                size=(40, 15),
 21                key="-THRESH SLIDER-",
 22            ),
 23        ],
 24        [
 25            sg.Radio("canny", "Radio", size=(10, 1), key="-CANNY-"),
 26            sg.Slider(
 27                (0, 255),
 28                128,
 29                1,
 30                orientation="h",
 31                size=(20, 15),
 32                key="-CANNY SLIDER A-",
 33            ),
 34            sg.Slider(
 35                (0, 255),
 36                128,
 37                1,
 38                orientation="h",
 39                size=(20, 15),
 40                key="-CANNY SLIDER B-",
 41            ),
 42        ],
 43        [
 44            sg.Radio("blur", "Radio", size=(10, 1), key="-BLUR-"),
 45            sg.Slider(
 46                (1, 11),
 47                1,
 48                1,
 49                orientation="h",
 50                size=(40, 15),
 51                key="-BLUR SLIDER-",
 52            ),
 53        ],
 54        [
 55            sg.Radio("hue", "Radio", size=(10, 1), key="-HUE-"),
 56            sg.Slider(
 57                (0, 225),
 58                0,
 59                1,
 60                orientation="h",
 61                size=(40, 15),
 62                key="-HUE SLIDER-",
 63            ),
 64        ],
 65        [
 66            sg.Radio("enhance", "Radio", size=(10, 1), key="-ENHANCE-"),
 67            sg.Slider(
 68                (1, 255),
 69                128,
 70                1,
 71                orientation="h",
 72                size=(40, 15),
 73                key="-ENHANCE SLIDER-",
 74            ),
 75        ],
 76        [sg.Button("Exit", size=(10, 1))],
 77    ]
 78
 79    # Create the window and show it without the plot
 80    window = sg.Window("OpenCV Integration", layout, location=(800, 400))
 81
 82    cap = cv2.VideoCapture(0)
 83
 84    while True:
 85        event, values = window.read(timeout=20)
 86        if event == "Exit" or event == sg.WIN_CLOSED:
 87            break
 88
 89        ret, frame = cap.read()
 90
 91        if values["-THRESH-"]:
 92            frame = cv2.cvtColor(frame, cv2.COLOR_BGR2LAB)[:, :, 0]
 93            frame = cv2.threshold(
 94                frame, values["-THRESH SLIDER-"], 255, cv2.THRESH_BINARY
 95            )[1]
 96        elif values["-CANNY-"]:
 97            frame = cv2.Canny(
 98                frame, values["-CANNY SLIDER A-"], values["-CANNY SLIDER B-"]
 99            )
100        elif values["-BLUR-"]:
101            frame = cv2.GaussianBlur(frame, (21, 21), values["-BLUR SLIDER-"])
102        elif values["-HUE-"]:
103            frame = cv2.cvtColor(frame, cv2.COLOR_BGR2HSV)
104            frame[:, :, 0] += int(values["-HUE SLIDER-"])
105            frame = cv2.cvtColor(frame, cv2.COLOR_HSV2BGR)
106        elif values["-ENHANCE-"]:
107            enh_val = values["-ENHANCE SLIDER-"] / 40
108            clahe = cv2.createCLAHE(clipLimit=enh_val, tileGridSize=(8, 8))
109            lab = cv2.cvtColor(frame, cv2.COLOR_BGR2LAB)
110            lab[:, :, 0] = clahe.apply(lab[:, :, 0])
111            frame = cv2.cvtColor(lab, cv2.COLOR_LAB2BGR)
112
113        imgbytes = cv2.imencode(".png", frame)[1].tobytes()
114        window["-IMAGE-"].update(data=imgbytes)
115
116    window.close()
117
118main()
That is a long piece of code! Let’s go over the example one piece at a time:
 1import PySimpleGUI as sg
 2import cv2
 3import numpy as np
 4
 5def main():
 6    sg.theme("LightGreen")
 7
 8    # Define the window layout
 9    layout = [
10        [sg.Text("OpenCV Demo", size=(60, 1), justification="center")],
11        [sg.Image(filename="", key="-IMAGE-")],
12        [sg.Radio("None", "Radio", True, size=(10, 1))],
13        [
14            sg.Radio("threshold", "Radio", size=(10, 1), key="-THRESH-"),
15            sg.Slider(
16                (0, 255),
17                128,
18                1,
19                orientation="h",
20                size=(40, 15),
21                key="-THRESH SLIDER-",
22            ),
23        ],
Lines 1 through 3 are the imports for the Python libraries that you’ll need. Then you set the theme on line 6.
The next step, starting on line 9, is to create a layout for all the elements in the GUI. The first set of elements includes a Text() element, an Image() element, and a Radio() element. You set the identifier key for the Image element to "-IMAGE-". You also nest a Radio() element and a Slider() element and set their identifier keys to "-THRESH-" and "-THRESH SLIDER-", respectively.
Now you’ll add some more elements to the layout:
24[
25    sg.Radio("canny", "Radio", size=(10, 1), key="-CANNY-"),
26    sg.Slider(
27        (0, 255),
28        128,
29        1,
30        orientation="h",
31        size=(20, 15),
32        key="-CANNY SLIDER A-",
33    ),
34    sg.Slider(
35        (0, 255),
36        128,
37        1,
38        orientation="h",
39        size=(20, 15),
40        key="-CANNY SLIDER B-",
41    ),
42],
On lines 24 through 42, you add another Radio() element and two Slider() elements to control canny edge detection with the user interface. You also set the identifiers appropriately.
Now you’ll add a way to blur images:
43[
44    sg.Radio("blur", "Radio", size=(10, 1), key="-BLUR-"),
45    sg.Slider(
46        (1, 11),
47        1,
48        1,
49        orientation="h",
50        size=(40, 15),
51        key="-BLUR SLIDER-",
52    ),
53],
Here, you only need to add a couple of elements to control image blurring, which is also known as image smoothing. You can read more about this technique in the OpenCV documentation.
You only have two more sets of controls to add. You’ll add the hue controls next:
54[
55    sg.Radio("hue", "Radio", size=(10, 1), key="-HUE-"),
56    sg.Slider(
57        (0, 225),
58        0,
59        1,
60        orientation="h",
61        size=(40, 15),
62        key="-HUE SLIDER-",
63    ),
64],
These elements allow you to convert between different color spaces. Color spaces are outside the scope of this tutorial, but you can read more about them in the Changing Colorspaces tutorial over on the OpenCV website.
The last elements to add are for controlling contrast:
65    [
66        sg.Radio("enhance", "Radio", size=(10, 1), key="-ENHANCE-"),
67        sg.Slider(
68            (1, 255),
69            128,
70            1,
71            orientation="h",
72            size=(40, 15),
73            key="-ENHANCE SLIDER-",
74        ),
75    ],
76    [sg.Button("Exit", size=(10, 1))],
77]
78
79# Create the window and show it without the plot
80window = sg.Window("OpenCV Integration", layout, location=(800, 400))
81
82cap = cv2.VideoCapture(0)
These last few elements will allow you to enhance the video stream’s contrast using the Contrast Limited Adaptive Histogram Equalization algorithm.
This finishes the layout. Then you pass your layout to the Window() so that you can see your UI onscreen.
Finally, you use cv2.VideoCapture(0) to access the webcam on your machine. You may see a pop-up asking you for permission to use your camera. If you do, then you’ll need to grant permission, or else this code won’t work.
Now take a look at the rest of the code:
 84    while True:
 85        event, values = window.read(timeout=20)
 86        if event == "Exit" or event == sg.WIN_CLOSED:
 87            break
 88
 89        ret, frame = cap.read()
 90
 91        if values["-THRESH-"]:
 92            frame = cv2.cvtColor(frame, cv2.COLOR_BGR2LAB)[:, :, 0]
 93            frame = cv2.threshold(
 94                frame, values["-THRESH SLIDER-"], 255, cv2.THRESH_BINARY
 95            )[1]
 96        elif values["-CANNY-"]:
 97            frame = cv2.Canny(
 98                frame, values["-CANNY SLIDER A-"], values["-CANNY SLIDER B-"]
 99            )
100        elif values["-BLUR-"]:
101            frame = cv2.GaussianBlur(frame, (21, 21), values["-BLUR SLIDER-"])
102        elif values["-HUE-"]:
103            frame = cv2.cvtColor(frame, cv2.COLOR_BGR2HSV)
104            frame[:, :, 0] += int(values["-HUE SLIDER-"])
105            frame = cv2.cvtColor(frame, cv2.COLOR_HSV2BGR)
106        elif values["-ENHANCE-"]:
107            enh_val = values["-ENHANCE SLIDER-"] / 40
108            clahe = cv2.createCLAHE(clipLimit=enh_val, tileGridSize=(8, 8))
109            lab = cv2.cvtColor(frame, cv2.COLOR_BGR2LAB)
110            lab[:, :, 0] = clahe.apply(lab[:, :, 0])
111            frame = cv2.cvtColor(lab, cv2.COLOR_LAB2BGR)
112
113        imgbytes = cv2.imencode(".png", frame)[1].tobytes()
114        window["-IMAGE-"].update(data=imgbytes)
115
116    window.close()
117
118main()
This is the event loop for your PySimpleGUI interface. When you change a slider in your UI, PySimpleGUI will grab the event and values and use them to determine which OpenCV function to apply to your webcam stream.
This code is a bit different from the others you’ve seen because it’s encapsulated within a main() function. This type of function is used as the main entry point of the program. To learn more on this topic, check out Defining Main Functions in Python.
Here’s an example of what the GUI will look like:
Now it’s time learn how to create an executable of your application for Windows.
Packaging Your PySimpleGUI Application for Windows
There are many different Python packages that you can use to convert your Python code into an executable for Windows. One of the most popular is PyInstaller.
You can install PyInstaller using pip:
$ python -m pip install pyinstaller
To learn more about how to use PyInstaller, check out Using PyInstaller to Easily Distribute Python Applications.
You’ll use PyInstaller to convert the image viewer application that you created earlier into an executable.
$ pyinstaller img_viewer.py
When you run this command, you’ll see a lot of output similar to the following:
177 INFO: PyInstaller: 3.6
178 INFO: Python: 3.8.2
179 INFO: Platform: Windows-10-10.0.10586-SP0
186 INFO: wrote C:\Users\mike\OneDrive\Documents\image_viewer_psg.spec
192 INFO: UPX is not available.
221 INFO: Extending PYTHONPATH with paths
---- output snipped ----
13476 INFO: Building COLLECT because COLLECT-00.toc is non existent
13479 INFO: Building COLLECT COLLECT-00.toc
25851 INFO: Building COLLECT COLLECT-00.toc completed successfully.
This output is abbreviated since PyInstaller is quite verbose. When it’s done, you’ll have a subfolder named dist in the same folder that contains img_viewer.py. You can go into the dist folder to find img_viewer.exe and try running it.
There will be a lot of other files in the dist folder that the executable uses.
If you prefer to have only a single executable file, then you can rerun the command using the --onefile flag:
$ pyinstaller --onefile img_viewer.py
This will still generate the dist folder, but this time there should be a single executable in it.
Note: Windows Defender may flag your executable as having a virus if you use the --onefile flag. If it does, then you’ll need to add an exclusion to Windows Security to get it to run. This is because Windows executables need to be signed in Windows 10.
When you run the executable, you’ll see a console window appear in addition to your user interface. To remove the console, you can use the --noconsole or the --windowed flag when running PyInstaller.
Conclusion
You learned a lot about the PySimpleGUI package in this tutorial! Above all, you became familiar with the basics of using PySimpleGUI to create applications.
In this tutorial, you learned how to:
- Install the PySimpleGUI package
- Create basic user interface elements with PySimpleGUI
- Create some applications, such as an image viewer, with PySimpleGUI
- Integrate PySimpleGUI with Matplotlib
- Use computer vision in PySimpleGUI
- Package your PySimpleGUI application for Windows
You can use what you learned in this tutorial to create your own interesting and useful applications.
The PySimpleGUI package offers many more example demos that you can use to build your skills and discover how to use all the tools in the library more effectively. Be sure to check them out, and you’ll soon find yourself creating your own cross-platform GUI applications
If you’d like to learn more about PySimpleGUI, then you can check out any of the following resources: