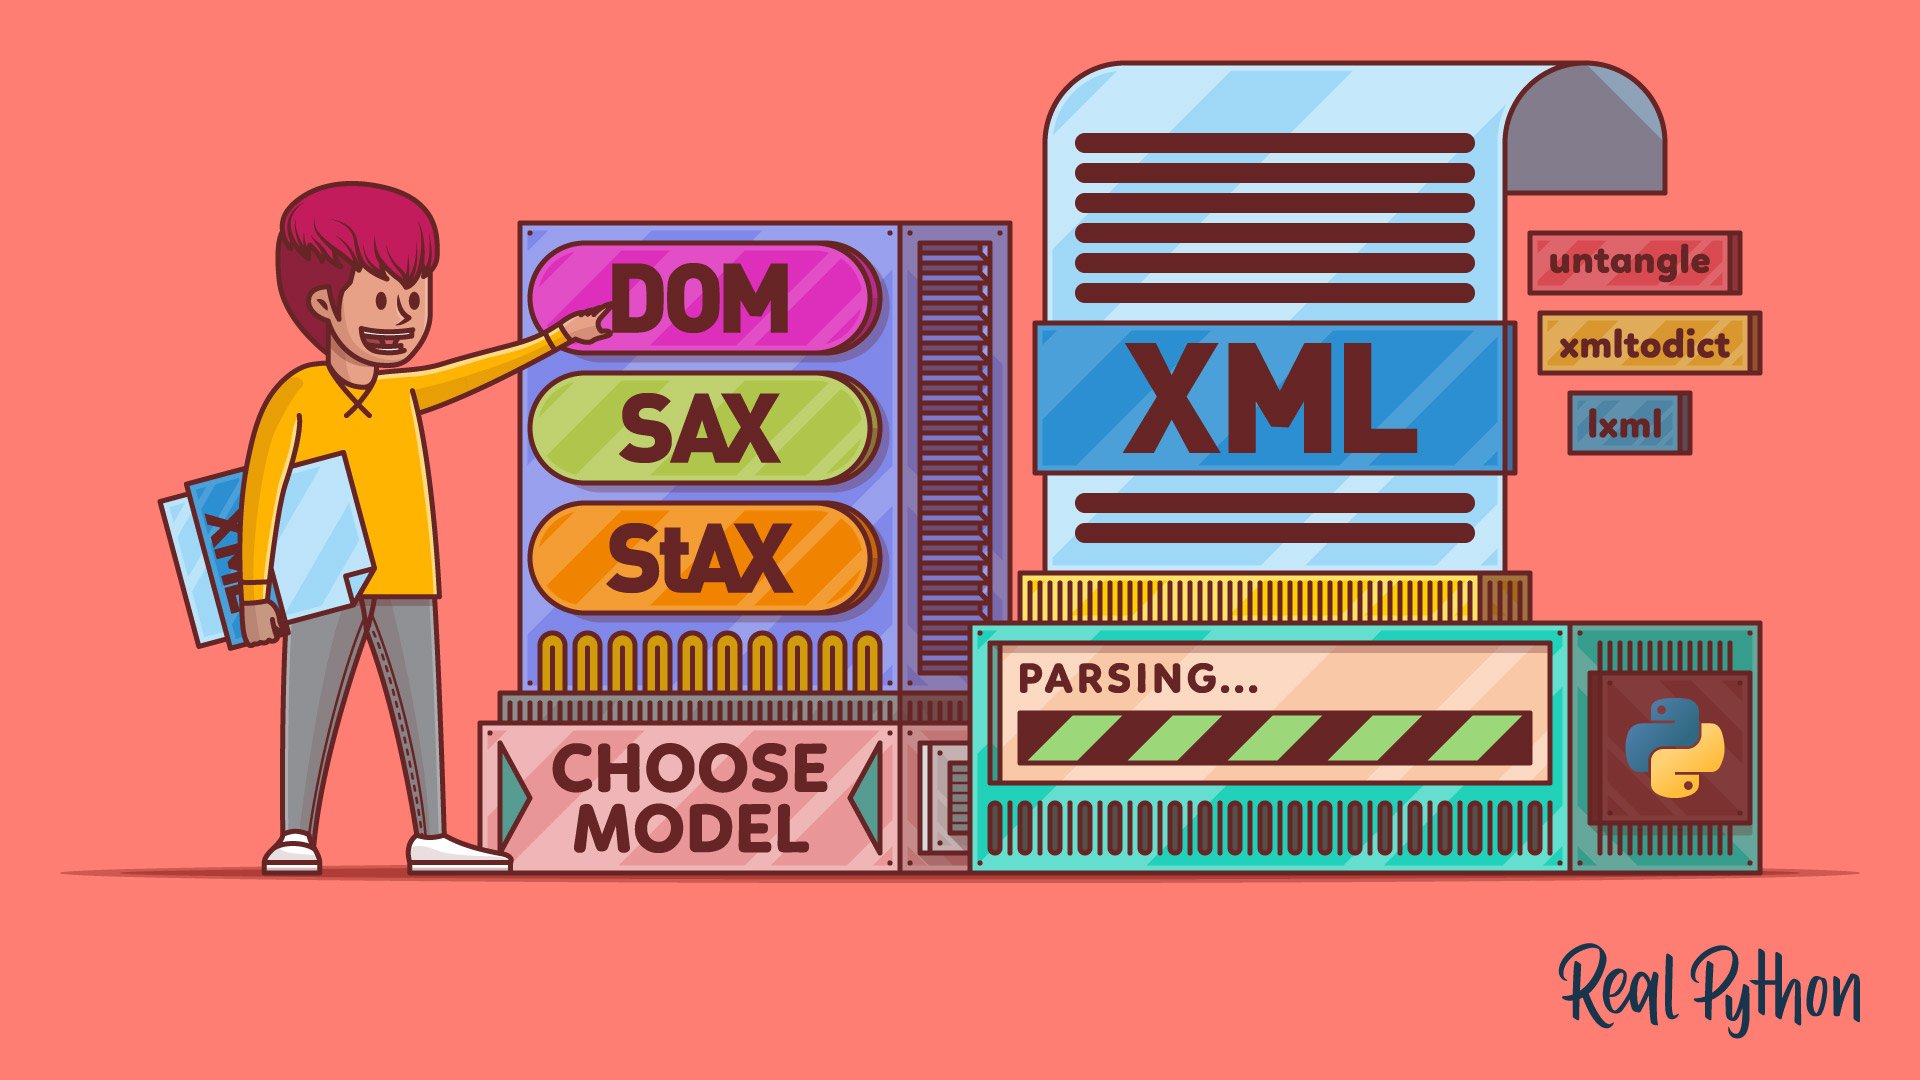
If you’ve ever tried to parse an XML document in Python before, then you know how surprisingly difficult such a task can be. On the one hand, the Zen of Python promises only one obvious way to achieve your goal. At the same time, the standard library follows the batteries included motto by letting you choose from not one but several XML parsers. Luckily, the Python community solved this surplus problem by creating even more XML parsing libraries.
Jokes aside, all XML parsers have their place in a world full of smaller or bigger challenges. It’s worthwhile to familiarize yourself with the available tools.
In this tutorial, you’ll learn how to:
- Choose the right XML parsing model
- Use the XML parsers in the standard library
- Use major XML parsing libraries
- Parse XML documents declaratively using data binding
- Use safe XML parsers to eliminate security vulnerabilities
You can use this tutorial as a roadmap to guide you through the confusing world of XML parsers in Python. By the end of it, you’ll be able to pick the right XML parser for a given problem. To get the most out of this tutorial, you should already be familiar with XML and its building blocks, as well as how to work with files in Python.
Free Bonus: 5 Thoughts On Python Mastery, a free course for Python developers that shows you the roadmap and the mindset you’ll need to take your Python skills to the next level.
Choose the Right XML Parsing Model
It turns out that you can process XML documents using a few language-agnostic strategies. Each demonstrates different memory and speed trade-offs, which can partially justify the wide range of XML parsers available in Python. In the following section, you’ll find out their differences and strengths.
Document Object Model (DOM)
Historically, the first and the most widespread model for parsing XML has been the DOM, or the Document Object Model, originally defined by the World Wide Web Consortium (W3C). You might have already heard about the DOM because web browsers expose a DOM interface through JavaScript to let you manipulate the HTML code of your websites. Both XML and HTML belong to the same family of markup languages, which makes parsing XML with the DOM possible.
The DOM is arguably the most straightforward and versatile model to use. It defines a handful of standard operations for traversing and modifying document elements arranged in a hierarchy of objects. An abstract representation of the entire document tree is stored in memory, giving you random access to the individual elements.
While the DOM tree allows for fast and omnidirectional navigation, building its abstract representation in the first place can be time-consuming. Moreover, the XML gets parsed at once, as a whole, so it has to be reasonably small to fit the available memory. This renders the DOM suitable only for moderately large configuration files rather than multi-gigabyte XML databases.
Use a DOM parser when convenience is more important than processing time and when memory is not an issue. Some typical use cases are when you need to parse a relatively small document or when you only need to do the parsing infrequently.
Simple API for XML (SAX)
To address the shortcomings of the DOM, the Java community came up with a library through a collaborative effort, which then became an alternative model for parsing XML in other languages. There was no formal specification, only organic discussions on a mailing list. The end result was an event-based streaming API that operates sequentially on individual elements rather than the whole tree.
Elements are processed from top to bottom in the same order they appear in the document. The parser triggers user-defined callbacks to handle specific XML nodes as it finds them in the document. This approach is known as “push” parsing because elements are pushed to your functions by the parser.
SAX also lets you discard elements if you’re not interested in them. This means it has a much lower memory footprint than DOM and can deal with arbitrarily large files, which is great for single-pass processing such as indexing, conversion to other formats, and so on.
However, finding or modifying random tree nodes is cumbersome because it usually requires multiple passes on the document and tracking the visited nodes. SAX is also inconvenient for handling deeply nested elements. Finally, the SAX model just allows for read-only parsing.
In short, SAX is cheap in terms of space and time but more difficult to use than DOM in most cases. It works well for parsing very large documents or parsing incoming XML data in real time.
Streaming API for XML (StAX)
Although somewhat less popular in Python, this third approach to parsing XML builds on top of SAX. It extends the idea of streaming but uses a “pull” parsing model instead, which gives you more control. You can think of StAX as an iterator advancing a cursor object through an XML document, where custom handlers call the parser on demand and not the other way around.
Note: It’s possible to combine more than one XML parsing model. For example, you can use SAX or StAX to quickly find an interesting piece of data in the document and then build a DOM representation of only that particular branch in memory.
Using StAX gives you more control over the parsing process and allows for more convenient state management. The events in the stream are only consumed when requested, enabling lazy evaluation. Other than that, its performance should be on par with SAX, depending on the parser implementation.
Learn About XML Parsers in Python’s Standard Library
In this section, you’ll take a look at Python’s built-in XML parsers, which are available to you in nearly every Python distribution. You’re going to compare those parsers against a sample Scalable Vector Graphics (SVG) image, which is an XML-based format. By processing the same document with different parsers, you’ll be able to choose the one that suits you best.
The sample image, which you’re about to save in a local file for reference, depicts a smiley face. It consists of the following XML content:
<?xml version="1.0" encoding="UTF-8" standalone="no"?>
<!DOCTYPE svg PUBLIC "-//W3C//DTD SVG 1.1//EN"
"http://www.w3.org/Graphics/SVG/1.1/DTD/svg11.dtd" [
<!ENTITY custom_entity "Hello">
]>
<svg xmlns="http://www.w3.org/2000/svg"
xmlns:inkscape="http://www.inkscape.org/namespaces/inkscape"
viewBox="-105 -100 210 270" width="210" height="270">
<inkscape:custom x="42" inkscape:z="555">Some value</inkscape:custom>
<defs>
<linearGradient id="skin" x1="0" x2="0" y1="0" y2="1">
<stop offset="0%" stop-color="yellow" stop-opacity="1.0"/>
<stop offset="75%" stop-color="gold" stop-opacity="1.0"/>
<stop offset="100%" stop-color="orange" stop-opacity="1"/>
</linearGradient>
</defs>
<g id="smiley" inkscape:groupmode="layer" inkscape:label="Smiley">
<!-- Head -->
<circle cx="0" cy="0" r="50"
fill="url(#skin)" stroke="orange" stroke-width="2"/>
<!-- Eyes -->
<ellipse cx="-20" cy="-10" rx="6" ry="8" fill="black" stroke="none"/>
<ellipse cx="20" cy="-10" rx="6" ry="8" fill="black" stroke="none"/>
<!-- Mouth -->
<path d="M-20 20 A25 25 0 0 0 20 20"
fill="white" stroke="black" stroke-width="3"/>
</g>
<text x="-40" y="75">&custom_entity; <svg>!</text>
<script>
<![CDATA[
console.log("CDATA disables XML parsing: <svg>")
const smiley = document.getElementById("smiley")
const eyes = document.querySelectorAll("ellipse")
const setRadius = r => e => eyes.forEach(x => x.setAttribute("ry", r))
smiley.addEventListener("mouseenter", setRadius(2))
smiley.addEventListener("mouseleave", setRadius(8))
]]>
</script>
</svg>
It starts with an XML declaration, followed by a Document Type Definition (DTD) and the <svg> root element. The DTD is optional, but it can help validate your document structure if you decide to use an XML validator. The root element specifies the default namespace xmlns as well as a prefixed namespace xmlns:inkscape for editor-specific elements and attributes. The document also contains:
- Nested elements
- Attributes
- Comments
- Character data (
CDATA) - Predefined and custom entities
Go ahead, save the XML in a file named smiley.svg, and open it using a modern web browser, which will run the JavaScript snippet present at the end:
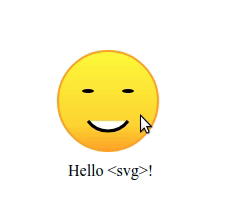
The code adds an interactive component to the image. When you hover the mouse over the smiley face, it blinks its eyes. If you want to edit the smiley face using a convenient graphical user interface (GUI), then you can open the file using a vector graphics editor such as Adobe Illustrator or Inkscape.
Note: Unlike JSON or YAML, some features of XML can be exploited by hackers. The standard XML parsers available in the xml package in Python are insecure and vulnerable to an array of attacks. To safely parse XML documents from an untrusted source, prefer secure alternatives. You can jump to the last section in this tutorial for more details.
It’s worth noting that Python’s standard library defines abstract interfaces for parsing XML documents while letting you supply concrete parser implementation. In practice, you rarely do that because Python bundles a binding for the Expat library, which is a widely used open-source XML parser written in C. All of the following Python modules in the standard library use Expat under the hood by default.
Unfortunately, while the Expat parser can tell you if your document is well-formed, it can’t validate the structure of your documents against an XML Schema Definition (XSD) or a Document Type Definition (DTD). For that, you’ll have to use one of the third-party libraries discussed later.
xml.dom.minidom: Minimal DOM Implementation
Considering that parsing XML documents using the DOM is arguably the most straightforward, you won’t be that surprised to find a DOM parser in the Python standard library. What is surprising, though, is that there are actually two DOM parsers.
The xml.dom package houses two modules to work with DOM in Python:
xml.dom.minidomxml.dom.pulldom
The first is a stripped-down implementation of the DOM interface conforming to a relatively old version of the W3C specification. It provides common objects defined by the DOM API such as Document, Element, and Attr. This module is poorly documented and has quite limited usefulness, as you’re about to find out.
The second module has a slightly misleading name because it defines a streaming pull parser, which can optionally produce a DOM representation of the current node in the document tree. You’ll find more information about the pulldom parser later.
There are two functions in minidom that let you parse XML data from various data sources. One accepts either a filename or a file object, while another one expects a Python string:
>>> from xml.dom.minidom import parse, parseString

>>> # Parse XML from a filename
>>> document = parse("smiley.svg")

>>> # Parse XML from a file object
>>> with open("smiley.svg") as file:
...     document = parse(file)
...

>>> # Parse XML from a Python string
>>> document = parseString("""\
... <svg viewBox="-105 -100 210 270">
...   <!-- More content goes here... -->
... </svg>
... """)
The triple-quoted string helps embed a multiline string literal without using the continuation character (\) at the end of each line. In any case, you’ll end up with a Document instance, which exhibits the familiar DOM interface, letting you traverse the tree.
Apart from that, you’ll be able to access the XML declaration, DTD, and the root element:
>>> document = parse("smiley.svg")

>>> # XML Declaration
>>> document.version, document.encoding, document.standalone
('1.0', 'UTF-8', False)

>>> # Document Type Definition (DTD)
>>> dtd = document.doctype
>>> dtd.entities["custom_entity"].childNodes
[<DOM Text node "'Hello'">]

>>> # Document Root
>>> document.documentElement
<DOM Element: svg at 0x7fc78c62d790>
As you can see, even though the default XML parser in Python can’t validate documents, it still lets you inspect .doctype, the DTD, if it’s present. Note that the XML declaration and DTD are optional. If the XML declaration or a given XML attribute is missing, then the corresponding Python attributes will be None.
To find an element by ID, you must use the Document instance rather than a specific parent Element. The sample SVG image has two nodes with an id attribute, but you can’t find either of them:
>>> document.getElementById("skin") is None
True
>>> document.getElementById("smiley") is None
True
That may be surprising for someone who has only worked with HTML and JavaScript but hasn’t worked with XML before. While HTML defines the semantics for certain elements and attributes such as <body> or id, XML doesn’t attach any meaning to its building blocks. You need to mark an attribute as an ID explicitly using DTD or by calling .setIdAttribute() in Python, for example:
| Definition Style | Implementation |
|---|---|
| DTD | <!ATTLIST linearGradient id ID #IMPLIED> |
| Python | linearGradient.setIdAttribute("id") |
However, using a DTD isn’t enough to fix the problem if your document has a default namespace, which is the case for the sample SVG image. To address this, you can visit all elements recursively in Python, check whether they have the id attribute, and indicate it as their ID in one go:
>>> from xml.dom.minidom import parse, Node

>>> def set_id_attribute(parent, attribute_name="id"):
...     if parent.nodeType == Node.ELEMENT_NODE:
...         if parent.hasAttribute(attribute_name):
...             parent.setIdAttribute(attribute_name)
...     for child in parent.childNodes:
...         set_id_attribute(child, attribute_name)
...
>>> document = parse("smiley.svg")
>>> set_id_attribute(document)
Your custom set_id_attribute() function takes a parent element and an optional name for the identity attribute, which defaults to "id". When you call that function on your SVG document, then all children elements that have an id attribute will become accessible through the DOM API:
>>> document.getElementById("skin")
<DOM Element: linearGradient at 0x7f82247703a0>

>>> document.getElementById("smiley")
<DOM Element: g at 0x7f8224770940>
Now, you’re getting the expected XML element corresponding to the id attribute’s value.
Using an ID allows for finding at most one unique element, but you can also find a collection of similar elements by their tag name. Unlike the .getElementById() method, you can call .getElementsByTagName() on the document or a particular parent element to reduce the search scope:
>>> document.getElementsByTagName("ellipse")
[
    <DOM Element: ellipse at 0x7fa2c944f430>,
    <DOM Element: ellipse at 0x7fa2c944f4c0>
]

>>> root = document.documentElement
>>> root.getElementsByTagName("ellipse")
[
    <DOM Element: ellipse at 0x7fa2c944f430>,
    <DOM Element: ellipse at 0x7fa2c944f4c0>
]
Notice that .getElementsByTagName() always returns a list of elements instead of a single element or None. Forgetting about it when you switch between both methods is a common source of errors.
Unfortunately, elements like <inkscape:custom> that are prefixed with a namespace identifier won’t be included. They must be searched using .getElementsByTagNameNS(), which expects different arguments:
>>> document.getElementsByTagNameNS(
...     "http://www.inkscape.org/namespaces/inkscape",
...     "custom"
... )
...
[<DOM Element: inkscape:custom at 0x7f97e3f2a3a0>]

>>> document.getElementsByTagNameNS("*", "custom")
[<DOM Element: inkscape:custom at 0x7f97e3f2a3a0>]
The first argument must be the XML namespace, which typically has the form of a domain name, while the second argument is the tag name. Notice that the namespace prefix is irrelevant! To search all namespaces, you can provide a wildcard character (*).
Note: To find the namespaces declared in your XML document, you can check out the root element’s attributes. In theory, they could be declared on any element, but the top-level one is where you’d usually find them.
Once you locate the element you’re interested in, you may use it to walk over the tree. However, another jarring quirk with minidom is how it handles whitespace characters between elements:
>>> element = document.getElementById("smiley")

>>> element.parentNode
<DOM Element: svg at 0x7fc78c62d790>

>>> element.firstChild
<DOM Text node "'\n    '">

>>> element.lastChild
<DOM Text node "'\n  '">

>>> element.nextSibling
<DOM Text node "'\n  '">

>>> element.previousSibling
<DOM Text node "'\n  '">
The newline characters and leading indentation are captured as separate tree elements, which is what the specification requires. Some parsers let you ignore these, but not the Python one. What you can do, however, is collapse whitespace in such nodes manually:
>>> def remove_whitespace(node):
...     if node.nodeType == Node.TEXT_NODE:
...         if node.nodeValue.strip() == "":
...             node.nodeValue = ""
...     for child in node.childNodes:
...         remove_whitespace(child)
...
>>> document = parse("smiley.svg")
>>> set_id_attribute(document)
>>> remove_whitespace(document)
>>> document.normalize()
Note that you also have to .normalize() the document to combine adjacent text nodes. Otherwise, you could end up with a bunch of redundant XML elements with just whitespace. Again, recursion is the only way to visit tree elements since you can’t iterate over the document and its elements with a loop. Finally, this should give you the expected result:
>>> element = document.getElementById("smiley")

>>> element.parentNode
<DOM Element: svg at 0x7fc78c62d790>

>>> element.firstChild
<DOM Comment node "' Head '">

>>> element.lastChild
<DOM Element: path at 0x7f8beea0f670>

>>> element.nextSibling
<DOM Element: text at 0x7f8beea0f700>

>>> element.previousSibling
<DOM Element: defs at 0x7f8beea0f160>

>>> element.childNodes
[
    <DOM Comment node "' Head '">,
    <DOM Element: circle at 0x7f8beea0f4c0>,
    <DOM Comment node "' Eyes '">,
    <DOM Element: ellipse at 0x7fa2c944f430>,
    <DOM Element: ellipse at 0x7fa2c944f4c0>,
    <DOM Comment node "' Mouth '">,
    <DOM Element: path at 0x7f8beea0f670>
]
Elements expose a few helpful methods and properties to let you query their details:
>>> element = document.getElementsByTagNameNS("*", "custom")[0]

>>> element.prefix
'inkscape'

>>> element.tagName
'inkscape:custom'

>>> element.attributes
<xml.dom.minidom.NamedNodeMap object at 0x7f6c9d83ba80>

>>> dict(element.attributes.items())
{'x': '42', 'inkscape:z': '555'}

>>> element.hasChildNodes()
True

>>> element.hasAttributes()
True

>>> element.hasAttribute("x")
True

>>> element.getAttribute("x")
'42'

>>> element.getAttributeNode("x")
<xml.dom.minidom.Attr object at 0x7f82244a05f0>

>>> element.getAttribute("missing-attribute")
''
For instance, you can check an element’s namespace, tag name, or attributes. If you ask for a missing attribute, then you’ll get an empty string ('').
Dealing with namespaced attributes isn’t much different. You just have to remember to prefix the attribute name accordingly or provide the domain name:
>>> element.hasAttribute("z")
False

>>> element.hasAttribute("inkscape:z")
True

>>> element.hasAttributeNS(
...     "http://www.inkscape.org/namespaces/inkscape",
...     "z"
... )
...
True

>>> element.hasAttributeNS("*", "z")
False
Strangely enough, the wildcard character (*) doesn’t work here as it did with the .getElementsByTagNameNS() method before.
Since this tutorial is only about XML parsing, you’ll need to check the minidom documentation for methods that modify the DOM tree. They mostly follow the W3C specification.
As you can see, the minidom module isn’t terribly convenient. Its main advantage comes from being part of the standard library, which means you don’t have to install any external dependencies in your project to work with the DOM.
xml.sax: The SAX Interface for Python
To start working with SAX in Python, you can use the same parse() and parseString() convenience functions as before, but from the xml.sax package instead. You also have to provide at least one more required argument, which must be a content handler instance. In the spirit of Java, you provide one by subclassing a specific base class:
from xml.sax import parse
from xml.sax.handler import ContentHandler

class SVGHandler(ContentHandler):
    pass

parse("smiley.svg", SVGHandler())
The content handler receives a stream of events corresponding to elements in your document as it’s being parsed. Running this code won’t do anything useful yet because your handler class is empty. To make it work, you’ll need to overload one or more callback methods from the superclass.
Fire up your favorite editor, type the following code, and save it in a file named svg_handler.py:
# svg_handler.py

from xml.sax.handler import ContentHandler

class SVGHandler(ContentHandler):

    def startElement(self, name, attrs):
        print(f"BEGIN: <{name}>, {attrs.keys()}")

    def endElement(self, name):
        print(f"END: </{name}>")

    def characters(self, content):
        if content.strip() != "":
            print("CONTENT:", repr(content))
This modified content handler prints out a few events onto the standard output. The SAX parser will call these three methods for you in response to finding the start tag, end tag, and some text between them. When you open an interactive session of the Python interpreter, import your content handler and give it a test drive. It should produce the following output:
>>> from xml.sax import parse
>>> from svg_handler import SVGHandler
>>> parse("smiley.svg", SVGHandler())
BEGIN: <svg>, ['xmlns', 'xmlns:inkscape', 'viewBox', 'width', 'height']
BEGIN: <inkscape:custom>, ['x', 'inkscape:z']
CONTENT: 'Some value'
END: </inkscape:custom>
BEGIN: <defs>, []
BEGIN: <linearGradient>, ['id', 'x1', 'x2', 'y1', 'y2']
BEGIN: <stop>, ['offset', 'stop-color', 'stop-opacity']
END: </stop>
⋮
That’s essentially the observer design pattern, which lets you translate XML into another hierarchical format incrementally. Say you wanted to convert that SVG file into a simplified JSON representation. First, you’ll want to store your content handler object in a separate variable to extract information from it later:
>>> from xml.sax import parse
>>> from svg_handler import SVGHandler
>>> handler = SVGHandler()
>>> parse("smiley.svg", handler)
Since the SAX parser emits events without providing any context about the element it’s found, you need to keep track of where you are in the tree. Therefore, it makes sense to push and pop the current element onto a stack, which you can simulate through a regular Python list. You may also define a helper property .current_element that will return the last element placed on the top of the stack:
# svg_handler.py

# ...

class SVGHandler(ContentHandler):

    def __init__(self):
        super().__init__()
        self.element_stack = []

    @property
    def current_element(self):
        return self.element_stack[-1]

    # ...
When the SAX parser finds a new element, you can immediately capture its tag name and attributes while making placeholders for children elements and the value, both of which are optional. For now, you can store every element as a dict object. Replace your existing .startElement() method with a new implementation:
# svg_handler.py

# ...

class SVGHandler(ContentHandler):

    # ...

    def startElement(self, name, attrs):
        self.element_stack.append({
            "name": name,
            "attributes": dict(attrs),
            "children": [],
            "value": ""
        })
The SAX parser gives you attributes as a mapping that you can convert to a plain Python dictionary with a call to the dict() function. The element value is often spread over multiple pieces that you can concatenate using the plus operator (+) or a corresponding augmented assignment statement:
# svg_handler.py

# ...

class SVGHandler(ContentHandler):

    # ...

    def characters(self, content):
        self.current_element["value"] += content
Aggregating text in such a way will ensure that multiline content ends up in the current element. For example, the <script> tag in the sample SVG file contains six lines of JavaScript code, which trigger separate calls to the characters() callback.
Finally, once the parser stumbles on a closing tag, you can pop the current element from the stack and append it to its parent’s children. If there’s only one element left, then it will be your document’s root that you should keep for later. Other than that, you might want to clean the current element by removing keys with empty values:
# svg_handler.py

# ...

class SVGHandler(ContentHandler):

    # ...

    def endElement(self, name):
        clean(self.current_element)
        if len(self.element_stack) > 1:
            child = self.element_stack.pop()
            self.current_element["children"].append(child)

def clean(element):
    element["value"] = element["value"].strip()
    for key in ("attributes", "children", "value"):
        if not element[key]:
            del element[key]
Note that clean() is a function defined outside of the class body. Cleaning must be done at the end since there’s no way of knowing up front how many text pieces to concatenate there might be. You can expand the collapsible section below for a complete content handler’s code.
# svg_handler.py

from xml.sax.handler import ContentHandler

class SVGHandler(ContentHandler):

    def __init__(self):
        super().__init__()
        self.element_stack = []

    @property
    def current_element(self):
        return self.element_stack[-1]

    def startElement(self, name, attrs):
        self.element_stack.append({
            "name": name,
            "attributes": dict(attrs),
            "children": [],
            "value": ""
        })

    def endElement(self, name):
        clean(self.current_element)
        if len(self.element_stack) > 1:
            child = self.element_stack.pop()
            self.current_element["children"].append(child)

    def characters(self, content):
        self.current_element["value"] += content

def clean(element):
    element["value"] = element["value"].strip()
    for key in ("attributes", "children", "value"):
        if not element[key]:
            del element[key]
Now, it’s time to put everything to the test by parsing the XML, extracting the root element from your content handler, and dumping it to a JSON string:
>>> from xml.sax import parse
>>> from svg_handler import SVGHandler
>>> handler = SVGHandler()
>>> parse("smiley.svg", handler)
>>> root = handler.current_element

>>> import json
>>> print(json.dumps(root, indent=4))
{
    "name": "svg",
    "attributes": {
        "xmlns": "http://www.w3.org/2000/svg",
        "xmlns:inkscape": "http://www.inkscape.org/namespaces/inkscape",
        "viewBox": "-105 -100 210 270",
        "width": "210",
        "height": "270"
    },
    "children": [
        {
            "name": "inkscape:custom",
            "attributes": {
                "x": "42",
                "inkscape:z": "555"
            },
            "value": "Some value"
        },
⋮
It’s worth noting that this implementation has no memory gain over DOM because it builds an abstract representation of the whole document just as before. The difference is that you’ve made a custom dictionary representation instead of the standard DOM tree. However, you could imagine writing directly to a file or a database instead of memory while receiving SAX events. That would effectively lift your computer memory limit.
If you want to parse XML namespaces, then you’ll need to create and configure the SAX parser yourself with a bit of boilerplate code and also implement slightly different callbacks:
# svg_handler.py

from xml.sax.handler import ContentHandler

class SVGHandler(ContentHandler):

    def startPrefixMapping(self, prefix, uri):
        print(f"startPrefixMapping: {prefix=}, {uri=}")

    def endPrefixMapping(self, prefix):
        print(f"endPrefixMapping: {prefix=}")

    def startElementNS(self, name, qname, attrs):
        print(f"startElementNS: {name=}")

    def endElementNS(self, name, qname):
        print(f"endElementNS: {name=}")
These callbacks receive additional parameters about the element’s namespace. To make the SAX parser actually trigger those callbacks instead of some of the earlier ones, you must explicitly enable XML namespace support:
>>> from xml.sax import make_parser
>>> from xml.sax.handler import feature_namespaces
>>> from svg_handler import SVGHandler

>>> parser = make_parser()
>>> parser.setFeature(feature_namespaces, True)
>>> parser.setContentHandler(SVGHandler())

>>> parser.parse("smiley.svg")
startPrefixMapping: prefix=None, uri='http://www.w3.org/2000/svg'
startPrefixMapping: prefix='inkscape', uri='http://www.inkscape.org/namespaces/inkscape'
startElementNS: name=('http://www.w3.org/2000/svg', 'svg')
⋮
endElementNS: name=('http://www.w3.org/2000/svg', 'svg')
endPrefixMapping: prefix='inkscape'
endPrefixMapping: prefix=None
Setting this feature turns the element name into a tuple comprised of the namespace’s domain name and the tag name.
The xml.sax package offers a decent event-based XML parser interface modeled after the original Java API. It’s somewhat limited compared to the DOM but should be enough to implement a basic XML streaming push parser without resorting to third-party libraries. With this in mind, there’s a less verbose pull parser available in Python, which you’ll explore next.
xml.dom.pulldom: Streaming Pull Parser
The parsers in the Python standard library often work together. For example, the xml.dom.pulldom module wraps the parser from xml.sax to take advantage of buffering and read the document in chunks. At the same time, it uses the default DOM implementation from xml.dom.minidom for representing document elements. However, those elements are processed one at a time without bearing any relationship until you ask for it explicitly.
Note: The XML namespace support is enabled by default in xml.dom.pulldom.
While the SAX model follows the observer pattern, you can think of StAX as the iterator design pattern, which lets you loop over a flat stream of events. Once again, you can call the familiar parse() or parseString() functions imported from the module to parse the SVG image:
>>> from xml.dom.pulldom import parse
>>> event_stream = parse("smiley.svg")
>>> for event, node in event_stream:
...     print(event, node)
...
START_DOCUMENT <xml.dom.minidom.Document object at 0x7f74f9283e80>
START_ELEMENT <DOM Element: svg at 0x7f74fde18040>
CHARACTERS <DOM Text node "'\n'">
⋮
END_ELEMENT <DOM Element: script at 0x7f74f92b3c10>
CHARACTERS <DOM Text node "'\n'">
END_ELEMENT <DOM Element: svg at 0x7f74fde18040>
It takes only a few lines of code to parse the document. The most striking difference between xml.sax and xml.dom.pulldom is the lack of callbacks since you drive the whole process. You have a lot more freedom in structuring your code, and you don’t need to use classes if you don’t want to.
Notice that the XML nodes pulled from the stream have types defined in xml.dom.minidom. But if you were to check their parents, siblings, and children, then you’d find out they know nothing about each other:
>>> from xml.dom.pulldom import parse, START_ELEMENT
>>> event_stream = parse("smiley.svg")
>>> for event, node in event_stream:
...     if event == START_ELEMENT:
...         print(node.parentNode, node.previousSibling, node.childNodes)
<xml.dom.minidom.Document object at 0x7f90864f6e80> None []
None None []
None None []
None None []
⋮
The relevant attributes are empty. Anyway, the pull parser can help in a hybrid approach to quickly look up some parent element and build a DOM tree only for the branch rooted in it:
from xml.dom.pulldom import parse, START_ELEMENT

def process_group(parent):
    left_eye, right_eye = parent.getElementsByTagName("ellipse")
    # ...

event_stream = parse("smiley.svg")
for event, node in event_stream:
    if event == START_ELEMENT:
        if node.tagName == "g":
            event_stream.expandNode(node)
            process_group(node)
By calling .expandNode() on the event stream, you essentially move the iterator forward and parse XML nodes recursively until finding the matching closing tag of the parent element. The resulting node will have children with properly initialized attributes. Moreover, you’ll be able to use the DOM methods on them.
The pull parser offers an interesting alternative to DOM and SAX by combining the best of both worlds. It’s efficient, flexible, and straightforward to use, leading to more compact and readable code. You could also use it to process multiple XML files at the same time more easily. That said, none of the XML parsers mentioned so far can match the elegance, simplicity, and completeness of the last one to arrive in Python’s standard library.
xml.etree.ElementTree: A Lightweight, Pythonic Alternative
The XML parsers you’ve come to know so far get the job done. However, they don’t fit Python’s philosophy very well, and that’s no accident. While DOM follows the W3C specification and SAX was modeled after a Java API, neither feels particularly Pythonic.
Even worse, both DOM and SAX parsers feel antiquated as some of their code in the CPython interpreter hasn’t changed for more than two decades! At the time of writing this, their implementation is still incomplete and has missing typeshed stubs, which breaks code completion in code editors.
Meanwhile, Python 2.5 brought a fresh perspective on parsing and writing XML documents—the ElementTree API. It’s a lightweight, efficient, elegant, and feature-rich interface that even some third-party libraries build on. To get started with it, you must import the xml.etree.ElementTree module, which is a bit of a mouthful. Therefore, it’s customary to define an alias like this:
import xml.etree.ElementTree as ET
In slightly older code, you may have seen the cElementTree module imported instead. It was an implementation several times faster than the same interface written in C. Today, the regular module uses the fast implementation whenever possible, so you don’t need to bother anymore.
You can use the ElementTree API by employing different parsing strategies:
| Non-incremental | Incremental (Blocking) | Incremental (Non-blocking) | |
|---|---|---|---|
ET.parse() |
✔️ | ||
ET.fromstring() |
✔️ | ||
ET.iterparse() |
✔️ | ||
ET.XMLPullParser |
✔️ |
The non-incremental strategy loads up the entire document into memory in a DOM-like fashion. There are two appropriately named functions in the module that allow for parsing a file or a Python string with XML content:
>>> import xml.etree.ElementTree as ET

>>> # Parse XML from a filename
>>> ET.parse("smiley.svg")
<xml.etree.ElementTree.ElementTree object at 0x7fa4c980a6a0>

>>> # Parse XML from a file object
>>> with open("smiley.svg") as file:
...     ET.parse(file)
...
<xml.etree.ElementTree.ElementTree object at 0x7fa4c96df340>

>>> # Parse XML from a Python string
>>> ET.fromstring("""\
... <svg viewBox="-105 -100 210 270">
...   <!-- More content goes here... -->
... </svg>
... """)
<Element 'svg' at 0x7fa4c987a1d0>
Parsing a file object or a filename with parse() returns an instance of the ET.ElementTree class, which represents the whole element hierarchy. On the other hand, parsing a string with fromstring() will return the specific root ET.Element.
Alternatively, you can read the XML document incrementally with a streaming pull parser, which yields a sequence of events and elements:
>>> for event, element in ET.iterparse("smiley.svg"):
...     print(event, element.tag)
...
end {http://www.inkscape.org/namespaces/inkscape}custom
end {http://www.w3.org/2000/svg}stop
end {http://www.w3.org/2000/svg}stop
end {http://www.w3.org/2000/svg}stop
end {http://www.w3.org/2000/svg}linearGradient
⋮
By default, iterparse() emits only the end events associated with the closing XML tag. However, you can subscribe to other events as well. You can find them with string constants such as "comment":
>>> import xml.etree.ElementTree as ET
>>> for event, element in ET.iterparse("smiley.svg", ["comment"]):
...     print(element.text.strip())
...
Head
Eyes
Mouth
Here’s a list of all the available event types:
start: Start of an elementend: End of an elementcomment: Comment elementpi: Processing instruction, as in XSLstart-ns: Start of a namespaceend-ns: End of a namespace
The downside of iterparse() is that it uses blocking calls to read the next chunk of data, which might be unsuitable for asynchronous code running on a single thread of execution. To alleviate that, you can look into XMLPullParser, which is a little bit more verbose:
import xml.etree.ElementTree as ET

async def receive_data(url):
    """Download chunks of bytes from the URL asynchronously."""
    yield b"<svg "
    yield b"viewBox=\"-105 -100 210 270\""
    yield b"></svg>"

async def parse(url, events=None):
    parser = ET.XMLPullParser(events)
    async for chunk in receive_data(url):
        parser.feed(chunk)
        for event, element in parser.read_events():
            yield event, element
This hypothetical example feeds the parser with chunks of XML that can arrive a few seconds apart. Once there’s enough content, you can iterate over a sequence of events and elements buffered by the parser. This non-blocking incremental parsing strategy allows for a truly concurrent parsing of multiple XML documents on the fly while you download them.
Elements in the tree are mutable, iterable, and indexable sequences. They have a length corresponding to the number of their immediate children:
>>> import xml.etree.ElementTree as ET
>>> tree = ET.parse("smiley.svg")
>>> root = tree.getroot()

>>> # The length of an element equals the number of its children.
>>> len(root)
5

>>> # The square brackets let you access a child by an index.
>>> root[1]
<Element '{http://www.w3.org/2000/svg}defs' at 0x7fe05d2e8860>
>>> root[2]
<Element '{http://www.w3.org/2000/svg}g' at 0x7fa4c9848400>

>>> # Elements are mutable. For example, you can swap their children.
>>> root[2], root[1] = root[1], root[2]

>>> # You can iterate over an element's children.
>>> for child in root:
...     print(child.tag)
...
{http://www.inkscape.org/namespaces/inkscape}custom
{http://www.w3.org/2000/svg}g
{http://www.w3.org/2000/svg}defs
{http://www.w3.org/2000/svg}text
{http://www.w3.org/2000/svg}script
Tag names might be prefixed with an optional namespace enclosed in a pair of curly braces ({}). The default XML namespace appears there, too, when defined. Notice how the swap assignment in the highlighted line made the <g> element come before <defs>. This shows the mutable nature of the sequence.
Here are a few more element attributes and methods that are worth mentioning:
>>> element = root[0]

>>> element.tag
'{http://www.inkscape.org/namespaces/inkscape}custom'

>>> element.text
'Some value'

>>> element.attrib
{'x': '42', '{http://www.inkscape.org/namespaces/inkscape}z': '555'}

>>> element.get("x")
'42'
One of the benefits of this API is how it uses Python’s native data types. Above, it uses a Python dictionary for the element’s attributes. In the previous modules, those were wrapped in less convenient adapters. Unlike the DOM, the ElementTree API doesn’t expose methods or properties for walking over the tree in any direction, but there are a couple of better alternatives.
As you’ve seen before, instances of the Element class implement the sequence protocol, letting you iterate over their direct children with a loop:
>>> for child in root:
...     print(child.tag)
...
{http://www.inkscape.org/namespaces/inkscape}custom
{http://www.w3.org/2000/svg}defs
{http://www.w3.org/2000/svg}g
{http://www.w3.org/2000/svg}text
{http://www.w3.org/2000/svg}script
You get the sequence of the root’s immediate children. To go deeper into nested descendants, however, you’ll have to call the .iter() method on the ancestor element:
>>> for descendant in root.iter():
...     print(descendant.tag)
...
{http://www.w3.org/2000/svg}svg
{http://www.inkscape.org/namespaces/inkscape}custom
{http://www.w3.org/2000/svg}defs
{http://www.w3.org/2000/svg}linearGradient
{http://www.w3.org/2000/svg}stop
{http://www.w3.org/2000/svg}stop
{http://www.w3.org/2000/svg}stop
{http://www.w3.org/2000/svg}g
{http://www.w3.org/2000/svg}circle
{http://www.w3.org/2000/svg}ellipse
{http://www.w3.org/2000/svg}ellipse
{http://www.w3.org/2000/svg}path
{http://www.w3.org/2000/svg}text
{http://www.w3.org/2000/svg}script
The root element has only five children but thirteen descendants in total. It’s also possible to narrow down the descendants by filtering only specific tag names using an optional tag argument:
>>> tag_name = "{http://www.w3.org/2000/svg}ellipse"
>>> for descendant in root.iter(tag_name):
...     print(descendant)
...
<Element '{http://www.w3.org/2000/svg}ellipse' at 0x7f430baa03b0>
<Element '{http://www.w3.org/2000/svg}ellipse' at 0x7f430baa0450>
This time, you only got two <ellipse> elements. Remember to include the XML namespace, such as {http://www.w3.org/2000/svg}, in your tag name—as long as it’s been defined. Otherwise, if you only provide the tag name without the right namespace, you could end up with fewer or more descendant elements than initially anticipated.
Dealing with namespaces is more convenient when using .iterfind(), which accepts an optional mapping of prefixes to domain names. To indicate the default namespace, you can leave the key blank or assign an arbitrary prefix, which must be used in the tag name later:
>>> namespaces = {
...     "": "http://www.w3.org/2000/svg",
...     "custom": "http://www.w3.org/2000/svg"
... }

>>> for descendant in root.iterfind("g", namespaces):
...     print(descendant)
...
<Element '{http://www.w3.org/2000/svg}g' at 0x7f430baa0270>

>>> for descendant in root.iterfind("custom:g", namespaces):
...     print(descendant)
...
<Element '{http://www.w3.org/2000/svg}g' at 0x7f430baa0270>
The namespace mapping lets you refer to the same element with different prefixes. Surprisingly, if you try to find those nested <ellipse> elements like before, then .iterfind() won’t return anything because it expects an XPath expression rather than a simple tag name:
>>> for descendant in root.iterfind("ellipse", namespaces):
...     print(descendant)
...

>>> for descendant in root.iterfind("g/ellipse", namespaces):
...     print(descendant)
...
<Element '{http://www.w3.org/2000/svg}ellipse' at 0x7f430baa03b0>
<Element '{http://www.w3.org/2000/svg}ellipse' at 0x7f430baa0450>
By coincidence, the string "g" happens to be a valid path relative to the current root element, which is why the function returned a non-empty result before. However, to find the ellipses nested one level deeper in the XML hierarchy, you need a more verbose path expression.
ElementTree has limited syntax support for the XPath mini-language, which you can use to query elements in XML, similar to CSS selectors in HTML. There are other methods that accept such an expression:
>>> namespaces = {"": "http://www.w3.org/2000/svg"}

>>> root.iterfind("defs", namespaces)
<generator object prepare_child.<locals>.select at 0x7f430ba6d190>

>>> root.findall("defs", namespaces)
[<Element '{http://www.w3.org/2000/svg}defs' at 0x7f430ba09e00>]

>>> root.find("defs", namespaces)
<Element '{http://www.w3.org/2000/svg}defs' at 0x7f430ba09e00>
While .iterfind() yields matching elements lazily, .findall() returns a list, and .find() returns only the first matching element. Similarly, you can extract text enclosed between the opening and closing tags of elements using .findtext() or get the inner text of the entire document with .itertext():
>>> namespaces = {"i": "http://www.inkscape.org/namespaces/inkscape"}

>>> root.findtext("i:custom", namespaces=namespaces)
'Some value'

>>> for text in root.itertext():
...     if text.strip() != "":
...         print(text.strip())
...
Some value
Hello <svg>!
console.log("CDATA disables XML parsing: <svg>")
⋮
You look for text embedded in a specific XML element first, then everywhere in the whole document. Searching by text is a powerful feature of the ElementTree API. It’s possible to replicate it using other built-in parsers, but at the cost of increased code complexity and less convenience.
The ElementTree API is probably the most intuitive one of them all. It’s Pythonic, efficient, robust, and universal. Unless you have a specific reason to use DOM or SAX, this should be your default choice.
Explore Third-Party XML Parser Libraries
Occasionally, reaching for the XML parsers in the standard library might feel like picking up a sledgehammer to crack a nut. At other times, it’s the opposite, and you wish for a parser that could do much more. For example, you might want to validate XML against a schema or use advanced XPath expressions. In those situations, it’s best to check out the external libraries available on PyPI.
Below, you’ll find a selection of external libraries with varying degrees of complexity and sophistication.
untangle: Convert XML to a Python Object
If you’re looking for a one-liner that could turn your XML document into a Python object, then look no further. While it hasn’t been updated in a few years, the untangle library might soon become your favorite way of parsing XML in Python. There’s only one function to remember, and it accepts a URL, a filename, a file object, or an XML string:
>>> import untangle

>>> # Parse XML from a URL
>>> untangle.parse("http://localhost:8000/smiley.svg")
Element(name = None, attributes = None, cdata = )

>>> # Parse XML from a filename
>>> untangle.parse("smiley.svg")
Element(name = None, attributes = None, cdata = )

>>> # Parse XML from a file object
>>> with open("smiley.svg") as file:
...     untangle.parse(file)
...
Element(name = None, attributes = None, cdata = )

>>> # Parse XML from a Python string
>>> untangle.parse("""\
... <svg viewBox="-105 -100 210 270">
...   <!-- More content goes here... -->
... </svg>
... """)
Element(name = None, attributes = None, cdata = )
In each case, it returns an instance of the Element class. You can use the dot operator to access its children and the square bracket syntax to get XML attributes or one of the child nodes by index. To get the document’s root element, for example, you can access it as if it was the object’s property. To get one of the element’s XML attributes, you may pass its name as a dictionary key:
>>> import untangle
>>> document = untangle.parse("smiley.svg")

>>> document.svg
Element(name = svg, attributes = {'xmlns': ...}, ...)

>>> document.svg["viewBox"]
'-105 -100 210 270'
There are no function or method names to remember. Instead, each parsed object is unique, so you really need to know the underlying XML document’s structure to traverse it with untangle.
To find out what the root element’s name is, call dir() on the document:
>>> dir(document)
['svg']
This reveals the names of the element’s immediate children. Note that untangle redefines the meaning of dir() for its parsed documents. Usually, you call this built-in function to inspect a class or a Python module. The default implementation would return a list of attribute names rather than the child elements of an XML document.
If there’s more than one child with the given tag name, then you can iterate over them with a loop or refer to one by index:
>>> dir(document.svg)
['defs', 'g', 'inkscape_custom', 'script', 'text']

>>> dir(document.svg.defs.linearGradient)
['stop', 'stop', 'stop']

>>> for stop in document.svg.defs.linearGradient.stop:
...     print(stop)
...
Element <stop> with attributes {'offset': ...}, ...
Element <stop> with attributes {'offset': ...}, ...
Element <stop> with attributes {'offset': ...}, ...

>>> document.svg.defs.linearGradient.stop[1]
Element(name = stop, attributes = {'offset': ...}, ...)
You might have noticed that the <inkscape:custom> element was renamed to inkscape_custom. Unfortunately, the library can’t handle XML namespaces well, so if that’s something you need to rely on, then you must look elsewhere.
Because of the dot notation, element names in XML documents must be valid Python identifiers. If they’re not, then untangle will automatically rewrite their names by replacing forbidden characters with an underscore:
>>> dir(untangle.parse("<com:company.web-app></com:company.web-app>"))
['com_company_web_app']
Children’s tag names aren’t the only object properties you can access. Elements have a few predefined object attributes that might be shown by calling vars():
>>> element = document.svg.text

>>> list(vars(element).keys())
['_name', '_attributes', 'children', 'is_root', 'cdata']

>>> element._name
'text'

>>> element._attributes
{'x': '-40', 'y': '75'}

>>> element.children
[]

>>> element.is_root
False

>>> element.cdata
'Hello <svg>!'
Behind the scenes, untangle uses the built-in SAX parser, but because the library is implemented in pure Python and creates lots of heavyweight objects, it has considerably poor performance. While it’s intended for reading tiny documents, you can still combine it with another approach to read multi-gigabyte XML files.
Here’s how. If you head over to Wikipedia archives, you can download one of their compressed XML files. The one at the top should contain a snapshot of the articles’ abstracts:
<feed>
  <doc>
    <title>Wikipedia: Anarchism</title>
    <url>https://en.wikipedia.org/wiki/Anarchism</url>
    <abstract>Anarchism is a political philosophy...</abstract>
    <links>
      <sublink linktype="nav">
        <anchor>Etymology, terminology and definition</anchor>
        <link>https://en.wikipedia.org/wiki/Anarchism#Etymology...</link>
      </sublink>
      <sublink linktype="nav">
        <anchor>History</anchor>
        <link>https://en.wikipedia.org/wiki/Anarchism#History</link>
      </sublink>
      ⋮
    </links>
  </doc>
  ⋮
</feed>
It’s over 6 GB in size after download, which is perfect for this exercise. The idea is to scan the file to find the consecutive opening and closing <doc> tags and then parse the XML fragment between them using untangle for convenience.
The built-in mmap module lets you create a virtual view of the file contents, even when it doesn’t fit the available memory. This gives an impression of working with a huge string of bytes that supports searching and the regular slicing syntax. If you’re interested in how to encapsulate this logic in a Python class and take advantage of a generator for lazy evaluation, then expand the collapsible section below.
Here’s the complete code of the XMLTagStream class:
import mmap
import untangle

class XMLTagStream:
    def __init__(self, path, tag_name, encoding="utf-8"):
        self.file = open(path)
        self.stream = mmap.mmap(
            self.file.fileno(), 0, access=mmap.ACCESS_READ
        )
        self.tag_name = tag_name
        self.encoding = encoding
        self.start_tag = f"<{tag_name}>".encode(encoding)
        self.end_tag = f"</{tag_name}>".encode(encoding)

    def __enter__(self):
        return self

    def __exit__(self, *args, **kwargs):
        self.stream.close()
        self.file.close()

    def __iter__(self):
        end = 0
        while (begin := self.stream.find(self.start_tag, end)) != -1:
            end = self.stream.find(self.end_tag, begin)
            yield self.parse(self.stream[begin: end + len(self.end_tag)])

    def parse(self, chunk):
        document = untangle.parse(chunk.decode(self.encoding))
        return getattr(document, self.tag_name)
It’s a custom context manager, which uses the iterator protocol defined as an inline generator function. The resulting generator object loops over the XML document as if it was a long stream of characters.
Note that the while loop takes advantage of fairly new Python syntax, the walrus operator (:=), to simplify the code. You can use this operator in assignment expressions, where an expression can be evaluated and assigned to a variable.
Without getting into the nitty-gritty details, here’s how you can use this custom class to go through a big XML file quickly while inspecting specific elements more thoroughly with untangle:
>>> with XMLTagStream("abstract.xml", "doc") as stream:
...     for doc in stream:
...         print(doc.title.cdata.center(50, "="))
...         for sublink in doc.links.sublink:
...             print("-", sublink.anchor.cdata)
...         if "q" == input("Press [q] to exit or any key to continue..."):
...             break
...
===============Wikipedia: Anarchism===============
- Etymology, terminology and definition
- History
- Pre-modern era
⋮
Press [q] to exit or any key to continue...
================Wikipedia: Autism=================
- Characteristics
- Social development
- Communication
⋮
Press [q] to exit or any key to continue...
First, you open a file for reading and indicate the tag name that you want to find. Then, you iterate over those elements and receive a parsed fragment of the XML document. It’s almost like looking through a tiny window moving over an infinitely long sheet of paper. That’s a relatively surface-level example that ignores a few details, but it should give you a general idea of how to use such a hybrid parsing strategy.
xmltodict: Convert XML to a Python Dictionary
If you like JSON but you’re not a fan of XML, then check out xmltodict, which tries to bridge the gap between both data formats. As the name implies, the library can parse an XML document and represent it as a Python dictionary, which also happens to be the target data type for JSON documents in Python. This makes conversion between XML and JSON possible.
Note: Dictionaries are made up of key-value pairs, while XML documents are inherently hierarchical, which may lead to some information loss during the conversion. On top of that, XML has attributes, comments, processing instructions, and other ways of defining metadata that aren’t available in dictionaries.
Unlike the rest of the XML parsers so far, this one expects either a Python string or a file-like object open for reading in binary mode:
>>> import xmltodict

>>> xmltodict.parse("""\
... <svg viewBox="-105 -100 210 270">
...   <!-- More content goes here... -->
... </svg>
... """)
OrderedDict([('svg', OrderedDict([('@viewBox', '-105 -100 210 270')]))])

>>> with open("smiley.svg", "rb") as file:
...     xmltodict.parse(file)
...
OrderedDict([('svg', ...)])
By default, the library returns an instance of the OrderedDict collection to retain element order. However, starting from Python 3.6, plain dictionaries also keep the insertion order. If you’d like to work with regular dictionaries instead, then pass dict as the dict_constructor argument to the parse() function:
>>> import xmltodict

>>> with open("smiley.svg", "rb") as file:
...     xmltodict.parse(file, dict_constructor=dict)
...
{'svg': ...}
Now, parse() returns a plain old dictionary with a familiar textual representation.
To avoid name conflicts between XML elements and their attributes, the library automatically prefixes the latter with an @ character. You may also ignore attributes completely by setting the xml_attribs flag appropriately:
>>> import xmltodict

>>> # Rename attributes by default
>>> with open("smiley.svg", "rb") as file:
...     document = xmltodict.parse(file)
...     print([x for x in document["svg"] if x.startswith("@")])
...
['@xmlns', '@xmlns:inkscape', '@viewBox', '@width', '@height']

>>> # Ignore attributes when requested
>>> with open("smiley.svg", "rb") as file:
...     document = xmltodict.parse(file, xml_attribs=False)
...     print([x for x in document["svg"] if x.startswith("@")])
...
[]
Yet another piece of information that gets ignored by default is the XML namespace declaration. These are treated like regular attributes, while the corresponding prefixes become part of the tag name. However, you can expand, rename, or skip some of the namespaces if you want to:
>>> import xmltodict

>>> # Ignore namespaces by default
>>> with open("smiley.svg", "rb") as file:
...     document = xmltodict.parse(file)
...     print(document.keys())
...
odict_keys(['svg'])

>>> # Process namespaces when requested
>>> with open("smiley.svg", "rb") as file:
...     document = xmltodict.parse(file, process_namespaces=True)
...     print(document.keys())
...
odict_keys(['http://www.w3.org/2000/svg:svg'])

>>> # Rename and skip some namespaces
>>> namespaces = {
...     "http://www.w3.org/2000/svg": "svg",
...     "http://www.inkscape.org/namespaces/inkscape": None,
... }
>>> with open("smiley.svg", "rb") as file:
...     document = xmltodict.parse(
...         file, process_namespaces=True, namespaces=namespaces
...     )
...     print(document.keys())
...     print("custom" in document["svg:svg"])
...     print("inkscape:custom" in document["svg:svg"])
...
odict_keys(['svg:svg'])
True
False
In the first example above, tag names don’t include the XML namespace prefix. In the second example, they do because you requested to process them. Finally, in the third example, you collapsed the default namespace to svg while suppressing Inkscape’s namespace with None.
The default string representation of a Python dictionary might not be legible enough. To improve its presentation, you can pretty-print it or convert it to another format such as JSON or YAML:
>>> import xmltodict
>>> with open("smiley.svg", "rb") as file:
...     document = xmltodict.parse(file, dict_constructor=dict)
...

>>> from pprint import pprint as pp
>>> pp(document)
{'svg': {'@height': '270',
         '@viewBox': '-105 -100 210 270',
         '@width': '210',
         '@xmlns': 'http://www.w3.org/2000/svg',
         '@xmlns:inkscape': 'http://www.inkscape.org/namespaces/inkscape',
         'defs': {'linearGradient': {'@id': 'skin',
         ⋮

>>> import json
>>> print(json.dumps(document, indent=4, sort_keys=True))
{
    "svg": {
        "@height": "270",
        "@viewBox": "-105 -100 210 270",
        "@width": "210",
        "@xmlns": "http://www.w3.org/2000/svg",
        "@xmlns:inkscape": "http://www.inkscape.org/namespaces/inkscape",
        "defs": {
            "linearGradient": {
             ⋮

>>> import yaml  # Install first with 'pip install PyYAML'
>>> print(yaml.dump(document))
svg:
  '@height': '270'
  '@viewBox': -105 -100 210 270
  '@width': '210'
  '@xmlns': http://www.w3.org/2000/svg
  '@xmlns:inkscape': http://www.inkscape.org/namespaces/inkscape
  defs:
    linearGradient:
    ⋮
The xmltodict library allows for converting the document the other way around—that is, from a Python dictionary back to an XML string:
>>> import xmltodict

>>> with open("smiley.svg", "rb") as file:
...     document = xmltodict.parse(file, dict_constructor=dict)
...

>>> xmltodict.unparse(document)
'<?xml version="1.0" encoding="utf-8"?>\n<svg...'
The dictionary may come in handy as an intermediate format when converting data from JSON or YAML to XML, should there be such a need.
There are a bunch more features in the xmltodict library, such as streaming, so feel free to explore them on your own. However, this library is a bit dated too. Besides, it’s the next library that should be on your radar if you’re really seeking advanced XML parsing features.
lxml: Use ElementTree on Steroids
If you want the best performance, the broadest spectrum of functionality, and the most familiar interface all wrapped in one package, then install lxml and forget about the rest of the libraries. It’s a Python binding for the C libraries libxml2 and libxslt, which support several standards, including XPath, XML Schema, and XSLT.
The library is compatible with Python’s ElementTree API, which you learned about earlier in this tutorial. That means you can reuse your existing code by replacing only a single import statement:
import lxml.etree as ET
This will give you a great performance boost. On top of that, the lxml library comes with an extensive set of features and provides different ways of using them. For example, it lets you validate your XML documents against several schema languages, one of which is the XML Schema Definition:
>>> import lxml.etree as ET

>>> xml_schema = ET.XMLSchema(
...     ET.fromstring("""\
...         <xsd:schema xmlns:xsd="http://www.w3.org/2001/XMLSchema">
...             <xsd:element name="parent"/>
...             <xsd:complexType name="SomeType">
...                 <xsd:sequence>
...                     <xsd:element name="child" type="xsd:string"/>
...                 </xsd:sequence>
...             </xsd:complexType>
...         </xsd:schema>"""))

>>> valid = ET.fromstring("<parent><child></child></parent>")
>>> invalid = ET.fromstring("<child><parent></parent></child>")

>>> xml_schema.validate(valid)
True

>>> xml_schema.validate(invalid)
False
None of the XML parsers in Python’s standard library have the capability to validate documents. Meanwhile, lxml lets you define an XMLSchema object and run documents through it while remaining largely compatible with the ElementTree API.
Besides the ElementTree API, lxml supports an alternative lxml.objectify interface, which you’ll cover later in the data binding section.
BeautifulSoup: Deal With Malformed XML
You won’t typically use the last library in this comparison for parsing XML since you mostly encounter it web scraping HTML documents. That said, it’s capable of parsing XML just as well. BeautifulSoup comes with a pluggable architecture that lets you choose the underlying parser. The lxml one described earlier is actually recommended by the official documentation and is currently the only XML parser supported by the library.
Depending on the kind of documents you’ll want to parse, the desired efficiency, and feature availability, you can select one of these parsers:
| Document Type | Parser Name | Python Library | Speed |
|---|---|---|---|
| HTML | "html.parser" |
- | Moderate |
| HTML | "html5lib" |
html5lib |
Slow |
| HTML | "lxml" |
lxml |
Fast |
| XML | "lxml-xml" or "xml" |
lxml |
Fast |
Other than speed, there are noticeable differences between the individual parsers. For example, some of them are more forgiving than others when it comes to malformed elements, while others emulate web browsers better.
Fun Fact: The library’s name refers to the tag soup, which describes syntactically or structurally incorrect HTML code.
Assuming you’ve already installed the lxml and beautifulsoup4 libraries into your active virtual environment, you can start parsing XML documents right away. You only need to import BeautifulSoup:
from bs4 import BeautifulSoup

# Parse XML from a file object
with open("smiley.svg") as file:
    soup = BeautifulSoup(file, features="lxml-xml")

# Parse XML from a Python string
soup = BeautifulSoup("""\
<svg viewBox="-105 -100 210 270">
  <!-- More content goes here... -->
</svg>
""", features="lxml-xml")
If you accidentally specified a different parser, say lxml, then the library would add missing HTML tags such as <body> to the parsed document for you. That probably isn’t what you intended in this case, so be careful when specifying the parser name.
BeautifulSoup is a powerful tool for parsing XML documents because it can handle invalid content and it has a rich API for extracting information. Have a look at how it copes with incorrectly nested tags, forbidden characters, and badly placed text:
>>> from bs4 import BeautifulSoup

>>> soup = BeautifulSoup("""\
... <parent>
...     <child>Forbidden < character </parent>
...     </child>
... ignored
... """, features="lxml-xml")

>>> print(soup.prettify())
<?xml version="1.0" encoding="utf-8"?>
<parent>
 <child>
  Forbidden
 </child>
</parent>
A different parser would raise an exception and surrender as soon as it detected something wrong with the document. Here, not only did it ignore the problems, but it also figured out sensible ways to fix some of them. The elements are properly nested now and have no invalid content.
There are way too many methods of locating elements with BeautifulSoup to cover them all here. Usually, you’ll call a variant of .find() or .findall() on the soup element:
>>> from bs4 import BeautifulSoup

>>> with open("smiley.svg") as file:
...     soup = BeautifulSoup(file, features="lxml-xml")
...

>>> soup.find_all("ellipse", limit=1)
[<ellipse cx="-20" cy="-10" fill="black" rx="6" ry="8" stroke="none"/>]

>>> soup.find(x=42)
<inkscape:custom inkscape:z="555" x="42">Some value</inkscape:custom>

>>> soup.find("stop", {"stop-color": "gold"})
<stop offset="75%" stop-color="gold" stop-opacity="1.0"/>

>>> soup.find(text=lambda x: "value" in x).parent
<inkscape:custom inkscape:z="555" x="42">Some value</inkscape:custom>
The limit parameter is similar to the LIMIT clause in MySQL, which lets you decide how many results you want to receive at most. It will return the specified number of results or fewer. That’s no coincidence. You can think of these search methods as being a simple query language with powerful filters.
The search interface is very flexible but is outside the scope of this tutorial. You can check the library’s documentation for more details or read yet another tutorial about web scraping in Python that touches on BeautifulSoup.
Bind XML Data to Python Objects
Say you want to consume a real-time data feed over a low-latency WebSocket connection with messages exchanged in XML format. For the purposes of this presentation, you’re going to use a web browser to broadcast your mouse and keyboard events to the Python server. You’ll build a custom protocol and use data binding to translate XML into native Python objects.
The idea behind data binding is to define a data model declaratively while letting the program figure out how to extract a valuable piece of information from the XML at runtime. If you’ve ever worked with Django models, then this concept should sound familiar.
First, begin by designing your data model. It’s going to consist of two types of events:
KeyboardEventMouseEvent
Each can represent a few specialized subtypes, like a keypress or key release for the keyboard and a click or right-click for the mouse. Here’s a sample XML message produced in response to holding down the Shift+2 key combination:
<KeyboardEvent>
    <Type>keydown</Type>
    <Timestamp>253459.17999999982</Timestamp>
    <Key>
        <Code>Digit2</Code>
        <Unicode>@</Unicode>
    </Key>
    <Modifiers>
        <Alt>false</Alt>
        <Ctrl>false</Ctrl>
        <Shift>true</Shift>
        <Meta>false</Meta>
    </Modifiers>
</KeyboardEvent>
This message contains a specific keyboard event type, a timestamp, the key code and its Unicode, as well as the modifier keys such as Alt, Ctrl, or Shift. The meta key is usually the Win or Cmd key, depending on your keyboard layout.
Similarly, a mouse event could look like this:
<MouseEvent>
    <Type>mousemove</Type>
    <Timestamp>52489.07000000145</Timestamp>
    <Cursor>
        <Delta x="-4" y="8"/>
        <Window x="171" y="480"/>
        <Screen x="586" y="690"/>
    </Cursor>
    <Buttons bitField="0"/>
    <Modifiers>
        <Alt>false</Alt>
        <Ctrl>true</Ctrl>
        <Shift>false</Shift>
        <Meta>false</Meta>
    </Modifiers>
</MouseEvent>
Instead of the key, however, there’s the mouse cursor position and a bit field encoding the mouse buttons pressed during the event. A bit field of zero indicates that no button was pressed.
As soon as a client makes the connection, it will start flooding the server with messages. The protocol won’t consist of any handshakes, heartbeats, graceful shutdowns, topic subscriptions, or control messages. You can code this in JavaScript by registering event handlers and creating a WebSocket object in less than fifty lines of code.
However, implementing the client isn’t the point of this exercise. Since you don’t need to understand it, just expand the collapsible section below to reveal the HTML code with embedded JavaScript and save it in a file named whatever you like.
<!DOCTYPE html>
<html>
<head>
    <meta charset="utf-8">
    <title>Real-Time Data Feed</title>
</head>
<body>
    <script>
        const ws = new WebSocket("ws://localhost:8000")
        ws.onopen = event => {
            ["keydown", "keyup"].forEach(name =>
                window.addEventListener(name, event =>
                    ws.send(`\
<KeyboardEvent>
    <Type>${event.type}</Type>
    <Timestamp>${event.timeStamp}</Timestamp>
    <Key>
        <Code>${event.code}</Code>
        <Unicode>${event.key}</Unicode>
    </Key>
    <Modifiers>
        <Alt>${event.altKey}</Alt>
        <Ctrl>${event.ctrlKey}</Ctrl>
        <Shift>${event.shiftKey}</Shift>
        <Meta>${event.metaKey}</Meta>
    </Modifiers>
</KeyboardEvent>`))
            );
            ["mousedown", "mouseup", "mousemove"].forEach(name =>
                window.addEventListener(name, event =>
                    ws.send(`\
<MouseEvent>
    <Type>${event.type}</Type>
    <Timestamp>${event.timeStamp}</Timestamp>
    <Cursor>
        <Delta x="${event.movementX}" y="${event.movementY}"/>
        <Window x="${event.clientX}" y="${event.clientY}"/>
        <Screen x="${event.screenX}" y="${event.screenY}"/>
    </Cursor>
    <Buttons bitField="${event.buttons}"/>
    <Modifiers>
        <Alt>${event.altKey}</Alt>
        <Ctrl>${event.ctrlKey}</Ctrl>
        <Shift>${event.shiftKey}</Shift>
        <Meta>${event.metaKey}</Meta>
    </Modifiers>
</MouseEvent>`))
            )
        }
    </script>
</body>
</html>
The client connects to a local server listening on port 8000. Once you save the HTML code in a file, you’ll be able to open it with your favorite web browser. But before that, you’ll need to implement the server.
Python doesn’t come with WebSocket support, but you can install the websockets library into your active virtual environment. You’re also going to need lxml later, so it’s a good moment to install both dependencies in one go:
$ python -m pip install websockets lxml
Finally, you can scaffold a minimal asynchronous web server:
# server.py

import asyncio
import websockets

async def handle_connection(websocket, path):
    async for message in websocket:
        print(message)

if __name__ == "__main__":
    future = websockets.serve(handle_connection, "localhost", 8000)
    asyncio.get_event_loop().run_until_complete(future)
    asyncio.get_event_loop().run_forever()
When you start the server and open the saved HTML file in a web browser, you should see XML messages appear in the standard output in response to your mouse moves and key presses. You can open the client in multiple tabs or even multiple browsers simultaneously!
Define Models With XPath Expressions
Right now, your messages arrive in plain string format. It’s not very convenient to work with the messages in this format. Fortunately, you can turn them into compound Python objects with a single line of code using the lxml.objectify module:
# server.py

import asyncio
import websockets
import lxml.objectify

async def handle_connection(websocket, path):
    async for message in websocket:
        try:
            xml = lxml.objectify.fromstring(message)
        except SyntaxError:
            print("Malformed XML message:", repr(message))
        else:
            if xml.tag == "KeyboardEvent":
                if xml.Type == "keyup":
                    print("Key:", xml.Key.Unicode)
            elif xml.tag == "MouseEvent":
                screen = xml.Cursor.Screen
                print("Mouse:", screen.get("x"), screen.get("y"))
            else:
                print("Unrecognized event type")

# ...
As long as the XML parsing is successful, you can inspect the root element’s usual properties, such as the tag name, attributes, inner text, and so on. You’ll be able to use the dot operator to navigate deep into the element tree. In most cases, the library will recognize a suitable Python data type and convert the value for you.
After saving those changes and restarting the server, you’ll need to reload the page in your web browser to make a new WebSocket connection. Here’s a sample output of the modified program:
$ python server.py
Mouse: 820 121
Mouse: 820 122
Mouse: 820 123
Mouse: 820 124
Mouse: 820 125
Key: a
Mouse: 820 125
Mouse: 820 125
Key: a
Key: A
Key: Shift
Mouse: 821 125
Mouse: 821 125
Mouse: 820 123
⋮
Sometimes, XML may contain tag names that aren’t valid Python identifiers, or you might want to adapt the message structure to fit your data model. In such a case, an interesting option would be defining custom model classes with descriptors that declare how to look up information using XPath expressions. That’s the part that starts to resemble Django models or Pydantic schema definitions.
You’re going to use a custom XPath descriptor and an accompanying Model class, which provide reusable properties for your data models. The descriptor expects an XPath expression for element lookup in the received message. The underlying implementation is a bit advanced, so feel free to copy the code from the collapsible section below.
import lxml.objectify

class XPath:
    def __init__(self, expression, /, default=None, multiple=False):
        self.expression = expression
        self.default = default
        self.multiple = multiple

    def __set_name__(self, owner, name):
        self.attribute_name = name
        self.annotation = owner.__annotations__.get(name)

    def __get__(self, instance, owner):
        value = self.extract(instance.xml)
        instance.__dict__[self.attribute_name] = value
        return value

    def extract(self, xml):
        elements = xml.xpath(self.expression)
        if elements:
            if self.multiple:
                if self.annotation:
                    return [self.annotation(x) for x in elements]
                else:
                    return elements
            else:
                first = elements[0]
                if self.annotation:
                    return self.annotation(first)
                else:
                    return first
        else:
            return self.default

class Model:
    """Abstract base class for your models."""
    def __init__(self, data):
        if isinstance(data, str):
            self.xml = lxml.objectify.fromstring(data)
        elif isinstance(data, lxml.objectify.ObjectifiedElement):
            self.xml = data
        else:
            raise TypeError("Unsupported data type:", type(data))
Assuming you already have the desired XPath descriptor and the Model abstract base class in your module, you might use them to define KeyboardEvent and MouseEvent message types along with reusable building blocks to avoid repetition. There are infinite ways to do so, but here’s one example:
# ...

class Event(Model):
    """Base class for event messages with common elements."""
    type_: str = XPath("./Type")
    timestamp: float = XPath("./Timestamp")

class Modifiers(Model):
    alt: bool = XPath("./Alt")
    ctrl: bool = XPath("./Ctrl")
    shift: bool = XPath("./Shift")
    meta: bool = XPath("./Meta")

class KeyboardEvent(Event):
    key: str = XPath("./Key/Code")
    modifiers: Modifiers = XPath("./Modifiers")

class MouseEvent(Event):
    x: int = XPath("./Cursor/Screen/@x")
    y: int = XPath("./Cursor/Screen/@y")
    modifiers: Modifiers = XPath("./Modifiers")
The XPath descriptor allows for lazy evaluation so that elements of the XML messages are looked up only when requested. More specifically, they’re only looked up when you access a property on the event object. Moreover, the results are cached to avoid running the same XPath query more than once. The descriptor also respects type annotations and converts deserialized data to the right Python type automatically.
Using those event objects isn’t much different from the ones auto-generated by lxml.objectify before:
if xml.tag == "KeyboardEvent":
    event = KeyboardEvent(xml)
    if event.type_ == "keyup":
        print("Key:", event.key)
elif xml.tag == "MouseEvent":
    event = MouseEvent(xml)
    print("Mouse:", event.x, event.y)
else:
    print("Unrecognized event type")
There’s an additional step of creating new objects of the specific event type. But other than that, it gives you more flexibility in terms of structuring your model independently of the XML protocol. Additionally, it’s possible to derive new model attributes based on the ones in the received messages and add more methods on top of that.
Generate Models From an XML Schema
Implementing model classes is a tedious and error-prone task. However, as long as your model mirrors the XML messages, you can take advantage of an automated tool to generate the necessary code for you based on XML Schema. The downside of such code is that it’s usually less readable than if written by hand.
One of the oldest third-party modules to allow that was PyXB, which mimics Java’s popular JAXB library. Unfortunately, it was last released several years ago and was targeting legacy Python versions. You can look into a similar yet actively maintained generateDS alternative, which generates data structures from XML Schema.
Let’s say you have this models.xsd schema file describing your KeyboardEvent message:
<xsd:schema xmlns:xsd="http://www.w3.org/2001/XMLSchema">
    <xsd:element name="KeyboardEvent" type="KeyboardEventType"/>
    <xsd:complexType name="KeyboardEventType">
        <xsd:sequence>
            <xsd:element type="xsd:string" name="Type"/>
            <xsd:element type="xsd:float" name="Timestamp"/>
            <xsd:element type="KeyType" name="Key"/>
            <xsd:element type="ModifiersType" name="Modifiers"/>
        </xsd:sequence>
    </xsd:complexType>
    <xsd:complexType name="KeyType">
        <xsd:sequence>
            <xsd:element type="xsd:string" name="Code"/>
            <xsd:element type="xsd:string" name="Unicode"/>
        </xsd:sequence>
    </xsd:complexType>
    <xsd:complexType name="ModifiersType">
        <xsd:sequence>
            <xsd:element type="xsd:string" name="Alt"/>
            <xsd:element type="xsd:string" name="Ctrl"/>
            <xsd:element type="xsd:string" name="Shift"/>
            <xsd:element type="xsd:string" name="Meta"/>
        </xsd:sequence>
    </xsd:complexType>
</xsd:schema>
A schema tells the XML parser what elements to expect, their order, and their level in the tree. It also restricts the allowed values for the XML attributes. Any discrepancies between these declarations and an actual XML document should render it invalid and make the parser reject the document.
Additionally, some tools can leverage this information to produce a piece of code that hides the details of XML parsing from you. After installing the library, you should be able to run the generateDS command in your active virtual environment:
$ generateDS -o models.py models.xsd
It will create a new file named models.py in the same directory with the generated Python source code. You can then import that module and use it to parse the incoming messages:
>>> from models import parseString

>>> event = parseString("""\
... <KeyboardEvent>
...     <Type>keydown</Type>
...     <Timestamp>253459.17999999982</Timestamp>
...     <Key>
...         <Code>Digit2</Code>
...         <Unicode>@</Unicode>
...     </Key>
...     <Modifiers>
...         <Alt>false</Alt>
...         <Ctrl>false</Ctrl>
...         <Shift>true</Shift>
...         <Meta>false</Meta>
...     </Modifiers>
... </KeyboardEvent>""", silence=True)

>>> event.Type, event.Key.Code
('keydown', 'Digit2')
It looks similar to the lxml.objectify example shown earlier. The difference is that using data binding enforces compliance with the schema, whereas lxml.objectify produces objects dynamically no matter if they’re semantically correct.
Defuse the XML Bomb With Secure Parsers
The XML parsers in Python’s standard library are vulnerable to a host of security threats that can lead to denial-of-service (DoS) or data loss, at best. That isn’t their fault, to be fair. They just follow the specification of the XML standard, which is more complicated and powerful than most people know.
Note: Please be advised that you should use the information you’re about to see wisely. You don’t want to wind up being the attacker, exposing yourself to legal consequences, or facing lifetime banishment from using a particular service.
One of the most common attacks is the XML Bomb, also known as the billion laughs attack. The attack exploits entity expansion in DTD to blow up the memory and occupy the CPU for as long as possible. All you need to stop an unprotected web server from receiving new traffic are these few lines of XML code:
import xml.etree.ElementTree as ET
ET.fromstring("""\
<?xml version="1.0"?>
<!DOCTYPE lolz [
 <!ENTITY lol "lol">
 <!ELEMENT lolz (#PCDATA)>
 <!ENTITY lol1 "&lol;&lol;&lol;&lol;&lol;&lol;&lol;&lol;&lol;&lol;">
 <!ENTITY lol2 "&lol1;&lol1;&lol1;&lol1;&lol1;&lol1;&lol1;&lol1;&lol1;&lol1;">
 <!ENTITY lol3 "&lol2;&lol2;&lol2;&lol2;&lol2;&lol2;&lol2;&lol2;&lol2;&lol2;">
 <!ENTITY lol4 "&lol3;&lol3;&lol3;&lol3;&lol3;&lol3;&lol3;&lol3;&lol3;&lol3;">
 <!ENTITY lol5 "&lol4;&lol4;&lol4;&lol4;&lol4;&lol4;&lol4;&lol4;&lol4;&lol4;">
 <!ENTITY lol6 "&lol5;&lol5;&lol5;&lol5;&lol5;&lol5;&lol5;&lol5;&lol5;&lol5;">
 <!ENTITY lol7 "&lol6;&lol6;&lol6;&lol6;&lol6;&lol6;&lol6;&lol6;&lol6;&lol6;">
 <!ENTITY lol8 "&lol7;&lol7;&lol7;&lol7;&lol7;&lol7;&lol7;&lol7;&lol7;&lol7;">
 <!ENTITY lol9 "&lol8;&lol8;&lol8;&lol8;&lol8;&lol8;&lol8;&lol8;&lol8;&lol8;">
]>
<lolz>&lol9;</lolz>""")
A naïve parser will try to resolve the custom entity &lol9; placed in the document root by inspecting the DTD. However, that entity itself refers to another entity several times, which refers to yet another entity, and so forth. When you run the script above, you’ll notice something disturbing about your memory and the processing unit:
Look how the main memory and the swap partition are exhausted in just a matter of seconds while one of the CPUs works at 100% of its capacity. The recording stops abruptly when the system memory becomes full and then resumes after the Python process gets killed.
Another popular type of attack known as XXE takes advantage of general external entities to read local files and make network requests. Nevertheless, starting from Python 3.7.1, this feature has been disabled by default to increase security. If you trust your data, then you can tell the SAX parser to process external entities anyway:
>>> from xml.sax import make_parser
>>> from xml.sax.handler import feature_external_ges

>>> parser = make_parser()
>>> parser.setFeature(feature_external_ges, True)
This parser will be able to read local files on your computer. It may pull usernames on a Unix-like operating system, for example:
>>> from xml.dom.minidom import parseString

>>> xml = """\
... <?xml version="1.0" encoding="UTF-8"?>
... <!DOCTYPE root [
...     <!ENTITY usernames SYSTEM "/etc/passwd">
... ]>
... <root>&usernames;</root>"""

>>> document = parseString(xml, parser)
>>> print(document.documentElement.toxml())
<root>root:x:0:0:root:/root:/bin/bash
daemon:x:1:1:daemon:/usr/sbin:/usr/sbin/nologin
bin:x:2:2:bin:/bin:/usr/sbin/nologin
⋮
realpython:x:1001:1001:Real Python,,,:/home/realpython:/bin/bash
</root>
It’s perfectly feasible to send that data over the network to a remote server!
Now, how can you protect yourself from such attacks? The Python official documentation prominently warns you about the risks of using the built-in XML parsers and recommends switching to an external package in mission-critical applications. While not distributed with Python, defusedxml is a drop-in replacement for all the parsers in the standard library.
The library imposes strict limits and disables a lot of the dangerous XML features. It should stop most of the well-known attacks, including the two just described. To use it, grab the library from PyPI and replace your import statements accordingly:
>>> import defusedxml.ElementTree as ET
>>> ET.parse("bomb.xml")
Traceback (most recent call last):
  ...
    raise EntitiesForbidden(name, value, base, sysid, pubid, notation_name)
defusedxml.common.EntitiesForbidden:
 EntitiesForbidden(name='lol', system_id=None, public_id=None)
That’s it! Forbidden features won’t make it through anymore.
Conclusion
The XML data format is a mature and surprisingly powerful standard that is still in use today, especially in the enterprise setting. Choosing the right XML parser is crucial in finding the sweet spot between performance, security, compliance, and convenience.
This tutorial puts a detailed roadmap in your hand to navigate the confusing maze of XML parsers in Python. You know where to take the shortcuts and how to avoid dead ends, saving you lots of time.
In this tutorial, you learned how to:
- Choose the right XML parsing model
- Use the XML parsers in the standard library
- Use major XML parsing libraries
- Parse XML documents declaratively using data binding
- Use safe XML parsers to eliminate security vulnerabilities
Now, you understand the different strategies for parsing XML documents as well as their strengths and weaknesses. With this knowledge, you’re able to pick the most suitable XML parser for your specific use case and even combine more than one to read multi-gigabyte XML files faster.