The Real Python Community Slack is an English-medium Python community with members located worldwide. It’s a welcoming group in which you’re free to discuss any questions you may have, celebrate your progress, or hang out with the community at the virtual watercooler.
This guide is for you if you want to:
- Get the most out of the Real Python Slack community
- Navigate some of Slack’s most valuable features
- Get your questions answered by other Real Python members
- Learn the dos and don’ts to keep things on an even keel
Any recommendations or questions that you may have are welcome. You can share them with the administrators in Slack or in the comments below. On Slack, you can tell if someone is an administrator by the Real Python symbol next to their name.
Free Bonus: 5 Thoughts On Python Mastery, a free course for Python developers that shows you the roadmap and the mindset you’ll need to take your Python skills to the next level.
Enjoy Yourself, Be Curious, Ask Questions, and Respect Others
The people in the Real Python Slack community are friendly people who love to answer questions and hang out. It’s a fantastic resource for beginners and more advanced Pythonistas looking to expand their knowledge and build friendships.
There are no stupid questions—no such thing exists! Interestingly, beginners’ questions tend to lead to the most exciting and deep discussions about Python and programming. So please, ask away!
The Real Python Slack community isn’t an adversarial forum—everyone is here to learn, and people love to help. So listen and be excellent to each other. You’ll make some friends!
Of course, there are challenges to online communication that aren’t present when people meet face to face. If you have any issues about anything at all, then please feel free to get in touch with one of the administrators:
They’ll be happy to help you in any way they can.
If you’re wondering how to navigate, benefit from, and contribute to the community, then you can read on for some helpful tips and guidelines. In the rest of this guide, you’ll get to grips with some of the dos and don’ts to keep things flowing.
Find the Best Channel to Ask Your Question
There are several Slack channels in which you can ask questions. Most channels focus on a particular topic or specialty. When you join Slack, you’ll automatically get added to a few general channels. You’re also free—and encouraged—to join any additional channels that exist within the community Slack.
You can find the list of available channels by clicking the + icon next to the Channels menu. Select the channel that you wish to join, and click the Join button. For instance, you may want to join the #webdev, #data-science, and #careers channels if those subjects interest you:

Once you’ve joined a few channels, you can ask your question in the channel that’s most closely related to your problem. If your question doesn’t fit into a particular category, then #coding-questions is the channel for you.
Spend Some Time Composing Your Questions
When you run into a problem and are in a rush, it can be tempting to jump on Slack, paste all your code, and write IT’S NOT WORKING. Unfortunately, this is a surefire way to get people to ignore your question. Knowing how to ask questions is hard!
These days, everyone is busy and in a rush. Imagine you’ve interrupted a working colleague and asked them to help you with a problem. You don’t bring your laptop, set it in front of them, and state that it’s not working. You present the issue to them in a way that might elicit a helpful response:
- Summarize the problem
- Give some context to the question
- Provide a minimal reproducible example
- Mention what you’ve tried so far
- Check your spelling, grammar, and formatting
The more complicated your question is to wrap your head around, the more likely that someone won’t know the answer off the top of their head and may dismiss the question as something they don’t know. Code is hard to read—it takes time and effort, no matter your skill level.
Spend some time collecting your thoughts and presenting the specific problem, along with code, in one post.
Summarize Your Problem
Summarizing the problem in one or two sentences can go a long way to help people help you—bad summaries can make people turn off:
- Don’t: This code isn’t working.
- Do: Why does using
floatinstead ofintgive me different results when all of my inputs are integers?
Everyone is busy, so if you can summarize your question in the first sentence, it’ll be easier for people to understand the situation and provide help quickly.
Sometimes, you might get responses that don’t seem to directly address the issue you’re facing. Instead of getting frustrated with your peers, consider whether your summary clearly and accurately pinpoints the issue. If you need to, respectfully thank the community for their responses, then post an updated summary in the thread on your original post.
Give Context to Your Question
Giving the context and the overall goal helps prevent the XY problem. This tends to happen if you have an idea for a solution and ask about how to accomplish that, without providing the original problem. The original problem may have another solution that you hadn’t thought of. Leaving out the context and failing to describe your original problem can lead to much wasted effort for both you and the person who decides to help you.
For example, you want to run a shell script with Python, but you don’t know how to navigate to the correct folder to run it. Someone spends a lot of time teaching you about running the file and the pitfalls of running shell scripts with Python. Then you reveal that all the shell script does is delete files, to which the person who’s helping asks: why don’t you ditch the shell script and do it in Python?
The context to the question—the actual problem you’re facing—can often be far more important than the solution that you attempt. So always provide some context when you’re asking your questions.
Provide A Minimal Reproducible Example
Please try to provide a minimal reproducible example. Providing a minimal reproducible example means providing enough code and instructions so that someone can reproduce your environment and reproduce the unwanted behavior that you’re experiencing.
When code doesn’t work, especially when there are more than ten lines of code, it becomes hard to find bugs by just reading. It’s much more efficient to run and tweak the code yourself to find the issue. This efficiency is why a minimal reproducible example is so practical—it’s like having a host of experts crowd around your computer to tinker with your code.
If your problem is intimately related to your environment, then be explicit. Mention clearly that this isn’t going to be reproducible for others. That said, you’ll have to accept that this problem will be challenging for others to debug.
Provide Tracebacks
Declaring that something isn’t working doesn’t provide much information. On the other hand, the traceback, or error messages that Python produces are immensely informative.
Tracebacks can be hard to decipher, though, and reading tracebacks is a skill that takes years to master. All the same, always provide your code’s error messages or output. The output gives essential clues as to what’s going wrong, which more experienced coders might be able to decipher.
Don’t Cross-Post
As a general rule, please don’t cross-post your question to several channels. Posting in one place ensures that there’s one clear place where people should answer your question. If you cross-post, then you might make members spend time answering your question when someone else has already responded to it elsewhere.
If you need to delete your question because you accidentally cross-posted, then see Delete and Edit Your Posts.
Try to Solve the Problem Yourself
The Real Python community loves to help and answer questions, but they won’t do your work for you. They won’t complete your homework assignments! They’re here to help you learn, and the best way to learn is by doing.
Eric Lippert has a classic article on How to Debug Small Programs, which is an excellent guide to the general approach to take when debugging.
If you’re a beginner, then you should also check out Understanding the Python Traceback. That tutorial will help you better understand what’s going on in your code, which will help you ask better questions in the community Slack.
Don’t break your head, though—there’s no shame in it if you’re stuck. Please ask! Just include what you’ve tried so far.
Deal With Unanswered Questions
Not getting your question answered can be frustrating. If you find that your questions aren’t getting answered, then it might be worth asking yourself a few questions:
- How much time has passed?
- Did I include all relevant information?
- Did I post to the most appropriate channel?
When you ask yourself how much time has passed, if the answer is just a few hours, then give it more time. Most members have full-time jobs and check Slack only when they have spare time to work on their Python skills.
Time zones also play a crucial factor. The person who will eventually answer your question may be sleeping when you post it. So sleep on it—not only will it give your mind time to work on the problem subconsciously, but you may wake up to a helpful answer.
You should also review the dos and don’ts of this guide to check if there’s something you left out. Did you include your traceback or error message? Is all relevant code included and properly formatted? These may all affect members’ ability to help, so it’s worth seeing if you can revise your question and make it easier for others to understand.
It can be hard to know what information to include and what to leave out when you’re a beginner, and that’s okay. It’ll get easier with practice. Follow the above guidelines, and don’t let doubt stop you from posting your question. The Real Python community is full of welcoming, generous people who will make every effort to help you.
If you’ve waited sufficient time and are sure your question is clear and descriptive, then you might also consider if you asked your question in the right place. Would it be better suited to a different channel? If so, you can bend the cross-posting guidance and share a link to your question in another channel:

Providing a link to the original question ensures that there’s still only one place to provide an answer. It also links people back to any previous discussion that might have taken place in the original question.
If you’ve exhausted all these options, then you could consider asking your question in the members-only Office Hours. Post a link to your question in the #office-hours channel, and the hosts will pick it up.
Finally, if none of the above yields a result, then reach out to one of the admins directly in Slack. They can either help you find a solution or point you in the right direction.
Don’t Give Up
Part of what makes a good coder is tenacity. Keep trying, even if you don’t get any responses to your question. Maybe it’s something so specific or difficult that no one feels they can help.
When you finally solve your problem, the community would love to hear about your triumph and solution. So please share, and let the community join in your learning journey.
Group Your Responses in Threads
If you want to respond to another member’s post, then please use the Reply in thread button. Using threads keeps the entire conversation about that topic in one place, making it possible to follow the conversation:
The thread feature is an excellent way to ensure that conversations don’t get tangled up. It makes the exchange readable for future users who might learn something from it. It also serves as a handy indicator to see if any questions don’t have any responses, further increasing the chances that all questions get answers.
Remember, everyone is here to learn, and everyone started somewhere. Be respectful in your threaded responses.
Pay Attention to Spelling, Grammar, and Formatting
Again, everyone is busy—it’s much easier to read something with structure, where the code is appropriately formatted. This goes for both questions and responses. Read the Slack formatting guide for more Slack-specific information on how to format your messages.
Use the browser’s integrated spell checker, and take some time to make your writing clear. Don’t worry if the grammar follows what your school teacher told you, especially if English isn’t your first language.
Where formatting matters, though, is with code. As mentioned, code is hard to read. So every little thing that you can do to make code easier to read will go a long way. There are four ways that you can share formatted code on Slack:
- Inline code: For tiny snippets of one to five words of code
- Code blocks: For small snippets of one to ten lines of code
- Code snippets (preferred method): For snippets up to thirty lines
- GitHub: For anything larger than thirty lines
Each has its use case, but the most common method should be using code snippets.
Inline Code
Inline code is for formatting small bits of code that you want to mention in your question or comments. It’s primarily for highlighting specific variables and objects within your question:

The words Flask, ModuleNotFoundError, and pip install flask are formatted as inline code.
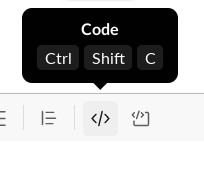
To add inline code to your question, wrap your variable or object name in backticks ( ` ) or click the Code formatting button on the message editor:

Just select the text that should be formatted as code and press the button.
Code Blocks
You can use code blocks for small code examples like single functions, REPL and terminal outputs, and short code excerpts.
Here’s an example question that uses inline code followed by a code block:

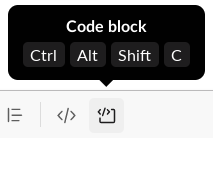
The question itself uses inline code for objects and variable names and is followed by a code block showing the code in question. To create a code block, wrap your code in triple backticks( ``` ) or click the Code block button in the Slack message editor:

Code blocks are ideal for showing ten or fewer lines of code. Code blocks aren’t suited to longer code for a few reasons:
- There’s no syntax highlighting, which makes long passages of code more difficult to read.
- It fills the screen, meaning other members’ questions can get buried or missed.
- It makes for an unpleasant reading experience for anyone scrolling through the feed.
If you need to share larger portions of code, then there’s a better way: code snippets!
Code Snippets - The Best Way to Share Code
Code snippets make sharing and reading large portions of code in Slack a much more pleasant experience. Snippets should be your preferred method of sharing most of your code. All you need to do is attach a .py file to your message!
Note: Depending on your system, and whether you’re interacting with Slack from the web client, desktop app, or mobile app, you may be able to simply drag and drop the file into the Slack window. Otherwise, you can attach the file using the steps below.
You can use both inline code and code blocks within a snippet message. This flexibility means that you can share your code and traceback in one message.
Here’s an example of a code snippet:

One significant benefit of using code snippets is that they support code syntax highlighting for almost any programming language. They’re also collapsible, making long code samples less intrusive. Interested members can expand and read the whole snippet with a single click.
Another great advantage is that they’re also downloadable, so anyone helping you can download the file. Being able to download the file makes it much quicker to reproduce your issue.
To create a code snippet, click the + button in the Slack message area as if you were going to add an attachment. You can then attach any code file, and that will display as a snippet.
You can also search for a shortcut called Create a text snippet, which will open an overlay in which you can type your question and copy your code into the content area. You can give the snippet a title (which you can treat like a filename) and choose the language for syntax highlighting.
Here’s a quick demonstration of how to create a code snippet:
Code snippets are the best way to share code on Slack!
Note: If you want to go the extra mile, then you can also record a programming video that walks through the code and offers more context. This can really help your fellow programmers to better understand your question.
If you have any further questions about formatting your code in Slack, then write your thoughts in the comments below, or reach out to any admins on the Real Python Community Slack.
GitHub
If making a reproducible example is complicated in fewer than thirty lines of code, or the person helping you needs access to all your code, then please share the link to your project’s Git repository instead. You can make a new repository and copy the minimal code required to reproduce the problem:
If there are any setup instructions, then document them in a README.md file. That way, someone will be able to copy your working environment quickly.
GitHub lets you have unlimited public repositories, so this is an excellent place for throwaway repositories that you can delete after you’ve found a solution.
If creating a whole repository seems like too much, then an in-between solution is to use GitHub Gists:
Gists allow you to share one or various files without requiring the extra boilerplate of a whole repository.
Delete and Edit Your Posts
You can edit your posts for a limited amount of time after initially posting, but after a short while, you won’t be able to change them. You can always post more context, clarifications, or corrections in the thread below the post—there’s no limit there.
If your post is too far gone or you’ve made a mistake and you really must start from scratch, please reach out to one of the admins, who are able to delete posts for you. They won’t be able to edit your question, though.
This limitation was mainly brought into effect because it’s common for people to delete their questions after getting an answer. While this is understandable, it’s valuable to have question-and-answer threads to read over, even if you didn’t participate. The old threads serve as a valuable resource for the whole community.
Summing Up
Participating in a vibrant community like the Real Python Slack can have enormous benefits for your journey as a developer. In this guide, you’ve learned how to get the most out of the Real Python Slack.
Learning how to communicate your technical problems is a significant step toward becoming a proficient developer. This guide will help you achieve this so that you can start tapping into Real Python members’ extensive knowledge base.
The Real Python community is diverse, with members of all backgrounds and experiences contributing from across the globe. Connecting with the Real Python community will enhance your technical skills, expose you to new areas of interest, and expand your social network.
Connecting with your peers isn’t just an online activity, either. Real Python got a booth at PyCon 2022 and met loads of members. There were meetups and an open space where members could ask questions and hang out.
Maybe you’re not yet a Real Python member and can’t take advantage of the Slack community’s benefits. Sign up for an account today to connect with your peers and start advancing your Python knowledge and career!


