In this tutorial, you’ll learn how to use Claude Code to build and debug Python projects using natural-language commands directly from your terminal. Unlike browser-based AI assistants, where you copy code back and forth, Claude Code operates inside your project directory. It reads your files, runs shell commands, proposes edits as diffs, and waits for your approval before making any changes.
You’ll start by installing and configuring Claude Code, then use it to build a command-line application from scratch. After that, you’ll return to the project as if picking it up after time away, and ask Claude Code to find and fix bugs. Along the way, you’ll develop a repeatable workflow: plan first, review every change, commit often, and clear context between sessions.
Get Your Code: Click here to download the free sample code you’ll use to build and debug mini-contacts, the command-line contact manager you create with Claude Code in this tutorial.
Take the Quiz: Test your knowledge with our interactive “How to Use Claude Code to Write and Debug Python” quiz. You’ll receive a score upon completion to help you track your learning progress:

Interactive Quiz
How to Use Claude Code to Write and Debug PythonTest your understanding of Claude Code by working through installation, plan mode, diff review, and debugging a Python project.
Prerequisites
Claude Code is a standalone application that doesn’t depend on any specific Python version. Before you start, make sure you have the following tools and accounts ready:
- A paid Anthropic account: To use all Claude Code features, you need either a Claude subscription at the Pro, Max, or Team tier, or an Anthropic Console account with API billing enabled.
- Git: You’ll use Git as a safety net throughout this tutorial, committing between tasks so you can always revert if Claude Code makes an unwanted change. If you’re new to Git, work through Introduction to Git and GitHub and configure your name and email before continuing.
You don’t need prior experience with AI coding tools. This tutorial assumes you’re trying Claude Code for the first time and walks through every step from installation to building a working project.
Step 1: Install and Configure Claude Code
Claude Code ships as a self-contained native binary, with no Node.js, global npm packages, or version manager required. In this step, you’ll install it, sign in to your Anthropic account, and take a quick tour of the built-in commands before writing any code.
Install and Authenticate
Claude Code installs from a single script. Pick the command for your operating system. On Windows, you can install natively in PowerShell or use Windows Subsystem for Linux (WSL), which runs the Linux command:
The installer drops a claude binary into your path and handles auto-updates going forward. Verify the install by checking the version:
$ claude --version
If you see a version number, you’re ready to authenticate. Start Claude Code to trigger the login flow:
$ claude
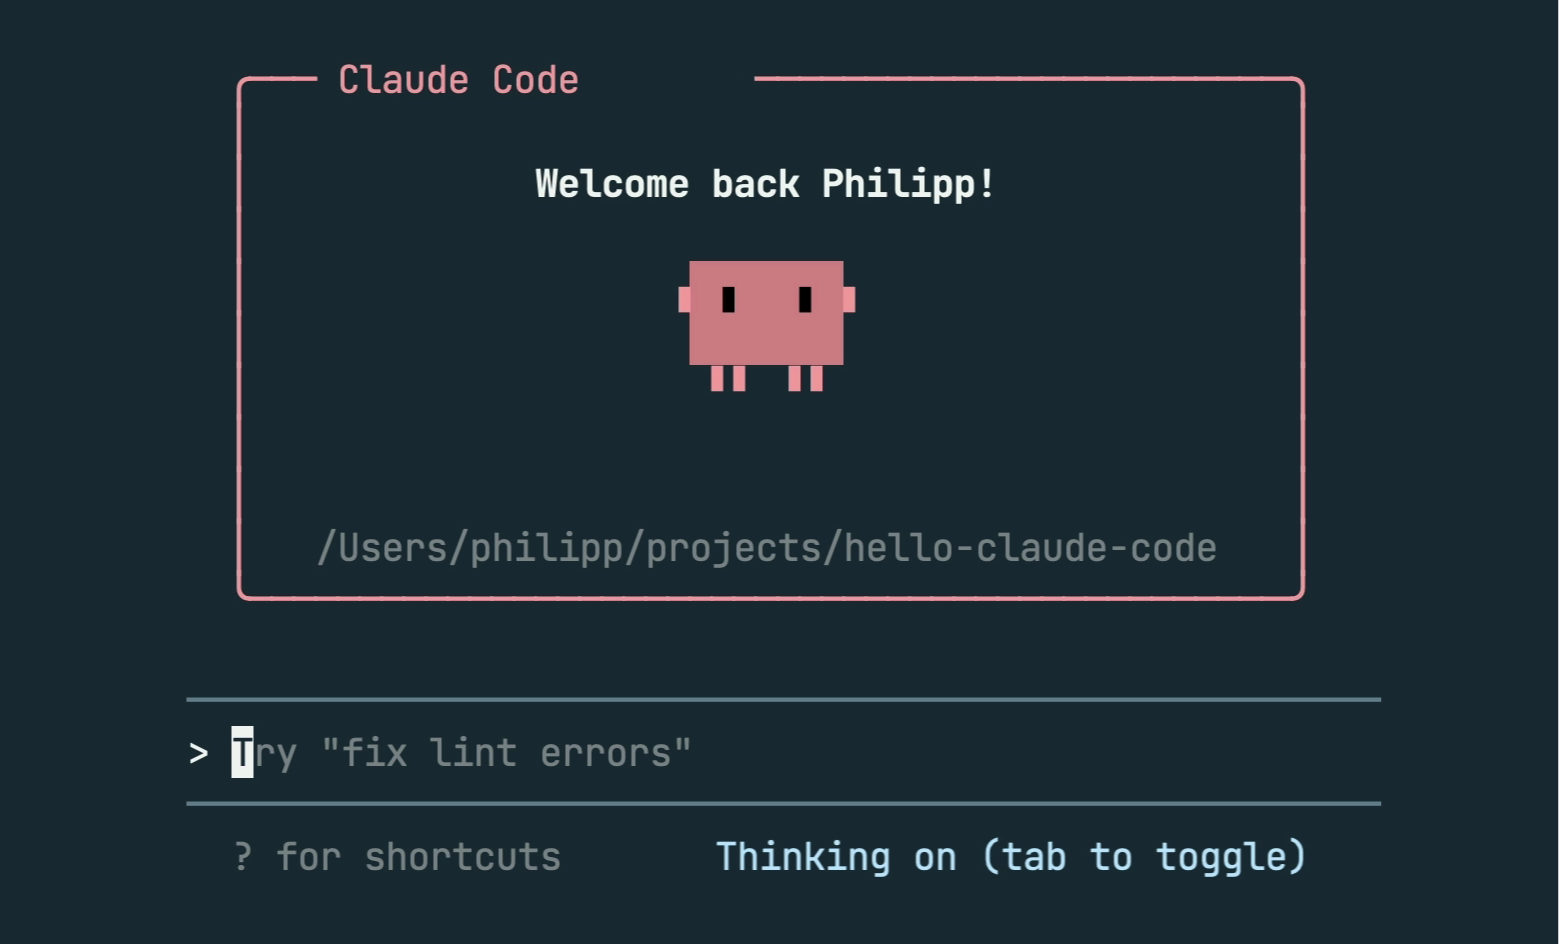
The first launch shows Claude Code’s welcome screen in your terminal, which looks something like this:
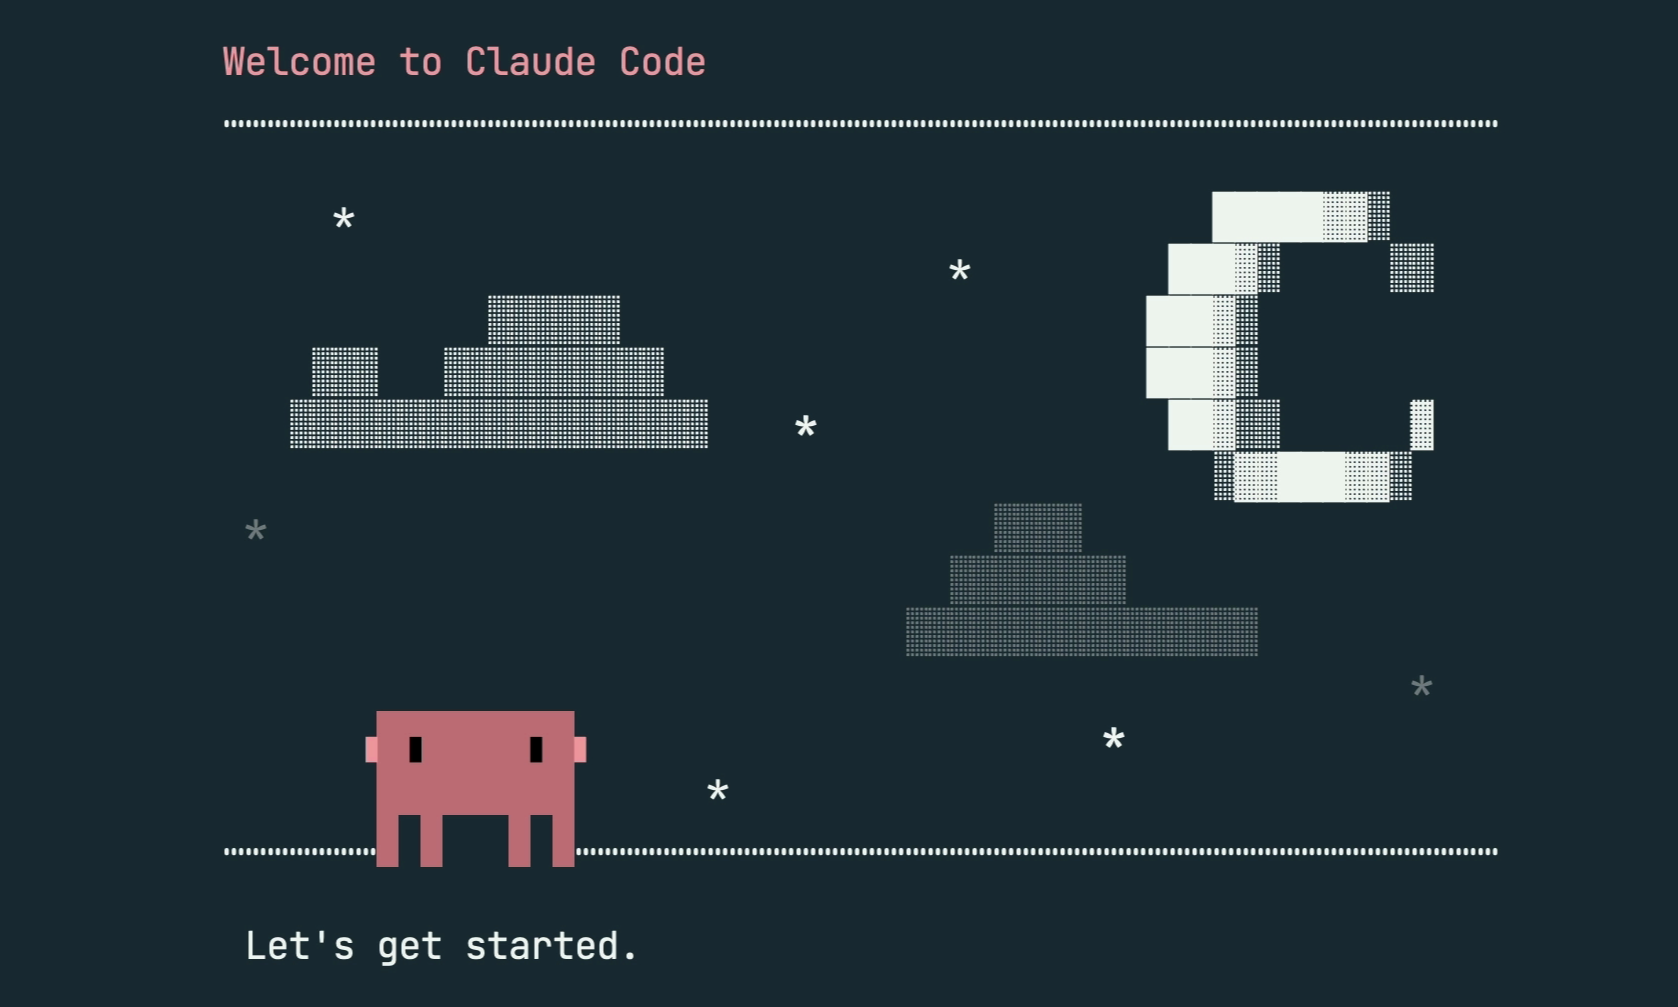
On the first run, Claude Code opens a browser tab for login. Sign in with your Claude Pro, Max, or Team account, or choose the Anthropic Console option if you’re billing through the API. Once authenticated, Claude Code stores a login credential locally and won’t prompt you again unless it expires or you run the /logout command.
Note: Because Claude Code can edit and delete files, only run it inside project directories you’re actively working on. Starting it from your home directory gives the agent access to far more than it needs and will trigger a warning.
With Claude Code installed and authenticated, you’re ready to look at what it can do.
Explore the CLI Interface
Before jumping into a project, take a moment to familiarize yourself with Claude Code’s built-in features. These will save you time throughout the tutorial:
- Slash commands: Type
/to see available commands. Some commonly used ones are/exitto end a session,/compactto summarize and free up context, and/clearto reset the conversation entirely. - Model selection: By default, Claude Code uses a model that depends on your plan. You can switch between models with
/modelif you need quicker responses or deeper reasoning. - Reasoning effort: For particularly complex problems, you can raise Claude Code’s reasoning effort with the
/effortcommand. Higher effort gives Claude Code more room to reason before it responds, at the cost of speed.
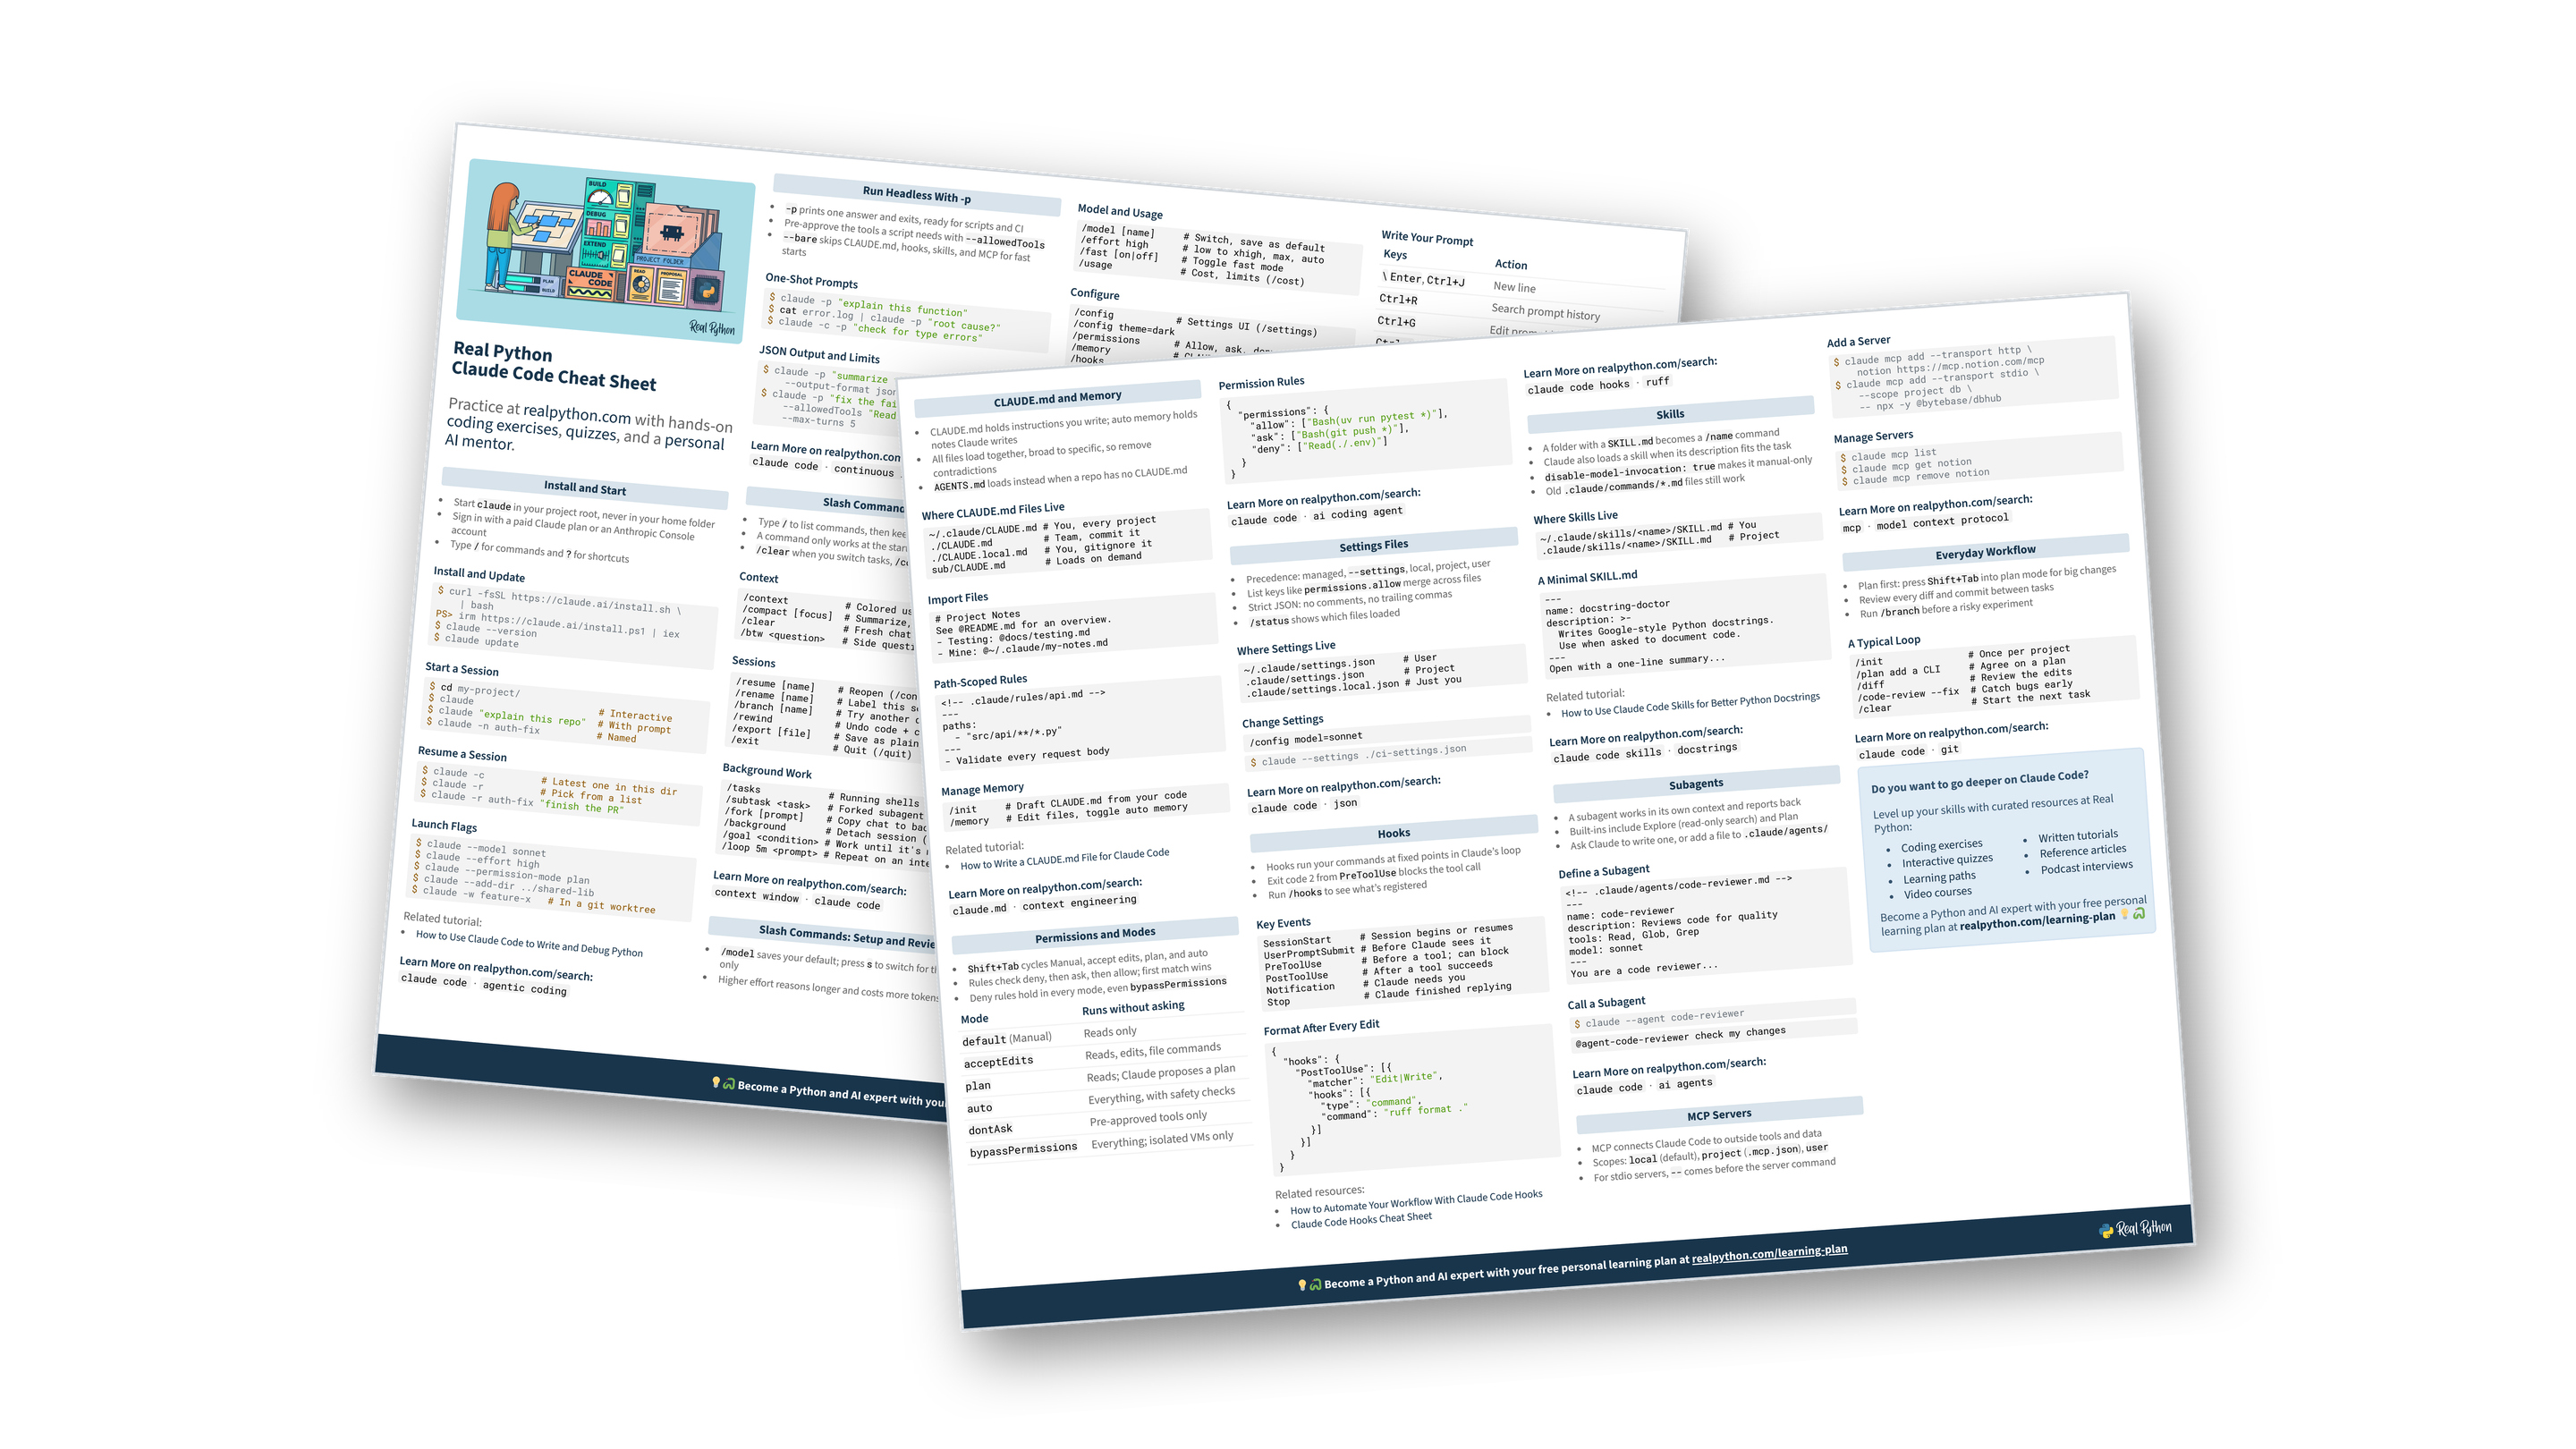
Get Your Cheat Sheet: Download a free Claude Code cheat sheet PDF with slash commands, keyboard shortcuts, CLI flags, CLAUDE.md, permissions, hooks, skills, subagents, and MCP.
Claude Code has several permission modes that control how much it does without asking. Four of them form the default cycle you step through by pressing Shift+Tab:
- Manual: Claude Code pauses and asks for approval before each edit, command, or network request. This is the safest starting point.
- Accept Edits: Claude Code applies edits automatically so you can review them afterward with
git diff. - Plan: Claude Code researches and proposes changes but doesn’t edit any files.
- Auto: Claude Code runs the actions it judges safe, blocks the risky ones, and looks for a safer alternative.
The four modes differ most when you send the same action through each one in turn:
Beyond the cycle of the four modes, Claude Code has bypass permissions and dontAsk modes, which you can enable through command-line flags or settings.
You’ll use plan mode in this tutorial. It’s the right default for starting any non-trivial task because it lets you catch misunderstandings before they land in your code. Exit the session with /exit. In the next step, you’ll start a fresh session inside a real project.
Step 2: Build a Python Project From Scratch
The fastest way to experience what Claude Code can do is to build something from scratch. In this step, you’ll create a minimal command-line contact manager and let Claude Code handle the implementation while you focus on planning and review.
Set Up the Project Directory
Create a fresh directory, initialize Git, and add a CLAUDE.md file. This file acts as Claude Code’s project-level instructions. Claude Code reads CLAUDE.md at the start of every session and treats its contents as baseline conventions:
$ mkdir mini-contacts/
$ cd mini-contacts/
$ git init
Open your editor and create a CLAUDE.md file in the project root:
CLAUDE.md
# Project Conventions

- Python 3.14+, four-space indentation, PEP 8 compliant
- Prefer the standard library; use third-party packages only when needed
- Use type hints on all public functions
Keep CLAUDE.md short and concrete. Longer documents are harder for Claude Code to follow consistently, so keep it focused. You can add to it over time as you notice patterns you want enforced. Now start Claude Code inside the project directory:
$ claude
When Claude Code asks whether to trust the directory, confirm with Enter or Y:
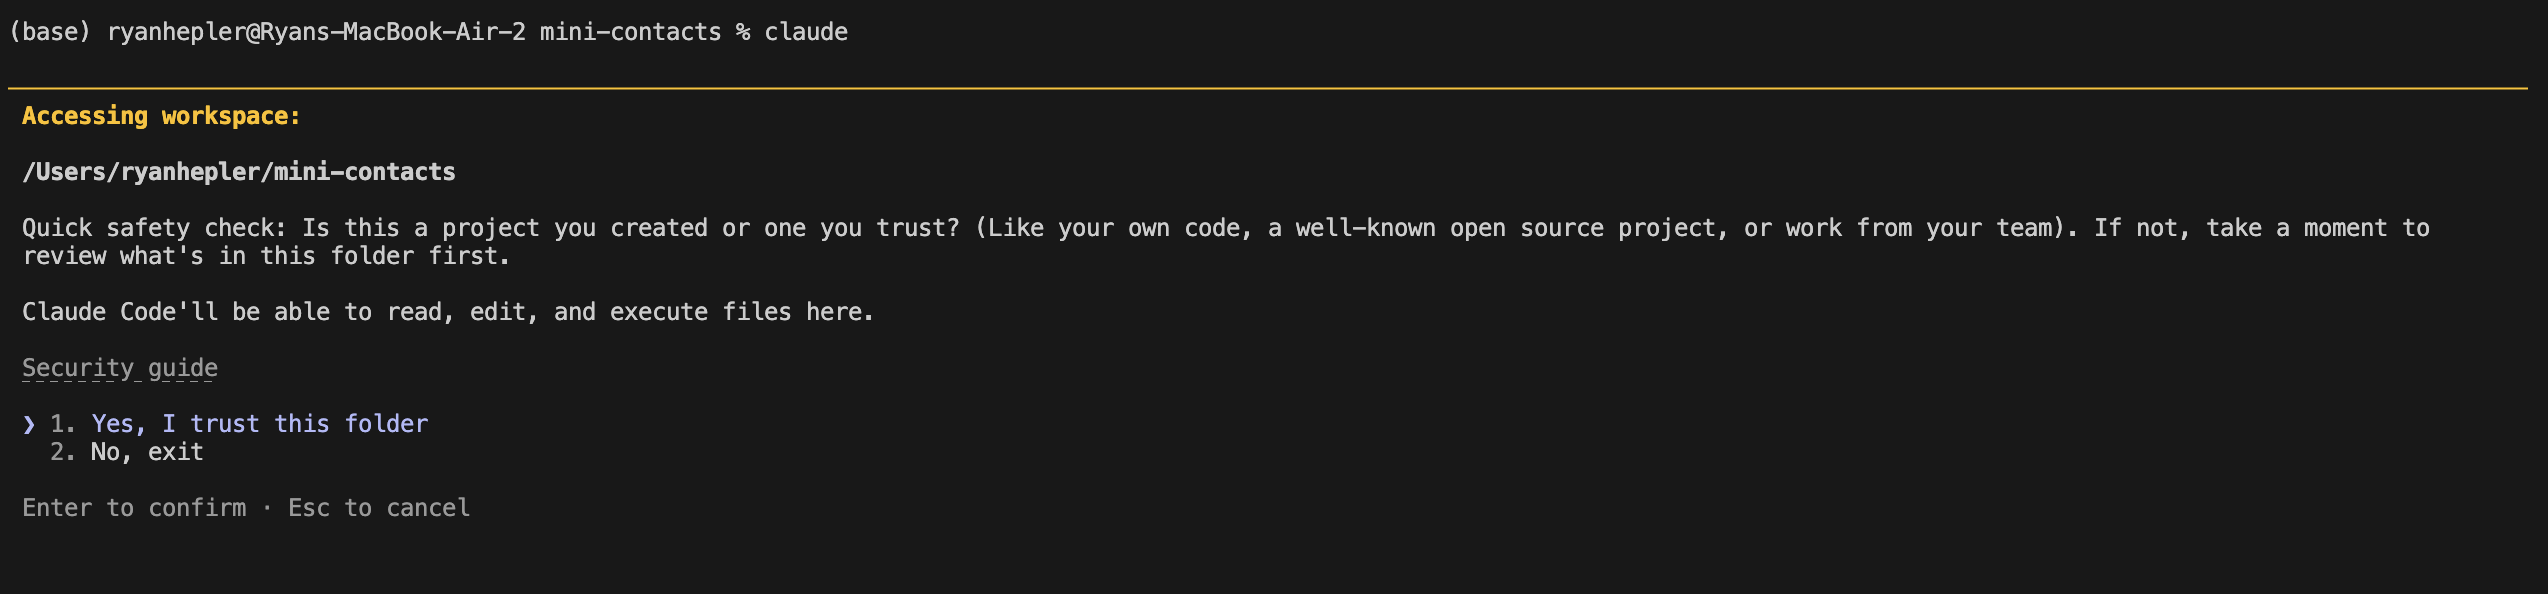
With the folder trusted, Claude Code can read and edit files in this project, and it won’t prompt you again for this directory.
Plan the Project Structure
Before writing any code, switch to plan mode by pressing Shift+Tab twice. You’ll see the mode indicator change in the prompt. Plan mode tells Claude Code to analyze and propose without editing files, which is perfect for getting alignment before committing to an implementation.
With plan mode active, describe what you want to build:
I want to build a minimal command-line contact manager in Python.

It should have two commands:

- `add` to append a new contact with name, email, and phone to a CSV file
- `list` to print all contacts in a readable table format

Use `argparse` for the CLI. Store the CSV at ~/.mini-contacts.csv
by default with a --path flag to override it.

Split the project into a mini_contacts/ package with storage.py for CSV
read/write and cli.py for the `argparse` interface.
Claude Code responds with a structured plan. Read it carefully. If it misses something, then push back in plain English.
Here’s what a typical response looks like:
Plan: Minimal CLI Contact Manager (mini_contacts)
Context
Build a minimal command-line contact manager in Python from scratch in an empty project directory. The tool stores contacts (name, email, phone) in a CSV file and provides add and list commands via argparse. No external dependencies—Python 3 standard library only.
File structure
mini-contacts/               # project root (already created)
│
├── mini_contacts/           # the importable package
│   │
│   ├── __init__.py          # empty, makes it a package
│   ├── __main__.py          # entry point for `python -m mini_contacts`
│   ├── storage.py           # CSV read/write logic
│   └── cli.py               # argparse interface + table formatting
│
└── CLAUDE.md                # project conventions for Claude Code
Implementation
Step 1: mini_contacts/__init__.py Empty file.
Step 2: mini_contacts/storage.py Module-level constant: FIELDNAMES = ("name", "email", "phone")
Two functions:
read_contacts(path: str) -> list[dict[str, str]]: Usescsv.DictReader. Returns[]if the file doesn’t exist. RaisesValueErroron malformed headers.add_contact(path: str, name: str, email: str, phone: str) -> None: Appends to the CSV. Creates the file with a header row if it doesn’t exist. Opens withnewline=""per thecsvmodule docs. Usesos.path.expanduser()on the path.
Step 3: mini_contacts/cli.py
main(argv: list[str] | None = None) -> None: Parses args and dispatches toadd/list.argparsestructure: top-level--pathflag (default~/.mini-contacts.csv), with required subparsers foradd(with required--name,--email,--phoneflags) andlist._print_table(contacts): Computes column widths and prints left-justified columns separated by|with a-+-separator line. Prints"No contacts found."if empty.- Error handling: catches
ValueError/OSErrorfrom storage, prints to stderr, and exits with code 1.
Step 4: mini_contacts/__main__.py
Two-line trampoline:
from mini_contacts.cli import main

main()
Usage
$ python -m mini_contacts add \
    --name "Alice" --email "alice@example.com" --phone "555-1234"
$ python -m mini_contacts list
$ python -m mini_contacts --path /tmp/contacts.csv add \
    --name "Bob" --email "bob@example.com" --phone "555-5678"
Edge cases
listwhen the file is missing: prints"No contacts found.", exits 0- Fields with commas/quotes: handled by
csv.QUOTE_MINIMAL ~in path: expanded byos.path.expanduser()in the storage layer- Wrong CSV headers:
ValueErrorcaught incli, printed to stderr, exit 1
Verification
- Run
python -m mini_contacts listwith no existing file:"No contacts found." - Run
python -m mini_contacts add --name "Alice" --email "alice@example.com" --phone "555-1234": creates~/.mini-contacts.csv - Run
python -m mini_contacts list: shows a table with Alice’s row - Add a second contact and list again: both rows displayed with aligned columns
- Test the
--path /tmp/test.csvoverride with both commands - Verify the CSV file content directly with
cat
Notice what the plan commits to before any code exists: files, function signatures, edge cases, and a verification list. With the plan reviewed and agreed on, you’re ready to turn it into working code.
Generate and Review the Code
Once you’re satisfied with the plan, press Shift+Tab twice to cycle out of plan mode, past auto mode, and back to manual mode, then tell Claude Code to implement it:
Implement the plan.
Claude Code proposes each file as a diff and waits for your approval. Review each diff before accepting. You’re checking that Claude Code accurately translated the plan into working logic:
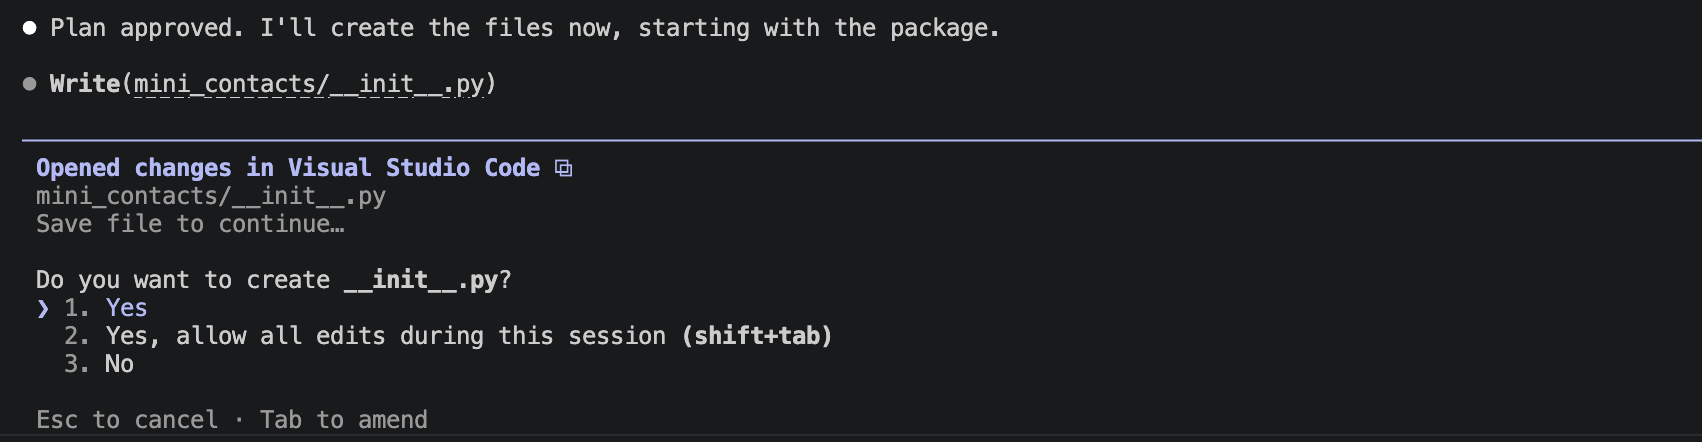
After you approve all the generated code, Claude Code creates the project files. Expand the collapsible below to see the result:
mini_contacts/storage.py
 1import csv
 2import os
 3
 4FIELDNAMES = ("name", "email", "phone")
 5
 6def read_contacts(path: str) -> list[dict[str, str]]:
 7    path = os.path.expanduser(path)
 8    try:
 9        with open(path, newline="") as f:
10            reader = csv.DictReader(f)
11            if reader.fieldnames is None:
12                return []
13            if tuple(reader.fieldnames) != FIELDNAMES:
14                raise ValueError(
15                    f"Expected CSV headers {FIELDNAMES}, got {tuple(reader.fieldnames)}"
16                )
17            return list(reader)
18    except FileNotFoundError:
19        return []
20
21def add_contact(path: str, name: str, email: str, phone: str) -> None:
22    path = os.path.expanduser(path)
23    write_header = not os.path.exists(path) or os.path.getsize(path) == 0
24    with open(path, "a", newline="") as f:
25        writer = csv.DictWriter(f, fieldnames=FIELDNAMES)
26        if write_header:
27            writer.writeheader()
28        writer.writerow({"name": name, "email": email, "phone": phone})
mini_contacts/cli.py
 1import argparse
 2import sys
 3
 4from mini_contacts import storage
 5
 6def _print_table(contacts: list[dict[str, str]]) -> None:
 7    if not contacts:
 8        print("No contacts found.")
 9        return
10    headers = {"name": "Name", "email": "Email", "phone": "Phone"}
11    widths = {
12        field: max(len(headers[field]), max(len(row[field]) for row in contacts))
13        for field in storage.FIELDNAMES
14    }
15    header_line = " | ".join(headers[f].ljust(widths[f]) for f in storage.FIELDNAMES)
16    separator = "-+-".join("-" * widths[f] for f in storage.FIELDNAMES)
17    print(header_line)
18    print(separator)
19    for row in contacts:
20        print(" | ".join(row[f].ljust(widths[f]) for f in storage.FIELDNAMES))
21
22def main(argv: list[str] | None = None) -> None:
23    parser = argparse.ArgumentParser(description="Minimal contact manager")
24    parser.add_argument(
25        "--path", default="~/.mini-contacts.csv", help="Path to the CSV file"
26    )
27    subparsers = parser.add_subparsers(dest="command")
28    subparsers.required = True
29    add_parser = subparsers.add_parser("add", help="Add a new contact")
30    add_parser.add_argument("--name", required=True)
31    add_parser.add_argument("--email", required=True)
32    add_parser.add_argument("--phone", required=True)
33    subparsers.add_parser("list", help="List all contacts")
34    args = parser.parse_args(argv)
35
36    try:
37        if args.command == "add":
38            storage.add_contact(args.path, args.name, args.email, args.phone)
39            print(f"Added contact: {args.name}")
40        elif args.command == "list":
41            contacts = storage.read_contacts(args.path)
42            _print_table(contacts)
43    except (ValueError, OSError) as e:
44        print(f"Error: {e}", file=sys.stderr)
45        sys.exit(1)
mini_contacts/__main__.py
from mini_contacts.cli import main

main()
The generated code uses the standard library’s csv module for file I/O and argparse for the CLI, matching the prompt and the CLAUDE.md conventions. Note how Claude Code applied type hints to all public functions as instructed.
Note: Large language models (LLMs) are stochastic, so your output won’t match these examples word for word. Expect the same general approach, a storage module for CSV operations, and a CLI module for argument parsing, but with different variable names, docstrings, or implementation details.
You now have a complete implementation that came from a plan you approved rather than from an open-ended prompt, and every file passed through a diff you accepted. Reviewing those diffs is what keeps the code close to the conventions in CLAUDE.md. Next, you’ll confirm the application actually runs.
Run and Verify the Application
Instead of running the commands yourself, ask Claude Code to exercise the code end to end. Tell it to add a contact and then list the contacts back, so you can confirm the happy path works before adding any tests.
You’re still in manual mode, so submit the following prompt:
Add a contact named "John Doe" with email john@example.com and
phone 555-0100, then list all contacts to verify it was saved.
Approve each command as Claude Code proposes it. After the second command runs, you’ll see output like this:
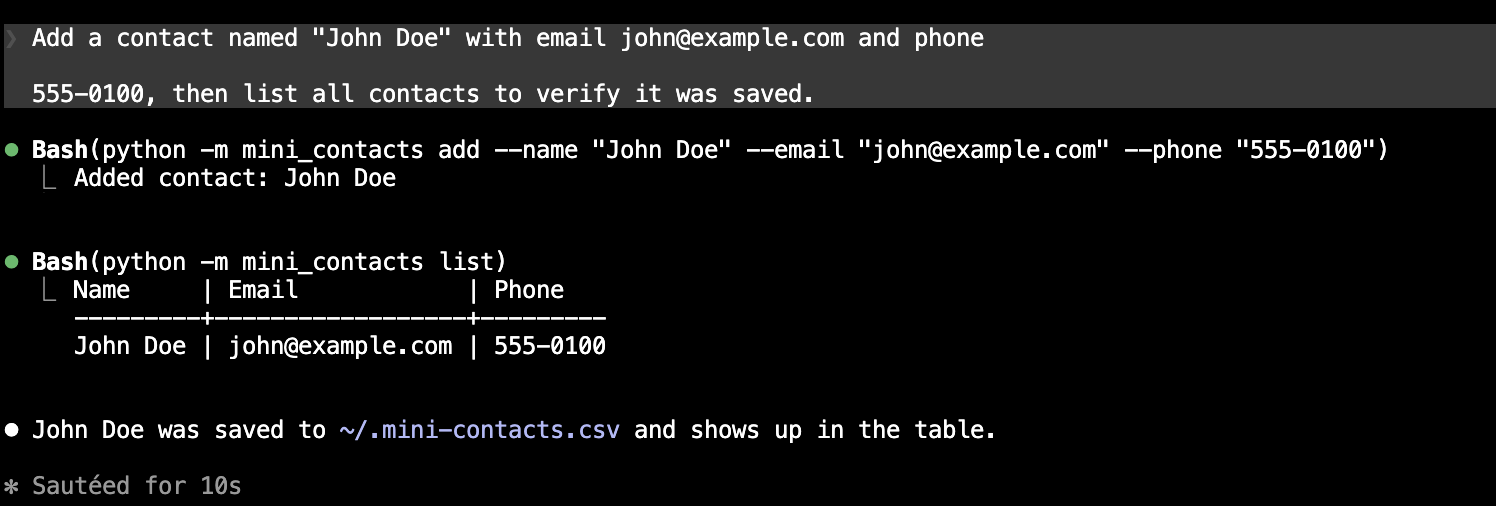
Now that the happy path works, you can continue and ask Claude Code to write tests before you commit:
Write tests for the storage and CLI modules. Cover the happy path for
add and list, and test what happens when the CSV file doesn't exist yet.
Notice that your prompt doesn’t name a testing framework. Ideally, the Prefer the standard library line in your CLAUDE.md convinces Claude Code to reach for unittest rather than pulling in pytest and leaving you with a dependency to install.
Note: If Claude Code tries to install pytest, you can press Esc to cancel Claude’s process and steer it toward unittest.
After Claude Code finishes, verify that it wrote some test files that look like this:
tests/test_storage.py
import tempfile
import unittest
from pathlib import Path

from mini_contacts import storage

class StorageTests(unittest.TestCase):
    def setUp(self):
        tmp = tempfile.TemporaryDirectory()
        self.addCleanup(tmp.cleanup)
        self.tmp_path = Path(tmp.name)

    def test_round_trip(self):
        path = self.tmp_path / "contacts.csv"
        storage.add_contact(str(path), "Alice", "alice@example.com", "555-1234")
        expected = {
            "name": "Alice",
            "email": "alice@example.com",
            "phone": "555-1234",
        }
        self.assertEqual(storage.read_contacts(str(path)), [expected])

    def test_header_written_once(self):
        path = self.tmp_path / "contacts.csv"
        storage.add_contact(str(path), "Alice", "alice@example.com", "555-1234")
        storage.add_contact(str(path), "Bob", "bob@example.com", "555-5678")
        self.assertEqual(path.read_text().count("name,email,phone"), 1)

    def test_read_missing_file_returns_empty(self):
        missing = self.tmp_path / "missing.csv"
        self.assertEqual(storage.read_contacts(str(missing)), [])
tests/test_cli.py
import contextlib
import io
import tempfile
import unittest
from pathlib import Path

from mini_contacts.cli import main

class CLITests(unittest.TestCase):
    def setUp(self):
        tmp = tempfile.TemporaryDirectory()
        self.addCleanup(tmp.cleanup)
        self.tmp_path = Path(tmp.name)

    def run_cli(self, *argv):
        stdout = io.StringIO()
        with contextlib.redirect_stdout(stdout):
            main(list(argv))
        return stdout.getvalue()

    def test_add_then_list(self):
        path = str(self.tmp_path / "contacts.csv")
        self.run_cli("--path", path, "add", "--name", "Alice",
                     "--email", "alice@example.com", "--phone", "555-1234")
        out = self.run_cli("--path", path, "list")
        self.assertIn("Alice", out)
        self.assertIn("alice@example.com", out)

    def test_list_empty(self):
        out = self.run_cli("--path", str(self.tmp_path / "empty.csv"), "list")
        self.assertIn("No contacts found.", out)
The tempfile.TemporaryDirectory() context manager paired with self.addCleanup() gives each test its own throwaway directory, and contextlib.redirect_stdout() captures printed output so you can assert against it.
Claude Code also creates an empty tests/__init__.py. Don’t delete it: unittest only looks for tests inside directories that are importable packages, so without that file, your suite reports NO TESTS RAN.
You could now run the test suite from the project root in another terminal. However, Claude Code comes with a shell mode that lets you run shell commands without leaving the session.
Prefix your prompt with an exclamation mark (!) to run the tests:
! python -m unittest
Because you run the command yourself in shell mode, it bypasses the manual-mode approval prompt. Claude Code reads the output and reports back:
All tests pass, covering everything you asked for.

Happy path — add and list:

- CLITests.test_add_then_list — adds a contact, then lists and checks
  that the name and email appear in the output.
- StorageTests.test_round_trip — add_contact then read_contacts
  returns the same contact.
- StorageTests.test_header_written_once — two adds append under
  a single header.

Missing CSV file:

- StorageTests.test_read_missing_file_returns_empty —
  read_contacts on a missing path returns [].
- CLITests.test_list_empty — list on a nonexistent path prints
  No contacts found.
With the tests passing, go on and ask Claude Code to commit the current state of your project:
Create a commit with the message "Add initial mini-contacts implementation".
You now have a working project built using a plan-first workflow. In the next step, you’ll return to this project with fresh eyes and use Claude Code to find problems you might have missed.
Step 3: Debug an Existing Project
Building from scratch is rewarding, but the more common situation is returning to code you haven’t touched in a while. Maybe you wrote it last week, or maybe someone else wrote it entirely. Either way, you need to understand the codebase before making any changes.
In this step, you’ll treat the mini-contacts project as if you’re picking it up after some time away. You’ll ask Claude Code to explore the code, find bugs, and fix them.
Explore the Codebase
Make sure you’re in your project directory and start a new Claude Code session:
$ cd mini-contacts/
$ claude
Your first task is to build a mental model of the project. Ask Claude Code to map the territory with a focused exploration prompt:
Review this codebase. Tell me what the application does, describe
each module and how they connect, and summarize the test coverage.
Claude Code reads through the source files and reports back. Expand the summary below to see how it maps out the project:
Here’s the full review.
What the application does
mini_contacts is a minimal CLI contact manager that stores contacts (name, email, phone) in a CSV file (default ~/.mini-contacts.csv) and supports two operations: adding a contact and listing all contacts.
Usage:
$ python -m mini_contacts add --name "Jane" --email "jane@example.com" --phone "555-1234"
$ python -m mini_contacts list
Modules
__init__.py— Empty; just marks the directory as a Python package.__main__.py— Entry point forpython -m mini_contacts. Imports and callsmain()fromcli.py.storage.py— Data layer. DefinesFIELDNAMES = ("name", "email", "phone")as the shared schema, referenced by both modules. Two functions:read_contacts(path)— Reads the CSV file, validates that headers match (name, email, phone), and returns a list of dicts. Returns[]if the file is missing or has no headers.add_contact(path, name, email, phone)— Appends a row to the CSV. Writes the header row first if the file doesn’t exist or is empty.
cli.py— Presentation/interface layer. Contains:main(argv)— Usesargparsewith two subcommands (add,list) plus a--pathoption. Dispatches to storage functions and catchesValueError/OSErrorfor clean error output._print_table(contacts)— Formats contacts as an aligned ASCII table with dynamic column widths.
How they connect
__main__.py → cli.main() → storage.read_contacts() / storage.add_contact() → CSV file on disk
cli depends on storage for data access and for the FIELDNAMES constant (used in table rendering). storage has no internal dependencies beyond the standard library (csv, os).
Test coverage
There is a tests/ directory with test modules covering storage and CLI functionality. Tests verify the happy path for adding and listing contacts and confirm correct behavior when the CSV file doesn’t exist yet. All tests pass.
This summary gives you a general picture of the codebase. Now ask follow-up questions while the context is fresh. For example, “What happens if the CSV file gets corrupted mid-write?” or “Does anything validate the email format?” Keep asking until you understand how the pieces fit together.
Find and Fix Bugs
With that overview in mind, ask Claude Code to specifically look for problems:
Now look for bugs, security issues, and edge cases that could cause
crashes or data loss. Be specific about each finding.
Claude Code works through the modules and comes back with a categorized list of issues. Expand the report below to see what it flagged:
I’ve already read all four source files, so I can analyze them directly. Here are the findings.
Crashes and error handling
1. _print_table crashes on malformed CSV rows (cli.py:12)
If the CSV file has a row with fewer columns than the header, csv.DictReader fills the missing fields with None (its default restval). The width calculation then calls len(row[field]) on that None, which raises TypeError. A CSV like this triggers it:
name,email,phone
Alice,alice@example.com
The crash happens at line 12 in the max(len(row[field]) for row in contacts) expression and would also hit at line 20 in row[f].ljust().
2. No file locking — concurrent writes can interleave (storage.py:24-28)
writeheader() and writerow() are two separate write calls. Two concurrent add operations can interleave, producing a corrupted line like:
name,email,phone
Alice,alice@exBob,bob@example.com,555-0002 ample.com,555-0001
Python’s file buffering and the lack of flock/fcntl locking make this possible under concurrent use.
3. Contacts with embedded newlines render incorrectly (cli.py:20)
The csv module correctly handles quoted multi-line fields, so this value round-trips in the file:
$ python -m mini_contacts add --name $'Line1\nLine2' --email a@b.com --phone 123
But _print_table prints each line independently, breaking the table alignment. The row renders as two broken lines instead of one.
4. Empty-string fields are silently accepted (cli.py:30-32)
argparse with required=True rejects missing arguments but accepts empty strings:
$ python -m mini_contacts add --name "" --email "" --phone ""
This writes a blank row to the CSV, and the list command then shows an empty row in the table.
Summary by severity
| Severity | # | Finding |
|---|---|---|
| Crash | 1 | TypeError on short CSV rows |
| Data loss | 2 | Concurrent appends corrupt rows |
| Edge case | 3 | Embedded newlines break table rendering |
| Edge case | 4 | Empty-string fields accepted silently |
The most impactful to fix first are #1 (a crash on real-world CSV files) and #4 (blank records accepted silently). Finding #2 only matters if more than one process writes the file at once.
Not every finding warrants an immediate fix. The crash affects anyone with a slightly malformed CSV, and the empty-string edge case is a quick win. The concurrency issue is real but unlikely to bite a single-user CLI tool, and the table-rendering glitch only surfaces for contacts that contain newlines.
Apply the Fixes
Switch to plan mode with Shift+Tab twice and ask Claude to plan the fixes:
Fix the crash bug and the edge case for empty-string validation.
For the crash on short CSV rows, handle rows with missing fields gracefully.
For the empty-string fields, reject blank values for name, email, and phone.
Plan mode is optional for changes this small. You could describe the fixes and review the diffs directly, but using it here keeps the plan-review-commit rhythm consistent. As you’ll see in a moment, both fixes are a couple of lines in storage.py, so bundling them keeps the diff small enough to review in one pass. When fixes are larger or spread across modules, ask for them one at a time and commit between them.
Once the plan looks right, press Shift+Tab twice to return to manual mode, then ask Claude to carry out the plan:
Implement the fixes.
Claude Code proposes a diff for each change and waits for your approval. The fixes are small and targeted, so you can check them quickly before you accept:
In storage.py, read_contacts() configures csv.DictReader to fill missing fields with an empty string instead of None, so a short row can no longer crash the table formatter:
mini_contacts/storage.py
reader = csv.DictReader(f, restval="")
The same module’s add_contact() gains a guard that rejects blank values before writing anything:
mini_contacts/storage.py
if not all([name, email, phone]):
    raise ValueError("name, email, and phone must not be empty")
Because each diff is only a couple of lines, you can confirm exactly what changed before accepting. With the fixes in place, run the test suite to confirm nothing broke:
Run the tests and show me the results.
Claude Code runs the suite with unittest and reports what passed:
Bash(python -m unittest -v 2>&1 | tail -30)
Run the test suite verbosely
---------------------------------------------------------------------
Ran 8 tests in 0.01s

OK

- tests.test_cli.CLITests — 3 tests (incl. test_list_short_row_exits_cleanly)
- tests.test_storage.StorageTests — 5 tests
    (incl. test_short_row_filled_with_blanks and
    test_add_blank_field_raises)
All tests pass, including the new ones Claude Code automatically added for both fixes:
tests/test_storage.py
class StorageTests(unittest.TestCase):
    # ...

    def test_short_row_filled_with_blanks(self):
        path = self.tmp_path / "contacts.csv"
        path.write_text("name,email,phone\nAlice,alice@example.com\n")
        contacts = storage.read_contacts(str(path))
        self.assertEqual(contacts[0]["phone"], "")

    def test_add_blank_field_raises(self):
        with self.assertRaises(ValueError):
            storage.add_contact(
                str(self.tmp_path / "c.csv"), "Alice", "", "555-1234"
            )
tests/test_cli.py
class CLITests(unittest.TestCase):
    # ...

    def test_list_short_row_exits_cleanly(self):
        path = self.tmp_path / "contacts.csv"
        path.write_text("name,email,phone\nAlice,alice@example.com\n")
        out = self.run_cli("--path", str(path), "list")
        self.assertIn("Alice", out)
The fixes work as intended. Now you can ask Claude Code to commit:
Create a commit with the message "Add input validation and fix the crash bug".
Before moving on, check your context. If the next task is unrelated to what you’ve been doing, then run /clear to start a new conversation and free up context space.
Note: To learn more about context management, check out the Context Engineering for Python Codebases tutorial.
You’ve now explored a codebase, identified real bugs, and fixed them systematically, all through focused prompts and a plan-first workflow. Next, you’ll look at some common gotchas when working with Claude Code.
Troubleshooting
Here are common issues you might encounter when working with Claude Code:
- Authentication loop: If Claude Code keeps opening the browser for login, your saved login may have expired. Run
/logoutinside a session, then restart Claude Code to re-authenticate. - Claude Code modifies unexpected files: This usually happens when you start a session from a too broad directory. Always
cdinto your project root before runningclaude. - Context window filling up quickly: Use
/contextto see what’s in your session’s context. You can also consider lowering the effort level using/effort. - Slow responses or timeouts: Switch to a faster model with
/model. Sonnet and Haiku respond much faster than Fable and Opus for routine tasks like file edits and test runs. - Session breaks: If your session ends before you’re done, you can start Claude Code with the
--resumeflag or use/resumeinside a session.
Most snags come down to session scope, context size, or an expired login, and each has a one-command fix. When something feels off, restart the session with a clean slate before digging deeper.
Next Steps for How to Use Claude Code
You’ve built a productive Claude Code workflow: plan before coding, review diffs carefully, commit between tasks, and clear your session when switching contexts. Here are directions to explore next:
- Custom slash commands: Create project-specific commands that automate repetitive prompts, such as running your full test suite or generating boilerplate modules.
- MCP servers: Connect Claude Code to external tools like databases, APIs, and documentation sites through the Model Context Protocol (MCP). This extends what the agent can access beyond your local file system.
CLAUDE.mdevolution: As your project grows, updateCLAUDE.mdwith architectural decisions, naming conventions, and patterns you want Claude Code to enforce consistently.- CI integration: Use Claude Code in your continuous integration pipeline to review code automatically, suggest refactoring, or generate test cases for uncovered paths.
- Debugging complex issues: For tricky bugs, combine plan mode with a higher
/effortlevel to have Claude Code reason through multi-step debugging scenarios before proposing fixes.
Whichever direction you choose, the same habits carry over: plan before you code, review every diff, and let Git and CLAUDE.md keep Claude Code on track.
Real Python’s Getting Started With Claude Code walks through this workflow on video, covering installation and configuration, CLAUDE.md, and Git integration.
For the commands, shortcuts, and settings you’ll reach for every day, keep the Claude Code Cheat Sheet handy.
Get Your Cheat Sheet: Download a free Claude Code cheat sheet PDF with slash commands, keyboard shortcuts, CLI flags, CLAUDE.md, permissions, hooks, skills, subagents, and MCP.
Frequently Asked Questions
Now that you’ve built a workflow around Claude Code, you can use the questions and answers below to check your understanding and recap what you’ve learned.
These FAQs cover the most common questions about installing, paying for, and working with Claude Code. Click the Show/Hide toggle beside each question to reveal the answer.
No. The native installer is self-contained and has no external runtime dependencies. An older npm-based install path still exists, but the native binary is the recommended option.
Claude Code is free to download and install, but using it requires a paid Anthropic plan or an Anthropic Console account with API billing enabled. The free Claude.ai plan doesn’t include Claude Code access.
It can edit and delete files, which is why you initialize Git at the start of every project and commit between tasks. Git is your safety net, so use it frequently.
Use a CLAUDE.md file in your project root. Claude Code reads it at the start of every session and treats its contents as baseline conventions. Keep it short, concrete, and up to date as your project evolves.
Take the Quiz: Test your knowledge with our interactive “How to Use Claude Code to Write and Debug Python” quiz. You’ll receive a score upon completion to help you track your learning progress:
Interactive Quiz
How to Use Claude Code to Write and Debug PythonTest your understanding of Claude Code by working through installation, plan mode, diff review, and debugging a Python project.