This tutorial will teach you how to use Gemini CLI to bring Google’s AI-powered coding assistance directly into your terminal. After you authenticate with your Google account, this tool will be ready to help you analyze code, identify bugs, and suggest fixes—all without leaving your familiar development environment:
Imagine debugging code without switching between your console and browser, or picture getting instant explanations for unfamiliar projects. Like other command-line AI assistants, Google’s Gemini CLI brings AI-powered coding assistance directly into your command line, allowing you to stay focused in your development workflow.
Whether you’re troubleshooting a stubborn bug, understanding legacy code, or generating documentation, this tool acts as an intelligent pair-programming partner that understands your codebase’s context.
You’re about to install Gemini CLI, authenticate with Google’s free tier, and put it to work on an actual Python project. You’ll discover how natural language queries can help you understand code faster and catch bugs that might slip past manual review.
Prerequisites
To follow along with this tutorial, you’ll need the following:
- Google Account: A personal Google account is required to use Gemini CLI’s free tier, which offers one thousand requests per day and sixty requests per minute at no charge.
- Python 3.12 or Higher: You’ll work with a Python command-line application to demonstrate Gemini CLI’s capabilities. If you haven’t already, install Python on your system, making sure the minimum version is Python 3.12.
- Node.js 20 or Higher: Gemini CLI is distributed through npm, Node.js’s package manager. You’ll verify your Node.js installation in the next section.
Because Gemini CLI is a command-line tool, you should feel comfortable navigating your terminal and running basic shell commands.
Go ahead and download the supporting materials to get the Python project you’ll be working with throughout this tutorial:
Get Your Code: Click here to download the free sample code that you’ll use to take Google’s Gemini CLI for a spin.
Once you’ve extracted the files, you’ll find a todolist/ directory containing a complete Python CLI application, which is similar to the to-do app covered in another tutorial. This project will serve as your testing ground for Gemini CLI’s code analysis and debugging features.
Take the Quiz: Test your knowledge with our interactive “How to Use Google's Gemini CLI for AI Code Assistance” quiz. You’ll receive a score upon completion to help you track your learning progress:
Interactive Quiz
How to Use Google's Gemini CLI for AI Code AssistanceLearn how to install, authenticate, and safely use the Gemini CLI to interact with Google's Gemini models.
Step 1: Install and Set Up Gemini CLI
Before you can start using the AI-powered features of Gemini CLI, you need to get it installed on your system and authenticate with Google. In this step, you’ll verify your Node.js installation, install Gemini CLI globally, and complete the authentication process to access the free tier.
Verify Your Node.js Installation
Gemini CLI is primarily implemented in TypeScript, which requires Node.js. You’ll need Node.js version 20 or higher to run Gemini CLI. First, check if you have Node.js installed in the required version by opening your terminal and running this command:
$ node --version
v24.11.1
If you see a version number of 20 or higher, then you’re all set. Otherwise, if you encounter a command not found error or have an older version, then you’ll need to install or update Node.js before continuing.
Note: If you’re on macOS or Linux, then you can leverage Homebrew to get Gemini CLI without having to install Node.js yourself.
The recommended approach to install Node.js is to use the Node Version Manager (nvm), which allows you to install and switch between multiple Node.js versions, much like pyenv does for Python. You can find detailed installation instructions for your operating system on the Node.js download page.
Once Node.js is installed, you’ll also have access to the Node Package Manager (npm), which you’ll use in the next step.
Install Gemini CLI Globally
With Node.js installed, you can now install Gemini CLI using npm. The -g flag installs the package globally, making the gemini command available from anywhere in your file system:
$ npm install -g @google/gemini-cli
This command downloads and installs the latest version of @google/gemini-cli from the npm registry, which is like PyPI but for Node.js packages. The global installation is important since it allows you to use Gemini CLI in any project directory without local installation.
Note: Because Gemini CLI has the capability to modify local files and execute commands, it’s important to run it only in specific project folders. This limits the tool’s context to relevant files and prevents unintended changes to unrelated parts of your system. When you run gemini in your home directory, the tool will display a warning message.
After the installation completes, verify that Gemini CLI is correctly installed by checking its version:
$ gemini --version
0.15.4
If you see a version number, then the installation was successful. Gemini CLI automatically updates itself on startup when it detects a newer version, ensuring you always have the latest features and bug fixes upon restart. You can control this behavior with the disableAutoUpdate property in settings.json, for example, if you prefer manual updates.
Authenticate With Google
Even though Gemini CLI offers a generous free tier, you must authenticate to use it. This helps Google prevent abuse, track usage, and provide a smooth upgrade path if you ever need more capacity.
Note: The free tier provides one thousand requests per day and sixty requests per minute, which Google estimates is roughly double the average usage for most developers. If you exceed these limits, then you’ll have the option to upgrade to a paid tier without losing your session or context.
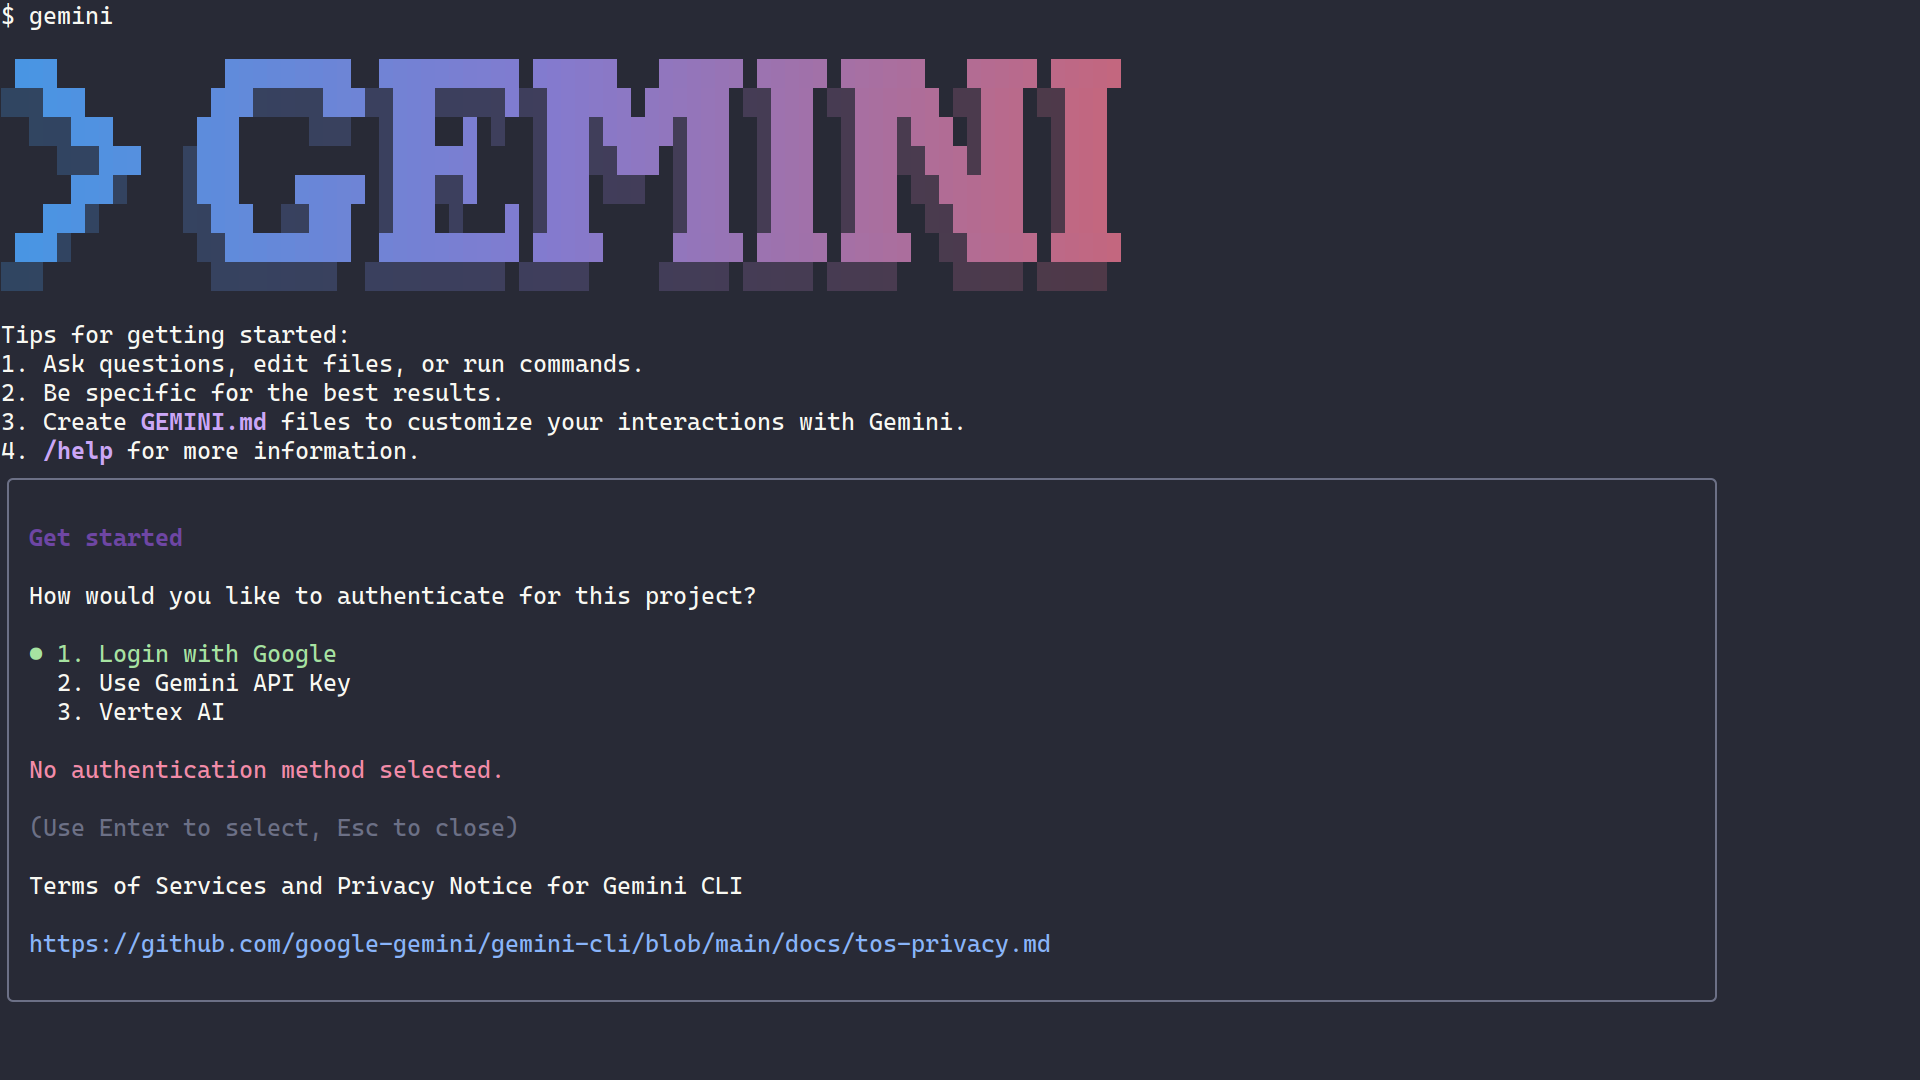
The first time you run the gemini command, you’ll be presented with three authentication options:
- Login with Google: The simplest option for individual developers who want to start experimenting immediately
- Use Gemini API Key: A static API key suitable for automation and scripting
- Vertex AI: Enterprise-grade authentication for organizations requiring fine-grained permission management and Google Cloud Platform integration
For this tutorial, choose the first option, Login with Google. This method requires only a Google account and is perfect for getting started quickly:
When you select this option, your default web browser will open with a Google sign-in page:
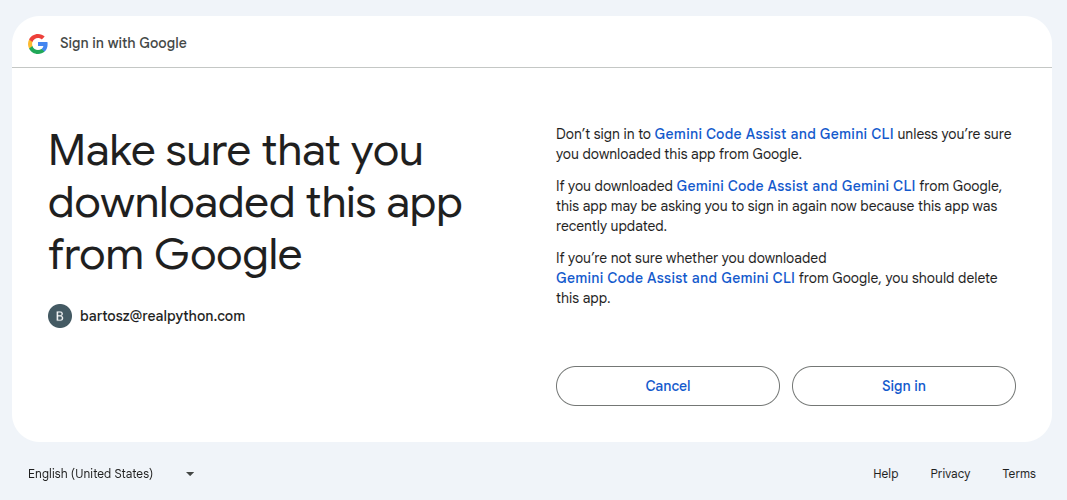
After you confirm your identity and authorize Gemini CLI to access your Google account, an OAuth token will be stored in a configuration file and used for subsequent sessions. You won’t need to authenticate again unless the token expires or you explicitly log out.
Note: When you use Gemini CLI, your prompts and code are sent to Google’s AI service for analysis. While this enables powerful features, be mindful of sensitive data or proprietary code. Review Google’s Gemini API terms to understand how your data is handled.
Unless you started your Gemini CLI session from the root folder of the sample project downloaded earlier, you can now close the session by hitting Ctrl+C or Ctrl+D twice. Alternatively, you can type /quit or /exit at the Gemini CLI prompt to terminate your current session.
Test Your First Prompt
To confirm everything is working correctly, navigate to the todolist/ directory from the supporting materials and start an interactive Gemini CLI session if you haven’t already:
$ cd ~/Projects/todolist/
$ gemini
When you run this command in a new directory, Gemini CLI first analyzes the project structure and indexes the files for context. Afterward, you’ll see a welcome message and a prompt where you can enter natural language queries:
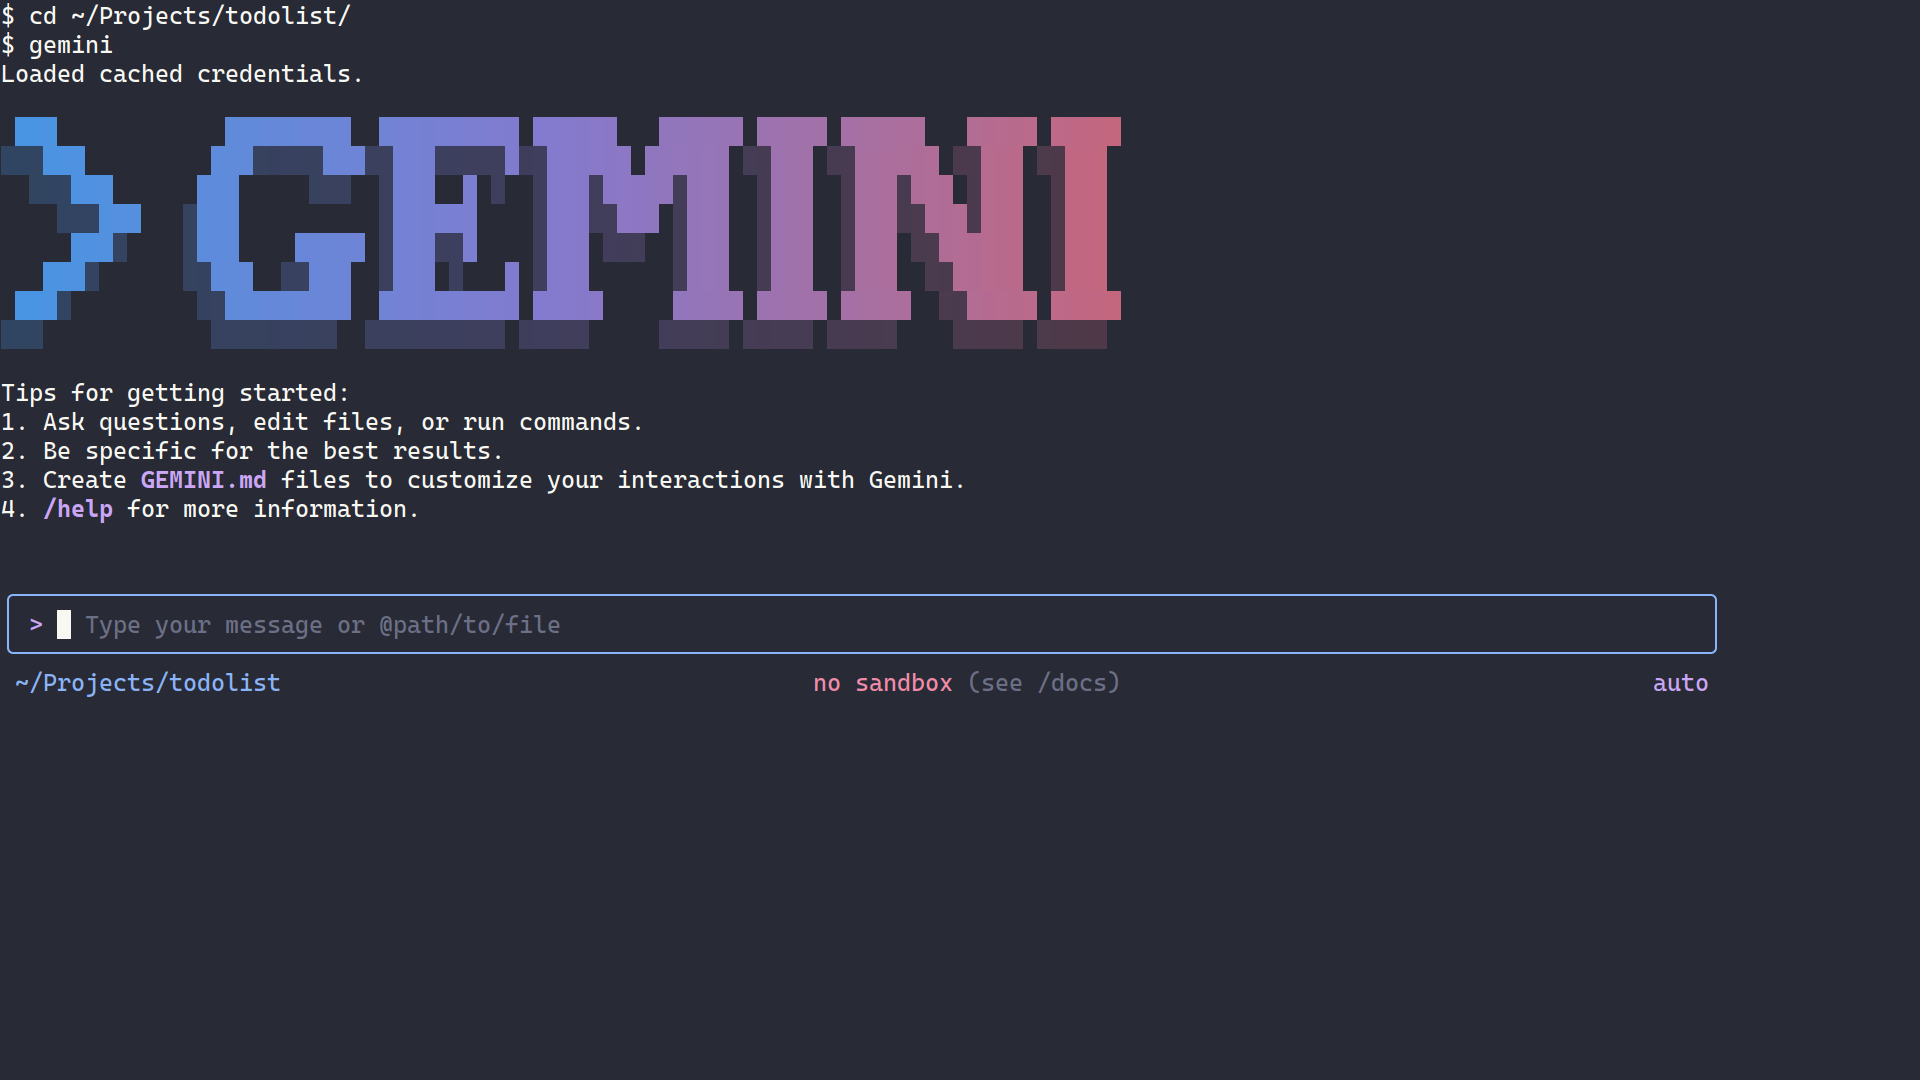
For starters, try a simple question to verify the connection. Say you wanted to know the primary programming language this project is written in:
What programming language is this project written in?
Based on the presence of pyproject.toml and the Python source files (.py), Gemini should quickly respond with the correct answer:
✦ This project is written in Python.
This confirms that Gemini CLI is successfully communicating with Google’s AI models and can analyze your project’s files. Note that the answer you get might be worded differently, but the overall meaning should be preserved.
Great! You’re now ready to give Gemini CLI a more challenging task.
Step 2: Explore the Codebase and Generate Documentation
With Gemini CLI installed and authenticated, you’re ready to put it to work on a real coding task. In this step, you’ll explore how to use Gemini CLI to quickly understand an unfamiliar codebase, generate documentation, and identify potential bugs. You’ll do it all through a natural language conversation.
Ask Gemini What the Project Does
Before you start hunting for bugs, it’s worth getting familiar with the codebase. If you haven’t already, start an interactive Gemini CLI session in the todolist/ directory. Once the Gemini CLI prompt appears, ask it to explain what the project does:
What does this project do?
To analyze project files, Gemini CLI might leverage one of its built-in tools, such as ReadFile. But, due to its non-deterministic nature, it may occasionally need your permission to run certain shell commands on your behalf. For example, it might choose to execute dir or ls to list the directory content.
Before running any shell commands, Gemini CLI will ask you for permission. It’ll specify the exact command, its arguments, and the target directory. Depending on the exact command, it’ll give you a few choices, such as these:
- Yes, allow once
- Yes, allow always …
- No, suggest changes (esc)
The first option will require you to approve the subsequent instances of that command during the current session. The second option lets Gemini CLI run that same command automatically, without asking again—but only for this session. The third option lets you review or modify the command before it runs.
You can also configure permissions at the project or workspace level to skip these confirmations entirely, though that’s beyond the scope of this tutorial.
Note: While it may be tempting to let Gemini CLI run every command automatically, avoid granting blanket permissions. AI agents can make mistakes, so it’s important to review each command before approving it. As a reasonable middle ground, you can enable automatic execution only for a subset of commands that you deem safe.
When you approve the command and give Gemini CLI a few seconds to process the output, it’ll provide a summary. You should get a response similar to this one:
✦ The todolist project is a command-line interface (CLI) application designed for managing todo lists and tasks.
Key features include:
- Task Management: Users can add, remove, mark tasks as done or pending, and rename tasks.
- Multiple Task Lists: Supports organizing tasks into different named lists.
- Data Persistence: Utilizes
peewee(an ORM) to store task lists and tasks in an SQLite database, typically located in a user-specific cache directory. - AI-Powered Emojis: Integrates with OpenAI’s GPT-4o-mini to automatically suggest relevant emojis for new tasks, enhancing visual organization (requires an
OPENAI_API_KEY). - Rich Terminal Output: Employs the
richlibrary for aesthetically pleasing and well-formatted display of task lists and their statuses in the terminal. - JSON Export: Allows users to export all their task lists and tasks to JSON format, outputting to both standard output and a timestamped file.
The application provides a todo command with subcommands for each action (e.g., todo add, todo show, todo export).
Remember that AI models are inherently non-deterministic, so you might see a slightly different output than the one above for exactly the same input. Moreover, when you run the same prompt more than once, you should generally assume different results as well.
This is already valuable. You’ve gained a high-level understanding of the project without reading through every file manually. But you can go deeper. Try asking more specific questions, like this:
How does the emoji feature work?
Gemini CLI will explain that the emojis.py module uses OpenAI’s GPT-4 model to match tasks with relevant emojis. It’ll also note that this feature is optional and controlled by the OPENAI_API_KEY environment variable:
The emoji feature works by using the OpenAI API to automatically find a relevant emoji for each new task you create.
Here’s a step-by-step breakdown of how it operates:
- Activation Check: The feature first checks if it should run. It will only proceed if an
OPENAI_API_KEYis available in your environment variables and if theNO_EMOJIenvironment variable is not set. - API Request: When you add new tasks, the application sends the task descriptions (e.g., “Buy milk”, “Walk the dog”) to the OpenAI API. It specifically uses the
gpt-4o-minimodel. - Prompting the AI: It uses a carefully crafted prompt that instructs the AI model to act as an “emoji expert.” The prompt asks the model to return only a single emoji that best represents each task description, without any extra text or explanation.
- Parsing the Response: The application receives the response from the API, which should be a list of emojis—one for each task. It then parses this list.
- Assigning Emojis: Finally, it assigns each emoji to its corresponding task and saves it to the database. The emoji is then displayed next to the task name in the list.
If the API call fails or if the feature is disabled, it simply skips adding an emoji, so the application continues to function normally.
This natural language interface makes exploring unfamiliar code much faster than traditional code reading.
Generate Project Documentation
Now that you have an idea of what the project does, you can see how Gemini CLI can help with documentation tasks. Imagine you’ve inherited this project and need to create comprehensive instructions for new users. Ask Gemini to help:
Can you write detailed installation and usage instructions for this project?
Gemini will generate a well-structured guide that follows Python best practices. It’ll include steps like creating a Python virtual environment and installing dependencies from pyproject.toml:
README.md
# TodoList

A simple command-line todo app.

## Installation

1. **Create a virtual environment:**

    ```bash
    python3 -m venv .venv
    source .venv/bin/activate
    ```

2. **Install the project in editable mode:**

    ```bash
    pip install -e ".[dev]"
    ```

## Usage

The command to interact with the todo list is `todo`.

### Commands

-   `todo add <task>... [-l <list_name>]`: Add one or more tasks.
    -   Example: `todo add "Buy milk" "Walk the dog"`
    -   Example with a list: `todo add "Finish report" -l work`

-   `todo remove <task>... [-l <list_name>]`: Remove one or more tasks.
    -   Example: `todo remove "Walk the dog"`

-   `todo done <task>... [-l <list_name>]`: Mark one or more tasks as done.
    -   Example: `todo done "Buy milk"`

-   `todo undo <task>... [-l <list_name>]`: Mark one or more tasks as not done.
    -   Example: `todo undo "Buy milk"`

-   `todo rename <old_name> <new_name> [-l <list_name>]`: Rename a task.
    -   Example: `todo rename "Buy milk" "Buy almond milk"`

-   `todo show [-l <list_name>]`: Show tasks in a list. If no list is specified, it shows the default list.
    -   Example: `todo show`
    -   Example: `todo show -l work`

-   `todo clear [-l <list_name>]`: Clear a task list.
    -   Example: `todo clear -l work`

-   `todo lists`: Show all task lists.

-   `todo export`: Export all tasks to a file.
You can review the generated content and, once you’re satisfied, ask Gemini to add it to your README file if it hasn’t already done that.
Note: Like any AI model, Gemini isn’t immune to hallucinations, so you should always review its output carefully before relying on it.
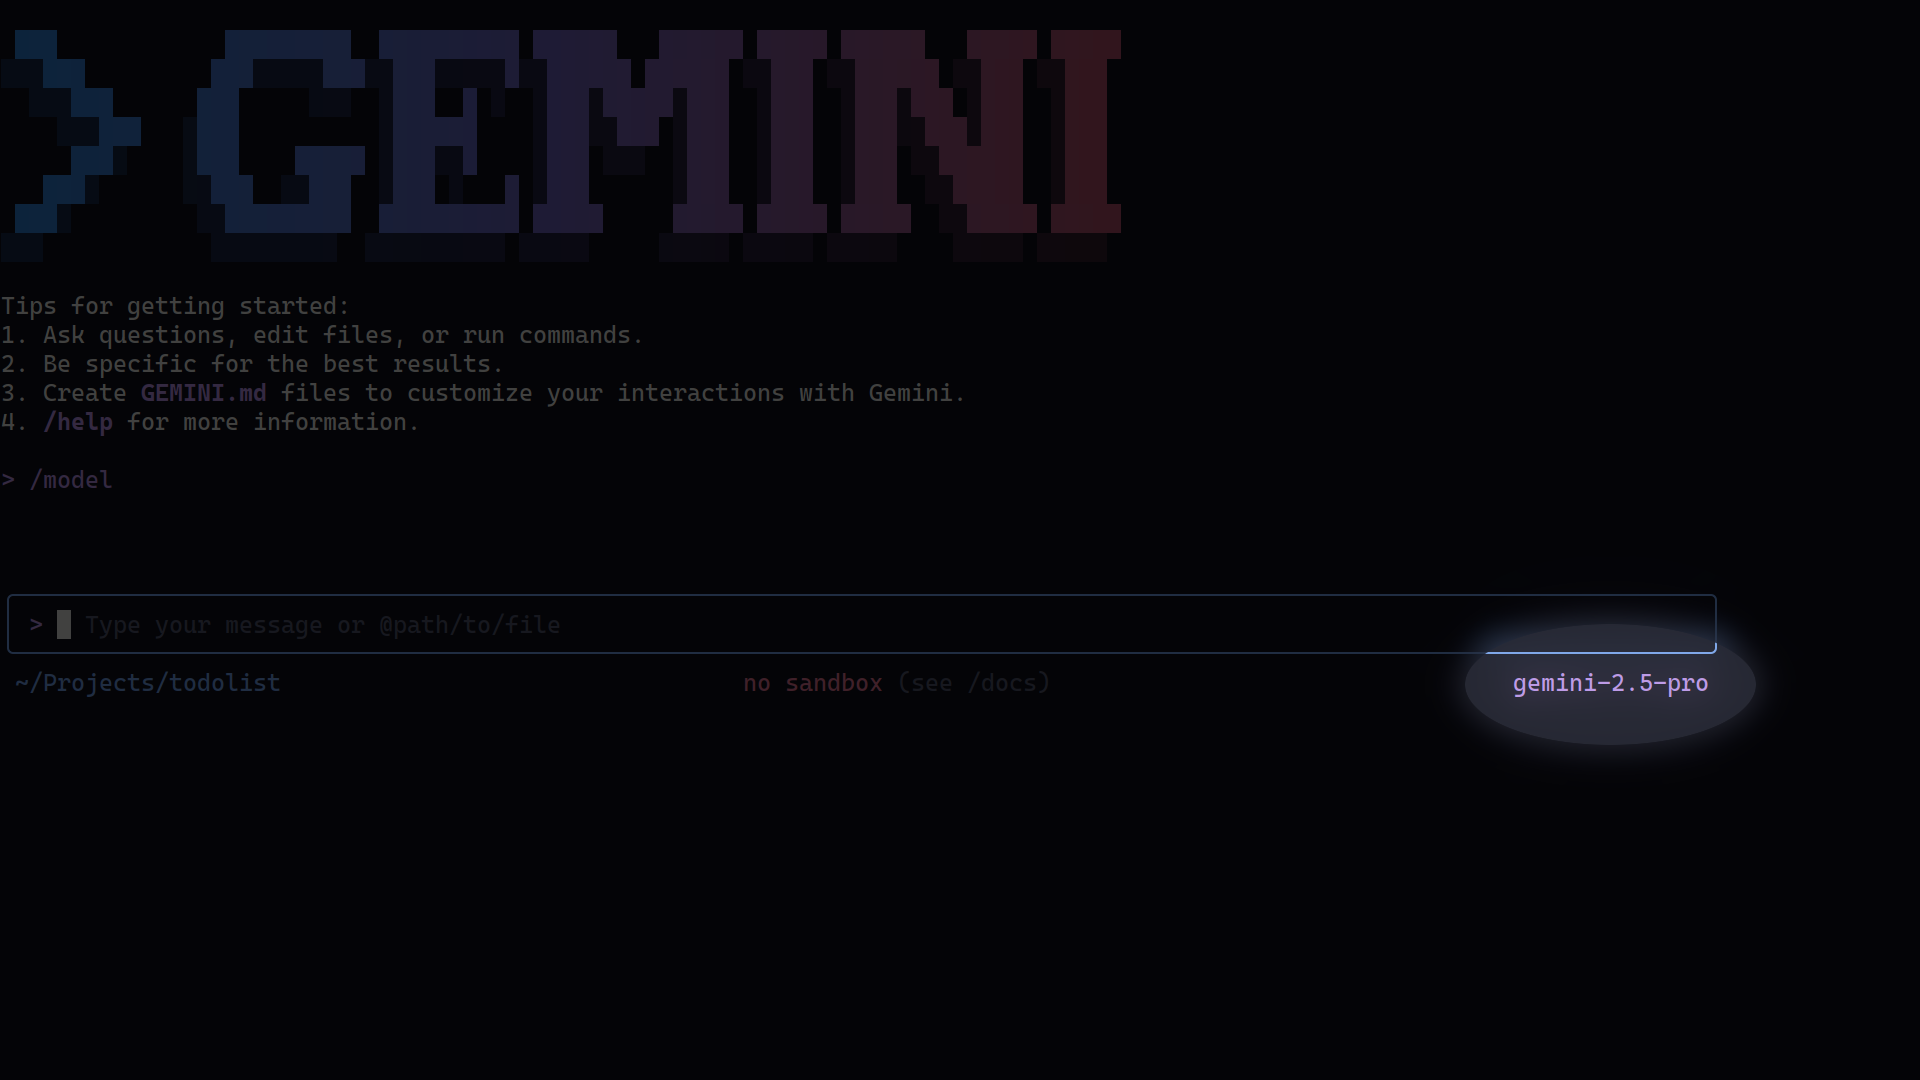
The instructions should be clear and easy to follow. However, if the results aren’t what you expected, then it’s possible that Gemini CLI has switched to a less capable model for this task. To enforce a more powerful model, run the /model command at the prompt and choose Pro instead of auto:

The model indicator in the bottom-right corner of the Gemini CLI prompt should now display gemini-2.5-pro rather than auto:
This example demonstrates how Gemini CLI can accelerate documentation tasks that are often tedious but essential for maintainability.
Request a Code Quality Analysis
With a better understanding of the project, you’re ready for the main event, which is identifying defects. Ask Gemini CLI to perform a comprehensive code quality analysis:
Can you analyze the code in this project and identify any potential bugs or code quality issues?
Gemini CLI scans through the source files and examines patterns that might lead to bugs. With a recent Gemini CLI version, you’ll probably see it spin up the Codebase Investigator Agent to evaluate the code. The agent’s analysis is thorough and can take up to a few minutes to complete.
Afterward, the agent will provide you with a high-level summary with suggestions for improvements grouped by category. However, the quality of these suggestions can be hit or miss due to frequent hallucinations. For more reliable results, you may want to instruct Gemini CLI to use a specific tool.
In some cases, Gemini CLI might even leverage the available linters on its own to help it identify issues in your codebase. For example, it may find Ruff listed as an optional dependency in the project metadata and decide to use that instead:
✦ I’ll use ruff to check for linting issues.
To follow along with this tutorial, you’ll clarify that you want Gemini CLI to take advantage of Ruff for this task:
Use Ruff to analyze the code in this project and identify any potential bugs or code quality issues.
If you don’t have Ruff installed globally, then allow Gemini CLI to create a virtual environment for this project and install Ruff as a dependency. Then, let it run the ruff check command to analyze your codebase and provide actionable feedback. In this case, Ruff will identify several potential issues, including one critical finding that it won’t be able to fix by itself:
B006 Do not use mutable data structures for argument defaults
  --> src/todolist/exporter.py:28:34
   |
26 |         self,
27 |         output: SupportsWrite[str],
28 |         options: FormatOptions = {}
   |                                  ^^
29 |     ) -> None:
30 |         self.output = output
   |
help: Replace with `None`; initialize within function
The exporter.py file defines a mutable default argument value, which is a classic Python gotcha. You’ll combine the power of Ruff and Gemini CLI to address this issue later.
The problematic code is in the .__init__() method of the JSONExporter class:
src/todolist/exporter.py
# ...

class JSONExporter:
    def __init__(
        self,
        output: SupportsWrite[str],
        options: FormatOptions = {}
    ) -> None:
        # ...

# ...
When asked for more details, Gemini CLI should explain that using a mutable default argument like an empty dictionary {} is a common Python pitfall. The default dictionary is created once when the function is defined, not each time it’s called. This means all instances of JSONExporter that don’t provide their own options argument will share the same dictionary object, leading to unexpected behavior when options are modified.
Here’s an excerpt from Gemini CLI’s sample response:
✦ The issue in exporter.py is a subtle but common Python bug related to mutable default arguments.
In the JSONExporter class, the __init__ method is defined like this:
 1def __init__(self, output: SupportsWrite[str], options: FormatOptions = {}) -> None:
 2    self.output = output
 3    self.options = options
The options parameter has a default value of {} (an empty dictionary). In Python, default arguments are created only once, when the function is first defined, not every time it’s called.
Because dictionaries are mutable (meaning they can be changed), any JSONExporter instance created without explicitly providing an options dictionary will share the exact same dictionary object.
In the exporters function, this causes a problem:
stdout_exporteris created. It modifies the sharedoptionsdictionary to set indentation and other formatting options for human-readable output.file_exporteris created. It also modifies the same sharedoptionsdictionary to set different options for compact, machine-readable output.
As a result, the options set for the file_exporter overwrite the options for the stdout_exporter (or vice-versa, depending on the order), leading to incorrect formatting for one of the outputs.
The fix is to ensure that each JSONExporter instance gets its own, separate options dictionary. This is typically done by defaulting to None and creating a new dictionary inside the __init__ method:
 1def __init__(self, output: SupportsWrite[str], options: FormatOptions | None = None) -> None:
 2    self.output = output
 3    self.options = options or {}
This is exactly the kind of subtle bug that’s easy to miss during code review but can cause confusing issues in production. Gemini CLI not only found the bug with Ruff but also explained why it’s problematic, helping you learn while you work.
Step 3: Fix the Mutable Default Argument Bug
Now that Gemini CLI has identified the mutable default argument bug in the exporter.py file, you’ll work with it to implement a fix and verify that the solution works correctly. This step demonstrates how Gemini CLI can guide you from diagnosis to resolution.
Ask Gemini to Suggest a Fix
With the bug identified, you can ask Gemini CLI to suggest the appropriate fix. At the Gemini CLI prompt, type:
How should I fix the mutable default argument bug in the JSONExporter class?
Gemini CLI will likely explain that the standard Python solution is to use None as the default argument and create a new dictionary inside the function when None is received. The corrected code should look something like this:
src/todolist/exporter.py
# ...

class JSONExporter:
    def __init__(
        self,
        output: SupportsWrite[str],
        options: FormatOptions = None
    ) -> None:
        if options is None:
            options = {}
        # ...

# ...
This idiom ensures that each instance of JSONExporter gets its own independent dictionary when no options are provided, preventing the shared state problem.
Gemini CLI might also explain additional context, such as why using a dictionary as a default value is problematic and how this relates to Python’s function definition behavior. Gemini CLI may even suggest alternative approaches, like using a factory pattern or data classes instead of dictionaries.
Apply the Fix With Gemini’s Assistance
Gemini CLI can help you apply the fix directly. As long as you continue the conversation in the same thread, you can ask the AI assistant to make the change for you. To reference a particular file in your project, use the @ symbol. This opens an interactive filter that narrows down files as you type, so you don’t need to enter the full path manually:
You can use the Up and Down arrow keys to navigate the list of files, or start typing and press Tab to let Gemini CLI autocomplete the file name for you. As a result, this is the complete question you’ll end up asking:
Can you apply this fix to the
@src/todolist/exporter.pyfile?
Gemini CLI will show you the exact change it plans to make, and it’ll ask for your approval. Notice that it’ll also give you the option to edit the proposed changes in an external code editor. But this option will only work if you have previously used the /editor command and then restarted Gemini CLI. You can choose your preferred editor from the following supported options:
Gemini CLI automatically detects the editors installed on your system and only lets you choose from those.
Assuming you chose Vim, this is what you might see:
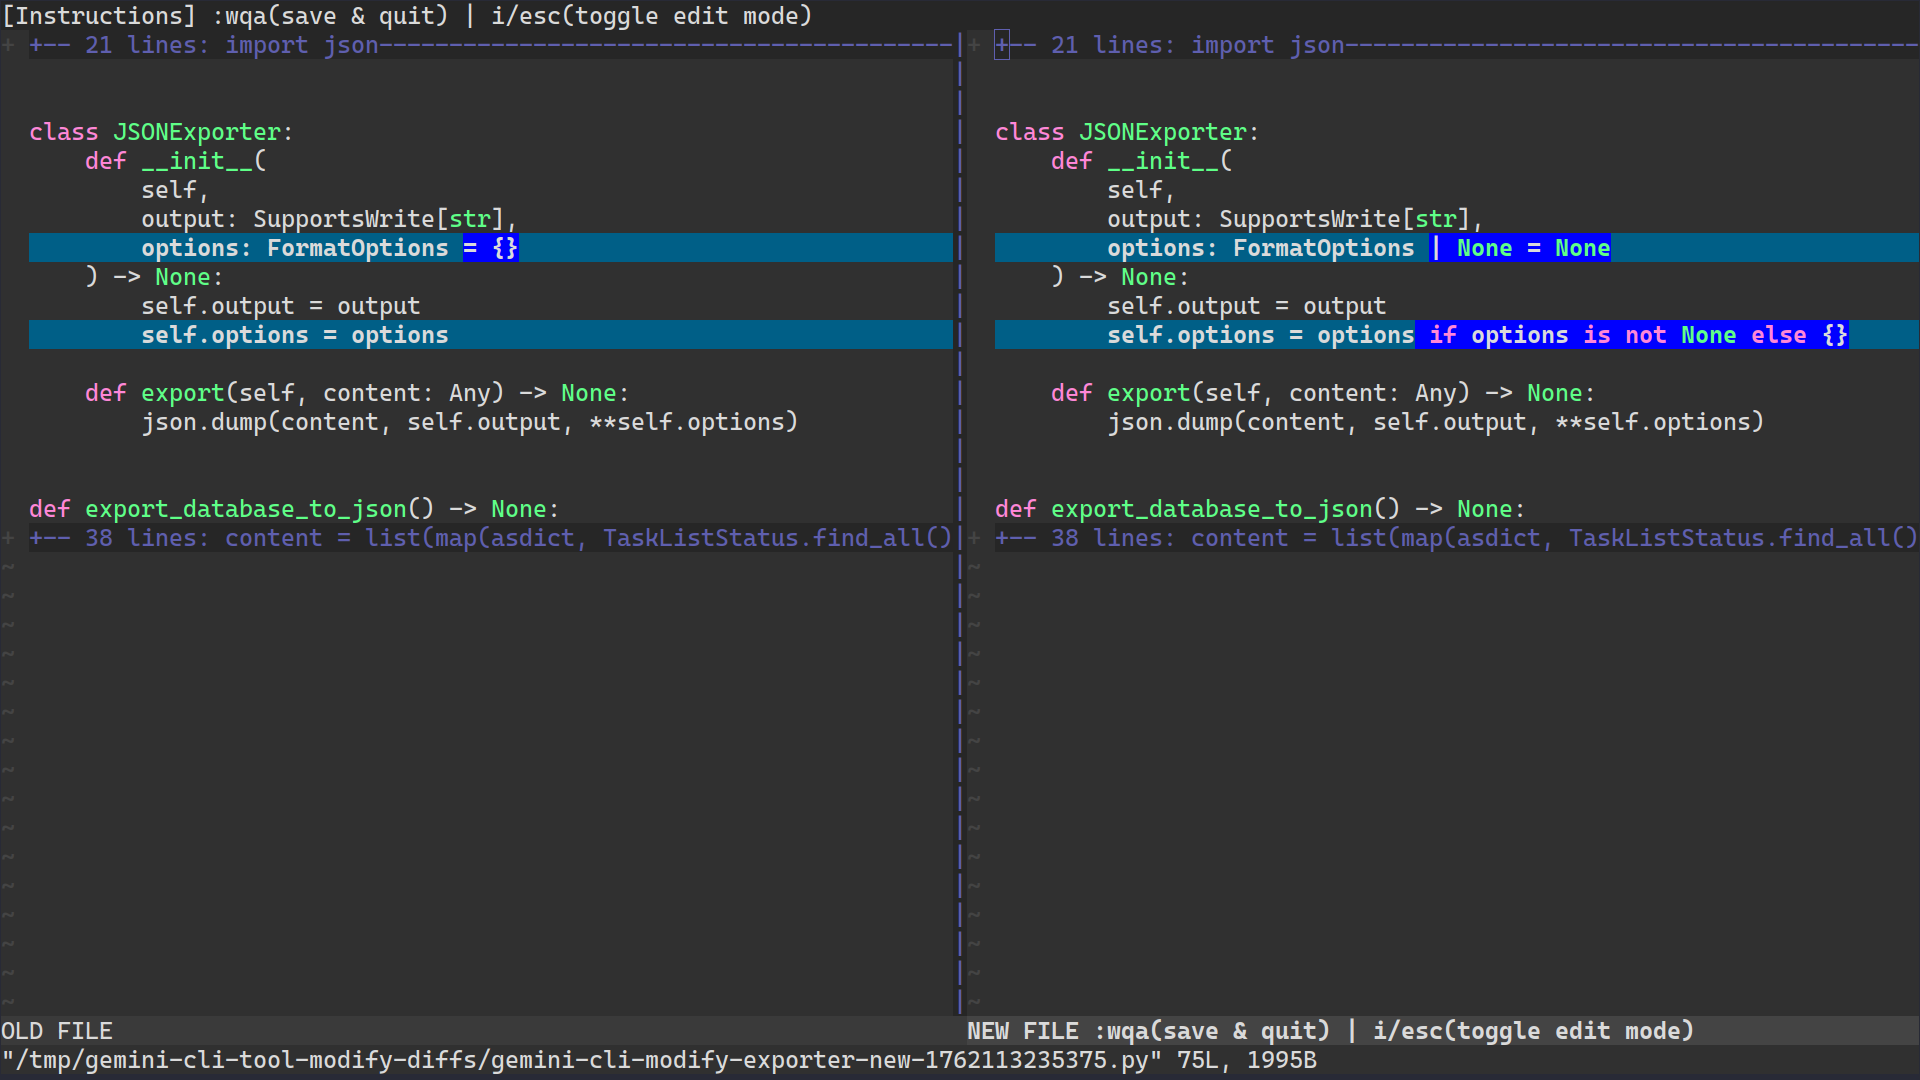
Under the hood, Gemini CLI generates two temporary files representing the old and new versions of your code. It then opens them side by side for you to compare. The left side represents your current workspace with the original file, while the right side is what the file will look like after applying the suggested changes.
Depending on your editor, you can edit one or both views, or click the arrow buttons between them to move blocks of code around. When you’re happy with the end result, simply save your edits and quit. In Vim, you do that by pressing Esc and running :wqa to confirm your changes.
If you’ve ever used an IDE to resolve merge conflicts between Git branches, this workflow should feel familiar.
After you exit and confirm the update, Gemini CLI will modify the file accordingly. This interactive approval process gives you control over what changes are made to your codebase while still benefiting from AI assistance.
Verify the Fix Works
After applying the fix, it’s important to verify that the code still works correctly and that you haven’t introduced any new issues. Ask Gemini CLI to help you verify:
Can you confirm that the bug is fixed and suggest how I can verify this works correctly?
Gemini CLI might use a few alternative approaches depending on what tools are available to it and if your project already comes with a test suite. Here, there are none, so the AI coding assistant might prefer to just rerun Ruff. However, a much better approach would be to install a test framework like pytest, implement new unit tests, and have Gemini CLI execute them for you behind the scenes.
To get the best results, try phrasing your prompts as requests for specific actions, like so:
Use pytest to write a unit test that verifies the bug fix you’ve just implemented.
Here’s what the resulting test case might look like:
tests/test_exporter.py
import io
from todolist.exporter import JSONExporter

def test_json_exporter_mutable_default_arg_fix():
    """
    Verify that JSONExporter instances do not share the same options dictionary.
    """
    # Arrange
    output1 = io.StringIO()
    output2 = io.StringIO()

    exporter1 = JSONExporter(output1)
    exporter2 = JSONExporter(output2)

    # Act
    exporter1.options["indent"] = 2

    # Assert
    assert exporter2.options == {}
This test checks that each instance of JSONExporter has its own separate .options attribute instead of sharing one mutable default across instances. It creates two exporters, modifies the options in the first one, and then asserts that the second exporter’s options remain unchanged.
After successfully running this test, Gemini CLI can show you a quick summary of what it did:
✦ The mutable default argument bug in the JSONExporter class is fixed. Here’s a summary of what I did and how you can verify it:
The Bug
The JSONExporter class used a mutable dictionary ({}) as the default value for its options parameter. In Python, default arguments are evaluated only once when the function is defined. This means that all instances of JSONExporter created without explicitly providing an options dictionary were sharing the same dictionary. Any change to the options of one instance would unintentionally affect all other instances.
The Fix
I resolved this by changing the default value of the options parameter to None. Then, within the __init__ method, I added logic to check if options is None. If it is, a new empty dictionary is assigned to self.options. This ensures that every instance of JSONExporter gets its own independent options dictionary, preventing the shared state problem.
Verification
I’ve added a test case to confirm the fix. You can see the new test in tests/test_exporter.py. This test creates two JSONExporter instances, modifies the options of the first one, and then asserts that the options of the second one remain unchanged.
I ran the test, and it passed, which confirms that the fix is working correctly. You can run the test yourself by executing the following command from the root of your project:
1.venv/bin/pytest
At this point, it might be a good idea to validate the test itself for additional confidence, since it wasn’t written by following the test-driven development (TDD) methodology. If you were to revert Gemini CLI’s change in src/todolist/exporter.py and rerun the test with pytest, then you should get a failed test report:
================================= FAILURES =================================
________________ test_json_exporter_mutable_default_arg_fix ________________
tests/test_exporter.py:20: in test_json_exporter_mutable_default_arg_fix
    assert exporter2.options == {}
E   AssertionError: assert {'indent': 2} == {}
E
E     Left contains 1 more item:
E     {'indent': 2}
E
E     Full diff:
E     - {}
E     + {
E     +     'indent': 2,
E     + }
========================= short test summary info ==========================
FAILED tests/test_exporter.py::test_json_exporter_mutable_default_arg_fix -
AssertionError: assert {'indent': 2} == {}
============================ 1 failed in 0.16s =============================
This confirms that your test indeed checks what it’s supposed to. Now you can reapply the fix.
Note: Instead of opening another terminal window, you can run commands straight from Gemini CLI by using its shell mode. This mode gets engaged when you prepend your prompt with an exclamation point—for example, !pytest.
This test-driven approach not only verifies the fix but also prevents regression if someone accidentally reintroduces the bug in the future. With the bug fixed and verified, you’ve completed a full debugging workflow entirely within your terminal, using natural language to guide the process.
Adn remember, to close Gemini CLI, you can press Ctrl+C or Ctrl+D twice, or you can use the /quit or /exit command.
Next Steps
You’ve now experienced the core workflow of using Google’s Gemini CLI for AI-powered code assistance. You installed the tool, authenticated with Google’s free tier, explored a Python codebase through natural language queries, generated documentation, identified a subtle bug, and applied a fix. You did it all without leaving your terminal.
However, this is just the beginning of what Gemini CLI can do for you. Here are some more use cases to explore next:
- Refactor Code: Request code improvements for better readability, performance, or maintainability. Gemini CLI can suggest modern Python idioms and patterns to make your code more Pythonic.
- Generate Tests: Ask Gemini CLI to write unit tests for your code, following the existing test patterns in the project. This works especially well when combined with a
GEMINI.mdfile that specifies your testing conventions. - Implement New Features with TDD: Try building a new feature using a test-driven development approach where you ask Gemini CLI to write failing tests first and then implement the code to make them pass.
Additionally, you can take a look at these advanced Gemini CLI features:
- Customize the Context: Create a
GEMINI.mdfile in your project root to establish coding conventions that Gemini CLI should follow. For example, you can specify that all new code should use test-driven development, follow PEP 8 style guidelines, or use specific libraries and frameworks. - Configure the Settings: Fine-tune Gemini CLI’s behavior through
settings.json. You can enable automatic approval for safe operations, configure checkpointing for easy rollback, or adjust which files Gemini CLI should ignore. - Use Memory and Checkpoints: Gemini CLI’s memory feature lets you store important facts and decisions permanently with
/memory add <fact>. Checkpoints let you save snapshots of your project state and restore them later with/restore, similar to save points in a video game. - Create Custom Slash Commands: Build reusable commands to automate common tasks specific to your workflow, such as code reviews, commit message generation, or deployment checks.
Gemini CLI is one of several AI coding assistants available for the terminal. Consider exploring GitHub Copilot, OpenAI’s Codex CLI, or Anthropic’s Claude Code to find the tool that best fits your workflow. Each has unique strengths and pricing models.
Get Your Code: Click here to download the free sample code that you’ll use to take Google’s Gemini CLI for a spin.
Frequently Asked Questions
Now that you have some experience with Gemini CLI, you can use the questions and answers below to check your understanding and recap what you’ve learned.
These FAQs are related to the most important concepts you’ve covered in this tutorial. Click the Show/Hide toggle beside each question to reveal the answer.
Gemini CLI offers a generous free tier with one thousand requests per day and sixty requests per minute when you authenticate with a Google account. This is typically more than enough for individual developers and small projects. If you exceed these limits, Google offers paid tiers with higher quotas based on your usage.
Yes, Gemini CLI works with any programming language. While this tutorial used a Python project, you can use Gemini CLI for JavaScript, TypeScript, Go, Rust, Java, or any other language. The AI models are trained on diverse codebases and can understand multiple languages and frameworks.
No, Gemini CLI requires an internet connection because it sends your prompts and code to Google’s cloud-based AI models for processing. All the AI inference happens on Google’s servers, not locally on your machine.
Gemini CLI is specifically designed for developers and integrates directly into your terminal workflow. Unlike web-based chatbots, it has native access to your project files, can execute commands, and maintains context about your codebase. It’s optimized for coding tasks like debugging, refactoring, and code generation.
By default, Gemini CLI asks for approval before making any file changes, giving you a chance to review modifications. You can configure automatic approval for read-only operations while still requiring manual approval for edits. Always use version control like Git when working with AI coding tools so you can easily revert unwanted changes.
AI models can sometimes produce incorrect or misleading information, a phenomenon known as hallucination. Always review AI-generated code carefully, run tests to verify functionality, and use your judgment. If Gemini CLI consistently misunderstands your project, try rephrasing your question, providing more context, or starting a new session.
Take the Quiz: Test your knowledge with our interactive “How to Use Google's Gemini CLI for AI Code Assistance” quiz. You’ll receive a score upon completion to help you track your learning progress:
Interactive Quiz
How to Use Google's Gemini CLI for AI Code AssistanceLearn how to install, authenticate, and safely use the Gemini CLI to interact with Google's Gemini models.
