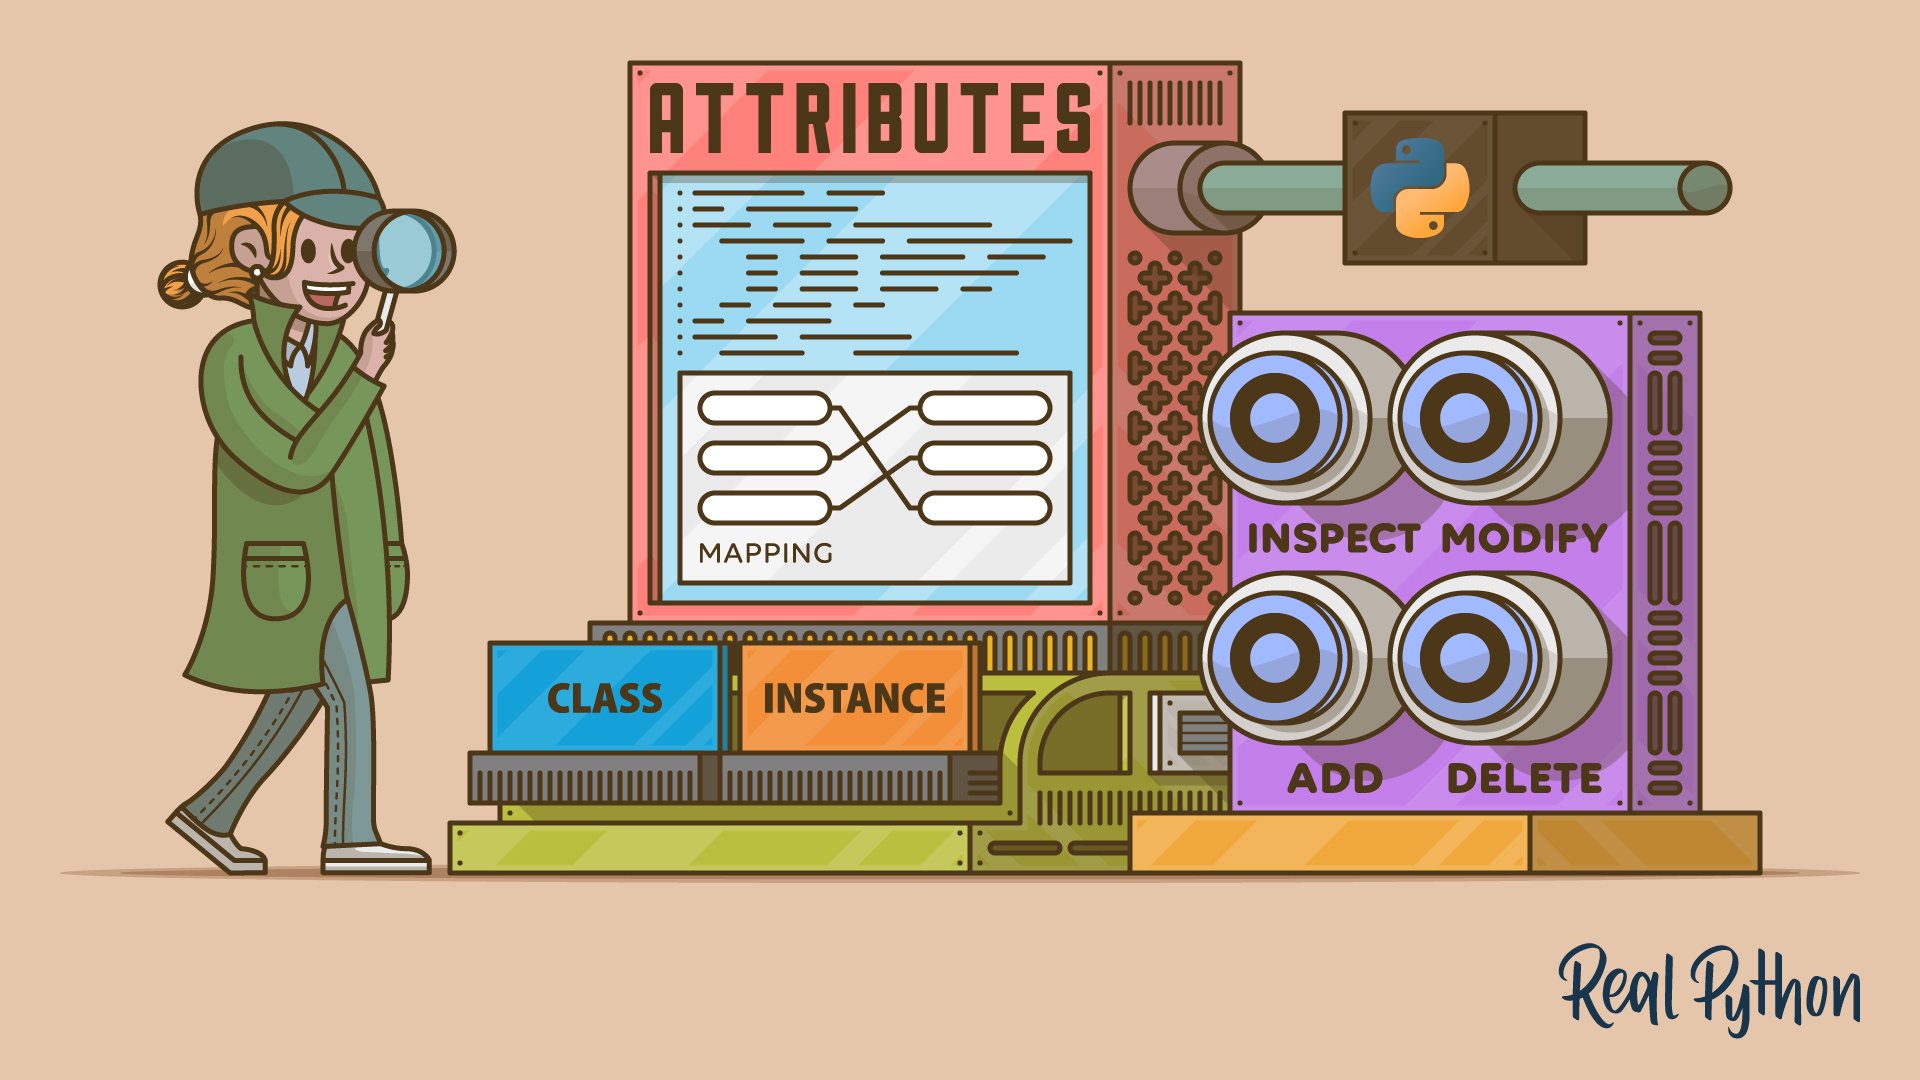
Python’s .__dict__ is a special attribute in classes and instances that acts as a namespace, mapping attribute names to their corresponding values. You can use .__dict__ to inspect, modify, add, or delete attributes dynamically, which makes it a versatile tool for metaprogramming and debugging.
In this tutorial, you’ll learn about using .__dict__ in various contexts, including classes, instances, and functions. You’ll also explore its role in inheritance with practical examples and comparisons to other tools for manipulating attributes.
By the end of this tutorial, you’ll understand that:
.__dict__holds an object’s writable attributes, allowing for dynamic manipulation and introspection.- Both
vars()and.__dict__let you inspect an object’s attributes. The.__dict__attribute gives you direct access to the object’s namespace, while thevars()function returns the object’s.__dict__. - Common use cases of
.__dict__include dynamic attribute management, introspection, serialization, and debugging in Python applications.
While this tutorial provides detailed insights into using .__dict__ effectively, having a solid understanding of Python dictionaries and how to use them in your code will help you get the most out of it.
Get Your Code: Click here to download the free sample code you’ll use to learn about using Python’s .__dict__ to work with attributes.
Take the Quiz: Test your knowledge with our interactive “Using Python's .__dict__ to Work With Attributes” quiz. You’ll receive a score upon completion to help you track your learning progress:
Interactive Quiz
Using Python's .__dict__ to Work With AttributesIn this quiz, you'll test your understanding of Python's .__dict__ attribute and its usage in classes, instances, and functions. Acting as a namespace, this attribute maps attribute names to their corresponding values and serves as a versatile tool for metaprogramming and debugging.
Getting to Know the .__dict__ Attribute in Python
Python supports the object-oriented programming (OOP) paradigm through classes that encapsulate data (attributes) and behaviors (methods) in a single entity. Under the hood, Python takes advantage of dictionaries to handle these attributes and methods.
Why dictionaries? Because they’re implemented as hash tables, which map keys to values, making lookup operations fast and efficient.
Note: To learn more about using Python dictionaries, check out the following resources:
Generally, Python uses a special dictionary called .__dict__ to maintain references to writable attributes and methods in a Python class or instance. In practice, the .__dict__ attribute is a namespace that maps attribute names to values and method names to method objects.
The .__dict__ attribute is fundamental to Python’s data model. The interpreter recognizes and uses it internally to process classes and objects. It enables dynamic attribute access, addition, removal, and manipulation. You’ll learn how to do these operations in a moment. But first, you’ll look at the differences between the class .__dict__ and the instance .__dict__.
The .__dict__ Class Attribute
To start learning about .__dict__ in a Python class, you’ll use the following demo class, which has attributes and methods:
demo.py
class DemoClass:
    class_attr = "This is a class attribute"

    def __init__(self):
        self.instance_attr = "This is an instance attribute"

    def method(self):
        return "This is a method"
In this class, you have a class attribute, two methods, and an instance attribute. Now, start a Python REPL session and run the following code:
>>> from demo import DemoClass

>>> print(DemoClass.__dict__)
{
    '__module__': 'demo',
    '__firstlineno__': 1,
    'class_attr': 'This is a class attribute',
    '__init__': <function DemoClass.__init__ at 0x102bcd120>,
    'method': <function DemoClass.method at 0x102bcd260>,
    '__static_attributes__': ('instance_attr',),
    '__dict__': <attribute '__dict__' of 'DemoClass' objects>,
    '__weakref__': <attribute '__weakref__' of 'DemoClass' objects>,
    '__doc__': None
}
The call to print() displays a dictionary that maps names to objects. First, you have the '__module__' key, which maps to a special attribute that specifies where the class is defined. In this case, the class lives in the demo module. Then, you have the '__firstlineno__' key, which holds the line number of the first line of the class definition, including decorators. Next, you have the 'class_attr' key and its corresponding value.
Note: When you access the .__dict__ attribute on a class, you get a mappingproxy object. This type of object creates a read-only view of a dictionary.
The '__init__' and 'method' keys map to the corresponding method objects .__init__() and .method(). Next, you have a key called '__dict__' that maps to the attribute .__dict__ of DemoClass instances. You’ll explore this attribute more in a moment.
The '__static_attributes__' key is a tuple containing the names of the attributes that you assign through self.attribute = value from any method in the class body.
The '__weakref__' key represents a special attribute that enables you to reference objects without preventing them from being garbage collected.
Finally, you have the '__doc__' key, which maps to the class’s docstring. If the class doesn’t have a docstring, it defaults to None.
Did you notice that the .instance_attr name doesn’t have a key in the class .__dict__ attribute? You’ll find out where it’s hidden in the following section.
The .__dict__ Instance Attribute
In the previous section, you learned that the class .__dict__ attribute has a key called '__dict__'. This key maps to the .__dict__ attribute in any instance or object of the class:
>>> DemoClass.__dict__["__dict__"]
<attribute '__dict__' of 'DemoClass' objects>
Run the following code to create a concrete instance of DemoClass and access the content of its .__dict__ attribute:
>>> demo_object = DemoClass()

>>> demo_object.__dict__
{'instance_attr': 'This is an instance attribute'}
When you access the .__dict__ attribute on an object, you get a dictionary that only contains key-value pairs representing instance attributes and their values.
Now, what if you have an instance attribute that shadows a class attribute? Consider the following class:
>>> class Number:
...     value = 42
...

>>> Number.__dict__
mappingproxy({
    '__module__': '__main__',
    '__firstlineno__': 1,
    'value': 42,
    ...
})

>>> number = Number()
>>> number.__dict__
{}

>>> number.value
42
When you access .__dict__ on Number, the output includes 'value' as the class attribute. When you access .__dict__ on number, you get an empty dictionary. Finally, when you use the dot notation to access .value, you get the class attribute’s value.
Go ahead and add an instance attribute called .value:
>>> class Number:
...     value = 42
...     def __init__(self):
...         self.value = 7
...

>>> Number.__dict__
mappingproxy({
    '__module__': '__main__',
    '__firstlineno__': 1,
    'value': 42,
    ...
})

>>> number = Number()
>>> number.__dict__
{'value': 7}

>>> number.value
7
Now, when you use the dot notation to look for .value, you get the instance attribute’s value. This is because Python searches for .value in number.__dict__ first. If it doesn’t find it, then it searches for .value in Number.__dict__.
The .__dict__ Attribute in Functions
Apart from classes and instances, functions also have a .__dict__ special attribute. This attribute is typically an empty dictionary:
>>> def greet(name):
...     print(f"Hello, {name}!")
...

>>> greet.__dict__
{}
In this example, when you access the .__dict__ attribute in a function object, you get an empty dictionary because functions don’t have any attributes attached by default.
Note: Methods are also functions, so they also have a .__dict__ attribute:
>>> DemoClass.__dict__["method"].__dict__
{}
Here, you access the method key on the .__dict__ attribute of your DemoClass. As expected, you get an empty dictionary.
In practice, a function’s .__dict__ gives you a namespace to attach metadata to the function, which can be useful for caching, debugging, and introspection.
For example, say that you want to write a function that’s able to track the number of calls. You can use the function .__dict__ for that:
>>> def track_calls():
...     track_calls.__dict__["calls"] = track_calls.__dict__.get("calls", 0) + 1
...     print(f"Calls: {track_calls.calls}")
...

>>> track_calls()
Calls: 1
>>> track_calls()
Calls: 2
>>> track_calls()
Calls: 3

>>> track_calls.calls
3
In the highlighted line, you add a new attribute named .calls to your function by doing a dictionary key assignment. The expression on the right-hand side gets the 'calls' key from .__dict__ using .get() and increments its value by one.
The .__dict__ Attribute in Other Objects
In Python, everything is an object. This fact may suggest that everything in Python has a .__dict__ attribute. However, that’s not correct.
For example, built-in functions don’t have one:
>>> abs.__dict__
Traceback (most recent call last):
    ...
AttributeError: 'builtin_function_or_method' object has no attribute '__dict__'.
    Did you mean: '__dir__'?

>>> print.__dict__
Traceback (most recent call last):
    ...
AttributeError: 'builtin_function_or_method' object has no attribute '__dict__'.
    Did you mean: '__dir__'?
When you try to access .__dict__ on a built-in function object such as abs() or print(), you get an AttributeError exception with a clear error message.
Other objects like built-in data types do have a .__dict__ attribute:
>>> int.__dict__
mappingproxy({
    '__new__': <built-in method __new__ of type object at 0x1010adb00>,
    '__repr__': <slot wrapper '__repr__' of 'int' objects>,
    ...
})

>>> list.__dict__
mappingproxy({
    '__new__': <built-in method __new__ of type object at 0x1010ad238>,
    '__repr__': <slot wrapper '__repr__' of 'list' objects>,
    ...
})

>>> dict.__dict__
mappingproxy({
    '__new__': <built-in method __new__ of type object at 0x1030da9a8>,
    '__repr__': <slot wrapper '__repr__' of 'dict' objects>,
    ...
})
In this example, you can see that the int, list, and dict data types have a .__dict__ attribute with a large series of key-value pairs.
Here’s a summary of different types of objects and whether they have a .__dict__ attribute:
| Object | Has .__dict__? |
|---|---|
| User-defined classes and their instances | ✅ |
| Modules | ✅ |
| User-defined functions and methods | ✅ |
| Built-in exceptions and their instances | ✅ |
Classes created with the built-in type() function |
✅ |
| Built-in data types | ✅ |
| Instances of built-in data types | ❌ |
| Built-in functions | ❌ |
Objects with a .__slots__ attribute |
❌ |
Instances of built-in data types, such as int, float, str, list, dict, and set don’t have a __dict__ attribute because they’re implemented in C and are optimized for memory efficiency and performance. Built-in functions are also implemented in C and don’t have a .__dict__ attribute either.
The .__slots__ attribute is intended to be a memory-efficient, immutable alternative to .__dict__ that you can use when you need to create many instances of a given object.
Inspecting .__dict__ With the Built-in vars() Function
The vars() function returns the .__dict__ attribute for a module, class, instance, or any other object with this attribute:
>>> vars(list)
mappingproxy({
    '__new__': <built-in method __new__ of type object at 0x1010ad238>,
    '__repr__': <slot wrapper '__repr__' of 'list' objects>,
    ...
})

>>> class DemoClass:
...     class_attr = "This is a class attribute"
...     def __init__(self):
...         self.instance_attr = "This is an instance attribute"
...     def method(self):
...         return "This is a method"
...

>>> vars(DemoClass)
mappingproxy({
    '__module__': '__main__',
    ...
    'class_attr': 'This is a class attribute',
    ...
})

>>> vars(abs)
Traceback (most recent call last):
    ...
TypeError: vars() argument must have __dict__ attribute
If you need to quickly inspect an object’s .__dict__ attribute, then you can use the vars() function. Note that when the argument to vars() doesn’t have a .__dict__, you get a TypeError exception.
Finally, it’s important to note that using vars() for introspection and debugging is more Pythonic than using the .__dict__ attribute directly.
Manipulating Attributes With .__dict__
The .__dict__ attribute gives you direct access to an object’s namespace, allowing you to dynamically inspect, modify, add, and delete attributes. This makes it a powerful tool for metaprogramming, debugging, and extending behaviors at runtime.
In the following sections, you’ll explore how to work with .__dict__ to access existing attributes, modify them, introduce new attributes dynamically, and remove them when needed.
Accessing Existing Attributes
You can use .__dict__ to access an object’s attributes. Since .__dict__ is a dictionary-like object, you can use it in many different ways with minimal effort because it has the same interface as dictionaries.
For example, consider the following Person class where you use .__dict__ to implement a few methods:
person.py
class Person:
    def __init__(self, first_name, last_name, age):
        self.first_name = first_name
        self.last_name = last_name
        self.age = age

    def __str__(self):
        return "{first_name} {last_name} is {age} years old".format(
            **self.__dict__
        )

    def __repr__(self):
        return "{cls}('{first_name}', '{last_name}', {age})".format(
            cls=type(self).__name__,
            **self.__dict__,
        )

    def as_dict(self):
        return self.__dict__

    def as_tuple(self):
        return tuple(self.__dict__.values())
In this example, you first use .__dict__ to fill in the instance attributes into the resulting string in .__str__() and .__repr__(). These methods provide a user-friendly and developer-friendly string representation for objects of Person.
You then use the .format() method to interpolate the key-value pairs from .__dict__, which you unpack using the dictionary unpacking operator (**).
Note: To learn more about string interpolation with the .format() method, check out the String Interpolation in Python: Exploring Available Tools tutorial.
Next, you use .__dict__ to implement a method called .as_dict(), which lets you express an instance of Person as a dictionary. Finally, you have a similar method named .as_tuple() that returns a tuple of attribute values. To do this, the method uses .__dict__ and its .values() method.
Here’s how this class works:
>>> from person import Person

>>> john = Person("John", "Doe", 30)
>>> john
Person('John', 'Doe', 30)
>>> print(john)
John Doe is 30 years old
>>> john.as_dict()
{'first_name': 'John', 'last_name': 'Doe', 'age': 30}
>>> john.as_tuple()
('John', 'Doe', 30)
As you can conclude, .__dict__ is a powerful tool for quickly accessing instance attributes within the class definition. Combined with the unpacking operator **, it can be very helpful.
Modifying Existing Attributes
Using .__dict__ to modify existing attributes can also be a useful strategy. It can be especially helpful when you need to change several attributes at a time. For example, consider the following Config class that lets you manage the settings of a hypothetical app:
config_v1.py
class Config:
    def __init__(self, **kwargs):
        self.__dict__.update(kwargs)

    update = __init__

    def __str__(self):
        return str(self.__dict__)
In this example, the .__init__() method takes an undetermined number of keyword arguments representing key-value pairs of setting parameters. Inside the method, you call .update() on .__dict__ to add the input parameters and their values to the instance.
The assignment update = __init__ provides a quick way to define an .update() instance method with the same implementation of .__init__(). This is a nice trick to have under your belt.
Finally, you define a .__str__() method to provide a user-friendly string representation for the class. In this method, you don’t perform any modification on attributes.
Here’s how the class works in practice:
>>> from config_v1 import Config
>>> config = Config(theme="light", font_size=12, language="English")

>>> config
{'theme': 'light', 'font_size': 12, 'language': 'English'}

>>> user_conf = {"theme": "dark", "font_size": 14, "language": "Spanish"}
>>> config.update(**user_conf)
>>> config
{'theme': 'dark', 'font_size': 14, 'language': 'Spanish'}
In this example, you first create an instance of Config with a series of initial configuration parameters and their values. Then, you use the .update() method to change the values after the user selection.
Adding New Attributes Dynamically
You can dynamically add attributes to an object that has a .__dict__ attribute. Likewise, you can add methods dynamically to a class with a .__dict__ attribute.
Consider the following class, which aims to store a row of data from a database table or CSV file:
>>> class Record:
...     """Hold a record of data."""
...
This class doesn’t have any attributes yet because you don’t know what data the class will store. Fortunately, you can add attributes and even methods to this class dynamically.
For example, say that you’ve read a row of data from an employees.csv file using csv.DictReader. This class reads the data and returns it in a dictionary-like object. Now, suppose that you have the following dictionary of data:
>>> john = {
...     "name": "John Doe",
...     "position": "Python Developer",
...     "department": "Engineering",
...     "salary": 80000,
...     "hire_date": "2020-01-01",
...     "is_manager": False,
... }
Next, you want to add this data to an instance of your Record class, and you need to represent each data field as an instance attribute.
Here’s how you can do it using the .__dict__ attribute:
>>> john_record = Record()

>>> john_record.__dict__.update(john)

>>> john_record.name
'John Doe'
>>> john_record.department
'Engineering'

>>> john_record.__dict__
{
    'name': 'John Doe',
    'position': 'Python Developer',
    'department': 'Engineering',
    'salary': 80000,
    'hire_date': '2020-01-01',
    'is_manager': False
}
In this code snippet, you first create an instance of Record called john_record. Then, you use the .update() method on the instance .__dict__ to add each field as an attribute to john_record. If you inspect john_record, then you’ll notice that it stores all the original data as attributes.
You can also add individual attributes using the dot notation and an assignment like in john_record.insurance = 1234.
The code in the example above operates on the instance .__dict__, which lets you add instance attributes. If you want to add methods and class attributes, then you use the dot notation as follows:
>>> def as_dict(self):
...     return self.__dict__
...

>>> Record.as_dict = as_dict
>>> Record.__dict__
mappingproxy({
    '__module__': '__main__',
    ...
    'as_dict': <function as_dict at 0x1026cff60>
})
In this example, you first define the as_dict() function outside the class. Then, you add it as a method on Record using the dot notation and an assignment. You can do this dynamic addition because the class has a .__dict__ attribute. However, you can’t do something like the following:
>>> Record.__dict__["as_dict"] = as_dict
Traceback (most recent call last):
    ...
TypeError: 'mappingproxy' object does not support item assignment
At the class level, accessing .__dict__ returns a mappingproxy object, which is a read-only, dictionary-like object. So, while you can add methods and class attributes dynamically using dot notation, you can’t modify .__dict__ directly.
Deleting Attributes
The .__dict__ attribute also lets you delete attributes from a class or instance dynamically using the del statement, or with dictionary methods like .pop() and .clear(). When it comes to removing an instance attribute, you can do something like the following:
config_v2.py
class Config:
    def __init__(self, name):
        self.name = name

    def set_option(self, key, value):
        self.__dict__[key] = value

    def get_option(self, key):
        return self.__dict__.get(key, None)

    def remove_option(self, key):
        if key in self.__dict__:
            del self.__dict__[key]
            # self.__dict__.pop(key)
            print(f"'{key}' removed!")
        else:
            print(f"'{key}' does not exist.")

    def clear(self):
        self.__dict__.clear()
        print("All options removed!")
In this example, the highlighted lines show how to use the del statement and the .pop() and .clear() methods to remove key-value pairs from .__dict__. This removes attributes from the current instance, self.
Here’s how the Config class works:
>>> from config_v2 import Config

>>> conf = Config("GUI App")

>>> conf.set_option("theme", "dark")
>>> conf.set_option("size", "200x400")
>>> conf.__dict__
{'name': 'GUI App', 'theme': 'dark', 'size': '200x400'}

>>> conf.remove_option("size")
'size' removed!
>>> conf.__dict__
{'name': 'GUI App', 'theme': 'dark'}

>>> conf.remove_option("autosave")
'autosave' does not exist.

>>> conf.clear()
All options removed!
>>> conf.__dict__
{}
In this example, you first create an instance of Config with "GUI App" as its name. Then, you use the .set_option() method to add a couple of attributes with their corresponding values. When you check .__dict__, you’ll see all the instance attributes listed.
Next, you remove the .size attribute using the .remove_option() method. This removal works as expected. You use the method to remove an attribute that isn’t present in the Config instance and get a message accordingly. Finally, you remove all the configuration options by using the .clear() method.
Comparing .__dict__ With Other Attribute Manipulation Tools
Python has a few built-in functions that let you manipulate attributes in your classes and instances. Here’s a list of these functions and what they do:
getattr(object, name)returns the value of thenameattribute onobject.setattr(object, name, value)sets the value of thenameattribute onobject.delattr(object, name)removes thenameattribute fromobject.hasattr(object, name)checks whetherobjecthas anameattribute.
These functions are generally the best choice when manipulating attributes and methods individually. They allow you to safely access attributes and provide default values for missing ones. They’re also the way to deal with classes that have a .__slots__ attribute instead of .__dict__.
However, in some situations, the .__dict__ attribute can be the appropriate way to access and modify attributes. It may even be the only way when you’re introspecting or debugging your code. It’s also a good solution when you need to add or update multiple attributes at a time programmatically or when you’re working with dynamically created objects.
In advanced use cases, such as descriptors, .__dict__ may be the only way to avoid issues like RecursionError exceptions. You’ll learn more about this in the section on writing descriptors.
To illustrate how you can use these built-in functions to manipulate your attributes, here’s an implementation of the Config class that uses them:
config_v3.py
class Config:
    def __init__(self, name):
        self.name = name

    def set_option(self, key, value):
        setattr(self, key, value)

    def get_option(self, key):
        return getattr(self, key, None)

    def remove_option(self, key):
        if hasattr(self, key):
            delattr(self, key)
            print(f"'{key}' removed!")
        else:
            print(f"'{key}' does not exist.")

    def clear(self):
        for key in list(self.__dict__.keys()):
            delattr(self, key)
        print("All options removed!")
In this new implementation of Config, you use setattr(), getattr(), hasattr(), and delattr() to manipulate the attributes instead of using .__dict__.
Exploring .__dict__ in Inheritance
When you’re working with inheritance in Python, understanding how .__dict__ behaves in this context helps you clarify where attributes are stored, how they’re accessed, and how modifications affect parent and child classes.
In the following sections, you’ll explore the differences between class .__dict__ and instance .__dict__ in inheritance hierarchies. This will help shed light on attribute resolution, method overriding, and other potential pitfalls.
Class .__dict__ in Inheritance
To visualize how the class .__dict__ attribute behaves in an inheritance tree, check out the following toy example:
>>> class Parent:
...     parent_attr = "parent"
...

>>> class Child(Parent):
...     child_attr = "child"
...

>>> Parent.__dict__
mappingproxy({
    '__module__': '__main__',
    '__firstlineno__': 1,
    'parent_attr': 'parent',
    '__static_attributes__': (),
    '__dict__': <attribute '__dict__' of 'Parent' objects>,
    '__weakref__': <attribute '__weakref__' of 'Parent' objects>,
    '__doc__': None
})

>>> Child.__dict__
mappingproxy({
    '__module__': '__main__',
    '__firstlineno__': 1,
    'child_attr': 'child',
    '__static_attributes__': (),
    '__doc__': None
})

>>> Child.parent_attr
'parent'
When you access .__dict__ on Child, the output includes .child_attr but not .parent_attr. However, you can access .parent_attr in the Child class. This is because Python searches for .parent_attr in Child.__dict__ and doesn’t find it. Then, Python searches for .parent_attr in Parent.__dict__ and finds it there.
Instance .__dict__ in Inheritance
What about the instance .__dict__ attribute? How does it behave in inheritance trees? Take a look at the following example:
>>> class Parent:
...     def __init__(self):
...         self.parent_attr = "parent"
...

>>> class Child(Parent):
...     def __init__(self):
...         self.child_attr = "child"
...

>>> parent = Parent()
>>> parent.__dict__
{'parent_attr': 'parent'}

>>> child = Child()
>>> child.__dict__
{'child_attr': 'child'}
As you can see, when you access .__dict__ on an instance of Child, you get the attributes of this instance and not the instance attributes of its parent. If you want that child.__dict__ to hold the instance attributes of its parent, then you can add a call to super() to the Child.__init__() method:
>>> class Child(Parent):
...     def __init__(self):
...         super().__init__()
...         self.child_attr = "child"
...

>>> child = Child()
>>> child.__dict__
{'parent_attr': 'parent', 'child_attr': 'child'}
The call to super().__init__() initializes the implicit instance of the Parent class. Now both attributes .parent_attr and .child_attr are present in child.__dict__.
Using .__dict__ in Practice
The .__dict__ attribute gives you direct access to an object’s namespace, making it a powerful tool for dynamic attribute management. Beyond object introspection, .__dict__ lets you implement advanced techniques, such as memoization, serialization, custom attribute handling, and object modification at runtime.
In the following sections, you’ll explore practical examples of using .__dict__ for each of these techniques.
Memoizing Data in Functions
When writing functions in Python, you may find that memoizing and caching values that have already been computed can help you improve the execution time of certain functions. For example, say you have the following function that calculates Fibonacci numbers recursively:
>>> def fibonacci_of(n):
...     if n < 2:
...         return n
...     return fibonacci_of(n - 1) + fibonacci_of(n - 2)
...

>>> fibonacci_of(35)
9227465
This function works. You pass an integer number as an argument, and the function computes the corresponding Fibonacci number. However, this implementation is inefficient:
>>> import time

>>> start = time.perf_counter(); fibonacci_of(35); end = time.perf_counter()
>>> print(f"{end - start:.3f} seconds")
1.153 seconds
To compute the Fibonacci number in the 35th position of the sequence, your function takes over a second. This is because the function repeatedly computes the already computed Fibonacci numbers. You can avoid this repetition by using memoization.
Note: To learn more about generating Fibonacci numbers, check out A Python Guide to the Fibonacci Sequence.
The following implementation of the fibonacci_of() function is way faster than the previous one:
>>> def fibonacci_of(n):
...     cache = fibonacci_of.__dict__.setdefault("cache", {})
...     if n not in cache:
...         cache[n] = n if n < 2 else fibonacci_of(n - 1) + fibonacci_of(n - 2)
...     return cache[n]
...

>>> import time
>>> start = time.perf_counter(); fibonacci_of(35); end = time.perf_counter()
>>> print(f"{end - start:.3f} seconds")
0.024 seconds
This time, the function only takes a fraction of a second to run. The key to this speed gain is that you’re using .__dict__ to attach a .cache attribute to your function. As its name suggests, this attribute works as a cache for already computed Fibonacci numbers.
In this implementation, you initialize a .cache dictionary in fibonacci_of.__dict__ using the .setdefault() method. This attribute ensures a persistent cache across function calls. If the Fibonacci value for n is not in the cache, the function computes the number recursively and stores the result in cache[n]. Finally, the result is returned from the cache.
Introspecting and Debugging Code
The .__dict__ attribute is also pretty useful when you need to introspect your code and find out the value of a specific attribute at a given point. This is especially helpful when you’re debugging your code during development.
For example, suppose you have the following class and when you use it, the result isn’t what you expect:
>>> class Employee:
...     def __init__(self, name, department, salary):
...         self.name = name
...         self.department = department
...         self.salary = salary
...     def give_raise(self, amount):
...         self.salery = self.salary + amount  # Typo here: self.salery
...

>>> john = Employee("John", "Engineering", 70000)
>>> john.give_raise(5000)
>>> john.salary
70000
After giving John a raise, you’d expect his salary to be 75000. However, you get 70000. The salary isn’t updated because of a typo: self.salery instead of self.salary. If you access the .__dict__ attribute on john, then you’ll realize that you have an unexpected attribute:
>>> john.__dict__
{
    'name': 'John',
    'department': 'Engineering',
    'salary': 70000,
    'salery': 75000
}
The content of .__dict__ reveals that now you have .salery with a value of 75000. Once you note this issue, you can fix the code by correcting the typo.
An interesting detail about using .__dict__ for introspection and debugging is that name mangled attributes also appear in the output. Consider the following class:
>>> class DemoClass:
...     def __init__(self):
...         self.__attr = "This is a mangled name"
...

>>> demo_object = DemoClass()
>>> demo_object.__attr
Traceback (most recent call last):
    ...
AttributeError: 'DemoClass' object has no attribute '__attr'

>>> demo_object.__dict__
{'_DemoClass__attr': 'This is a mangled name'}
In this example, .__attr starts with a double underscore. This naming convention triggers name mangling in Python. Note that name mangling hides the name so that you can’t access it directly. The .__dict__ attribute uncovers the trick behind name mangling in Python. The .__attr name internally changes to _DemoClass__attr.
Serializing Data to JSON Format
In Python, data serialization is the process of converting objects into a format that you can store to a file system or transmit over a network. Serializing Python objects into JSON is a common example. In the standard library, you have the json module for this task.
Instances of user-defined classes aren’t directly serializable with tools like json.dumps() because they’re not basic data types supported by JSON. However, by accessing an object’s .__dict__ attribute, you can retrieve its instance attributes as a dictionary that you can serialize to JSON format.
In the example below, you use .__dict__ to convert a Person object into a JSON string:
>>> class Person:
...     def __init__(self, first_name, last_name, age):
...         self.first_name = first_name
...         self.last_name = last_name
...         self.age = age
...

>>> jane = Person("Jane", "Doe", 25)

>>> import json
>>> jane_as_json = json.dumps(jane.__dict__)
>>> jane_as_json
'{"first_name": "Jane", "last_name": "Doe", "age": 25}'
The Person class has three instance attributes: .first_name, .last_name, and .age. You instantiate the Person class with "Jane", "Doe", and 25 as the values for the corresponding attributes.
Next, you use the .__dict__ attribute as an argument to json.dumps(), which converts the object into a JSON string. You can now store this JSON content in a file or send it over a network.
Customizing Access, Mutation, and Deletion
Another interesting use case for the .__dict__ attribute is when you want to customize the way a custom class behaves in response to access, mutation, and deletion operations. You can customize these operations with the .__getattribute__(), .__setattr__(), and .__delattr__() special methods.
To illustrate, say that you need a class to present a record of data. The class should implement the .__getattribute__(), .__setattr__(), and .__delattr__() special methods to log when any of these operations happen in one of the data fields.
Here’s how the Record class will look:
record.py
import logging

logging.basicConfig(level=logging.INFO, format="%(message)s")

class Record:
    def __init__(self, **fields):
        logging.info(f"[INIT] Creating record with fields: {fields}")
        self.__dict__.update(fields)

    def __getattribute__(self, key):
        if key == "__dict__":
            return super().__getattribute__(key)
        value = super().__getattribute__(key)
        logging.info(f"[GET] Accessing '{key}' → {value}")
        return value

    def __setattr__(self, key, value):
        if key in self.__dict__:
            logging.info(f"[UPDATE] Modifying '{key}' → {value}")
        else:
            logging.info(f"[SET] Creating '{key}' → {value}")
        self.__dict__[key] = value

    def __delattr__(self, key):
        if key in self.__dict__:
            logging.info(f"[DEL] Deleting '{key}'")
            del self.__dict__[key]
        else:
            logging.warning(
                f"[DEL] Attempted to delete non-existent field '{key}'"
            )
In this example, .__getattribute__() intercepts every attribute access, logging all retrievals. It calls super().__getattribute__(key) to fetch the target value while avoiding a RecursionError exception. This allows you to monitor when and how the attributes are accessed.
Note: You can’t use .__getattr__() to implement the example above because this method isn’t called when the target attribute is in .__dict__. So, to intercept all the attributes, you need to use .__getattribute__() instead.
Additionally, you can’t access .__dict__ inside .__getattribute__() because any attribute access on self via dot notation would raise a RecursionError exception, breaking the code. That’s why you use super().
Next, you override .__setattr__() to log both new attribute creation and modifications to existing ones. Here, you directly use .__dict__ to prevent recursion issues.
Finally, .__delattr__() logs attribute deletions using del self.__dict__[key]. If the attribute doesn’t exist, a warning is logged instead of raising an error, making deletions safer and more transparent.
Here’s how the Record class works:
>>> from record import Record

>>> jane = Record(first_name="Jane", last_name="Doe", age=25)
[INIT] Creating record with fields: {
    'first_name': 'Jane', 'last_name': 'Doe', 'age': 25
}

>>> # Access
>>> jane.first_name
[GET] Accessing 'first_name' → Jane
'Jane'
>>> jane.age
[GET] Accessing 'age' → 25
25

>>> # Mutations
>>> jane.age = 26
[UPDATE] Modifying 'age' → 26
>>> jane.job = "Software Engineer"
[SET] Creating 'job' → Software Engineer

>>> # Deletion
>>> del jane.last_name
[DEL] Deleting 'last_name'

>>> jane.__dict__
{'first_name': 'Jane', 'age': 26, 'job': 'Software Engineer'}
Your Record class effectively logs every access, mutation, and deletion on its fields. This makes Record a logged container, which ensures visibility into its attribute manipulation.
Writing Robust Descriptors
When you need to use descriptors in your code, you may find them hard to write because of infinite recursion issues. The .__dict__ attribute is a great tool for dealing with these situations. To illustrate, consider the following attempt to write a demo descriptor class:
>>> class Descriptor:
...     def __get__(self, instance, owner):
...         return instance.value
...     def __set__(self, instance, value):
...         instance.value = value
...

>>> class DemoClass:
...     value = Descriptor()
...

>>> obj = DemoClass()
>>> obj.value = 10
Traceback (most recent call last):
    ...
RecursionError: maximum recursion depth exceeded
In this example, the assignment obj.value = 10 triggers Descriptor.__set__() because .value is an instance of Descriptor. Inside .__set__(), you execute instance.value = value, which again triggers Descriptor.__set__(). This behavior creates an infinite recursion, raising a RecursionError exception.
You may think of using the getattr() and setattr() functions in the descriptor to fix the issue:
>>> class Descriptor:
...     def __get__(self, instance, owner):
...         return getattr(instance, "value")
...     def __set__(self, instance, value):
...         setattr(instance, "value", value)
...

>>> class DemoClass:
...     value = Descriptor()
...

>>> obj = DemoClass()
>>> obj.value = 10
Traceback (most recent call last):
    ...
RecursionError: maximum recursion depth exceeded
Again, the assignment obj.value = 10 triggers Descriptor.__set__() because .value is an instance of Descriptor. Inside .__set__(), you call setattr(instance, "value", value), which again triggers .__set__(), causing an infinite recursion.
At this point, the situation may be frustrating. This is when .__dict__ comes to your rescue. You can fix the code as in the example below:
>>> class Descriptor:
...     def __get__(self, instance, owner):
...         return instance.__dict__.get("value", None)
...     def __set__(self, instance, value):
...         instance.__dict__["value"] = value
...

>>> class DemoClass:
...     value = Descriptor()
...

>>> obj = DemoClass()
>>> obj.value = 10
>>> obj.value
10
Now, your Descriptor class properly avoids recursion issues. In .__get__(), you access instance.__dict__ directly to retrieve the value without triggering the descriptor protocol again. In .__set__(), you store the value directly in instance.__dict__ using a dictionary key assignment, which again avoids triggering the descriptor protocol.
Note: The example above avoids recursion by directly manipulating .__dict__. However, you should be aware that directly modifying .__dict__ in a descriptor can bypass certain encapsulation principles, so you should use this technique judiciously.
This approach successfully sidesteps recursion issues that can occur with descriptors and special methods. The descriptor stores and retrieves values directly through the object’s .__dict__ without triggering automatic calls to the descriptor’s special methods.
Conclusion
You’ve learned a lot about Python’s .__dict__ attribute, which is a powerful tool for low-level and dynamic management of attributes in classes and instances. You learned that .__dict__ is a dictionary that maps attribute names to their values. You also delved into how .__dict__ works in classes, instances, functions, and other objects.
Understanding .__dict__ is key for Python developers, as it’s particularly useful for tasks such as debugging, data serialization, memoization, and metaprogramming.
In this tutorial, you’ve learned how to:
- Access, modify, and add attributes dynamically using
.__dict__ - Differentiate between class and instance
.__dict__attributes - Use
.__dict__for introspection and debugging - Implement programming techniques like memoization and descriptors
- Compare
.__dict__with other attribute manipulation tools
Now that you have a solid understanding of .__dict__, you can leverage this knowledge to make your Python code more dynamic, flexible, and efficient. Whether you’re debugging, creating dynamic objects, or implementing advanced behaviors, .__dict__ is a valuable tool in your Python toolkit.
Get Your Code: Click here to download the free sample code you’ll use to learn about using Python’s .__dict__ to work with attributes.
Frequently Asked Questions
Now that you have some experience using Python’s .__dict__ to work with attributes, you can use the questions and answers below to check your understanding and recap what you’ve learned.
These FAQs are related to the most important concepts you’ve covered in this tutorial. Click the Show/Hide toggle beside each question to reveal the answer.
You use .__dict__ to access or modify an object’s namespace, which maps attribute names to their corresponding values.
You use vars() to retrieve the content of .__dict__ in a Python object, while .__dict__ gives you direct access to the object’s namespace, allowing you to modify it dynamically.
You can use .__dict__ to inspect, modify, add, and delete attributes dynamically, which is useful for metaprogramming and debugging.
You commonly use .__dict__ for tasks like memoization, data serialization, attribute access, and managing attributes in your classes.
Take the Quiz: Test your knowledge with our interactive “Using Python's .__dict__ to Work With Attributes” quiz. You’ll receive a score upon completion to help you track your learning progress:
Interactive Quiz
Using Python's .__dict__ to Work With AttributesIn this quiz, you'll test your understanding of Python's .__dict__ attribute and its usage in classes, instances, and functions. Acting as a namespace, this attribute maps attribute names to their corresponding values and serves as a versatile tool for metaprogramming and debugging.


